Configure routing
In this section we will configure to connect Test VPC and Customer VPC. This configuration is very similar to part 4, all steps below are only briefly described, not detailed.
1. Transit Gateway Peering
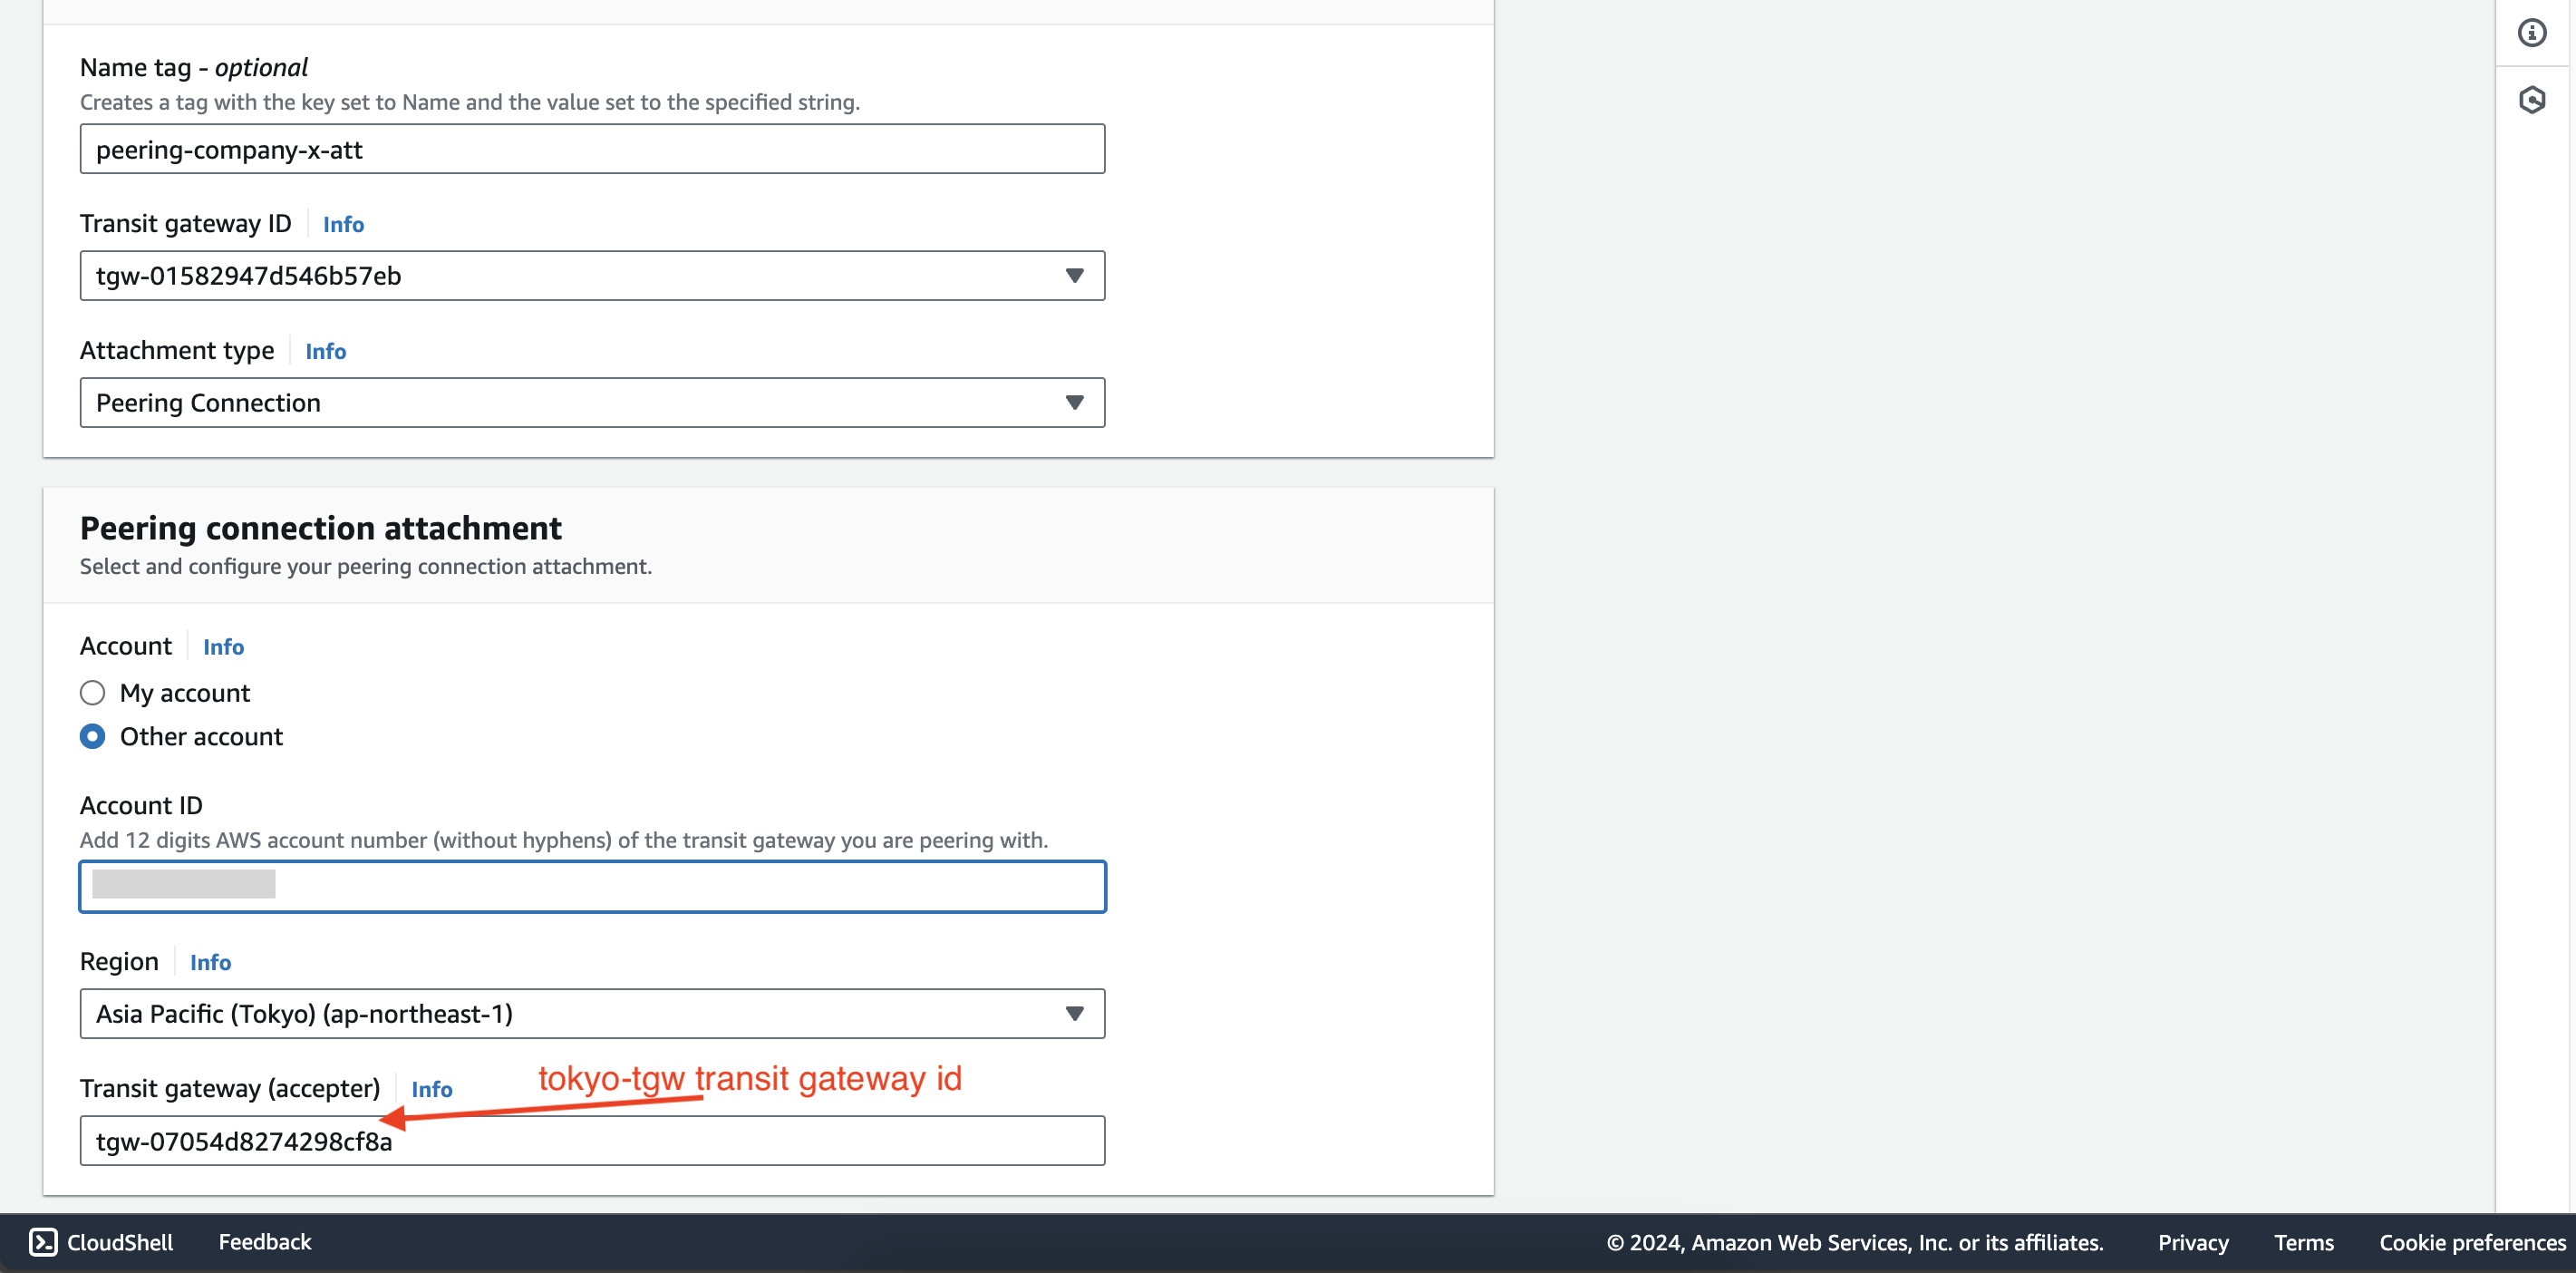
Create a new transit gateway attachment in second account with the following configuration:
- Name tag:
peering-company-x-att - Transit gateway ID: Select customer-tgw
- Attachment type: Peering connection
- Account: Select Other account
- Account ID: First AWS account ID
- Region: Tokyo
- Transit gateway (accepter): ID of tokyo-tgw transit gateway
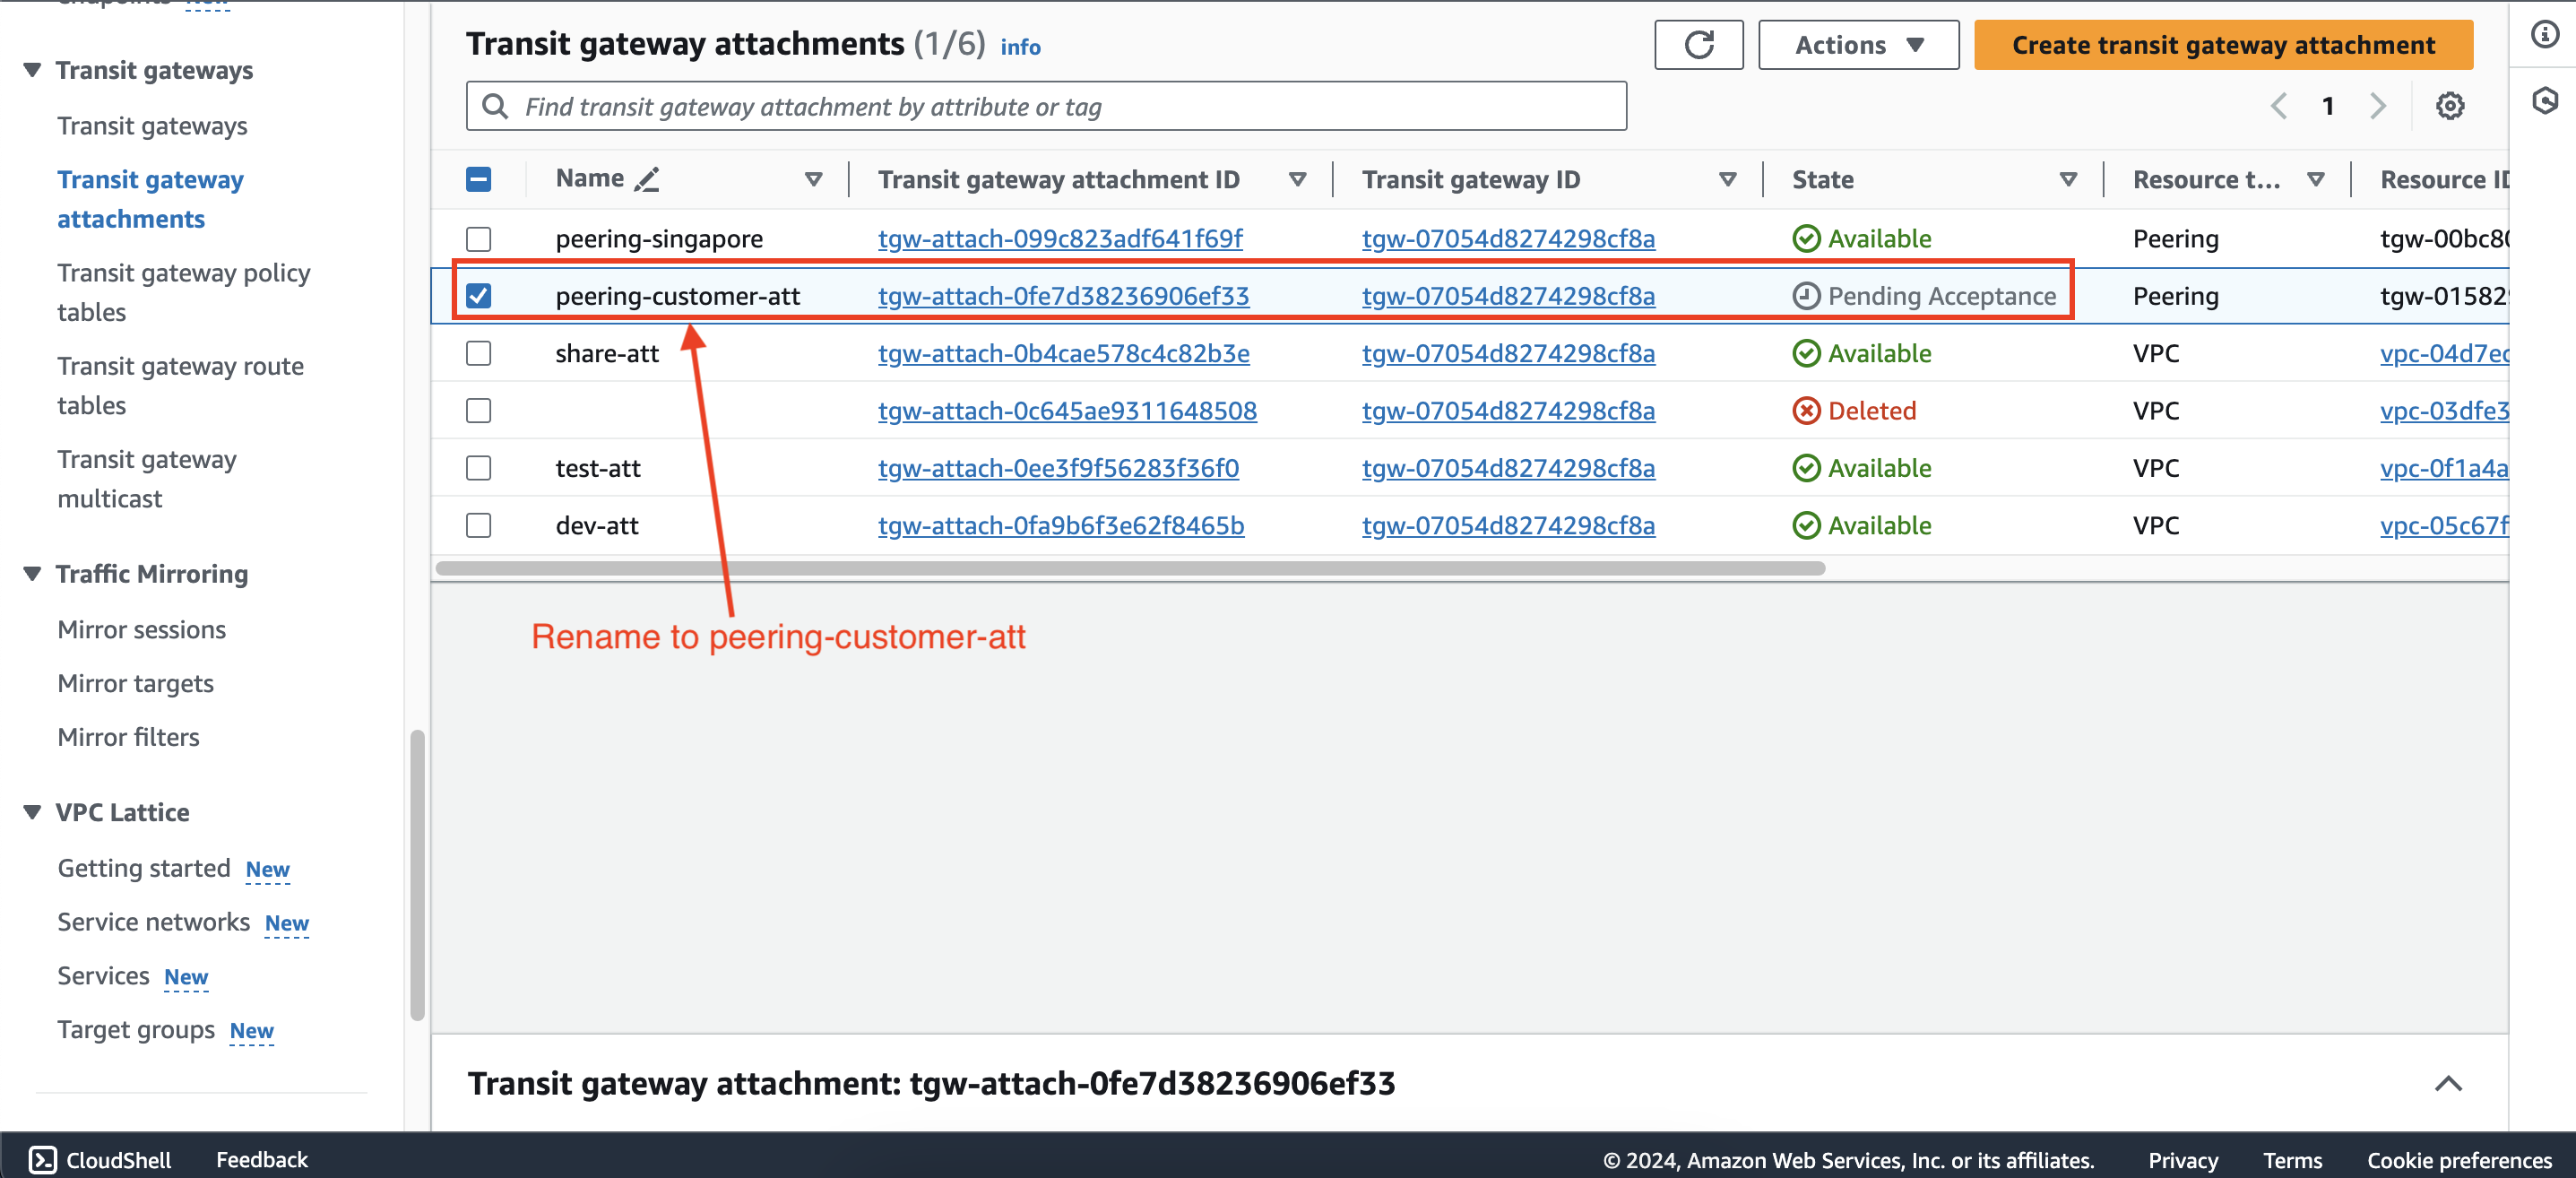
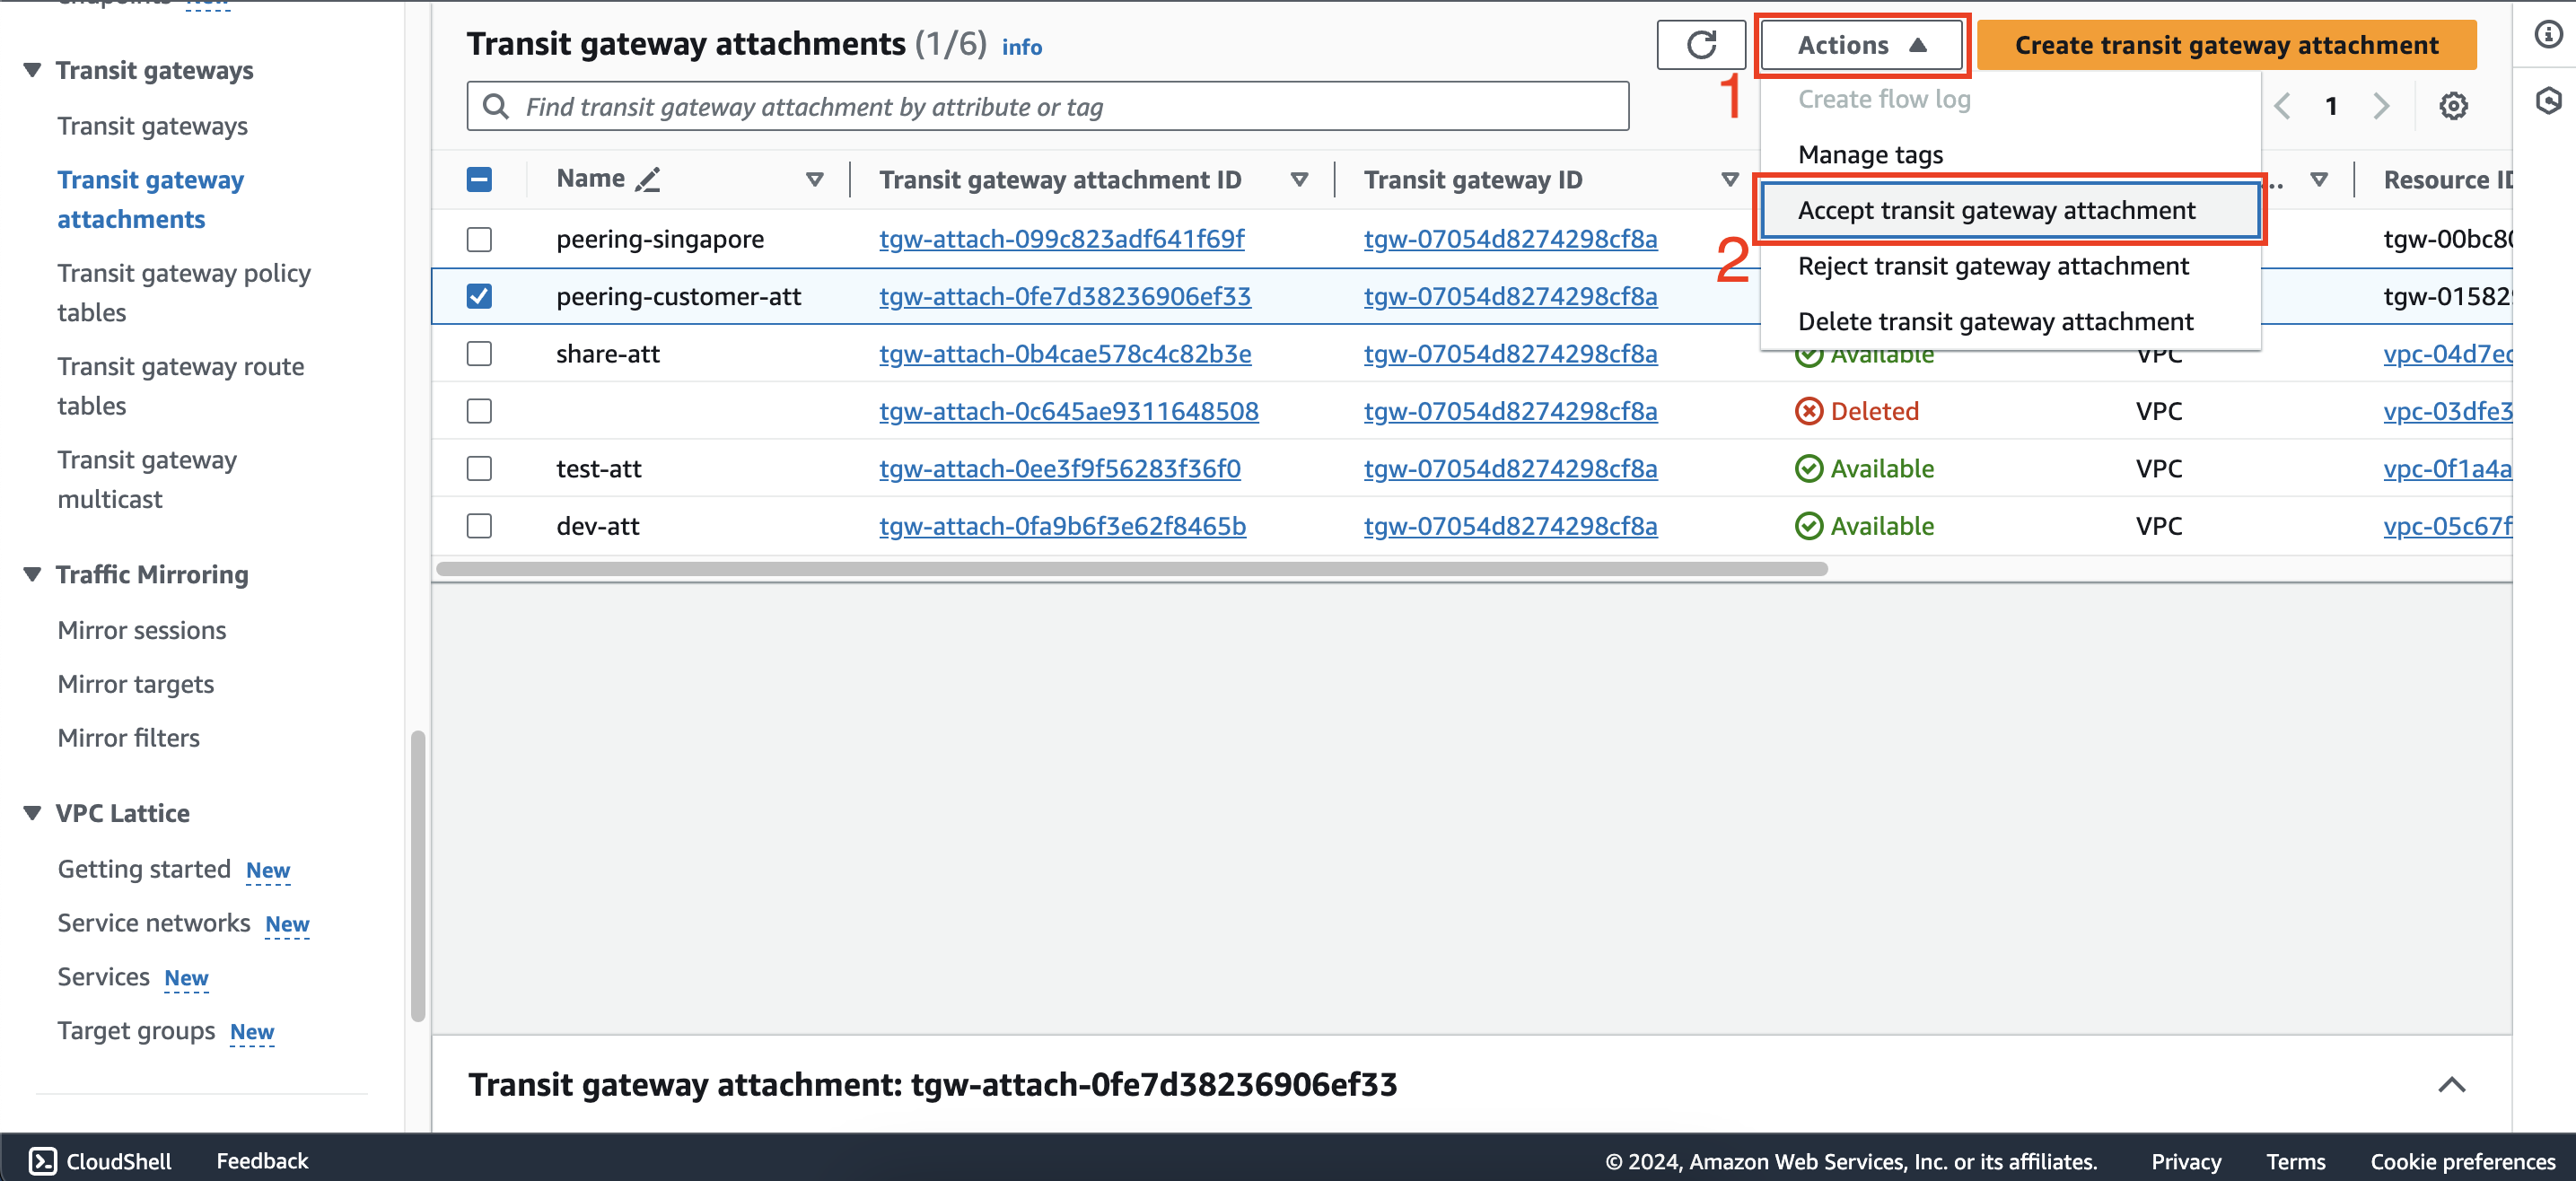
Back to Transit gateway attachments interface of first account, you will see an attachment with Pending Acceptance
status. Rename it to peering-customer-att then accept.
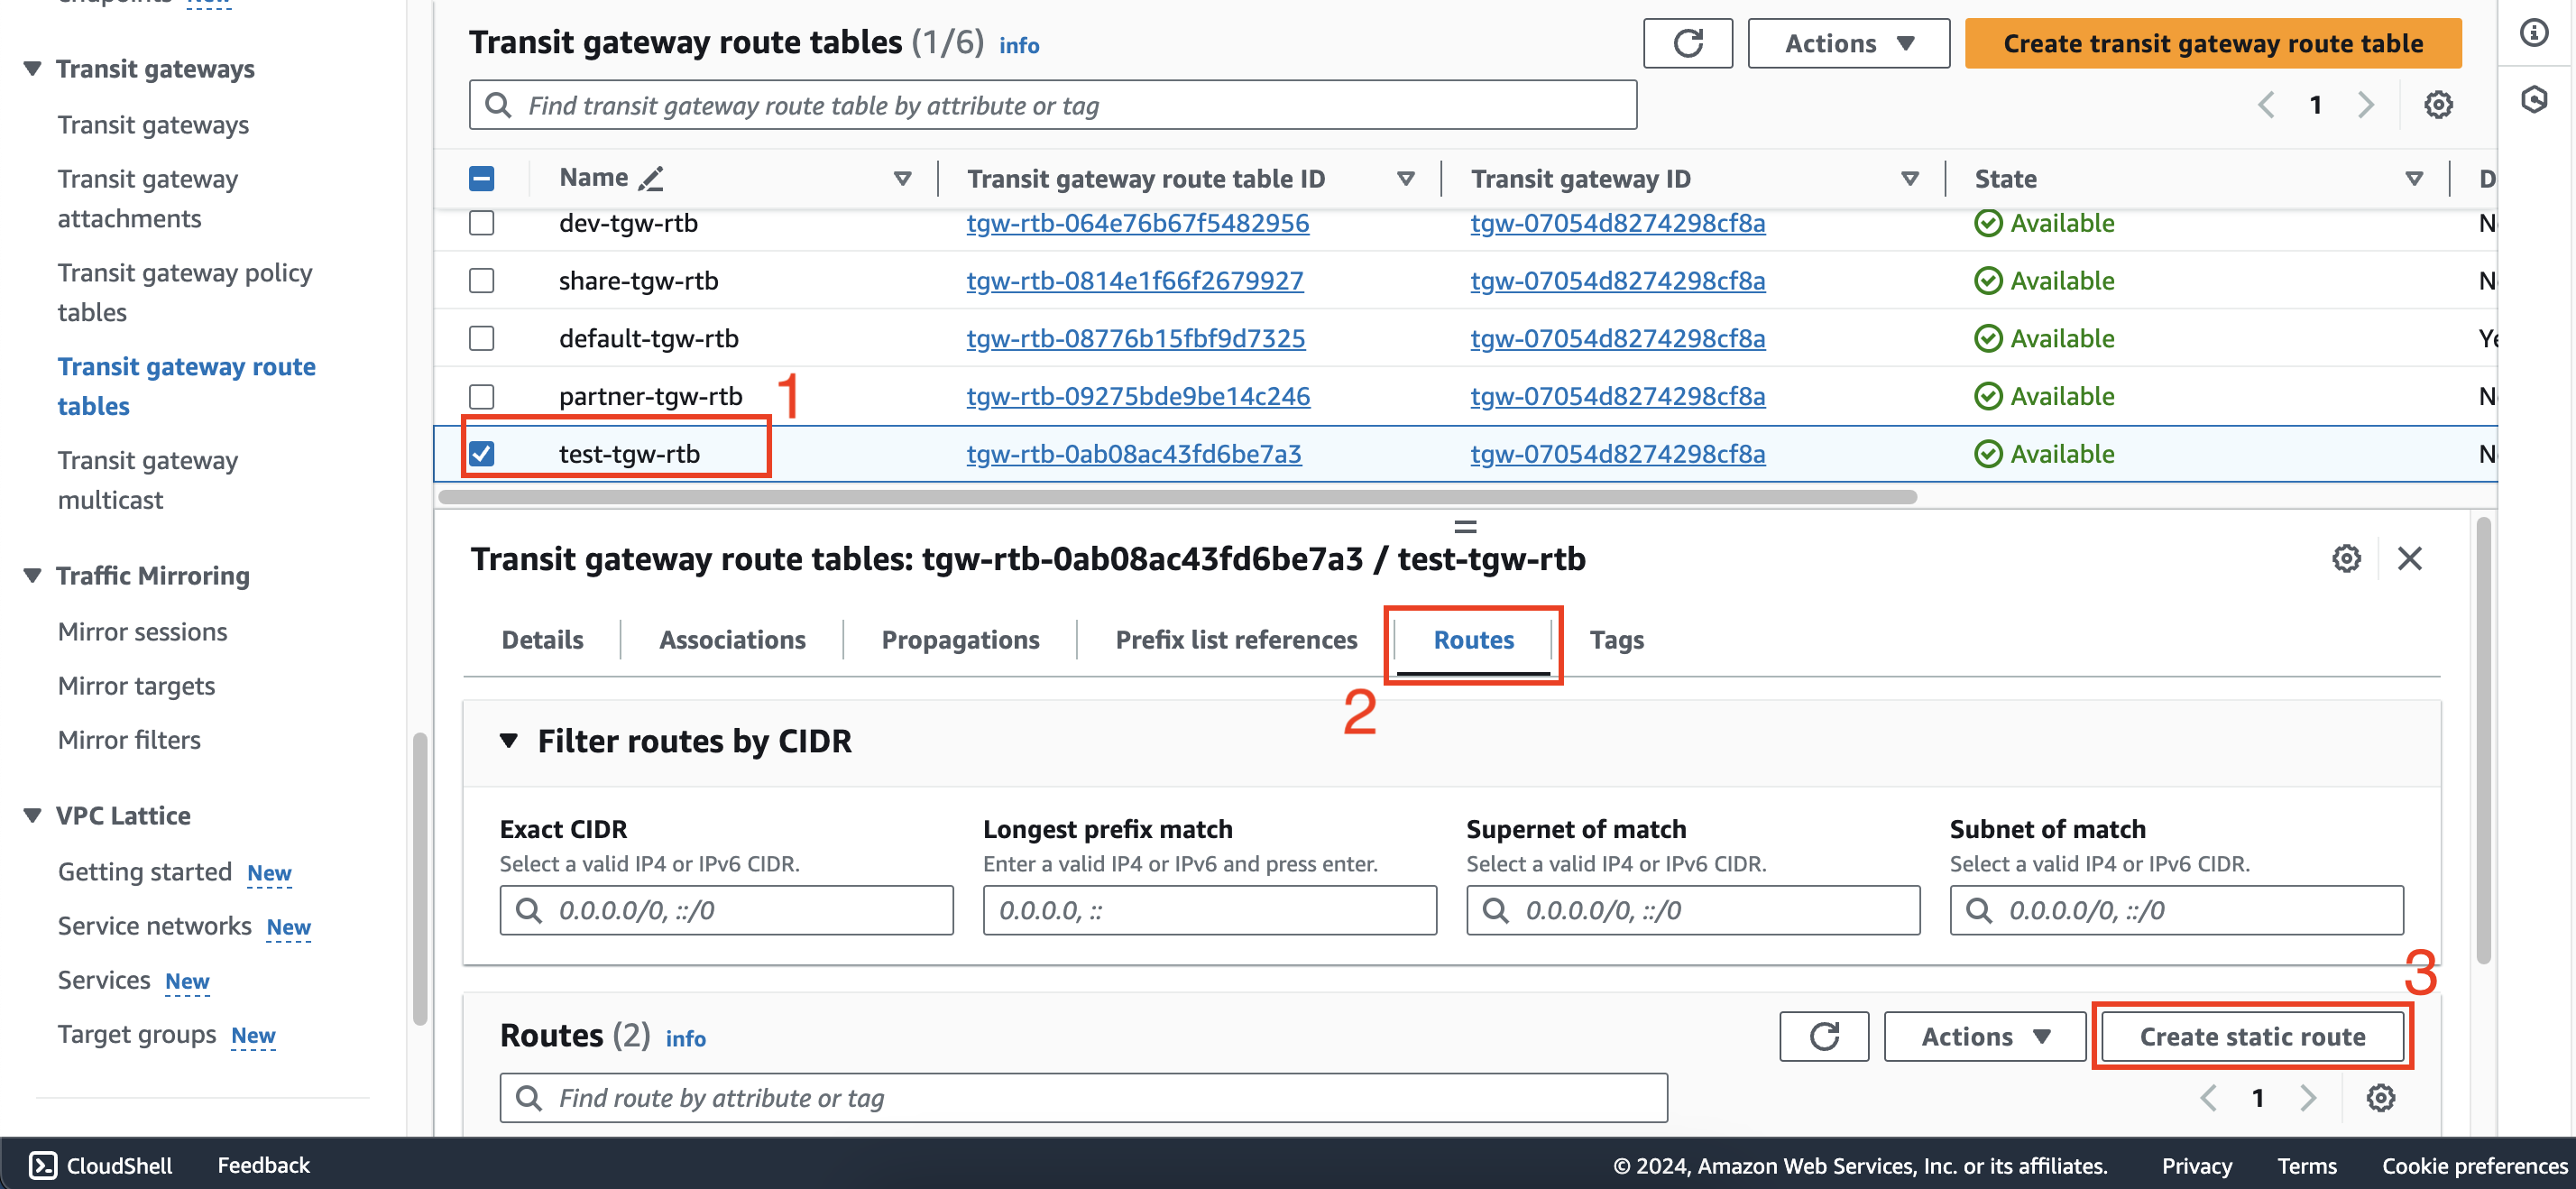
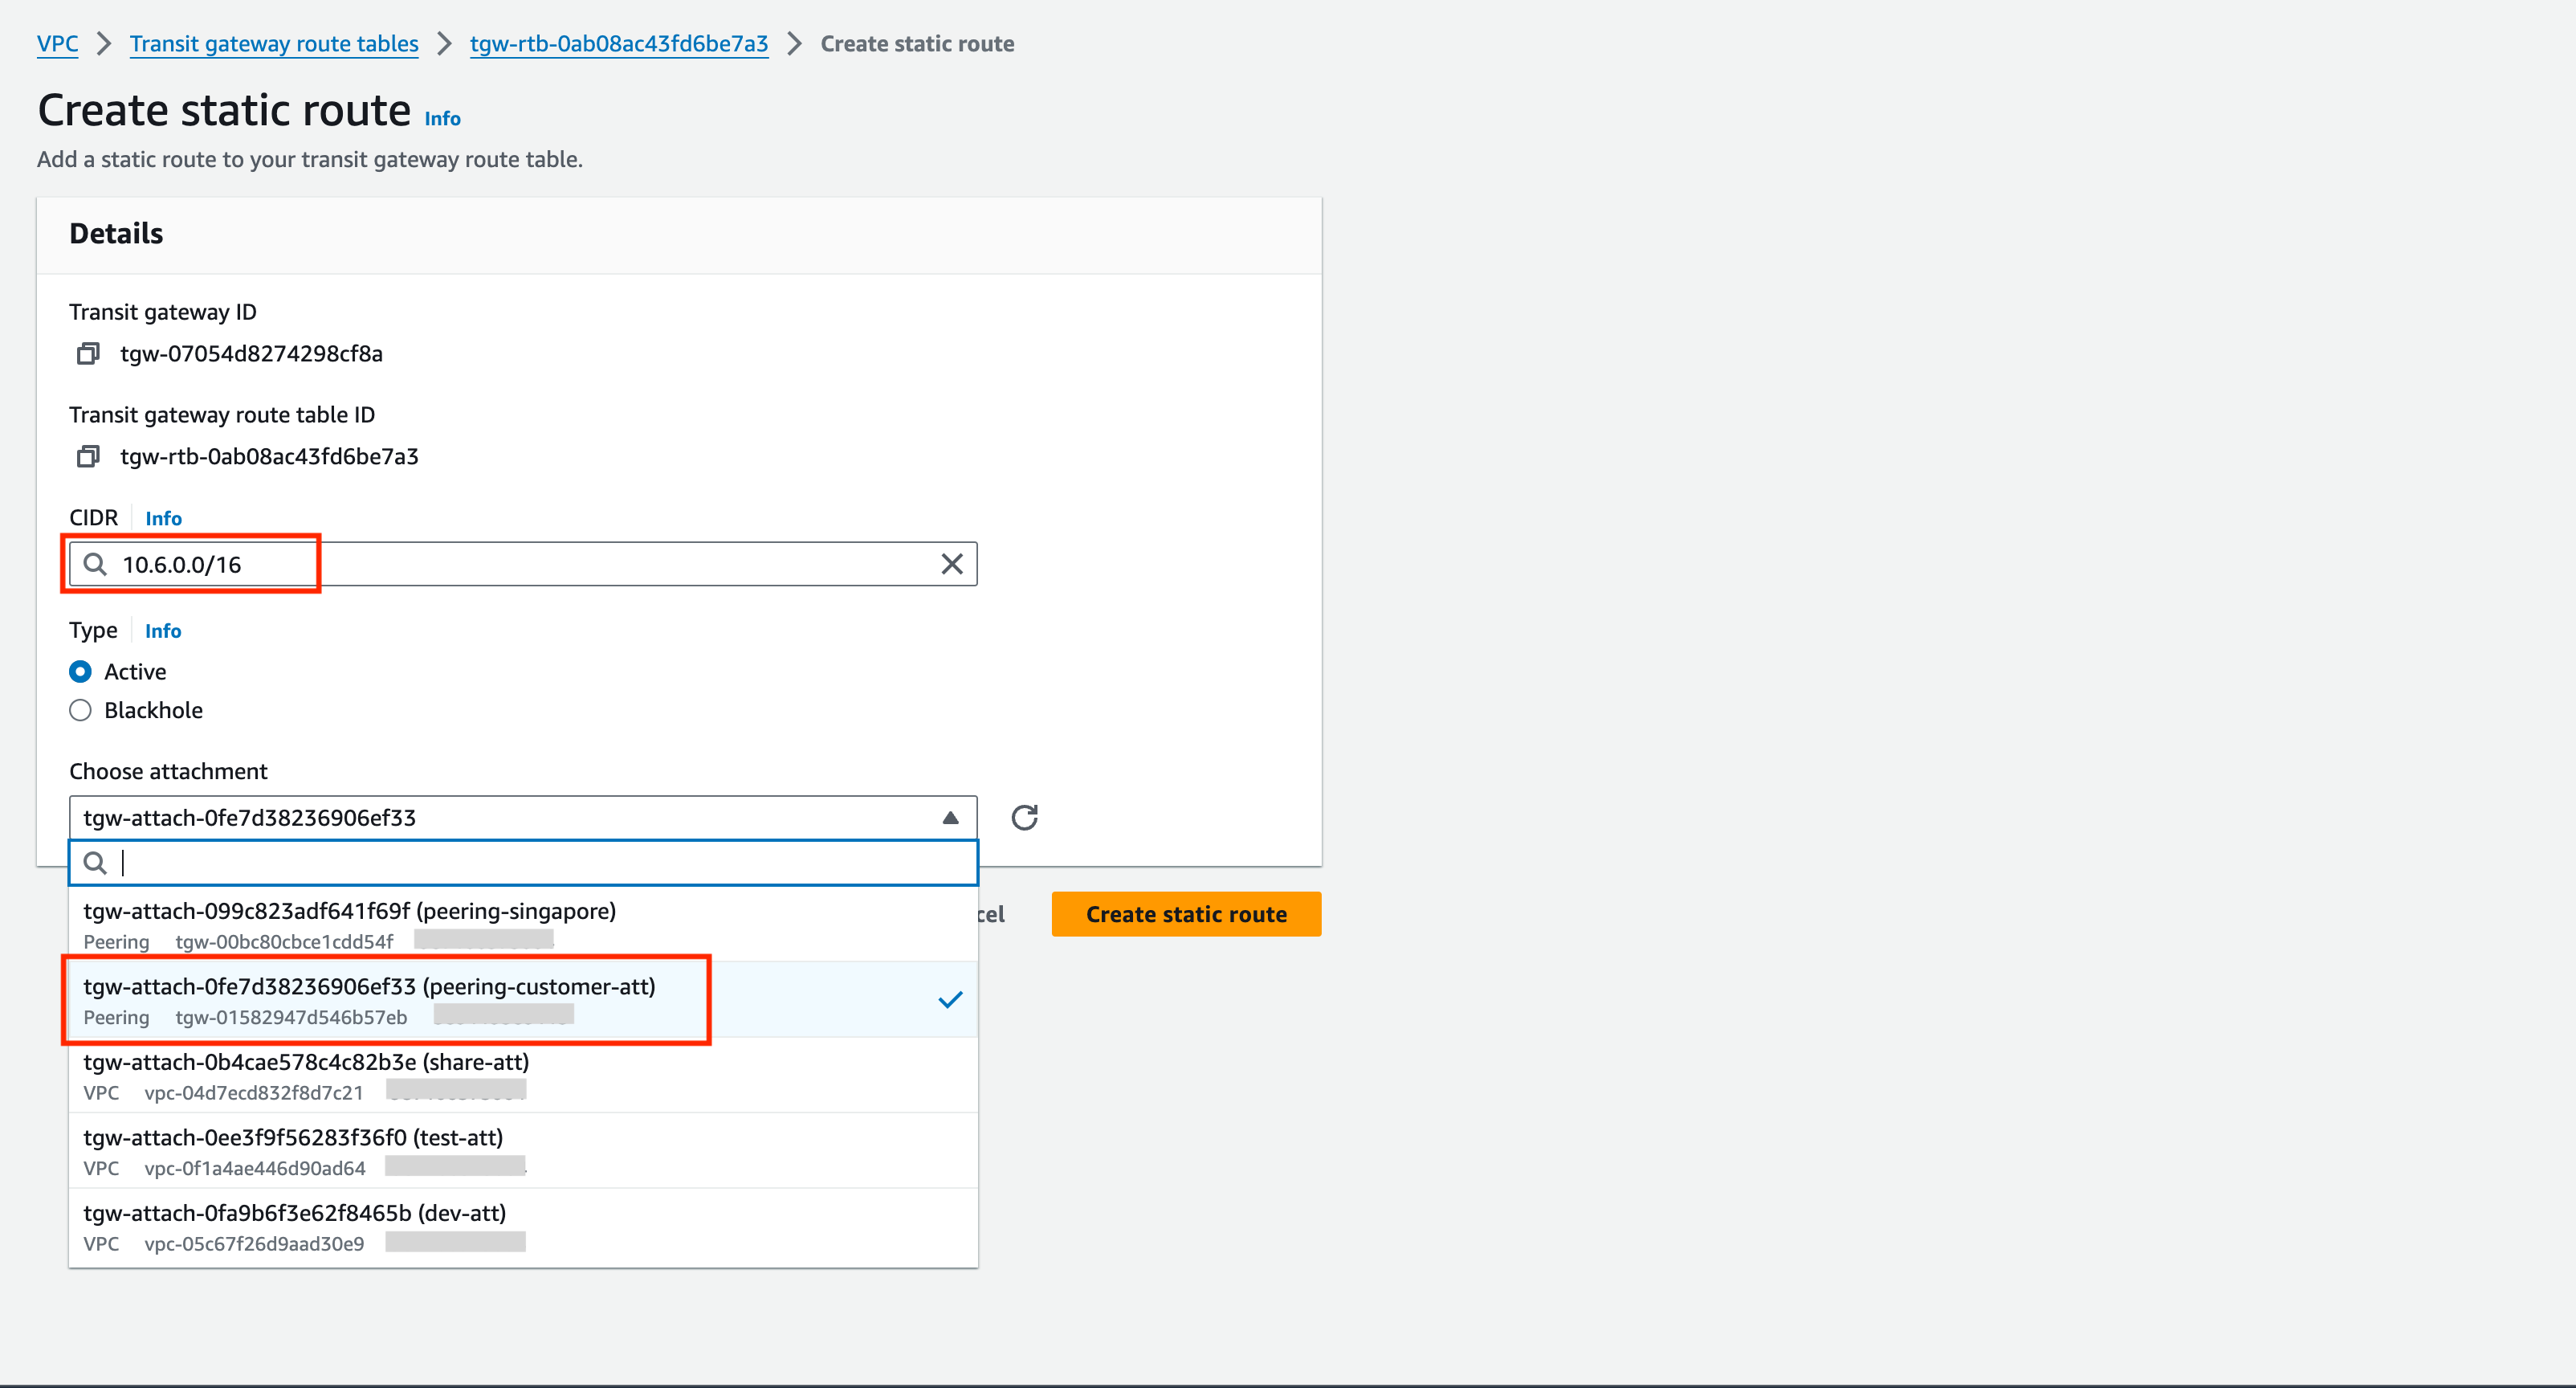
Within Transit gateway route tables interface of first account, select test-tgw-rtb and add a new static route with
CIDR 10.6.0.0/16 and attachment peering-customer-att.
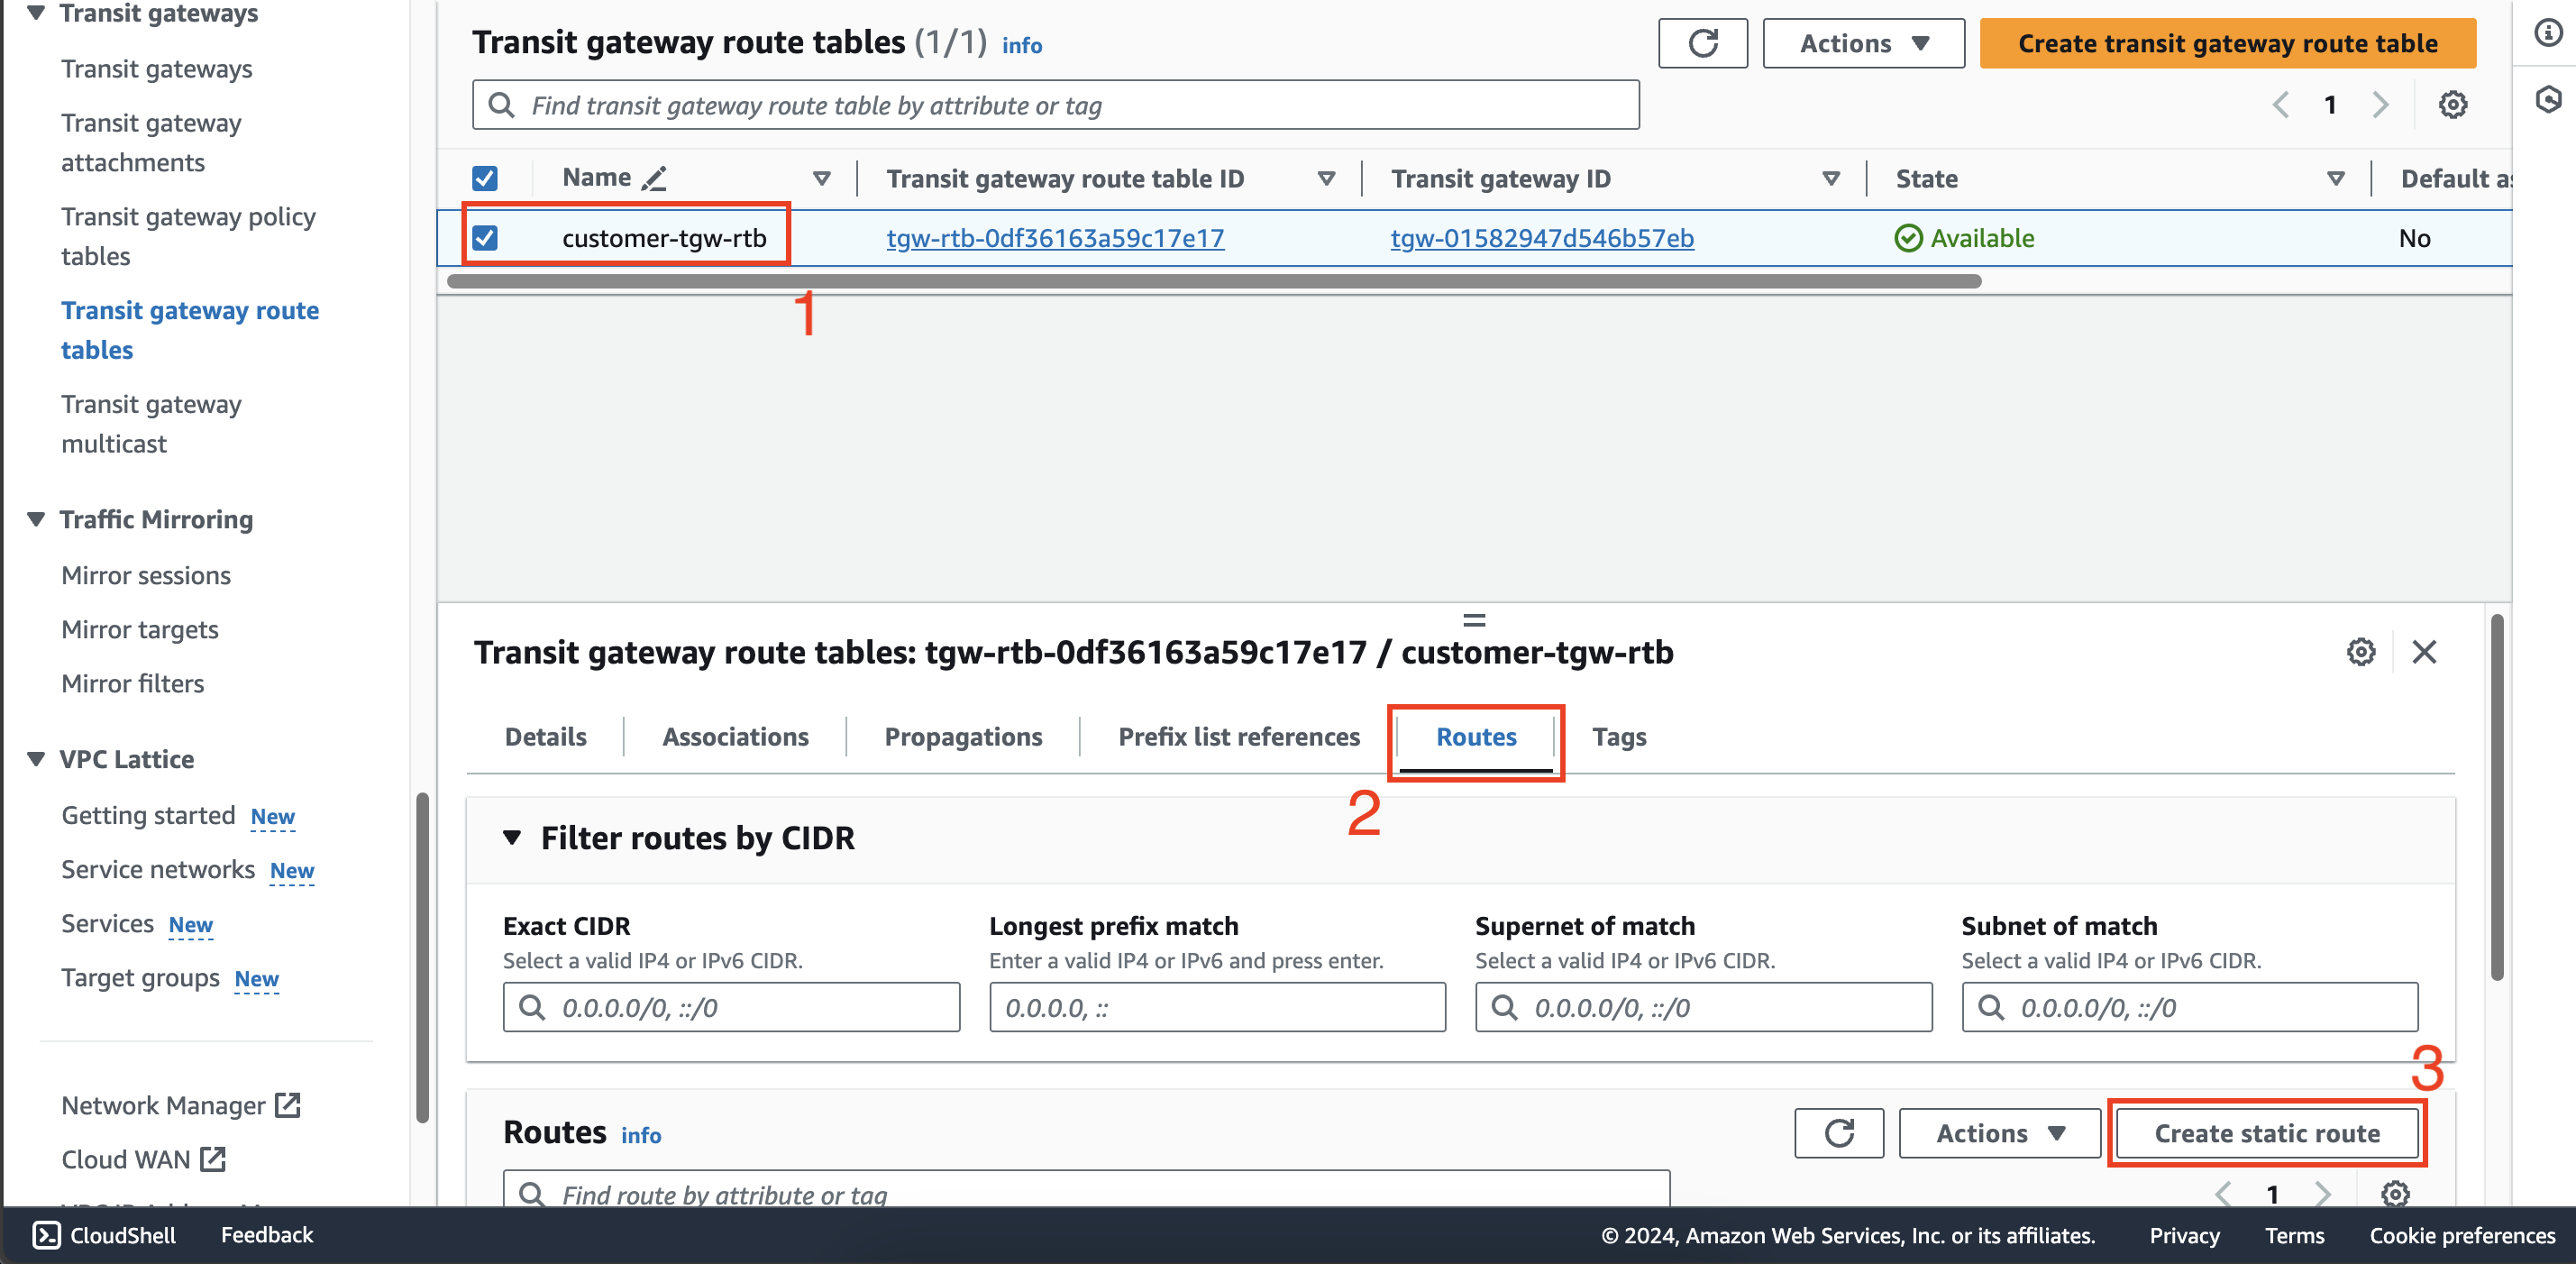
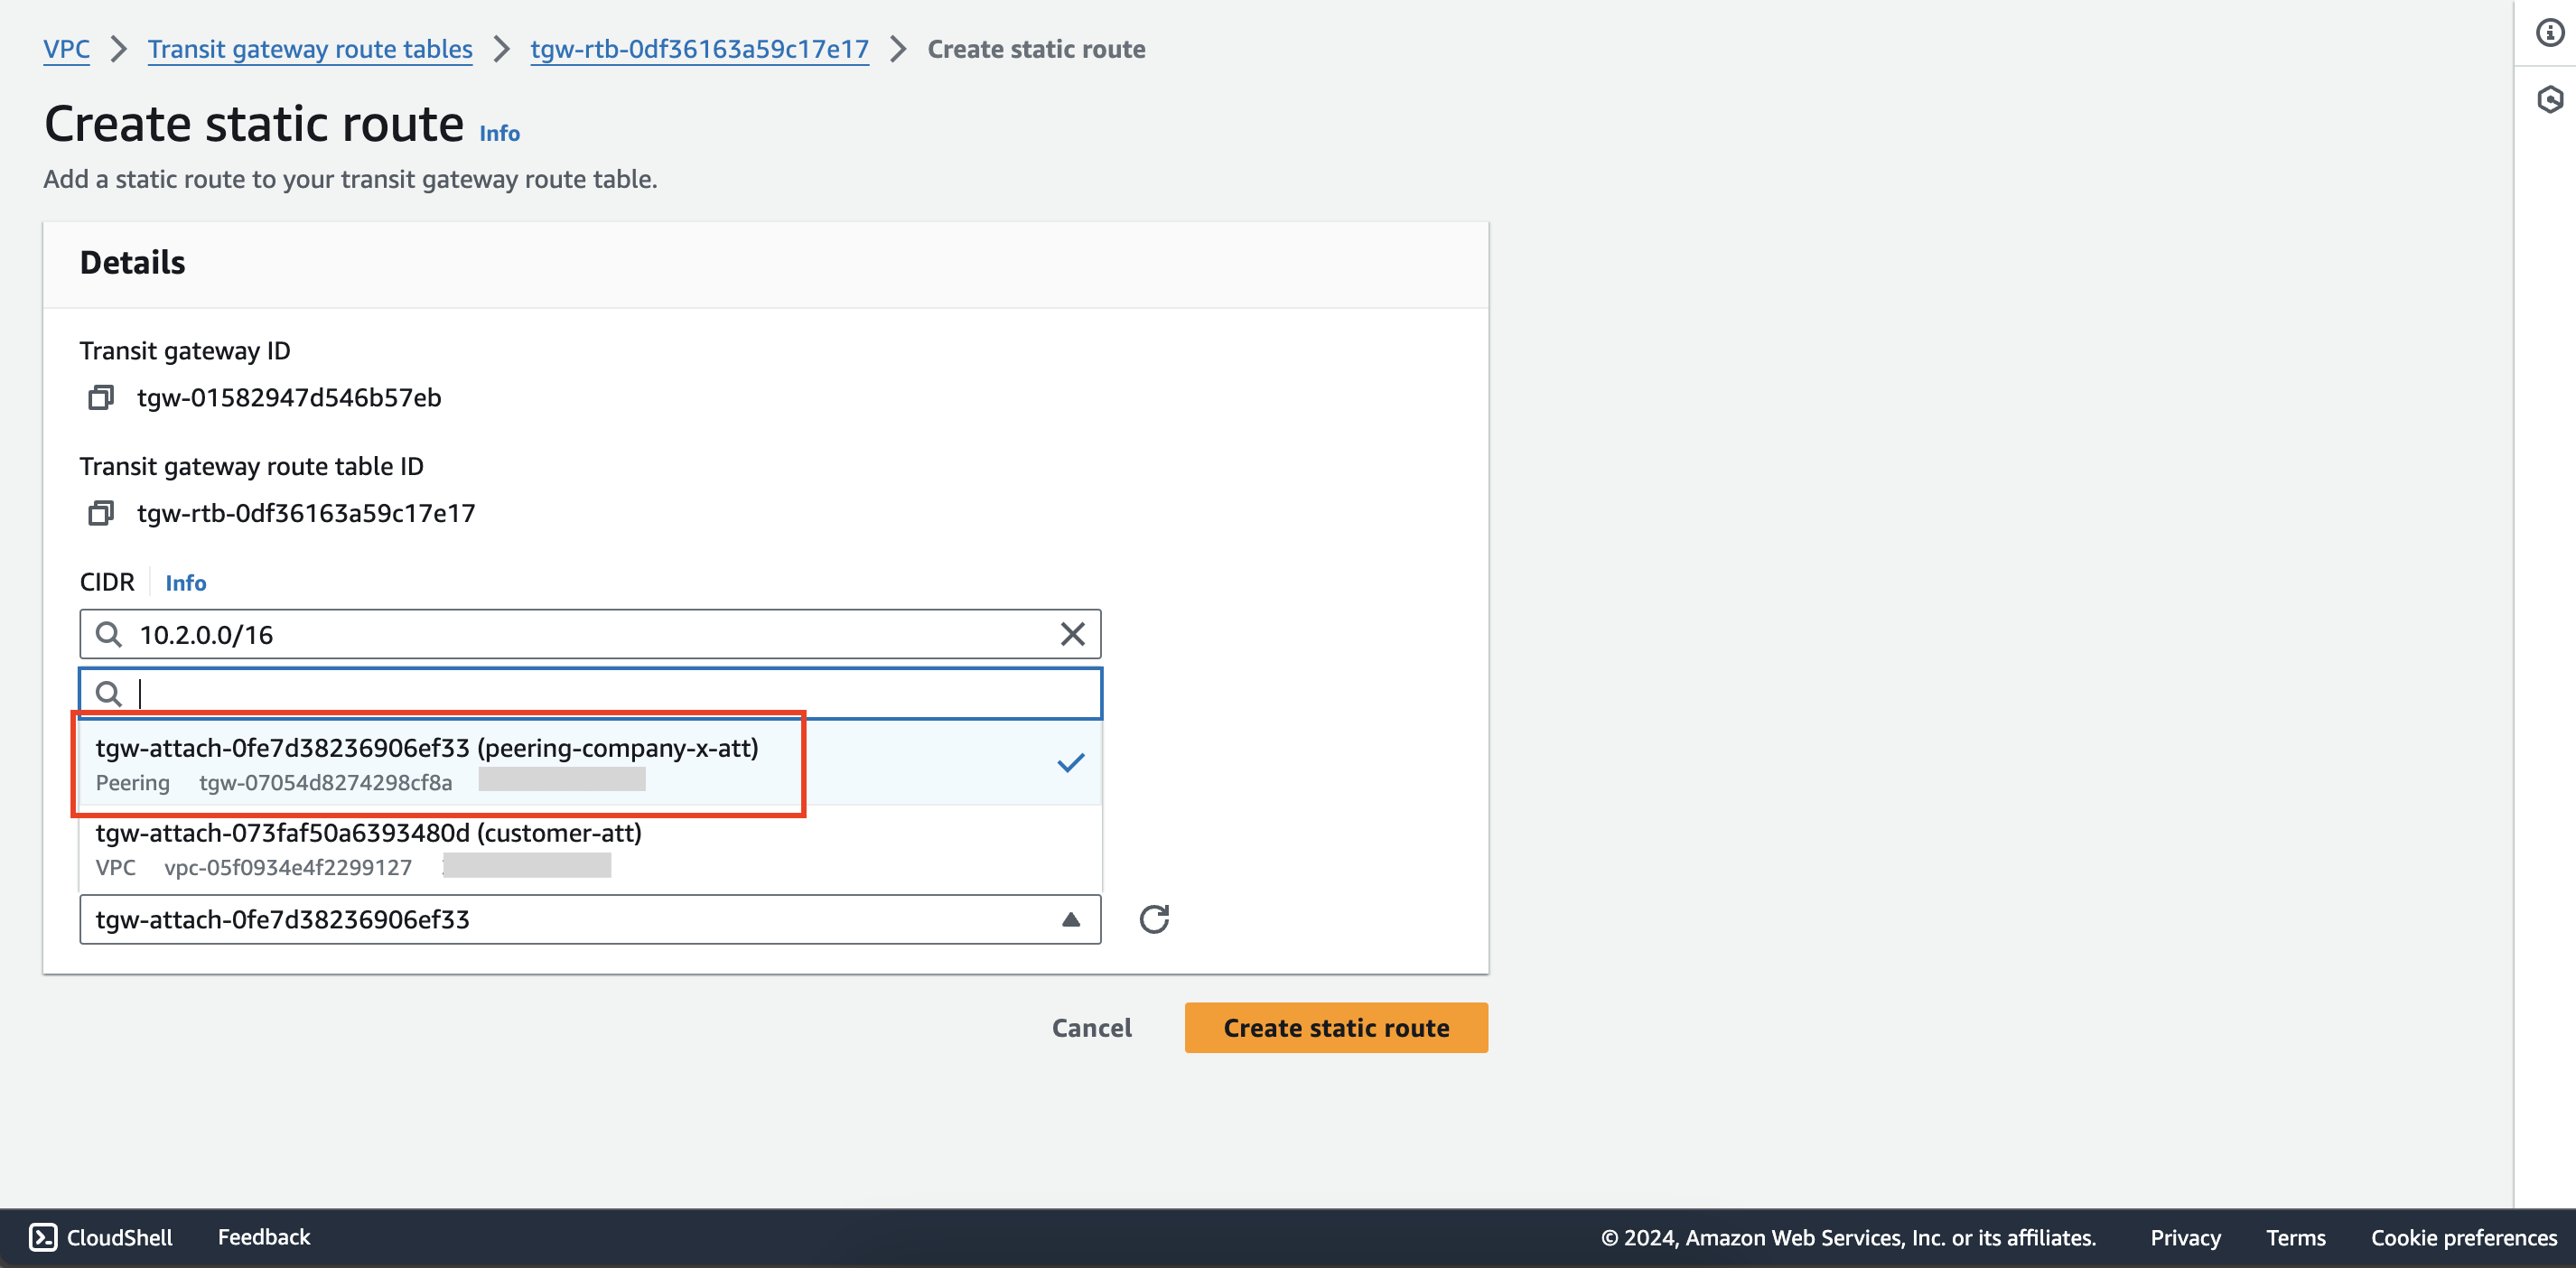
Do the same to add a new static route for customer-tgw-rtb in second account with CIDR 10.2.0.0/16 and attachment peering-company-x-att.
2. Configure route tables for transit gateways
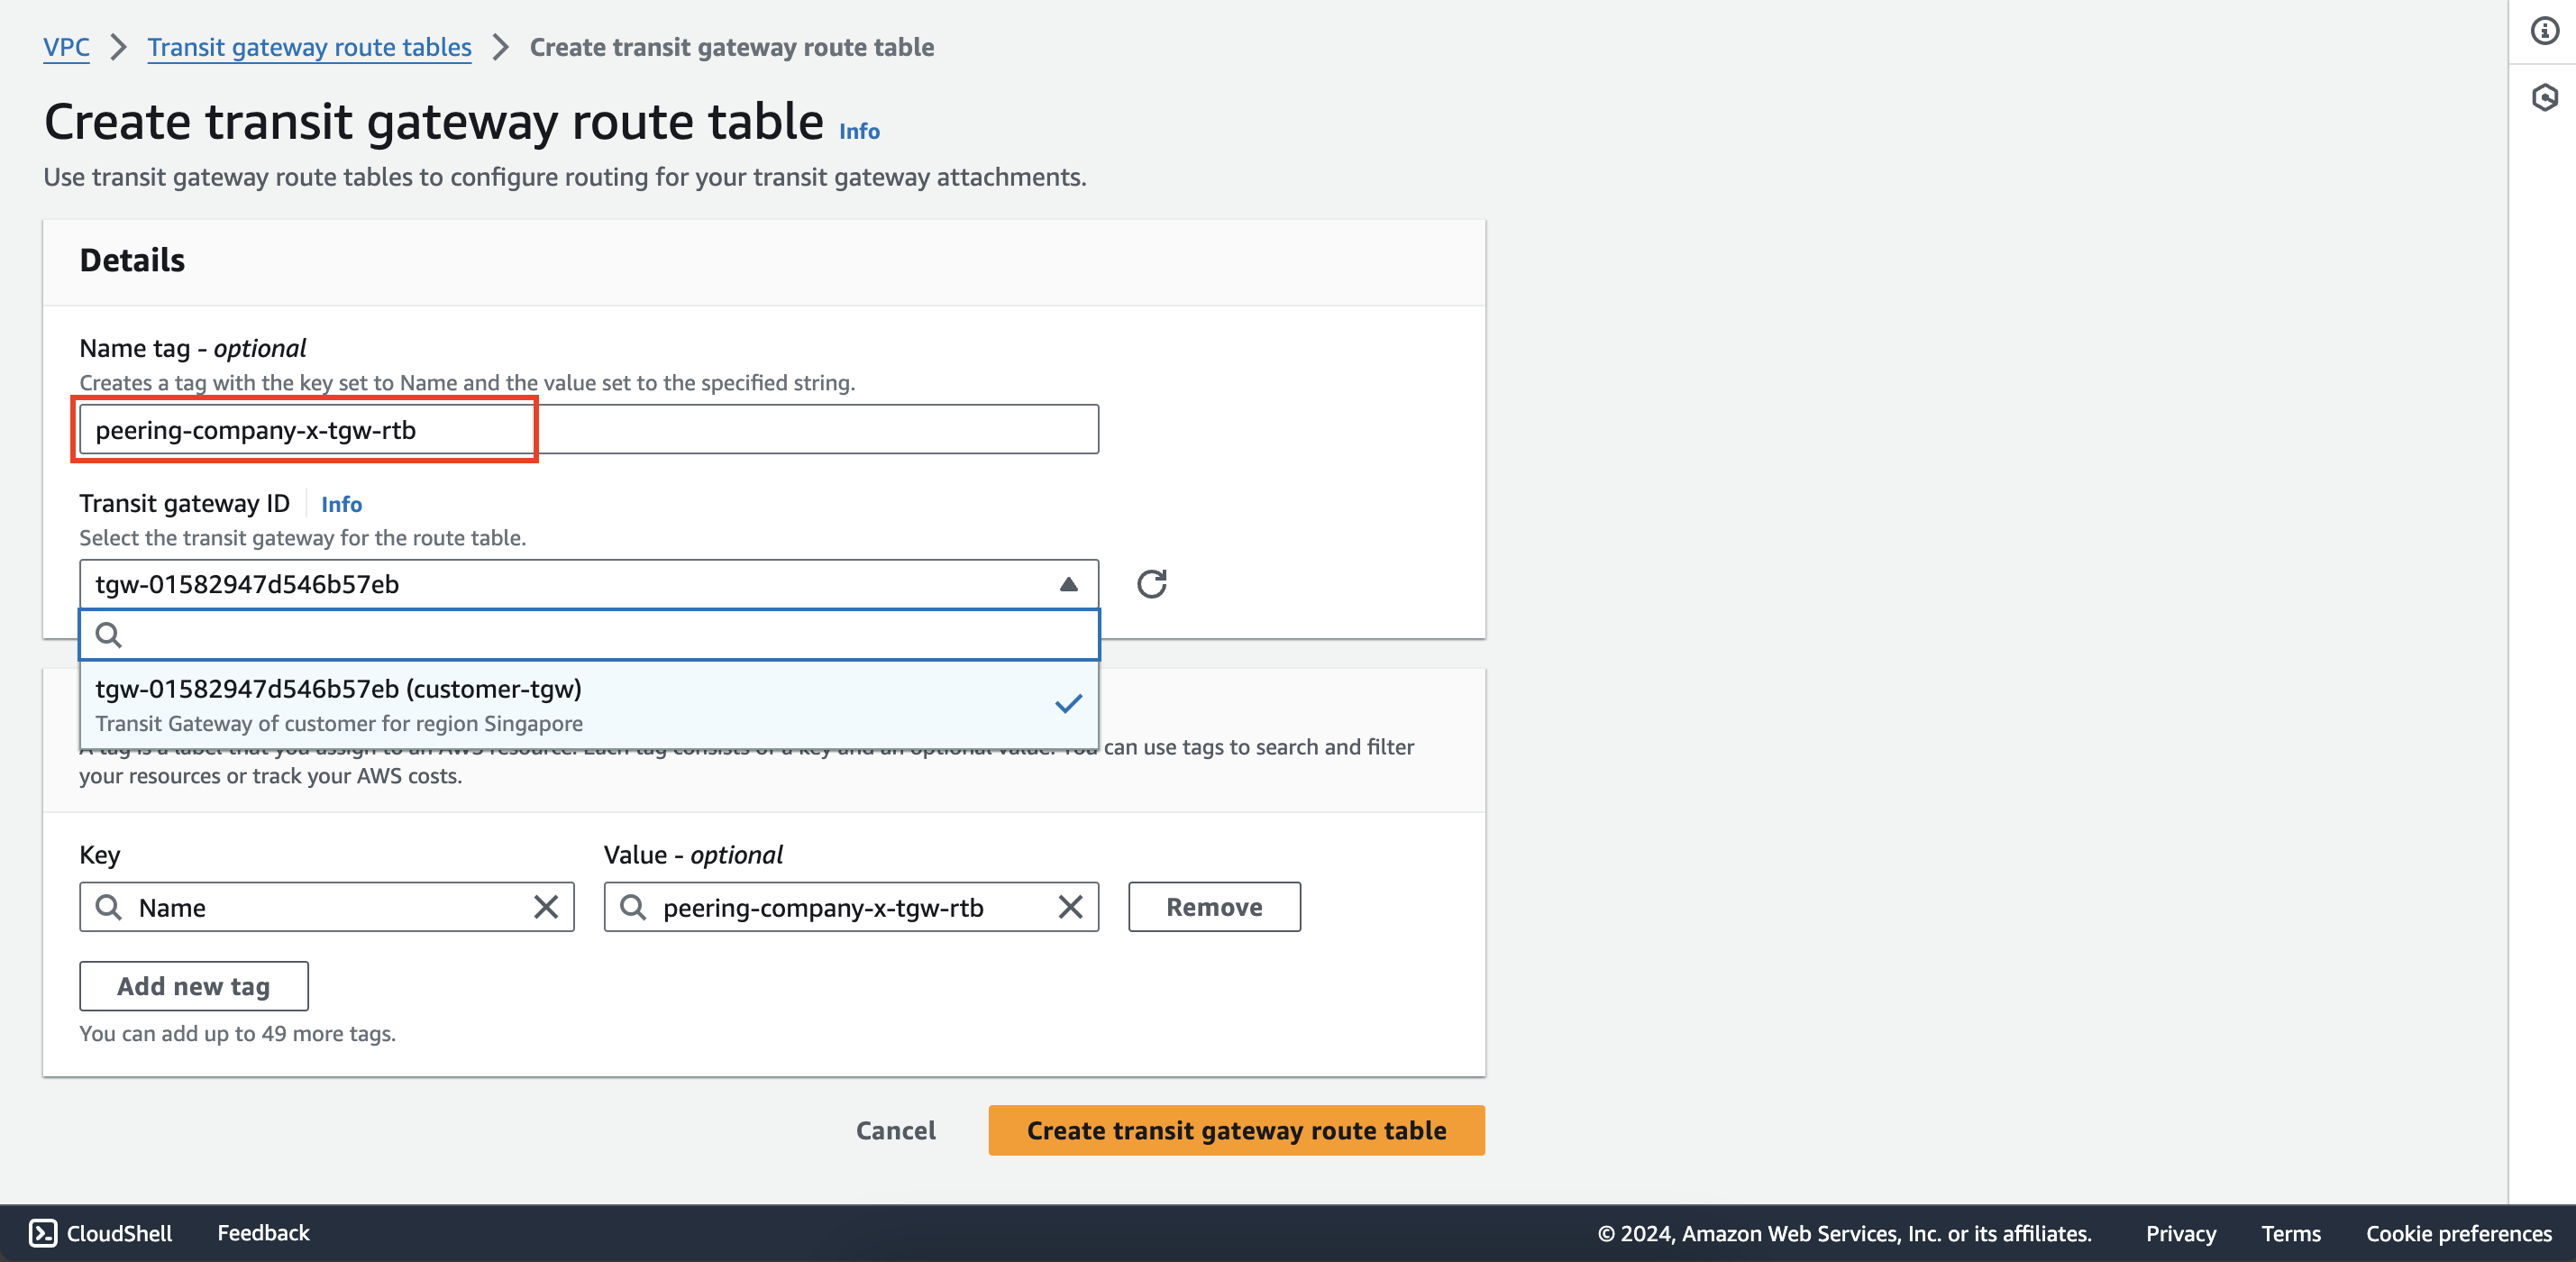
Create a new transit gateway route table in second account named peering-company-x-tgw-rtb attached to customer-tgw
then create an association with peering-company-x-att attachment and propagate to customer-att attachment.
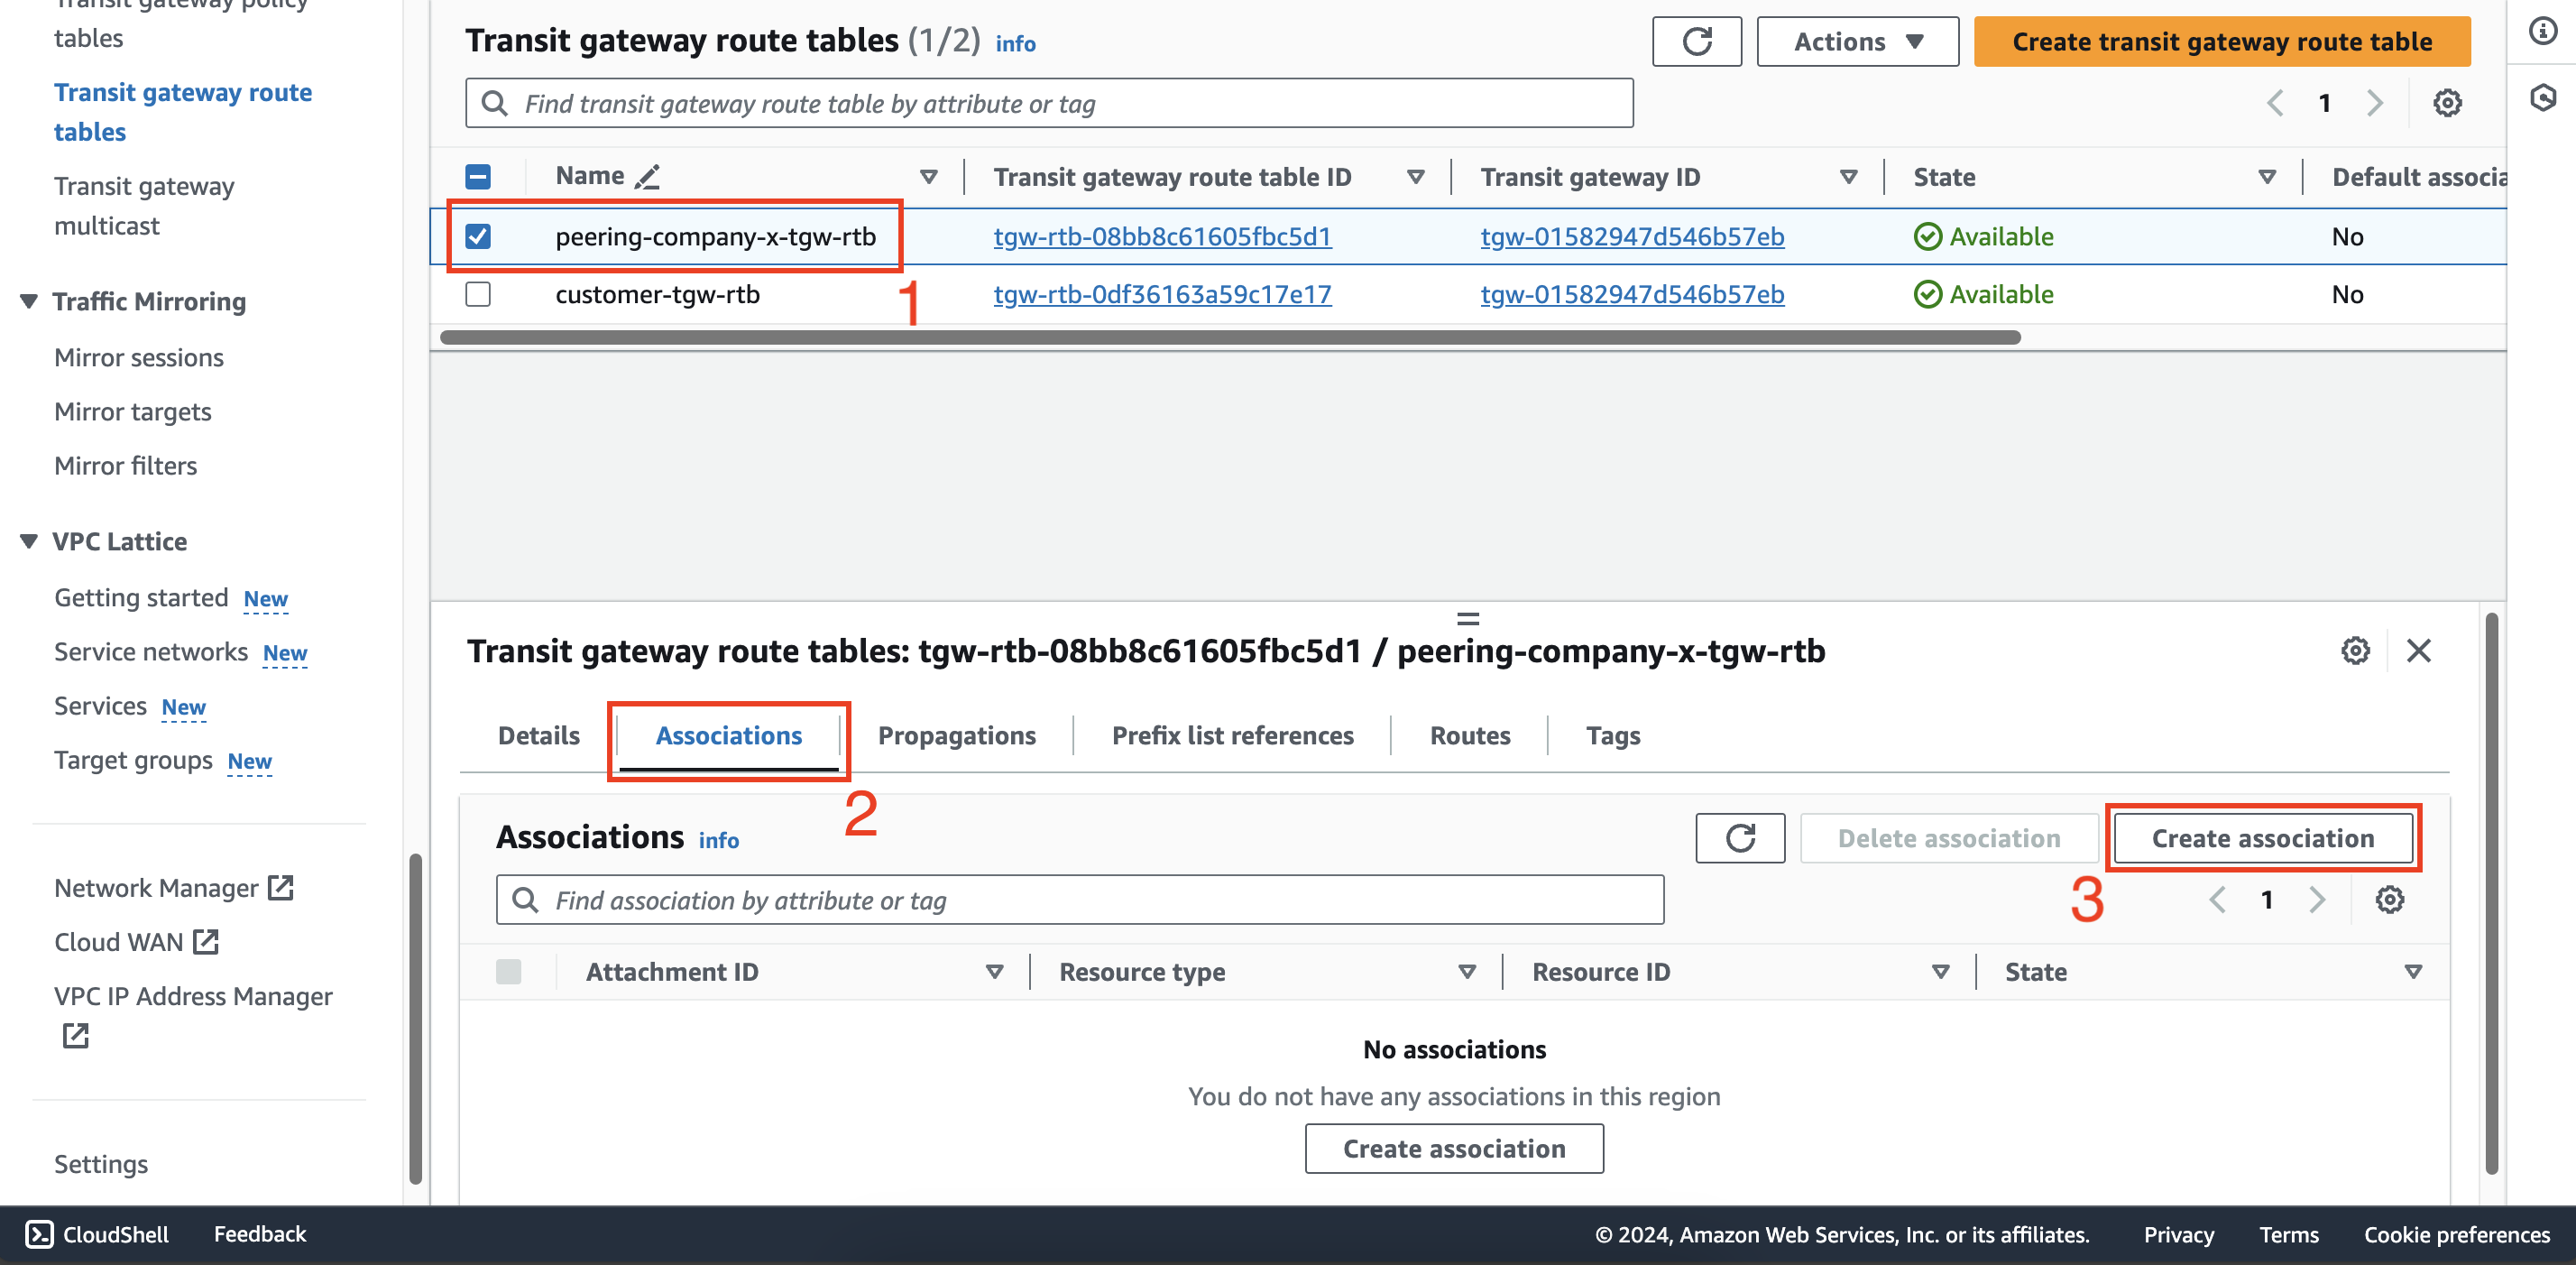
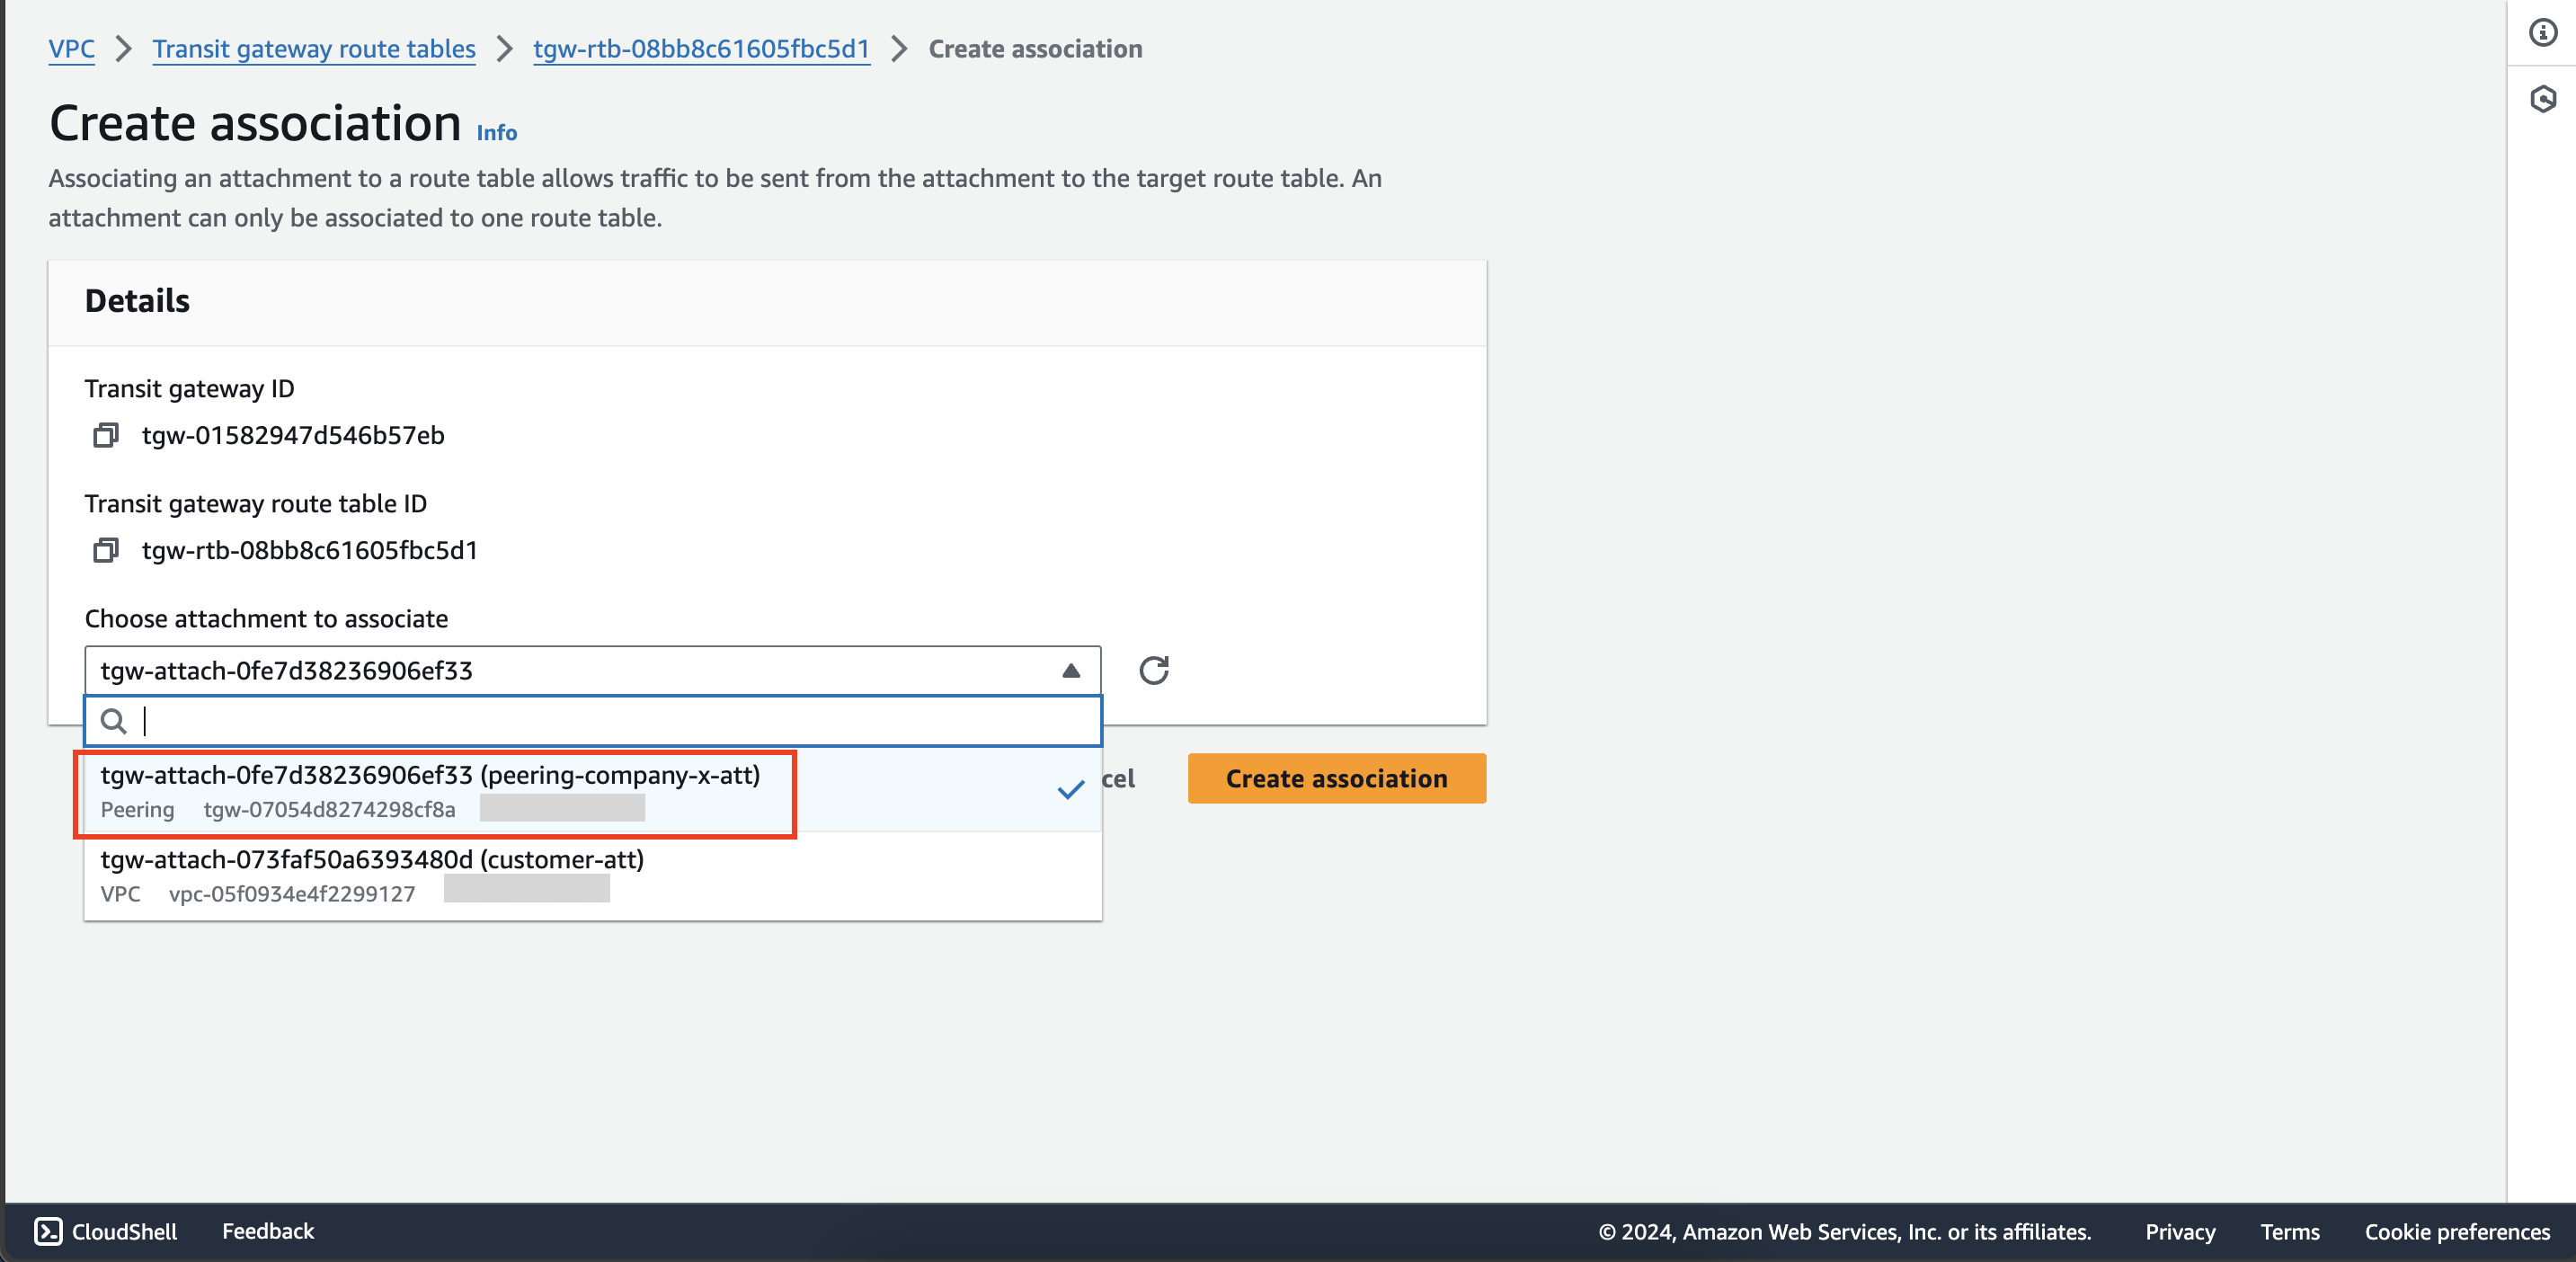
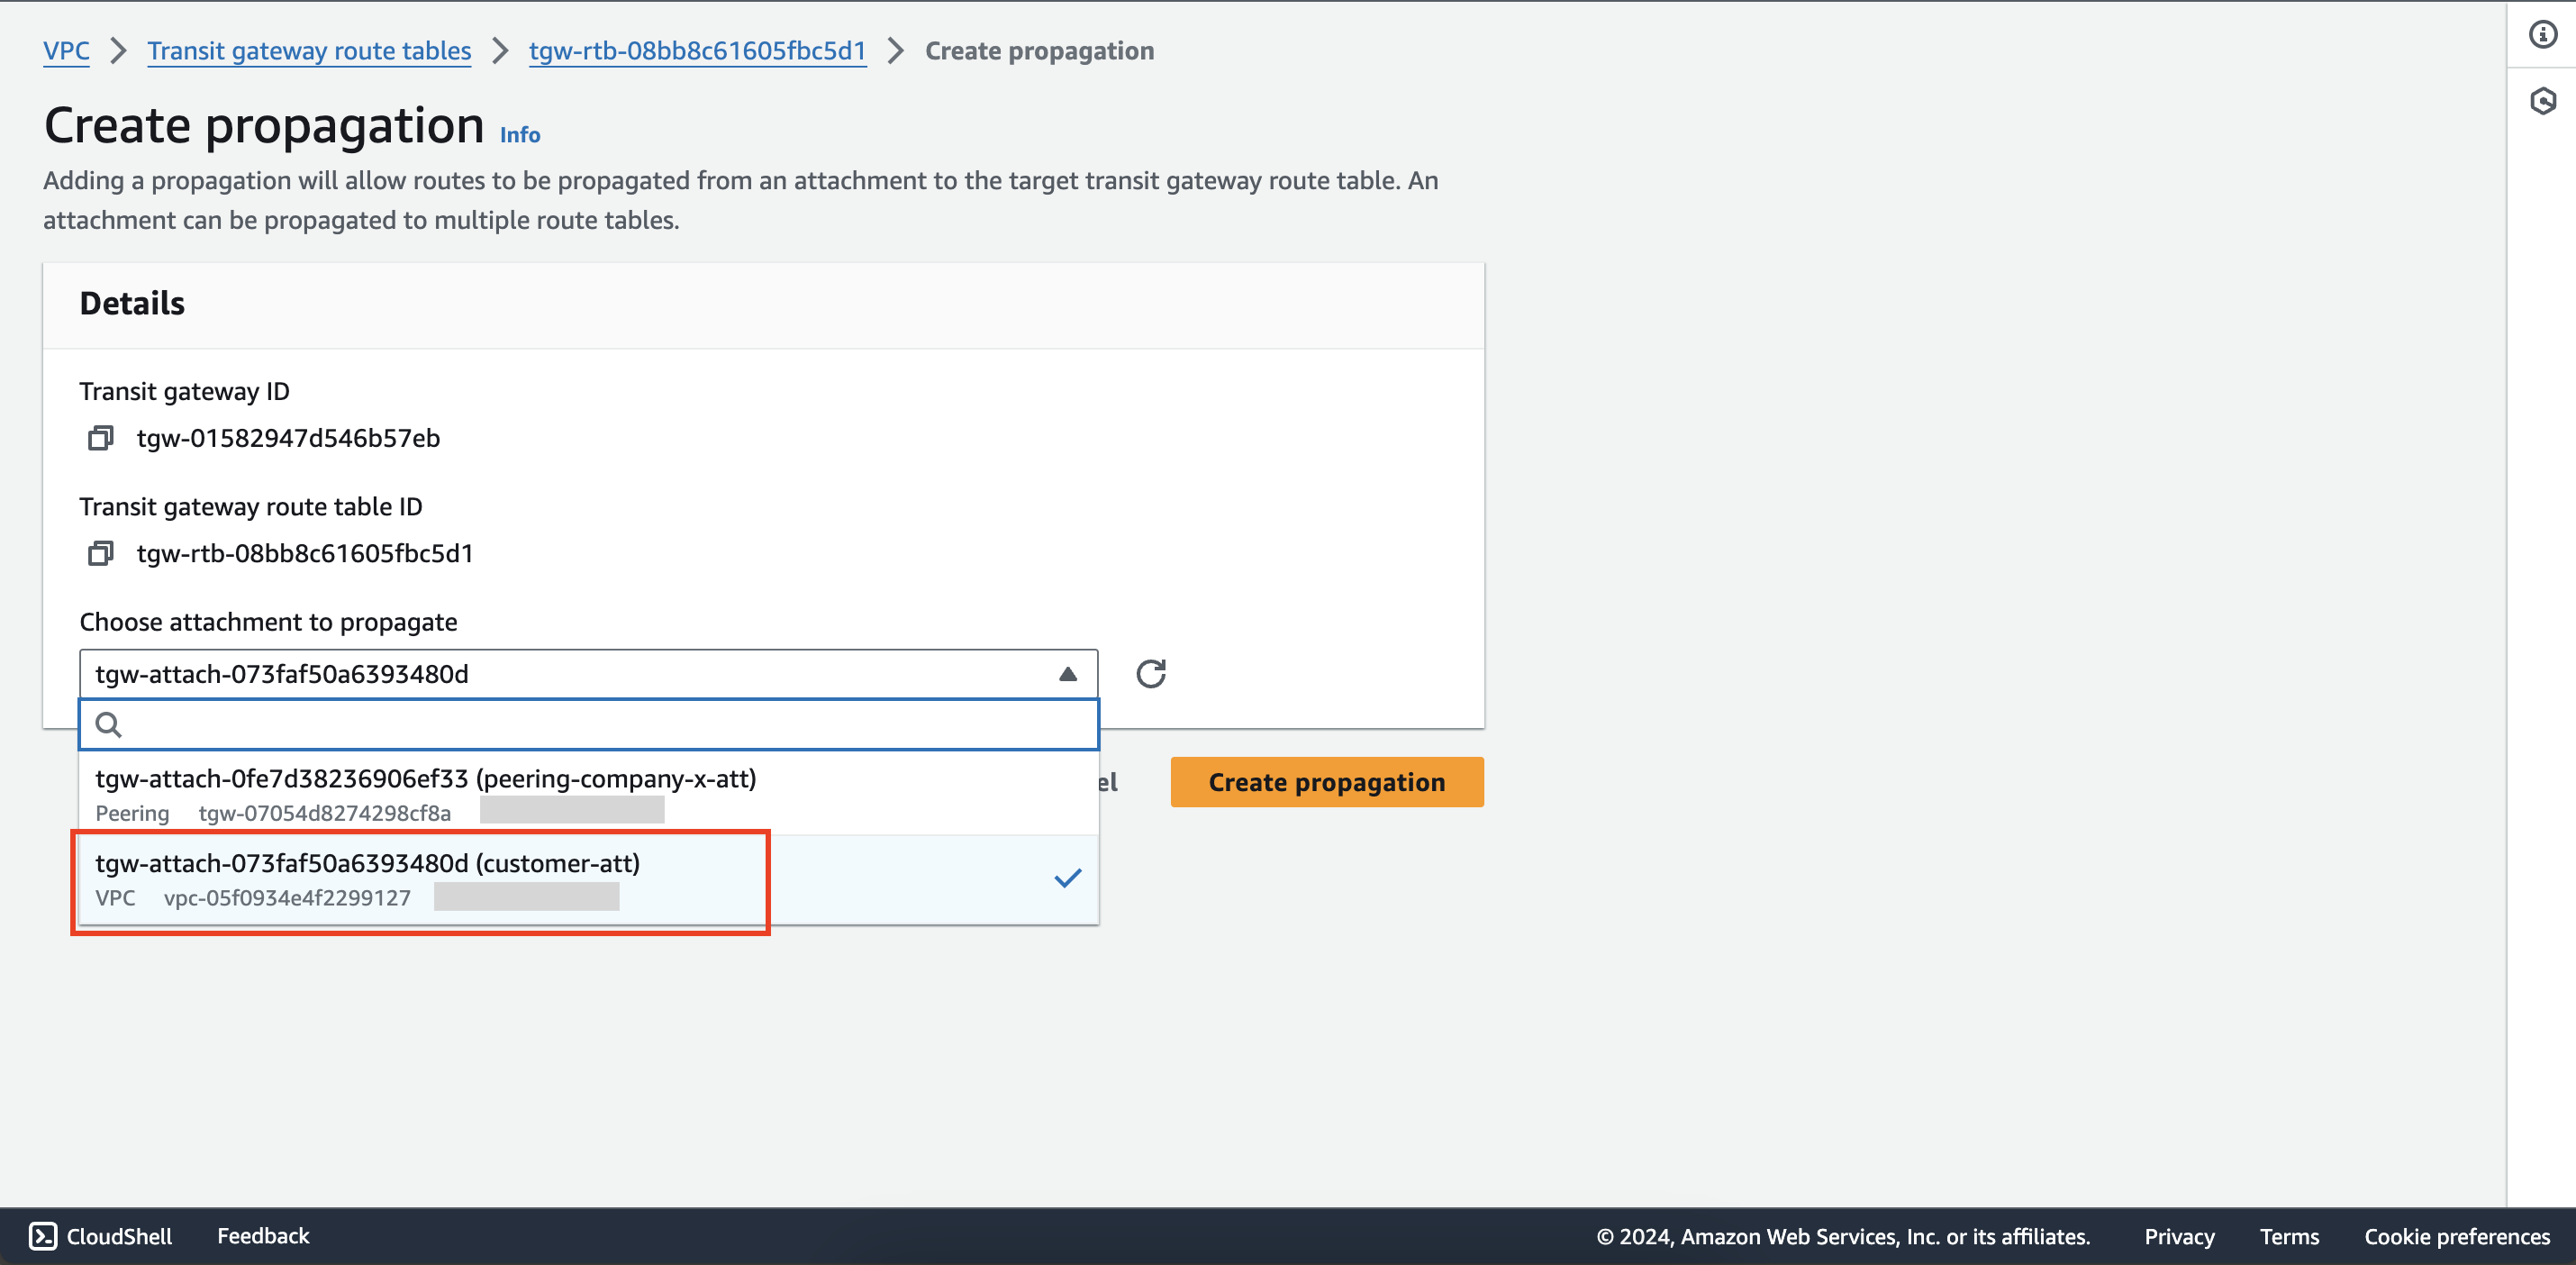
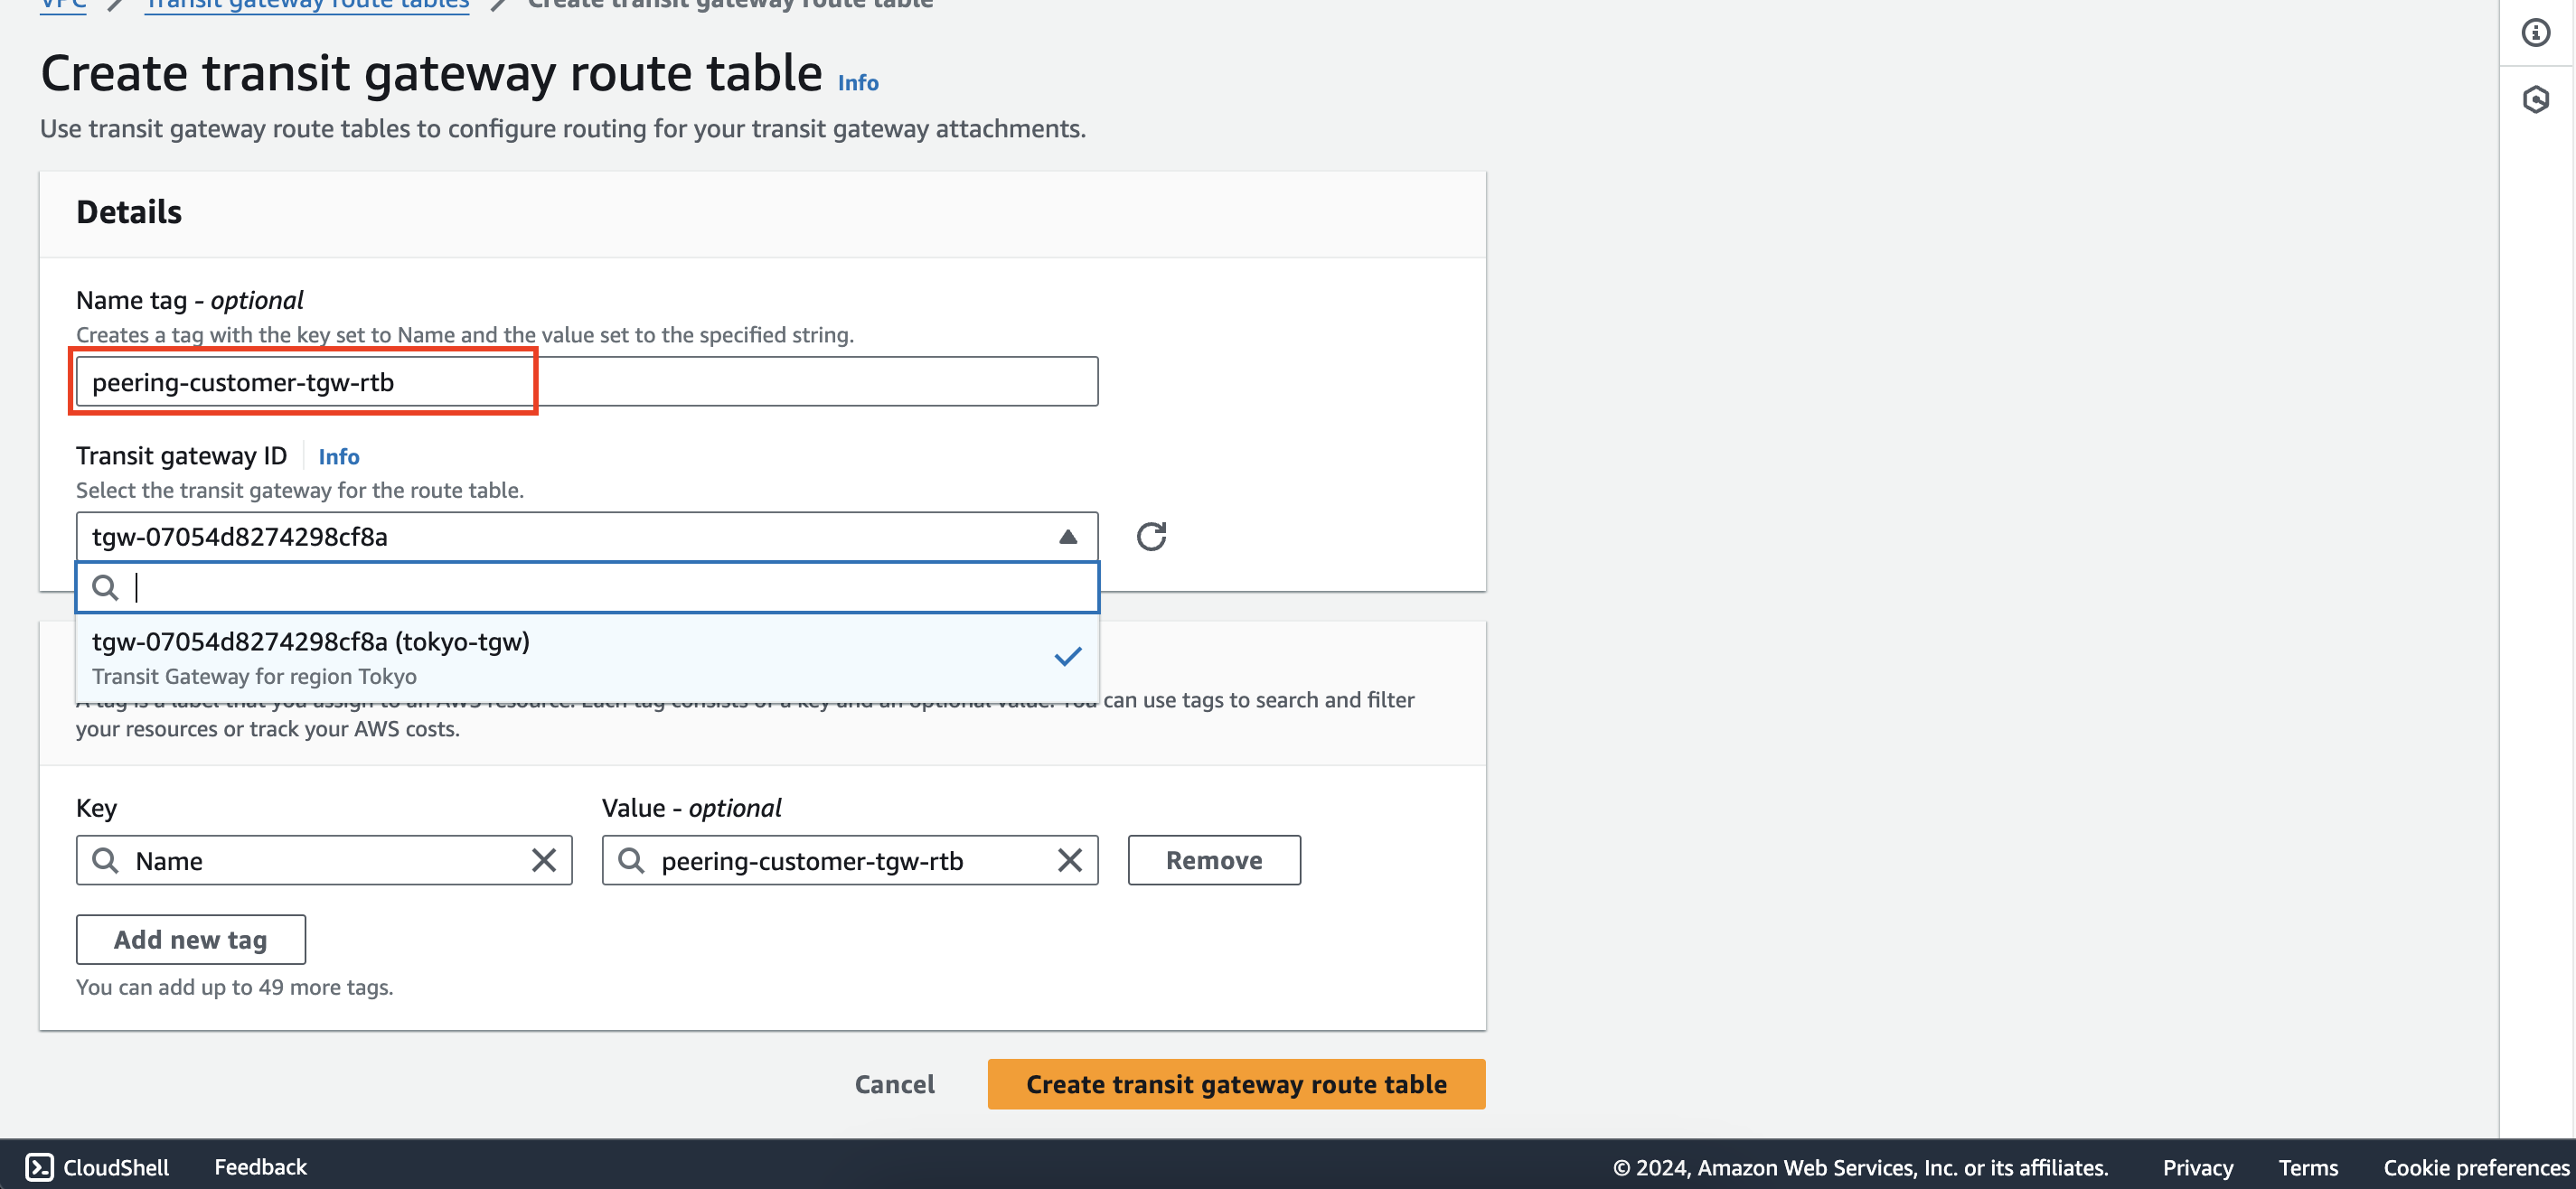
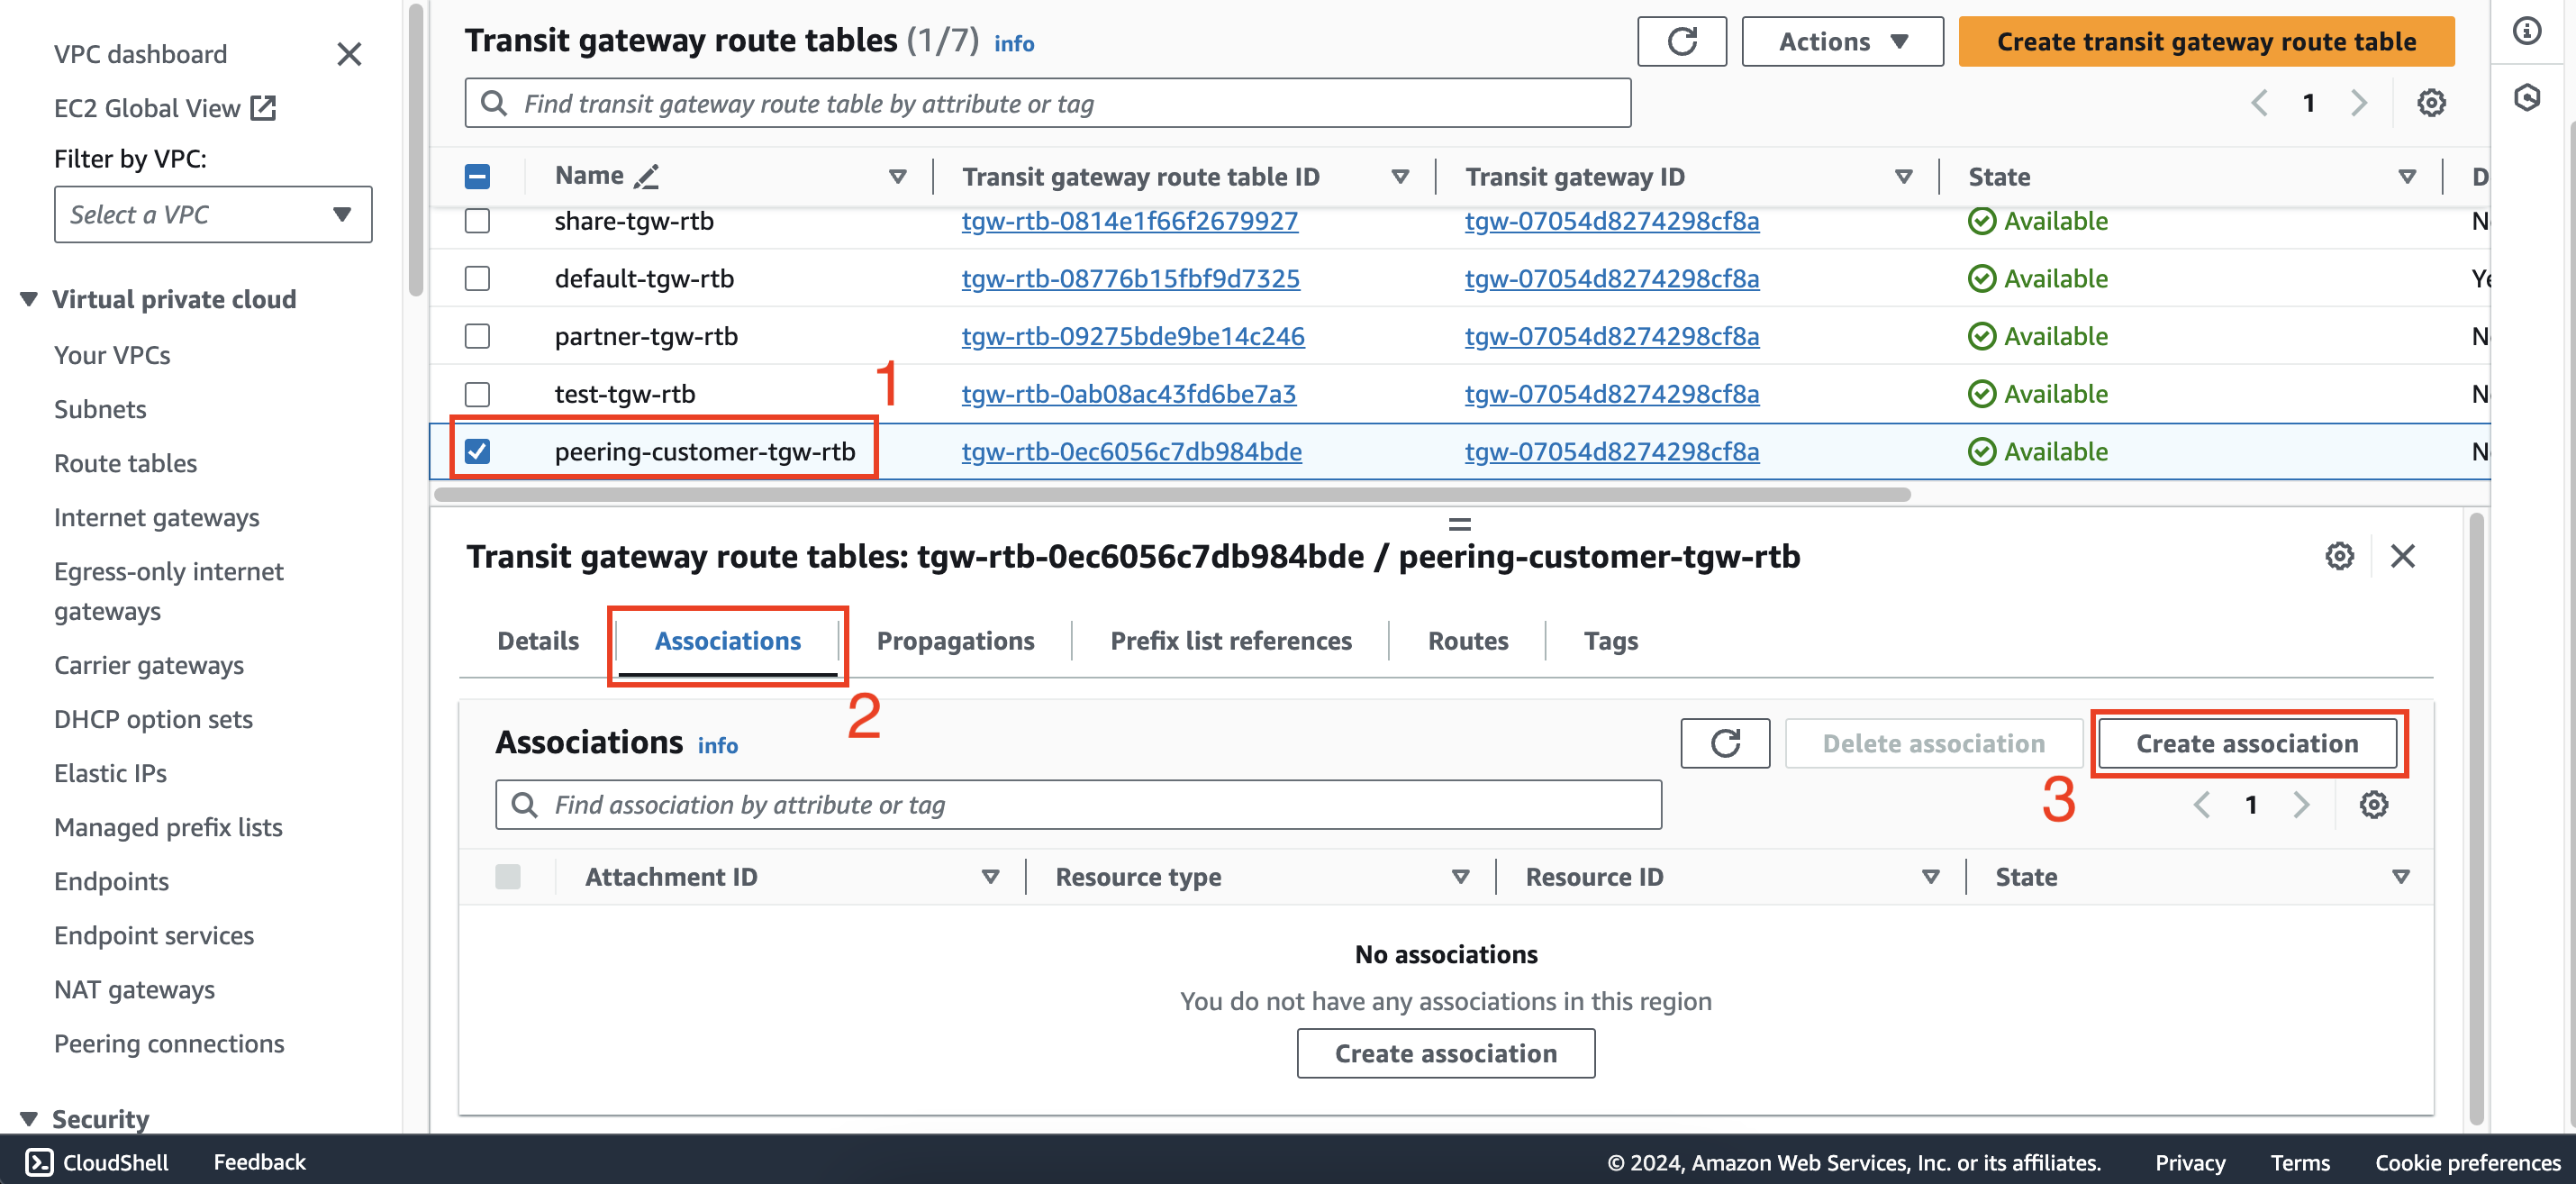
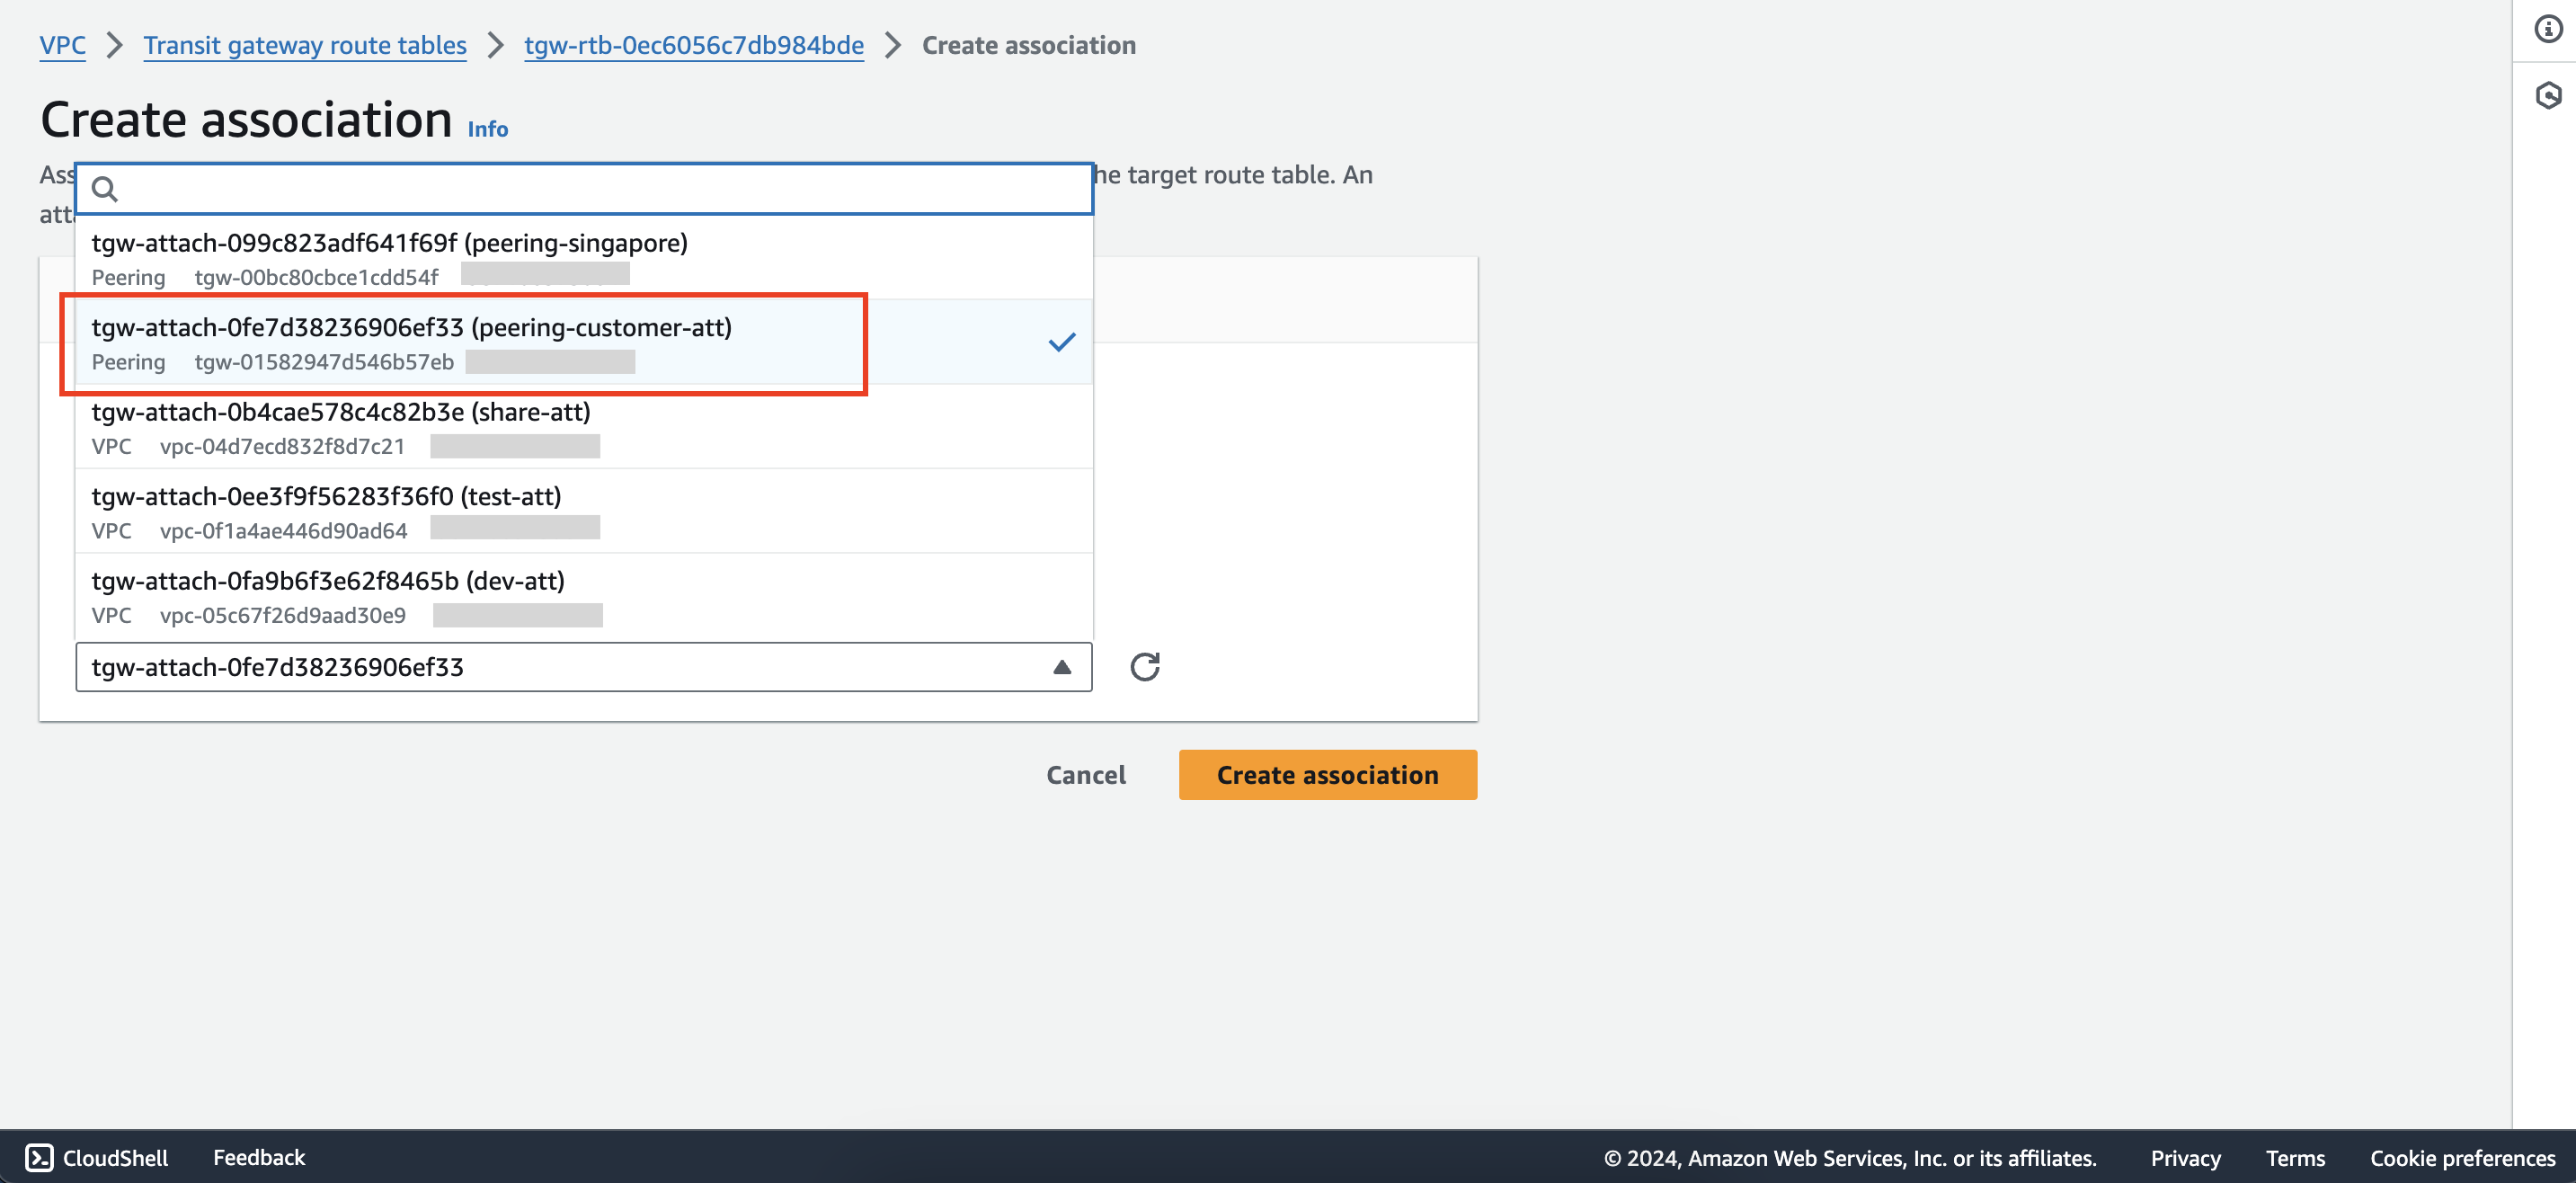
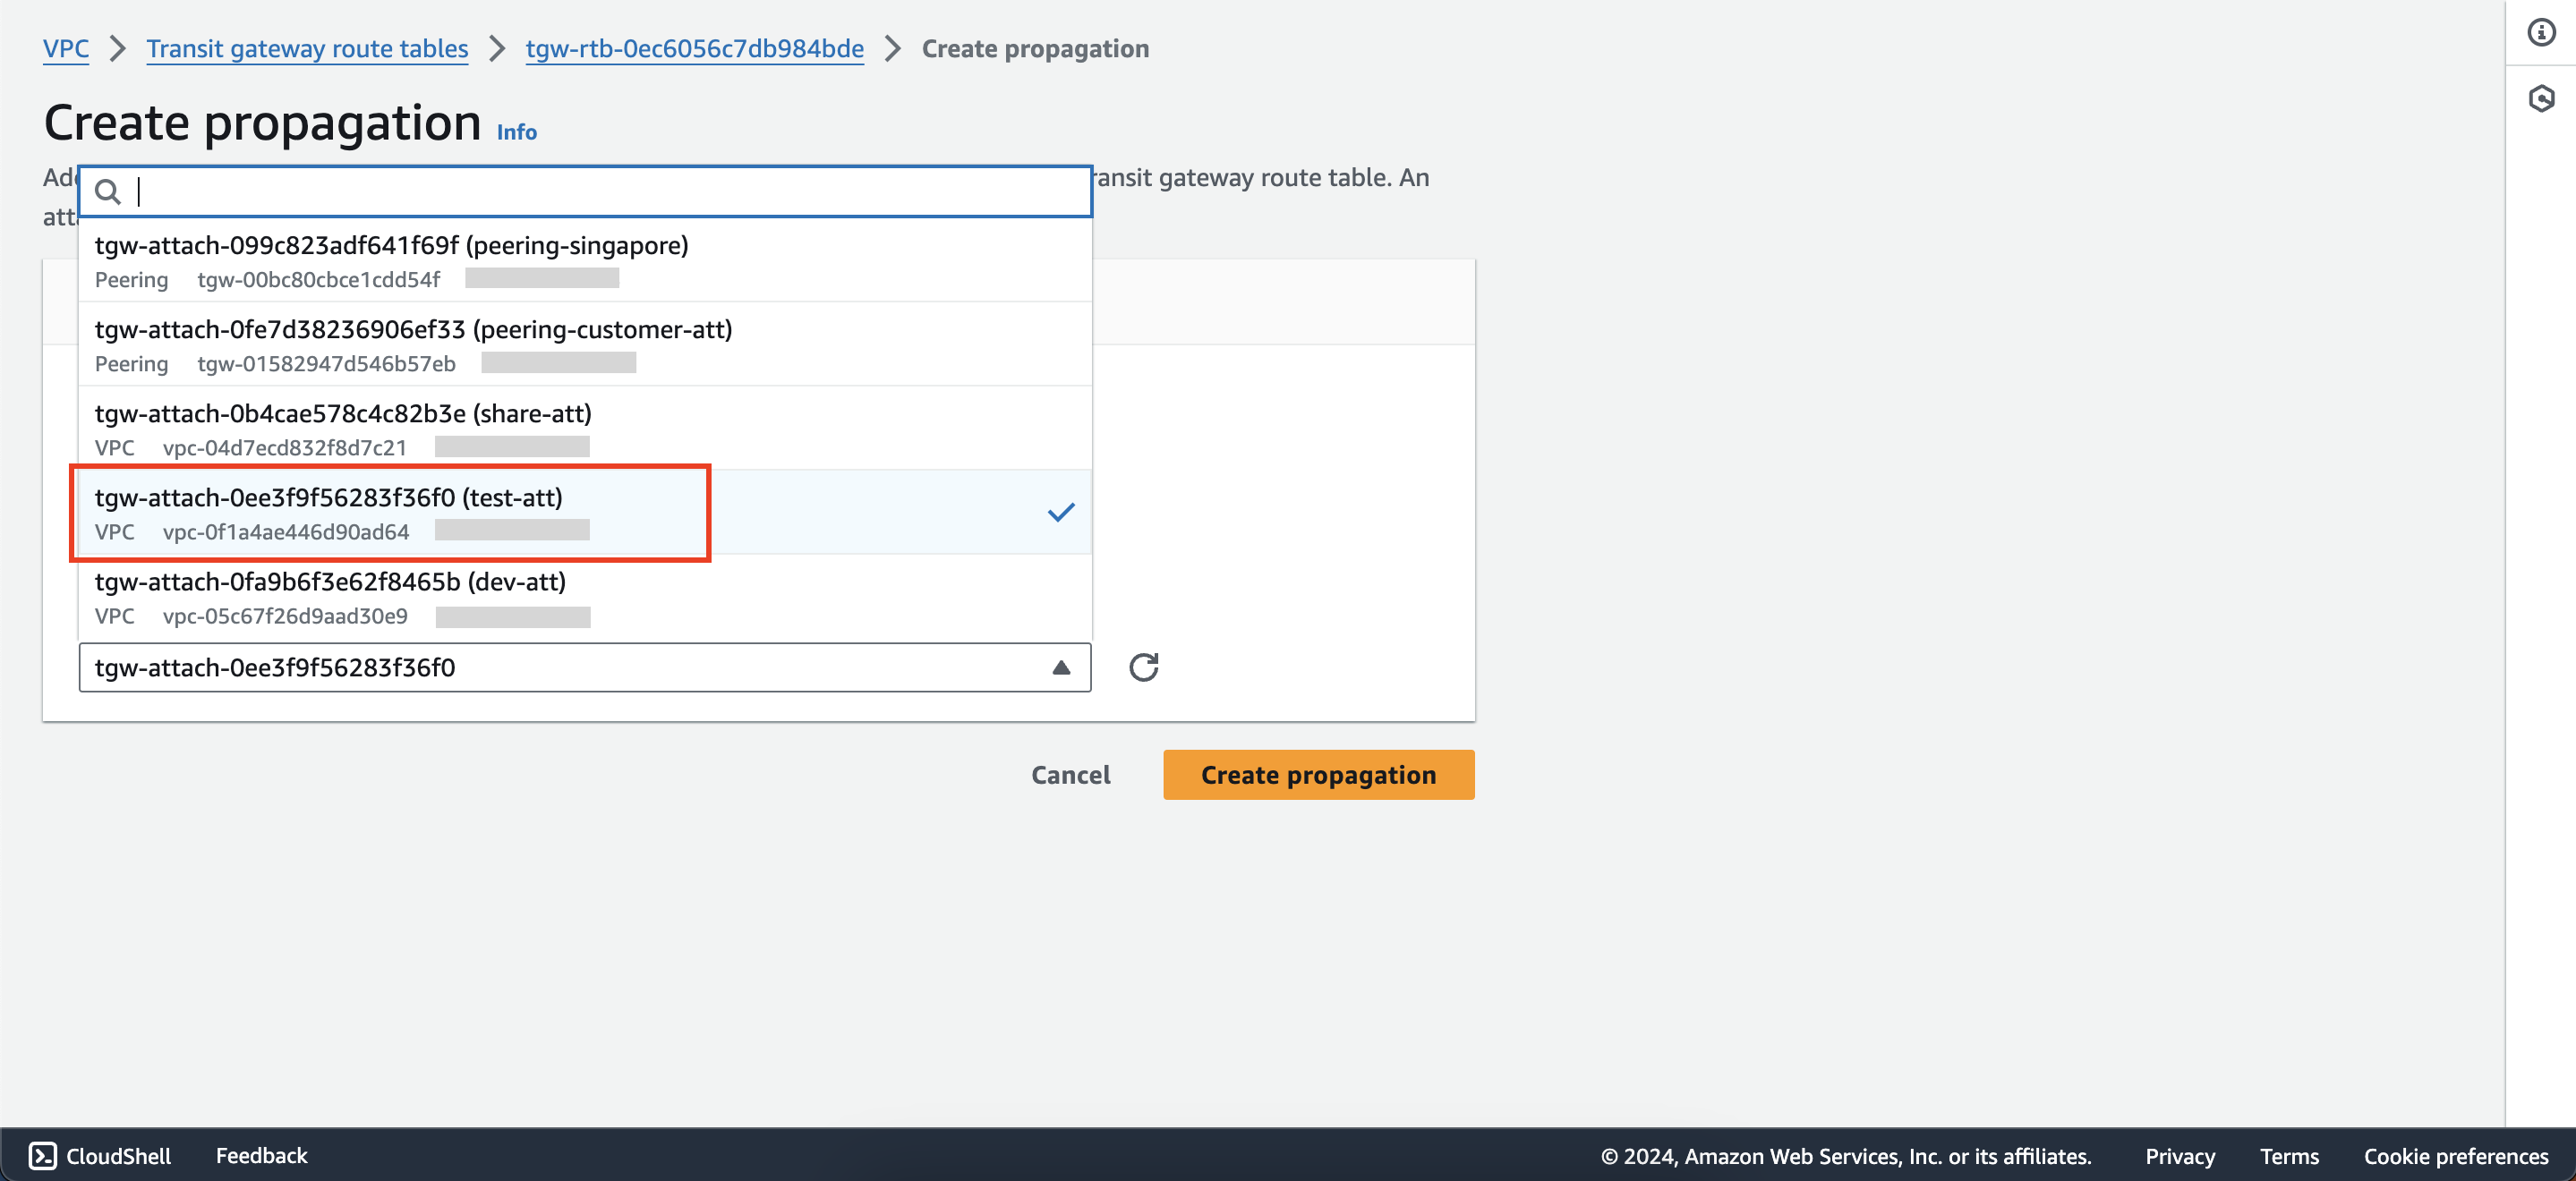
Do the same to create transit gateway route table peering-customer-tgw-rtb in first account then associate with tokyo-tgw
transit gateway, create association with peering-customer-att attachment and propagate to test-att attachment.
3. Configure route tables for VPCs
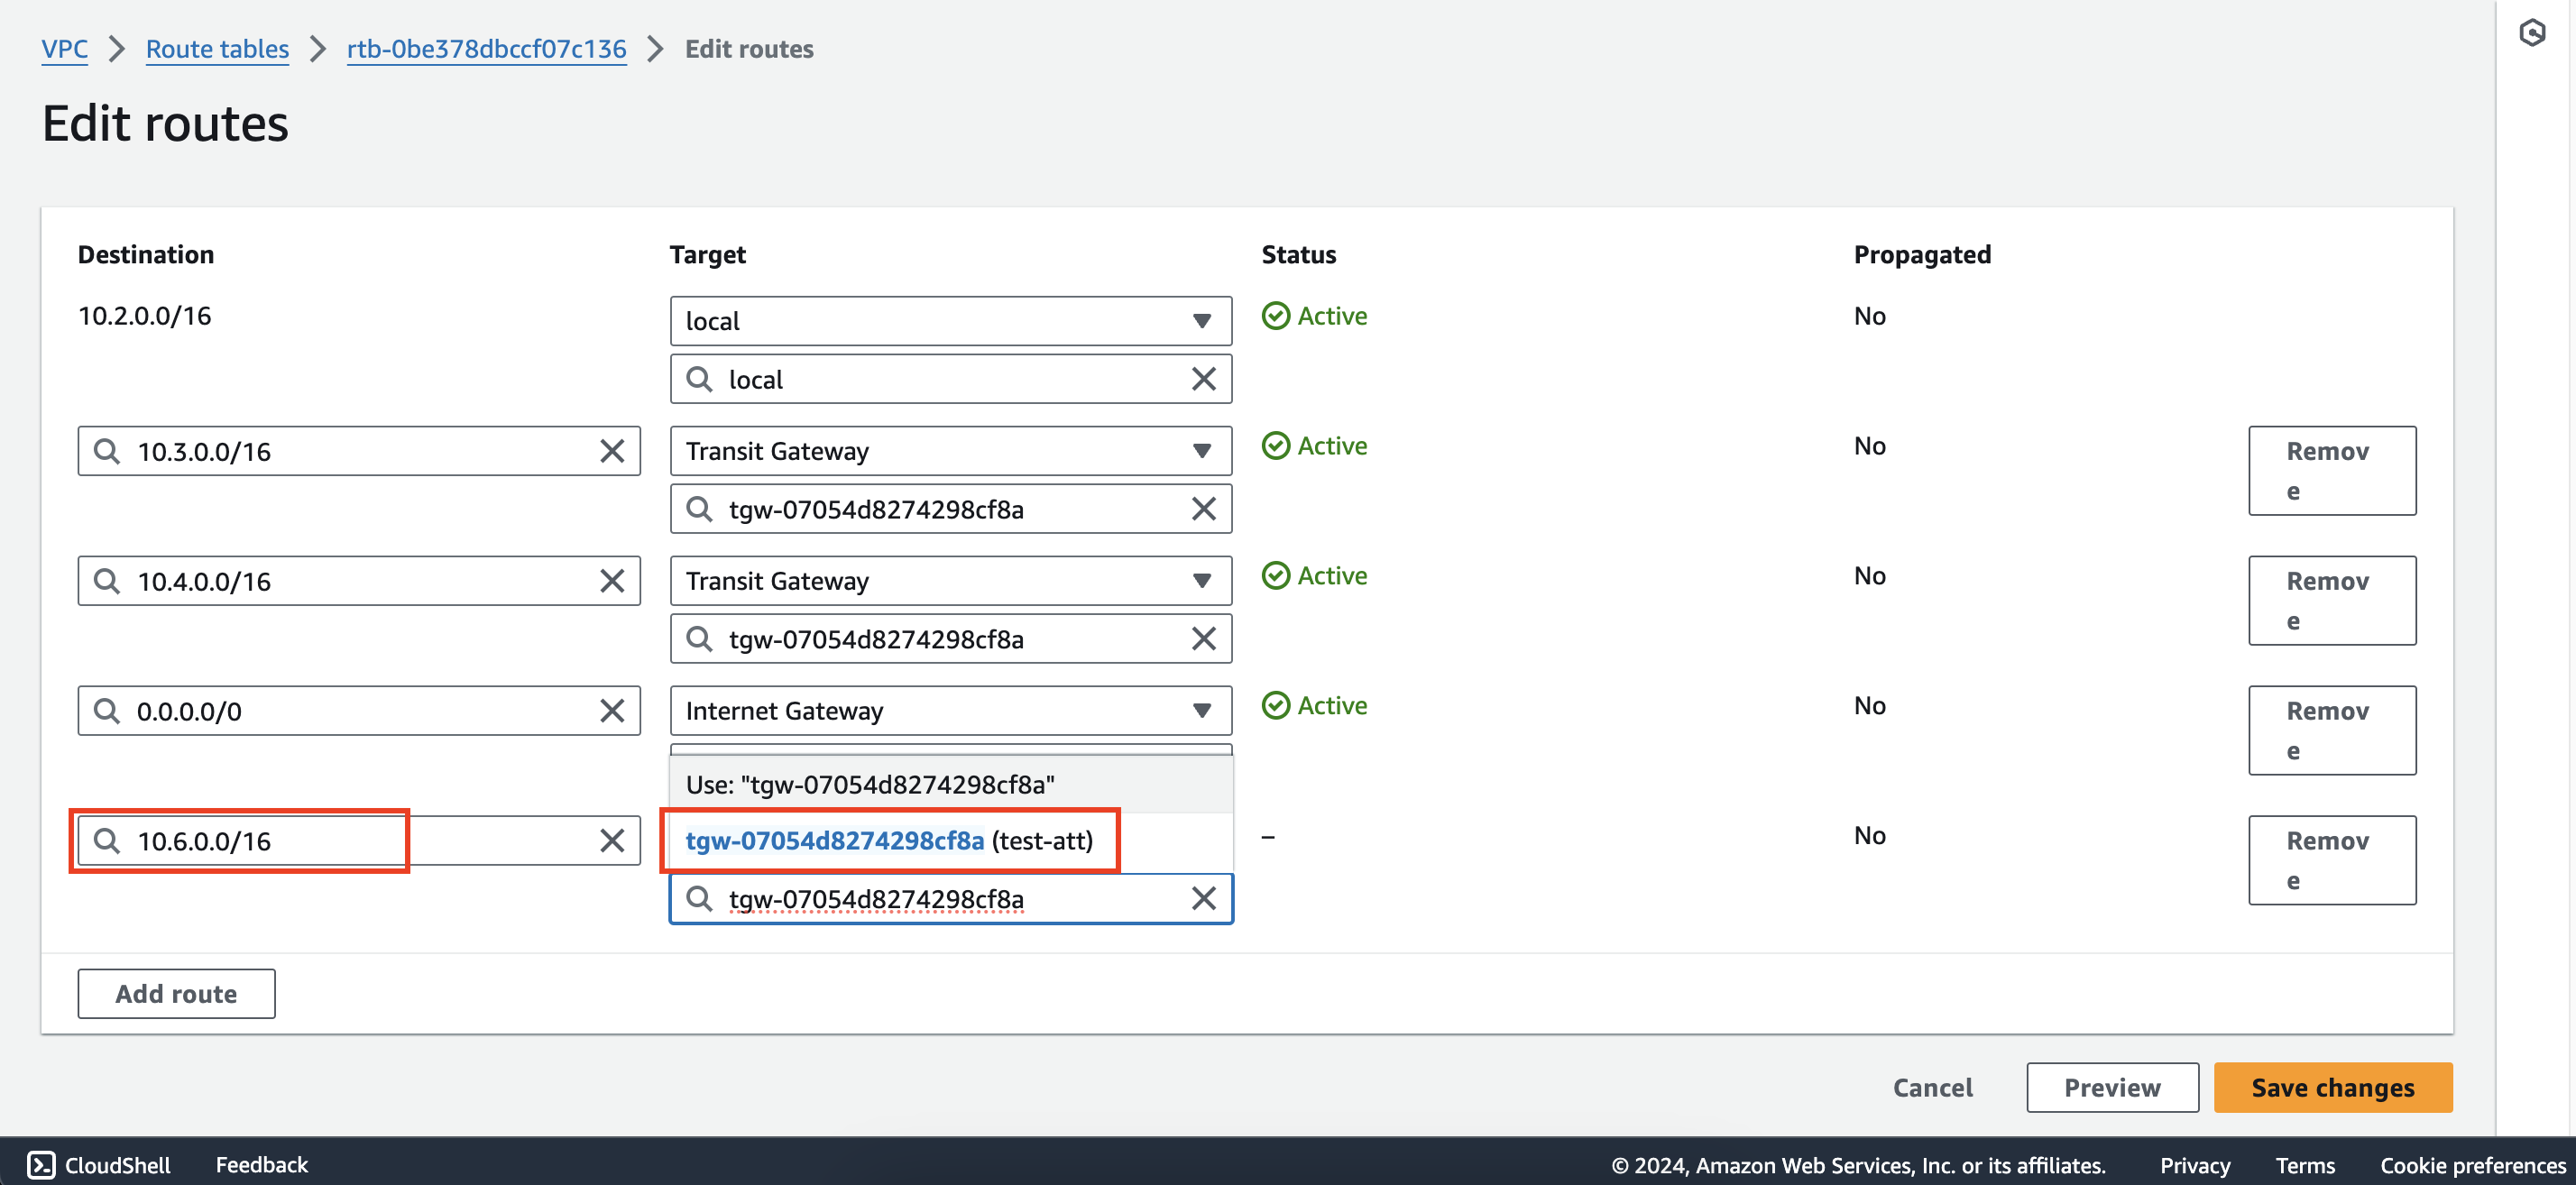
Add a new route with destination 10.6.0.0/16 and target test-att to test-rtb route table in first account.
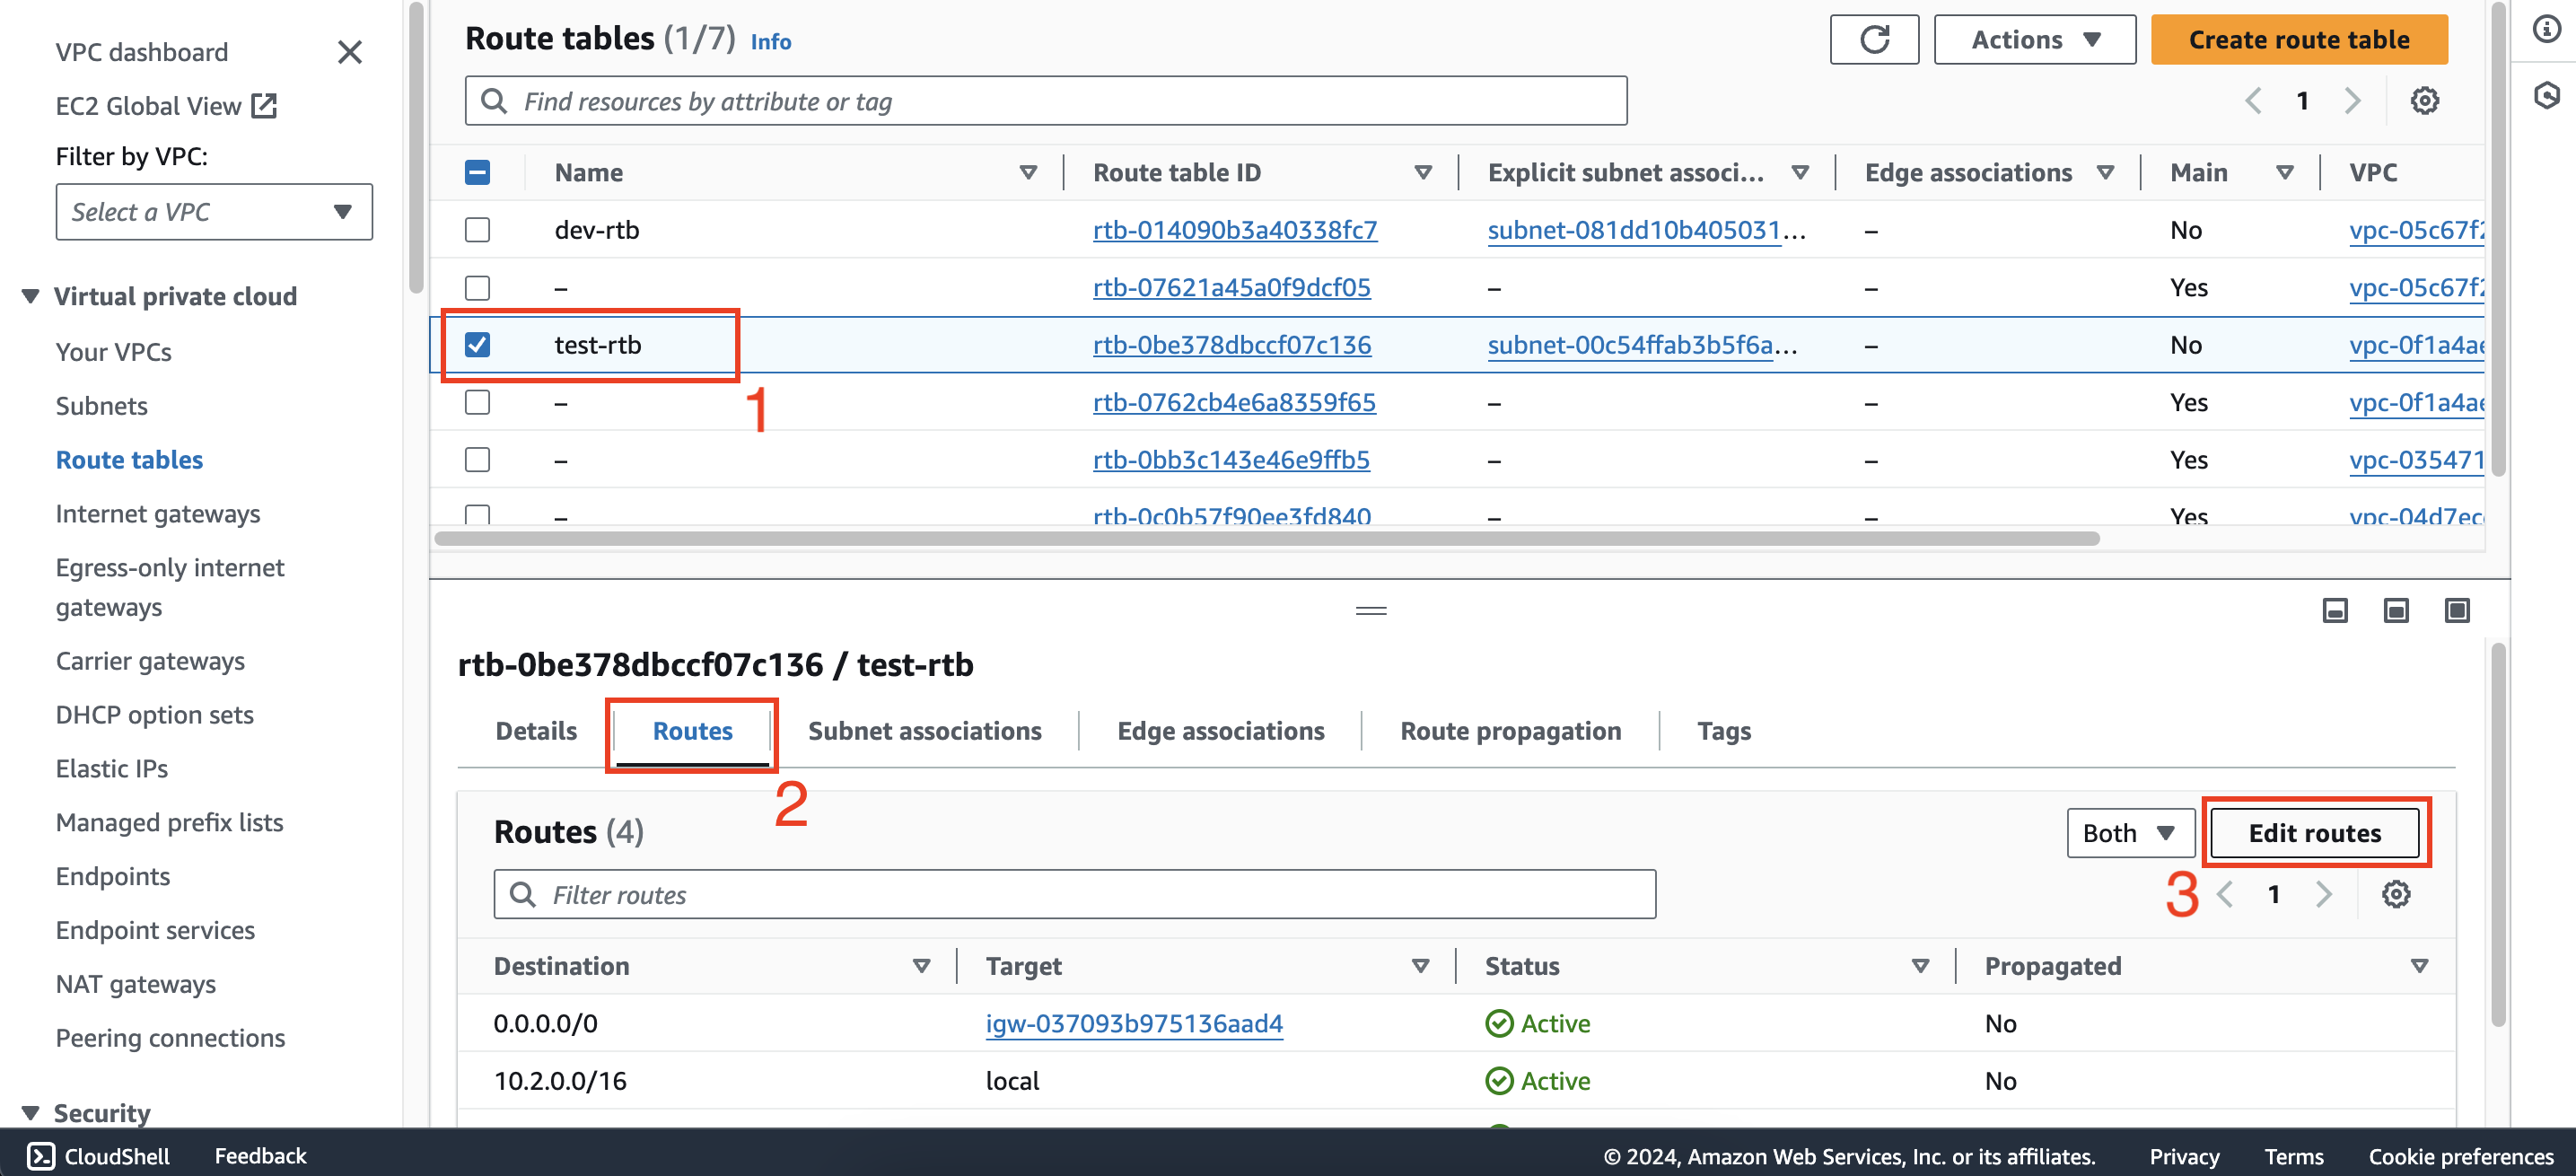
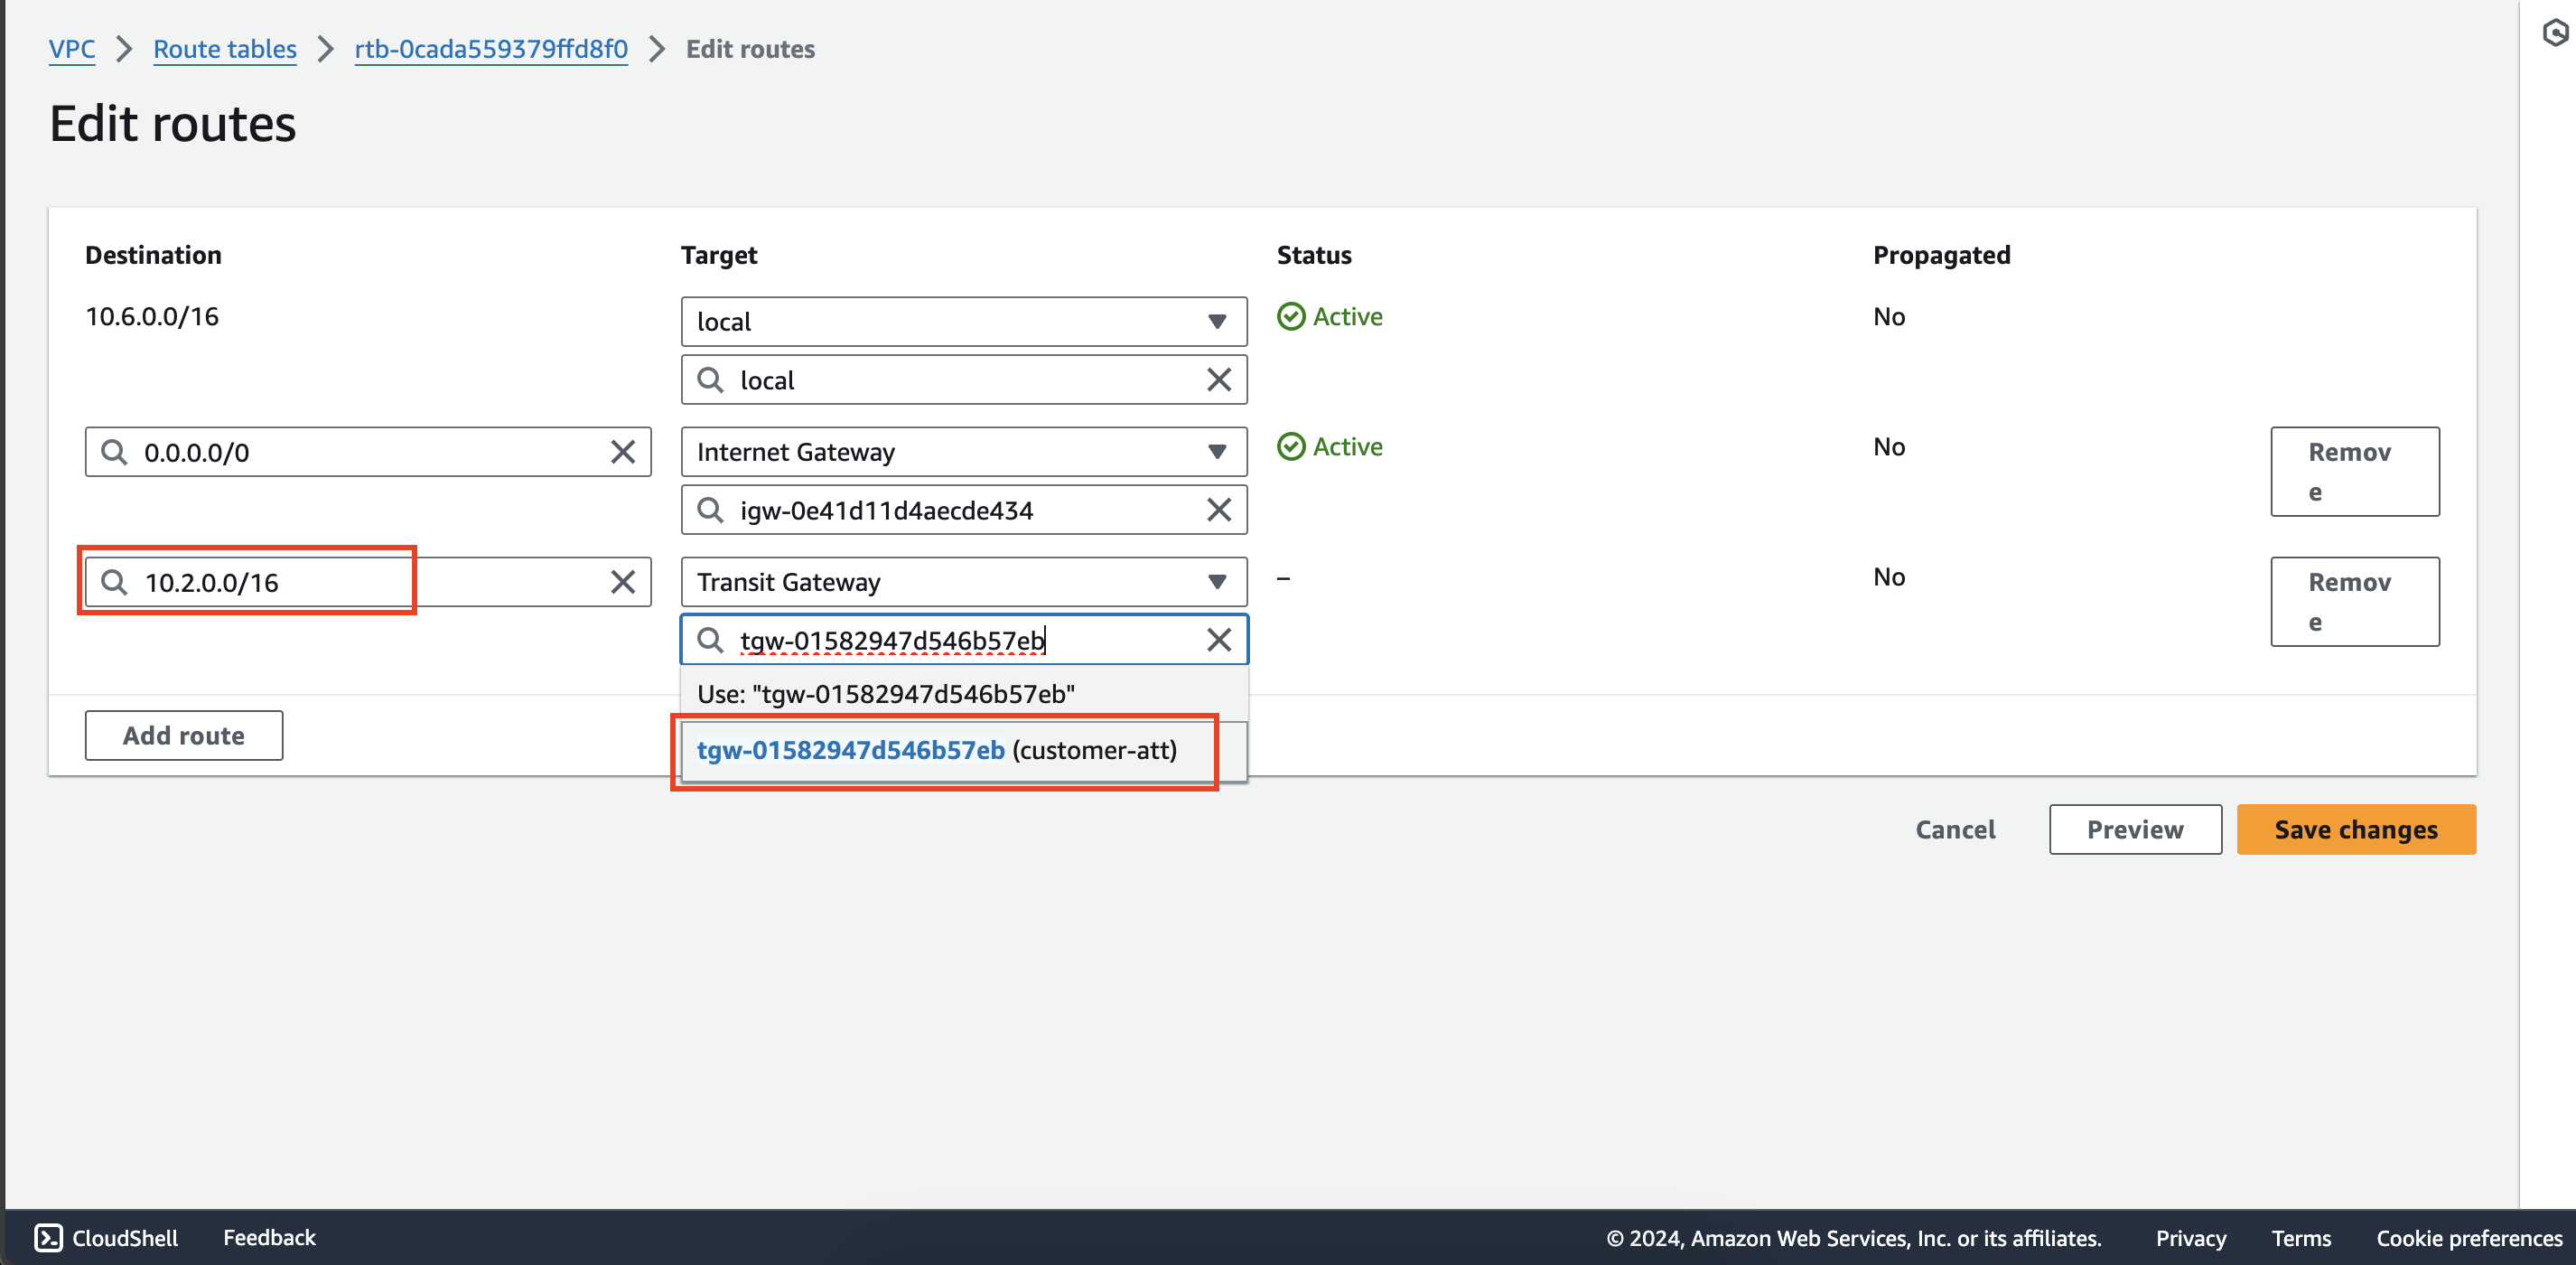
Do the same to add a route with destination 10.2.0.0/16 and target customer-att to customer-rtb route table in second account.
4. Check the connection between instances
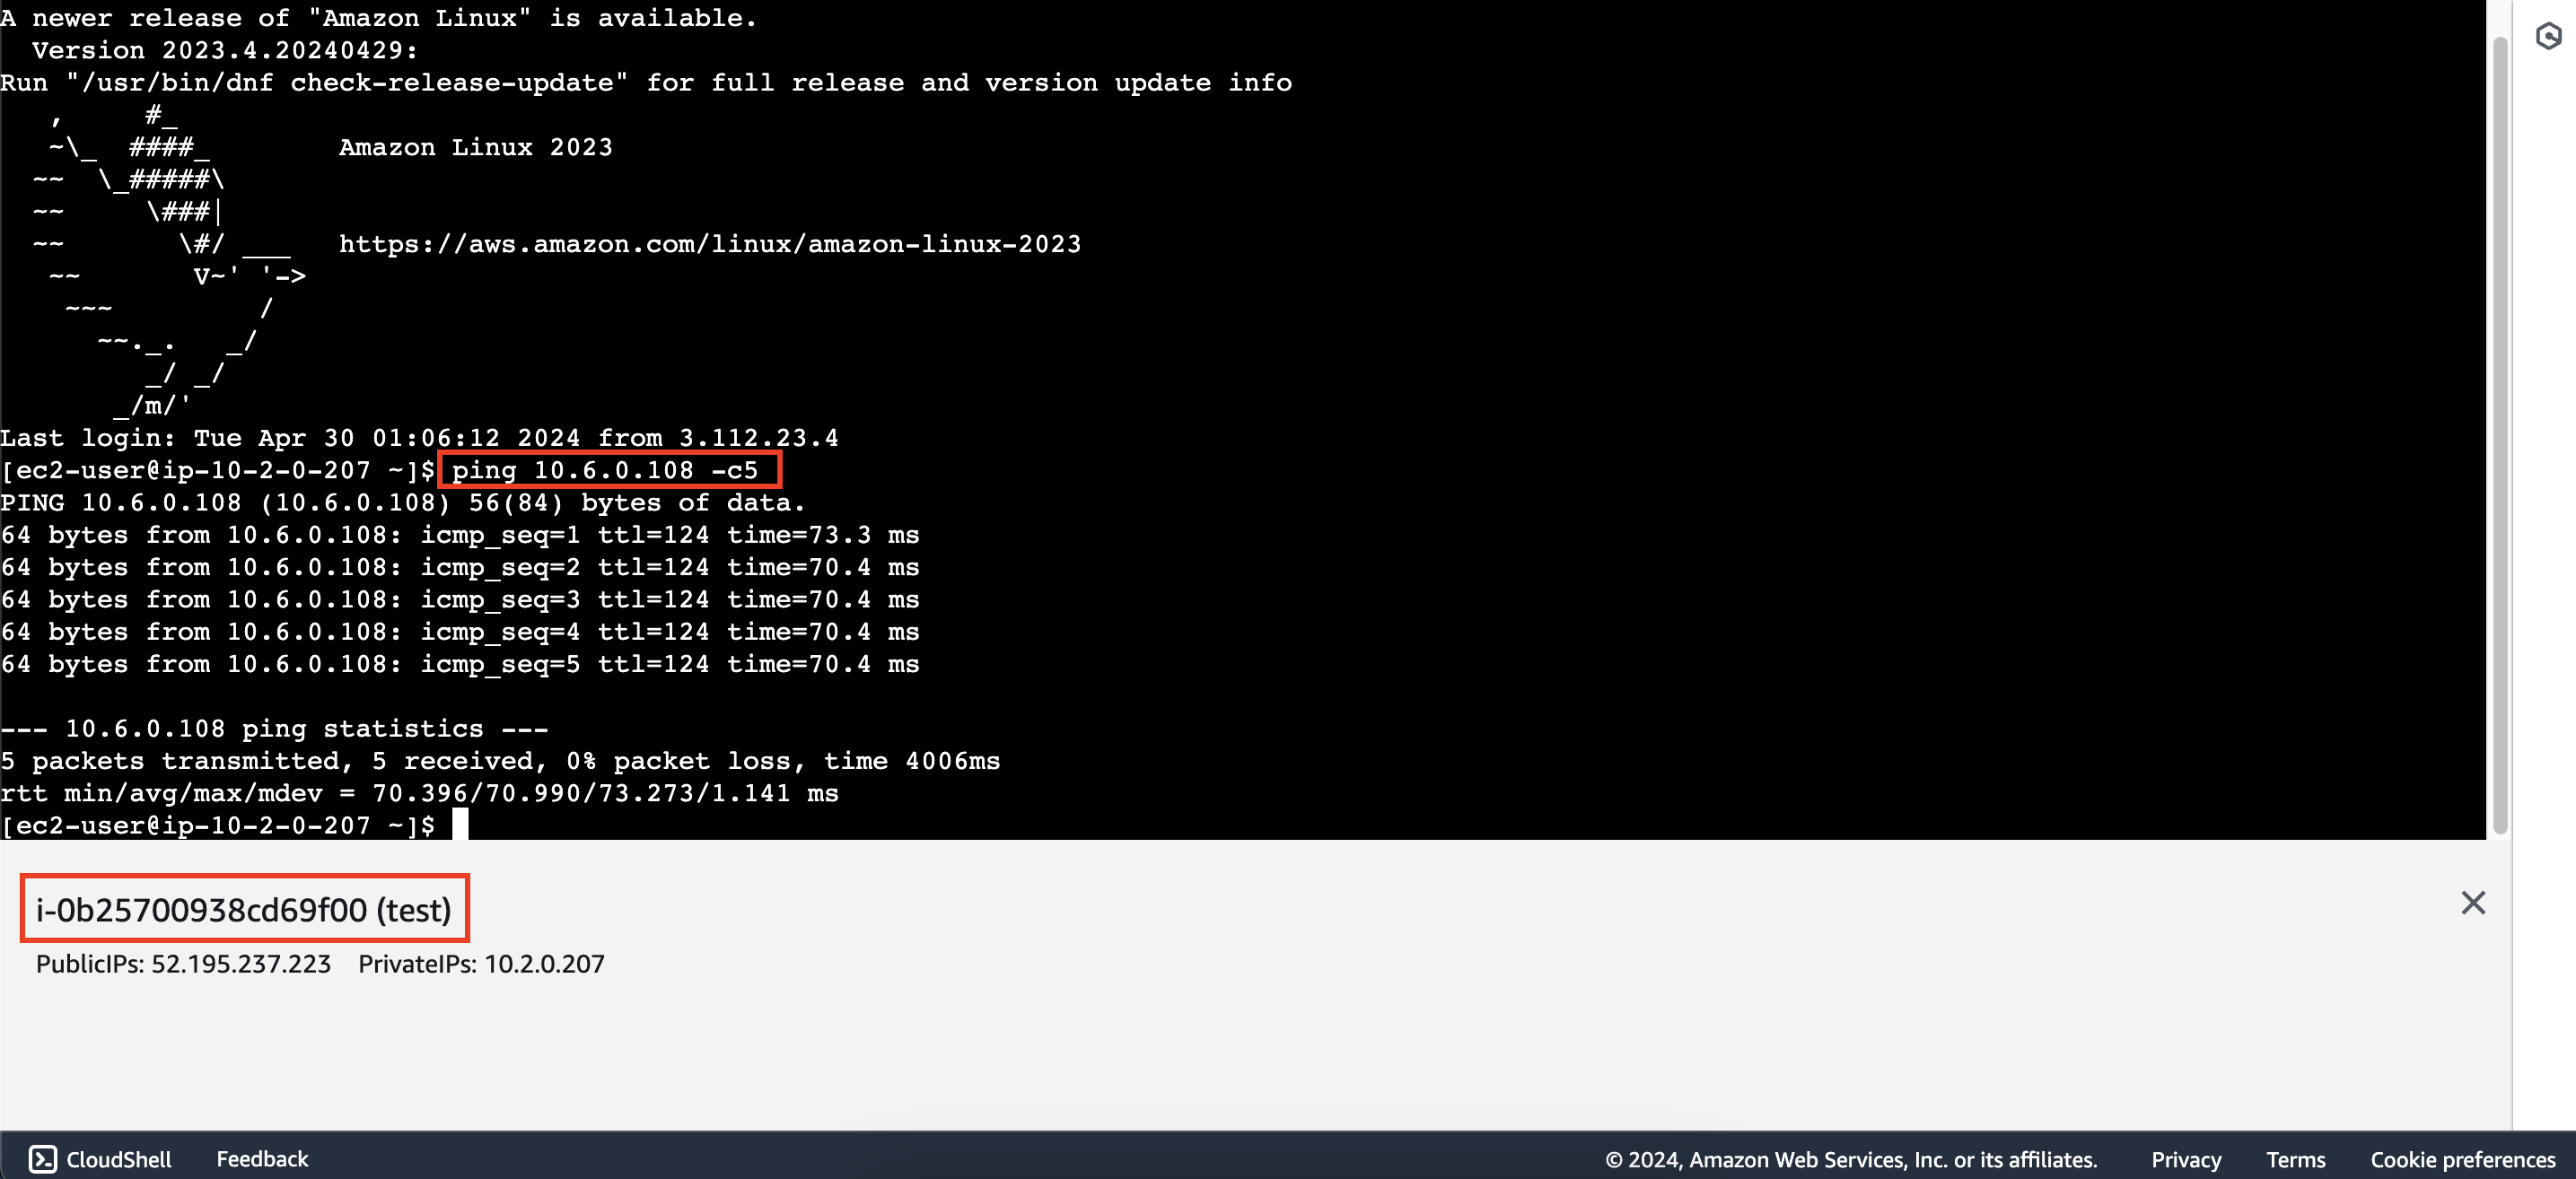
Connect to the test instance using EC2 instance connect and then try connect to the customer instance.
The results show that we have successfully connected.
Practice yourself
Try to configure routing to connect Dev VPC and Customer VPC to better understand the process.