Configure routing
In this step, we will configure routing to connect Dev VPC and Partner VPC. You can absolutely use the peering connection between two AWS Transit Gateways similar to the previous section for configuration. But in the case of two VPCs belonging to the same region, we can use a better, easy-to-configure way and more cost-effective that is AWS Resource Access Manager.
AWS Resource Access Manager (AWS RAM) is a service that allows you to share AWS resources, such as EC2 instances, database, network firewall, Transit Gateway, etc with other AWS accounts. This simplifies the process of sharing resources and managing access across multiple accounts.
After the first AWS account share AWS Transit Gateway to the second account, users of second account can create transit gateway attachments and attach to this Transit Gateway. This allows users of first account to manage, configure newly created attachments as if they were created by this account.
Share AWS Transit Gateway using AWS Resource Access Manager (AWS RAM)
- Access to AWS RAM service
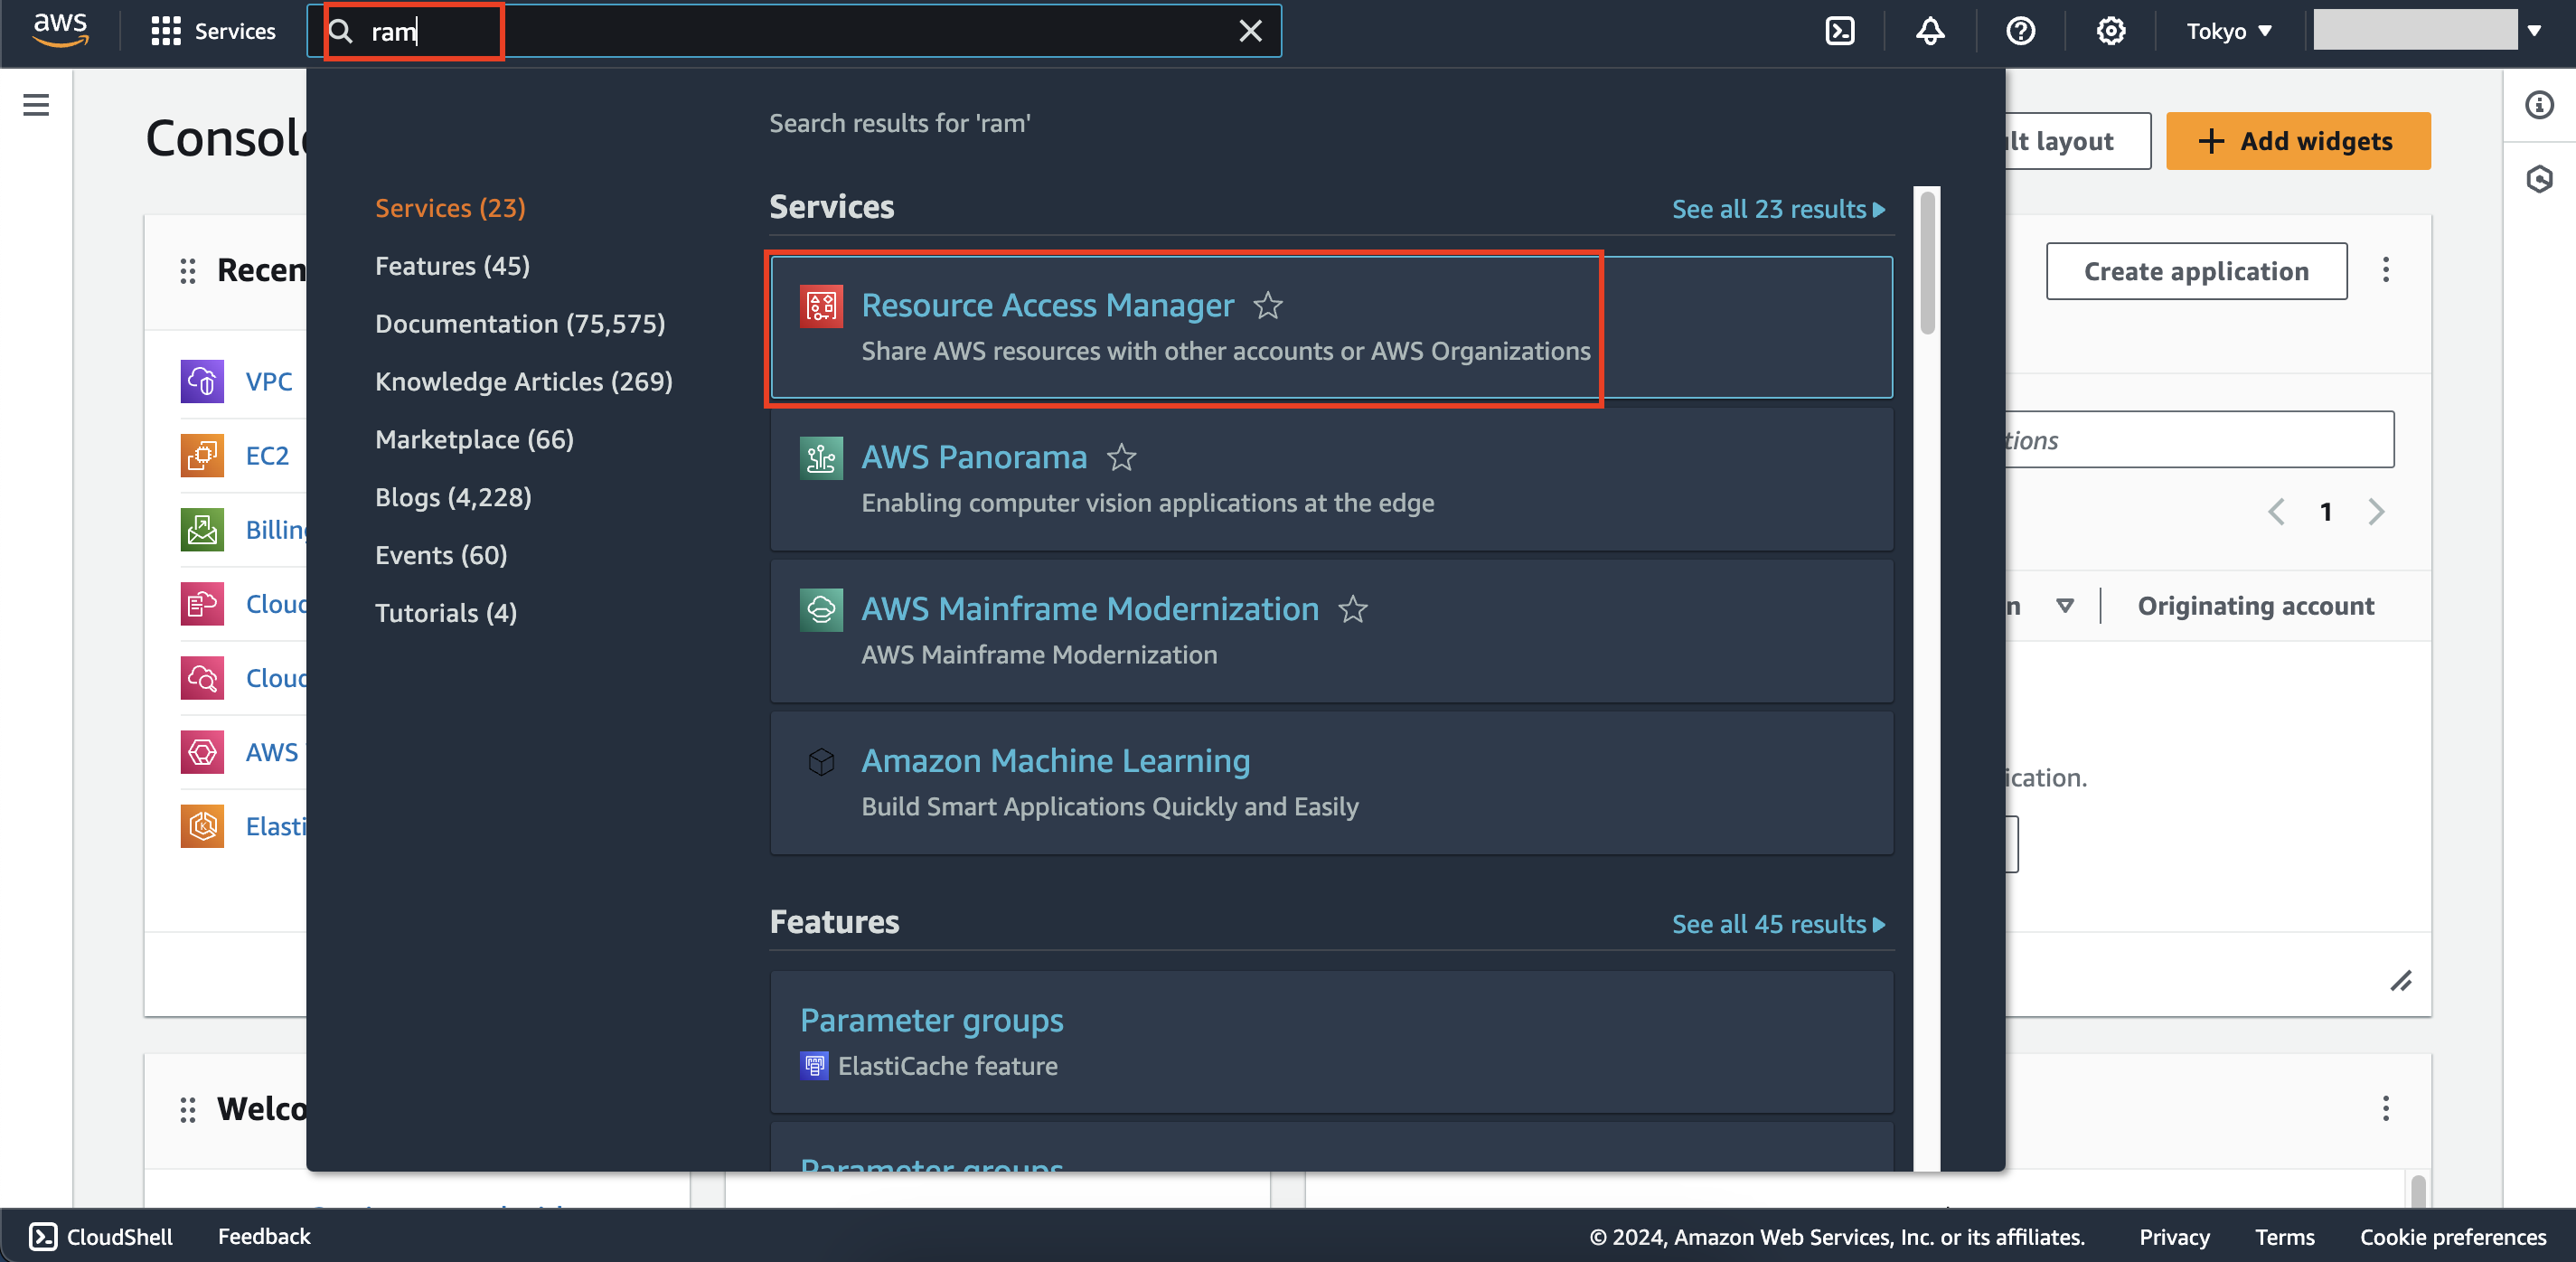
- Within AWS management console interface of first account, search keyword
ram - Select Resource Access Manager service
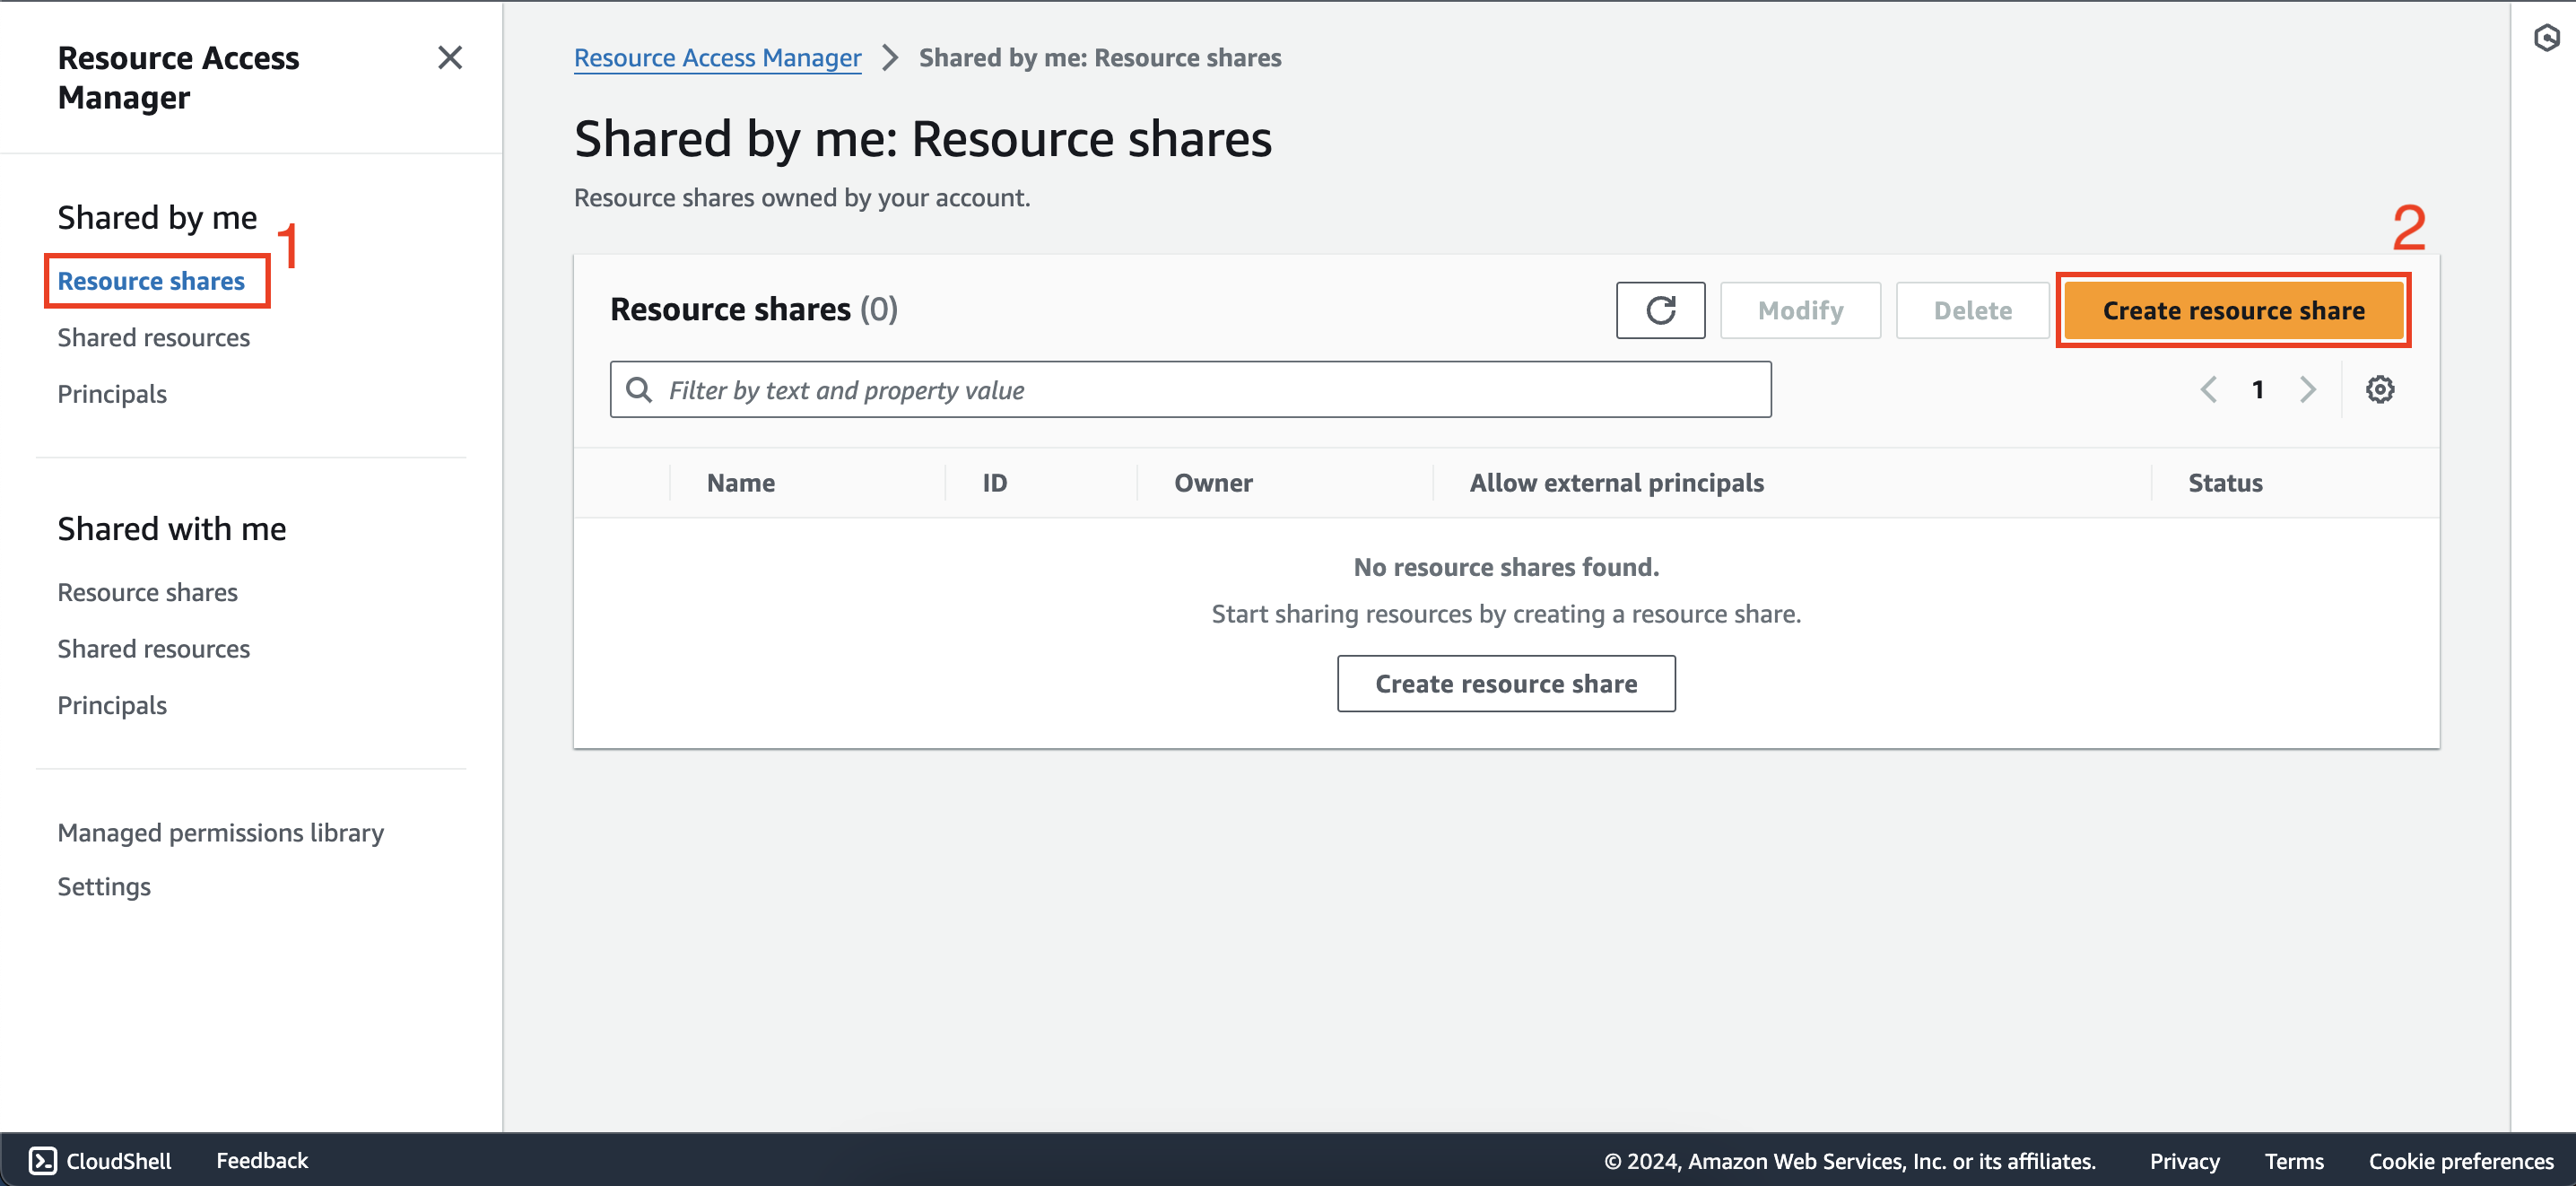
- Create share resource
- Select Resource shares under Shared by me section then click Create resource share
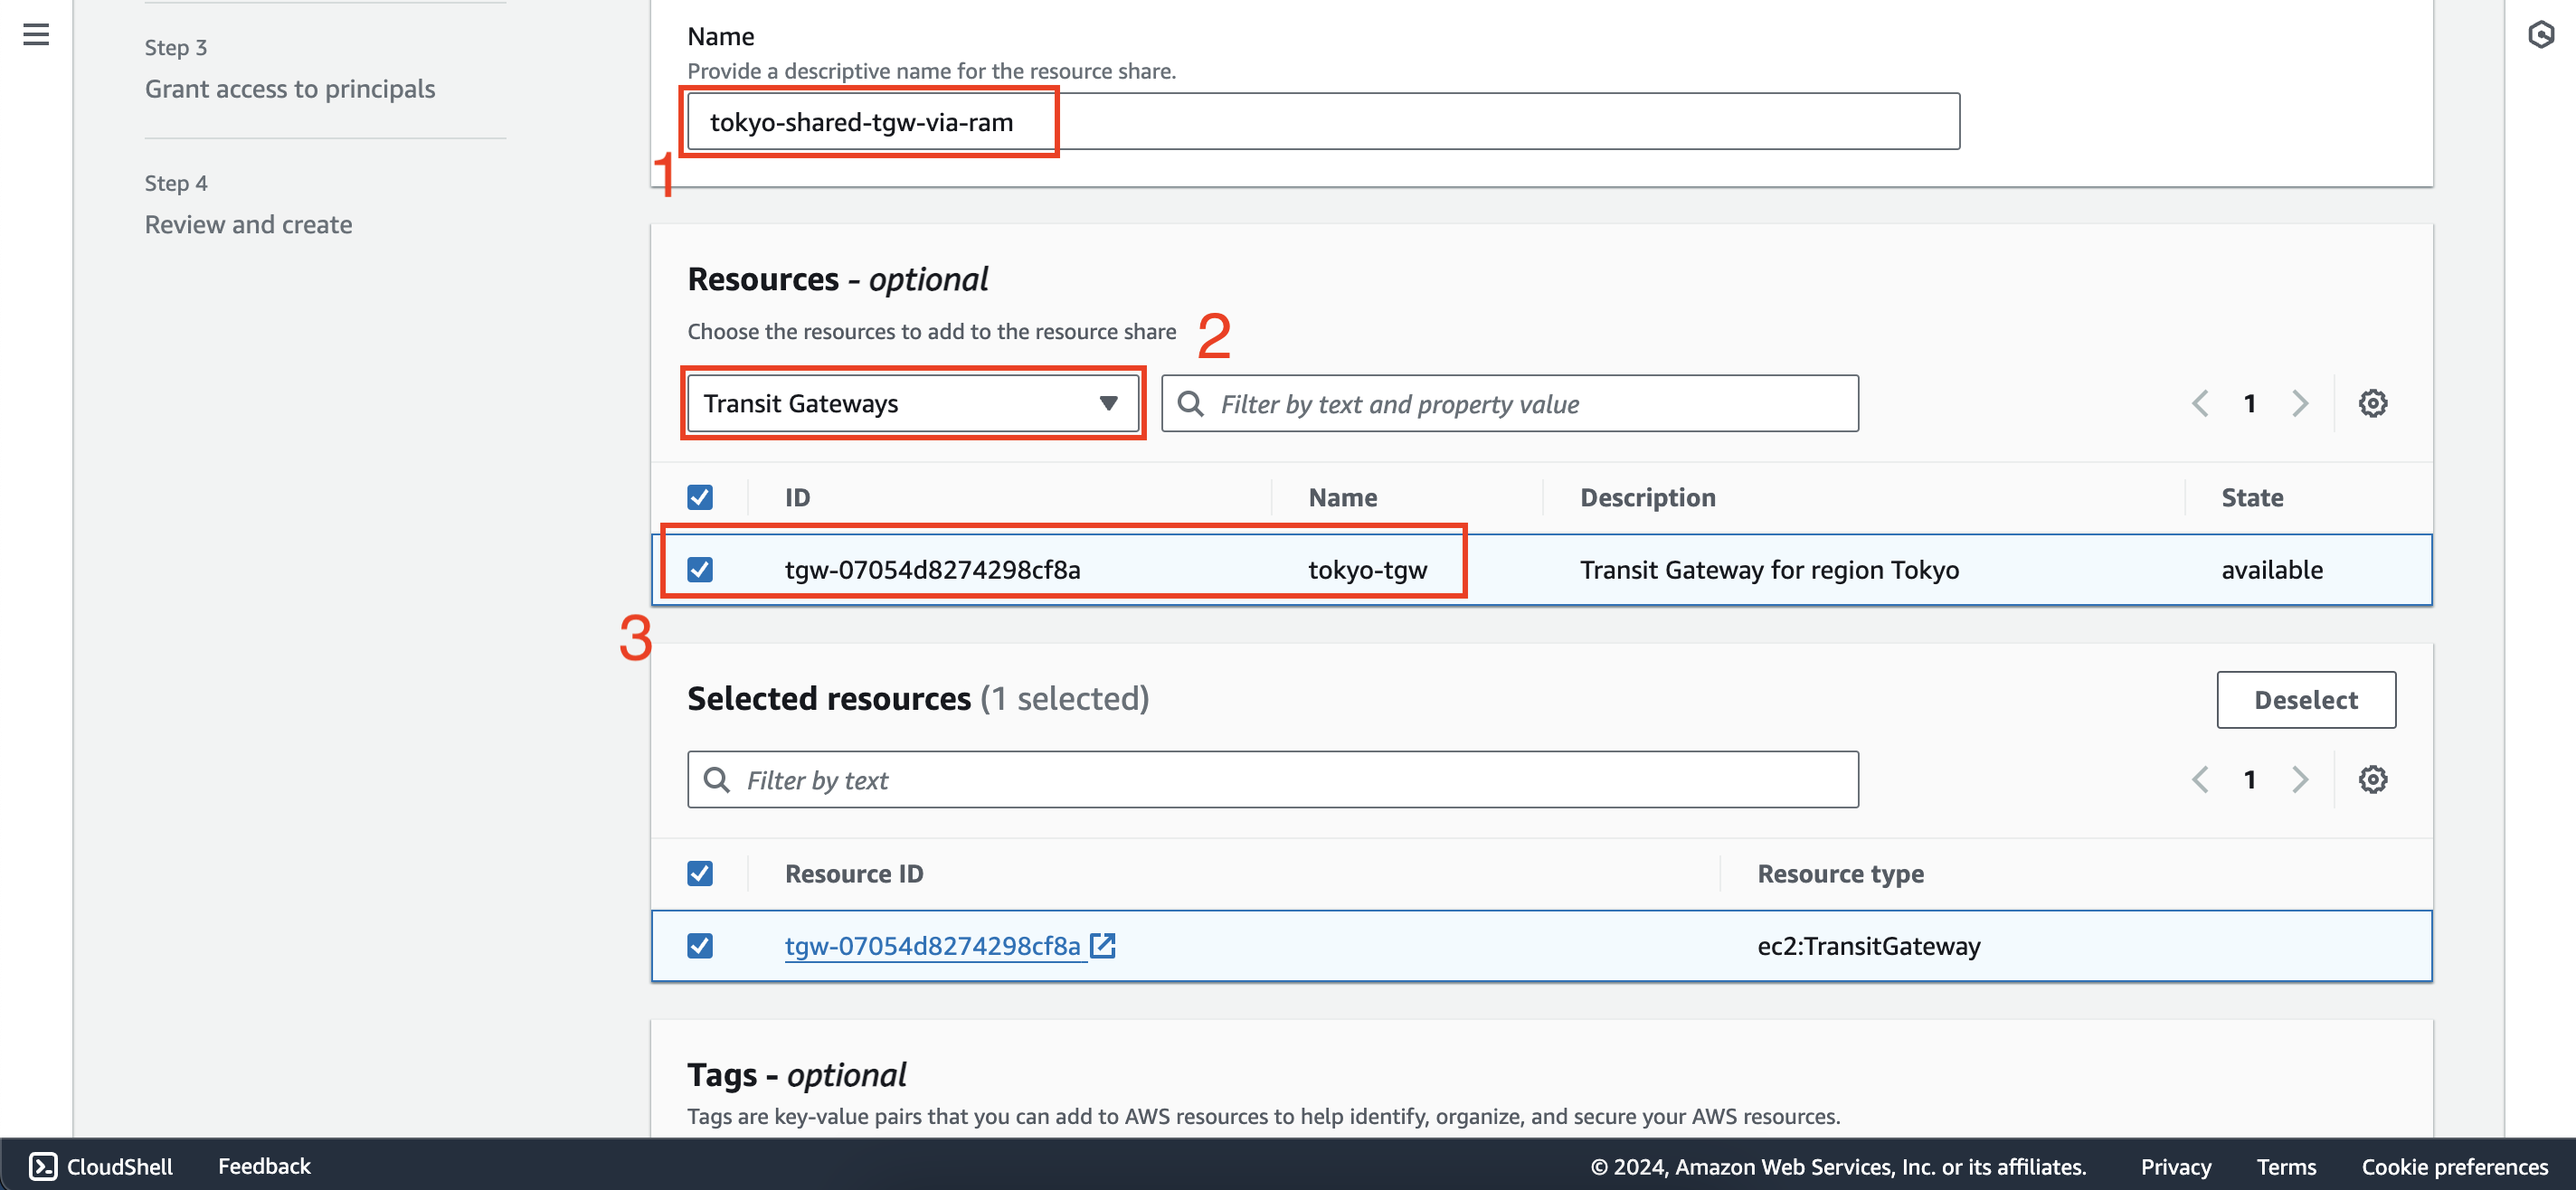
- Configuration is as follows:
- Name:
tokyo-shared-tgw-via-ram - Resources: Select Transit Gateways then select tokyo-tgw
- Name:
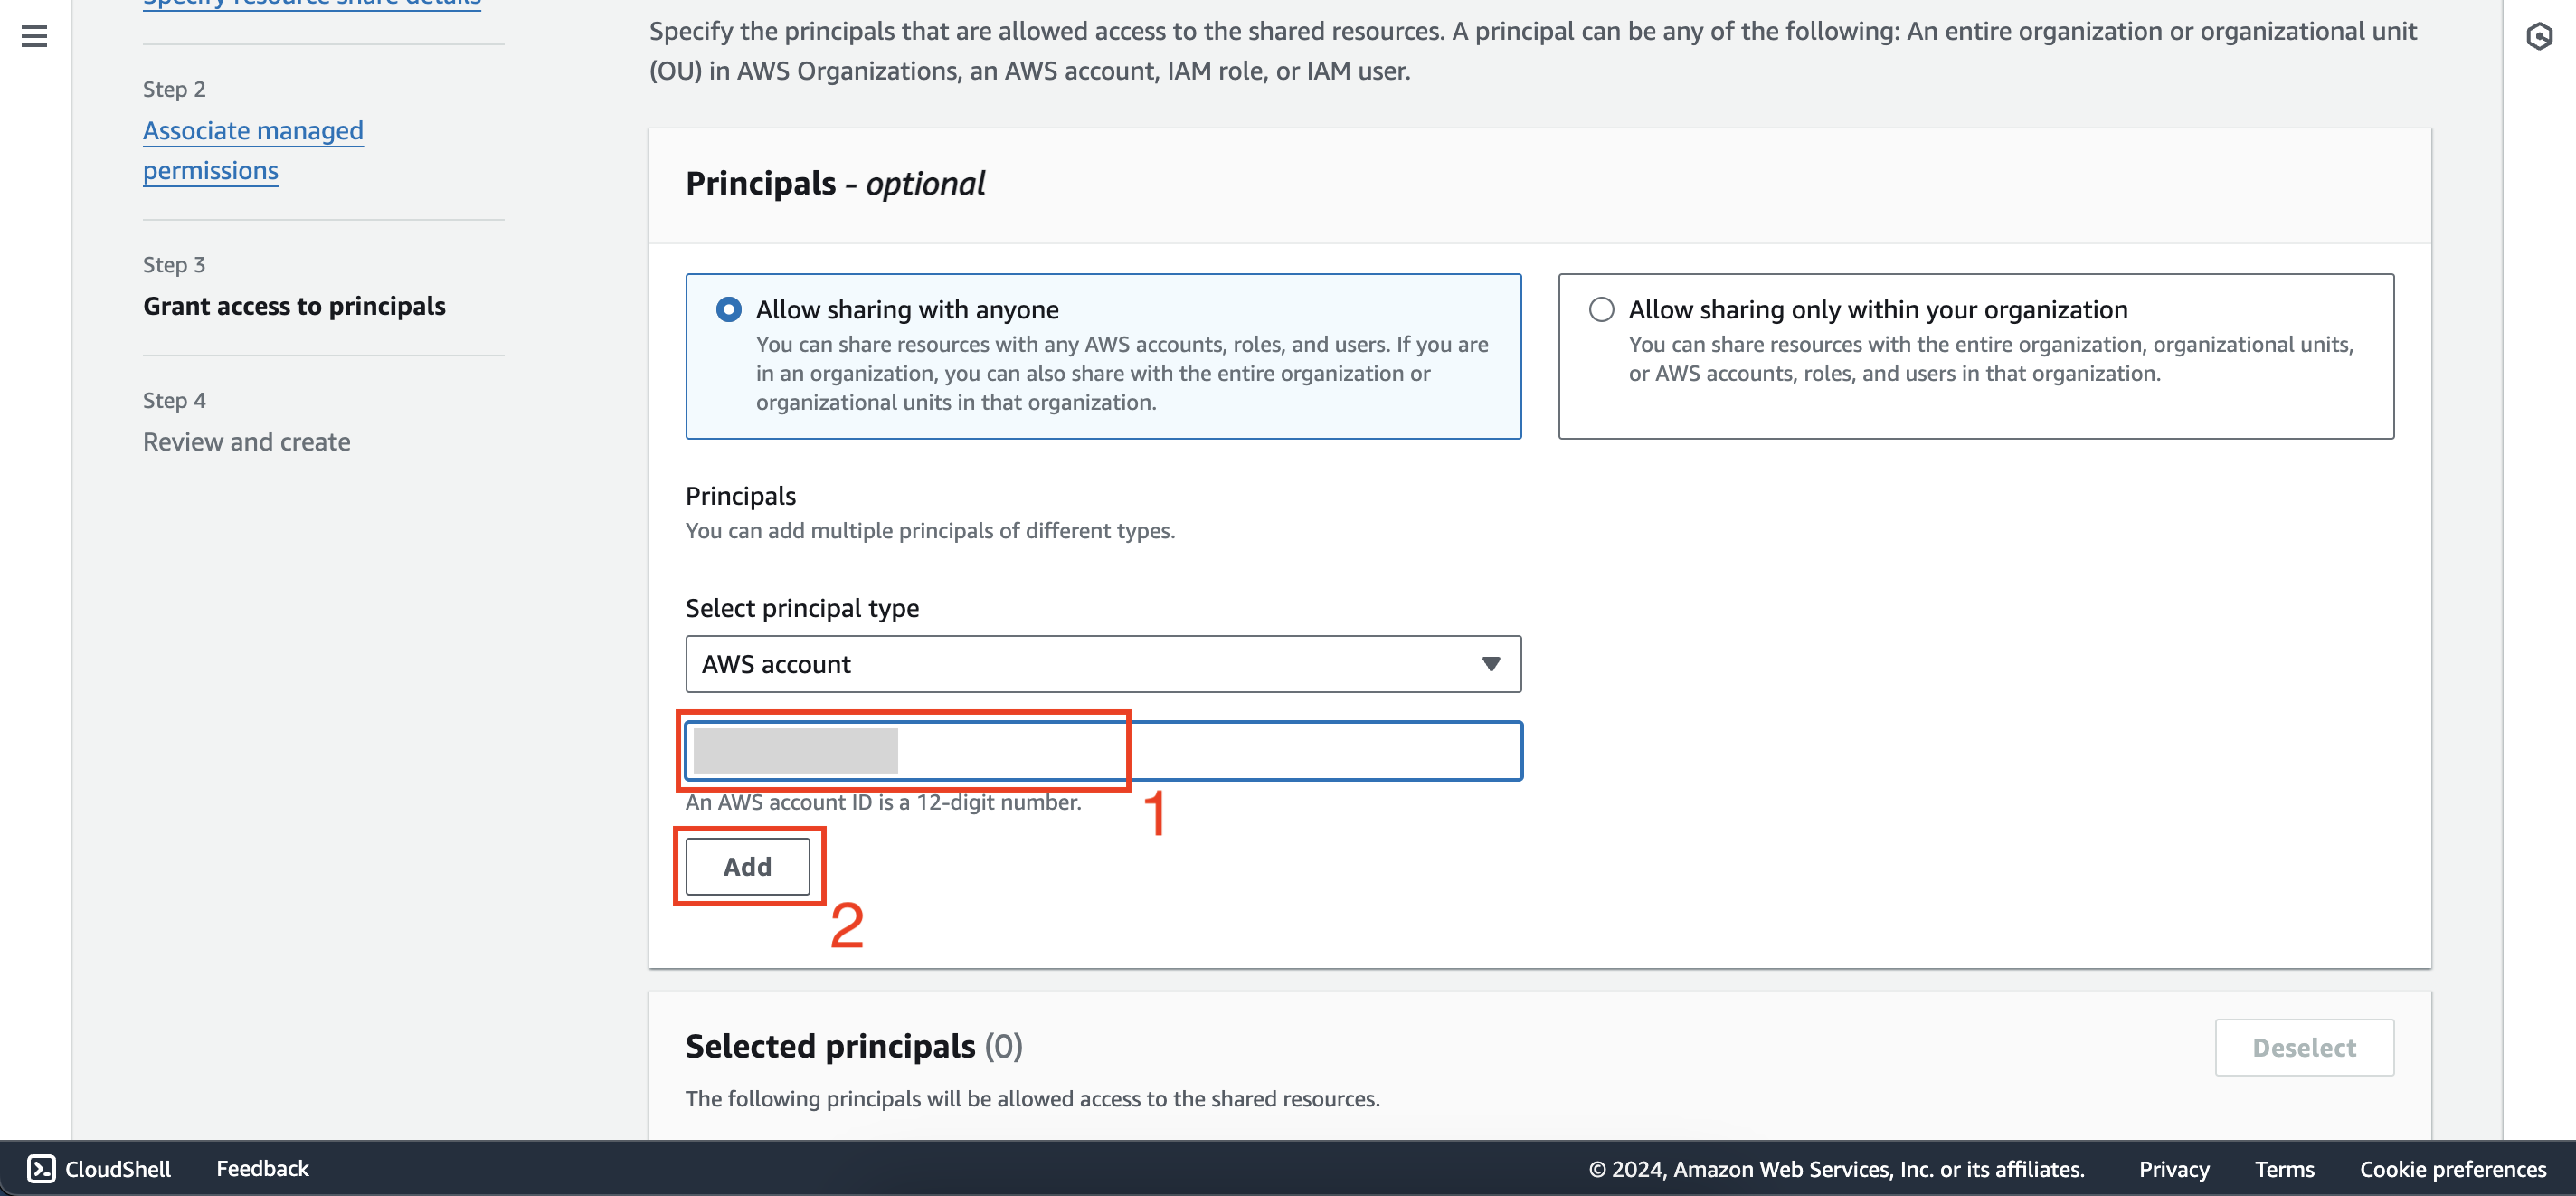
Click next until the step of adding Principals, copy the id of second account (12 digits) then click Add
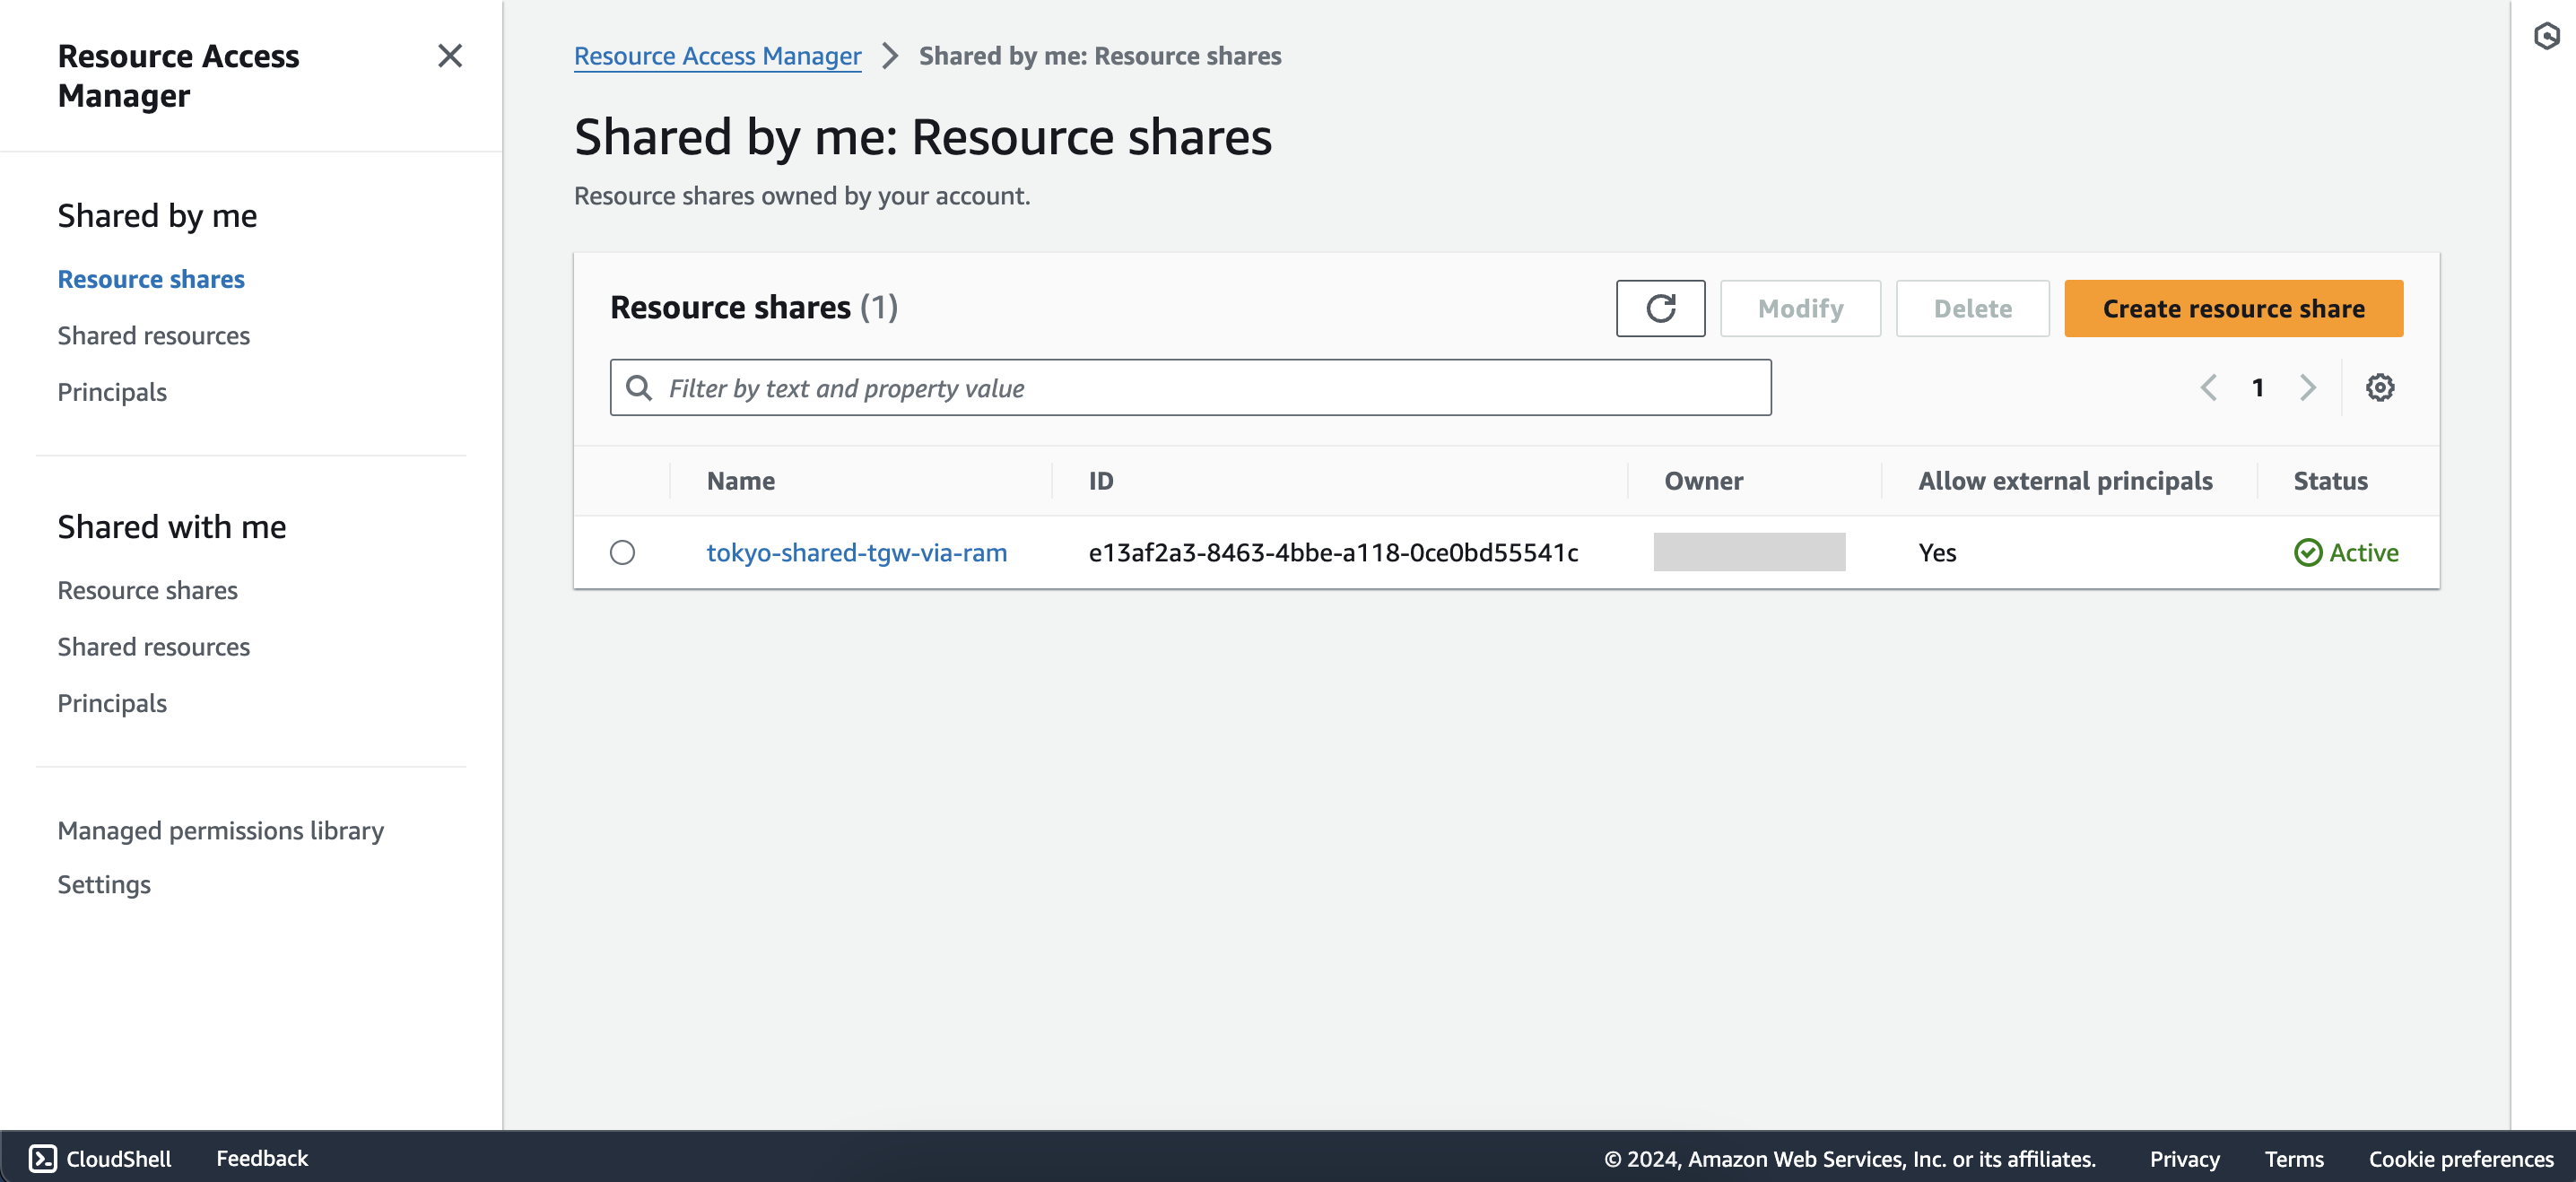
 After creating the resource share, the interface will look like this:
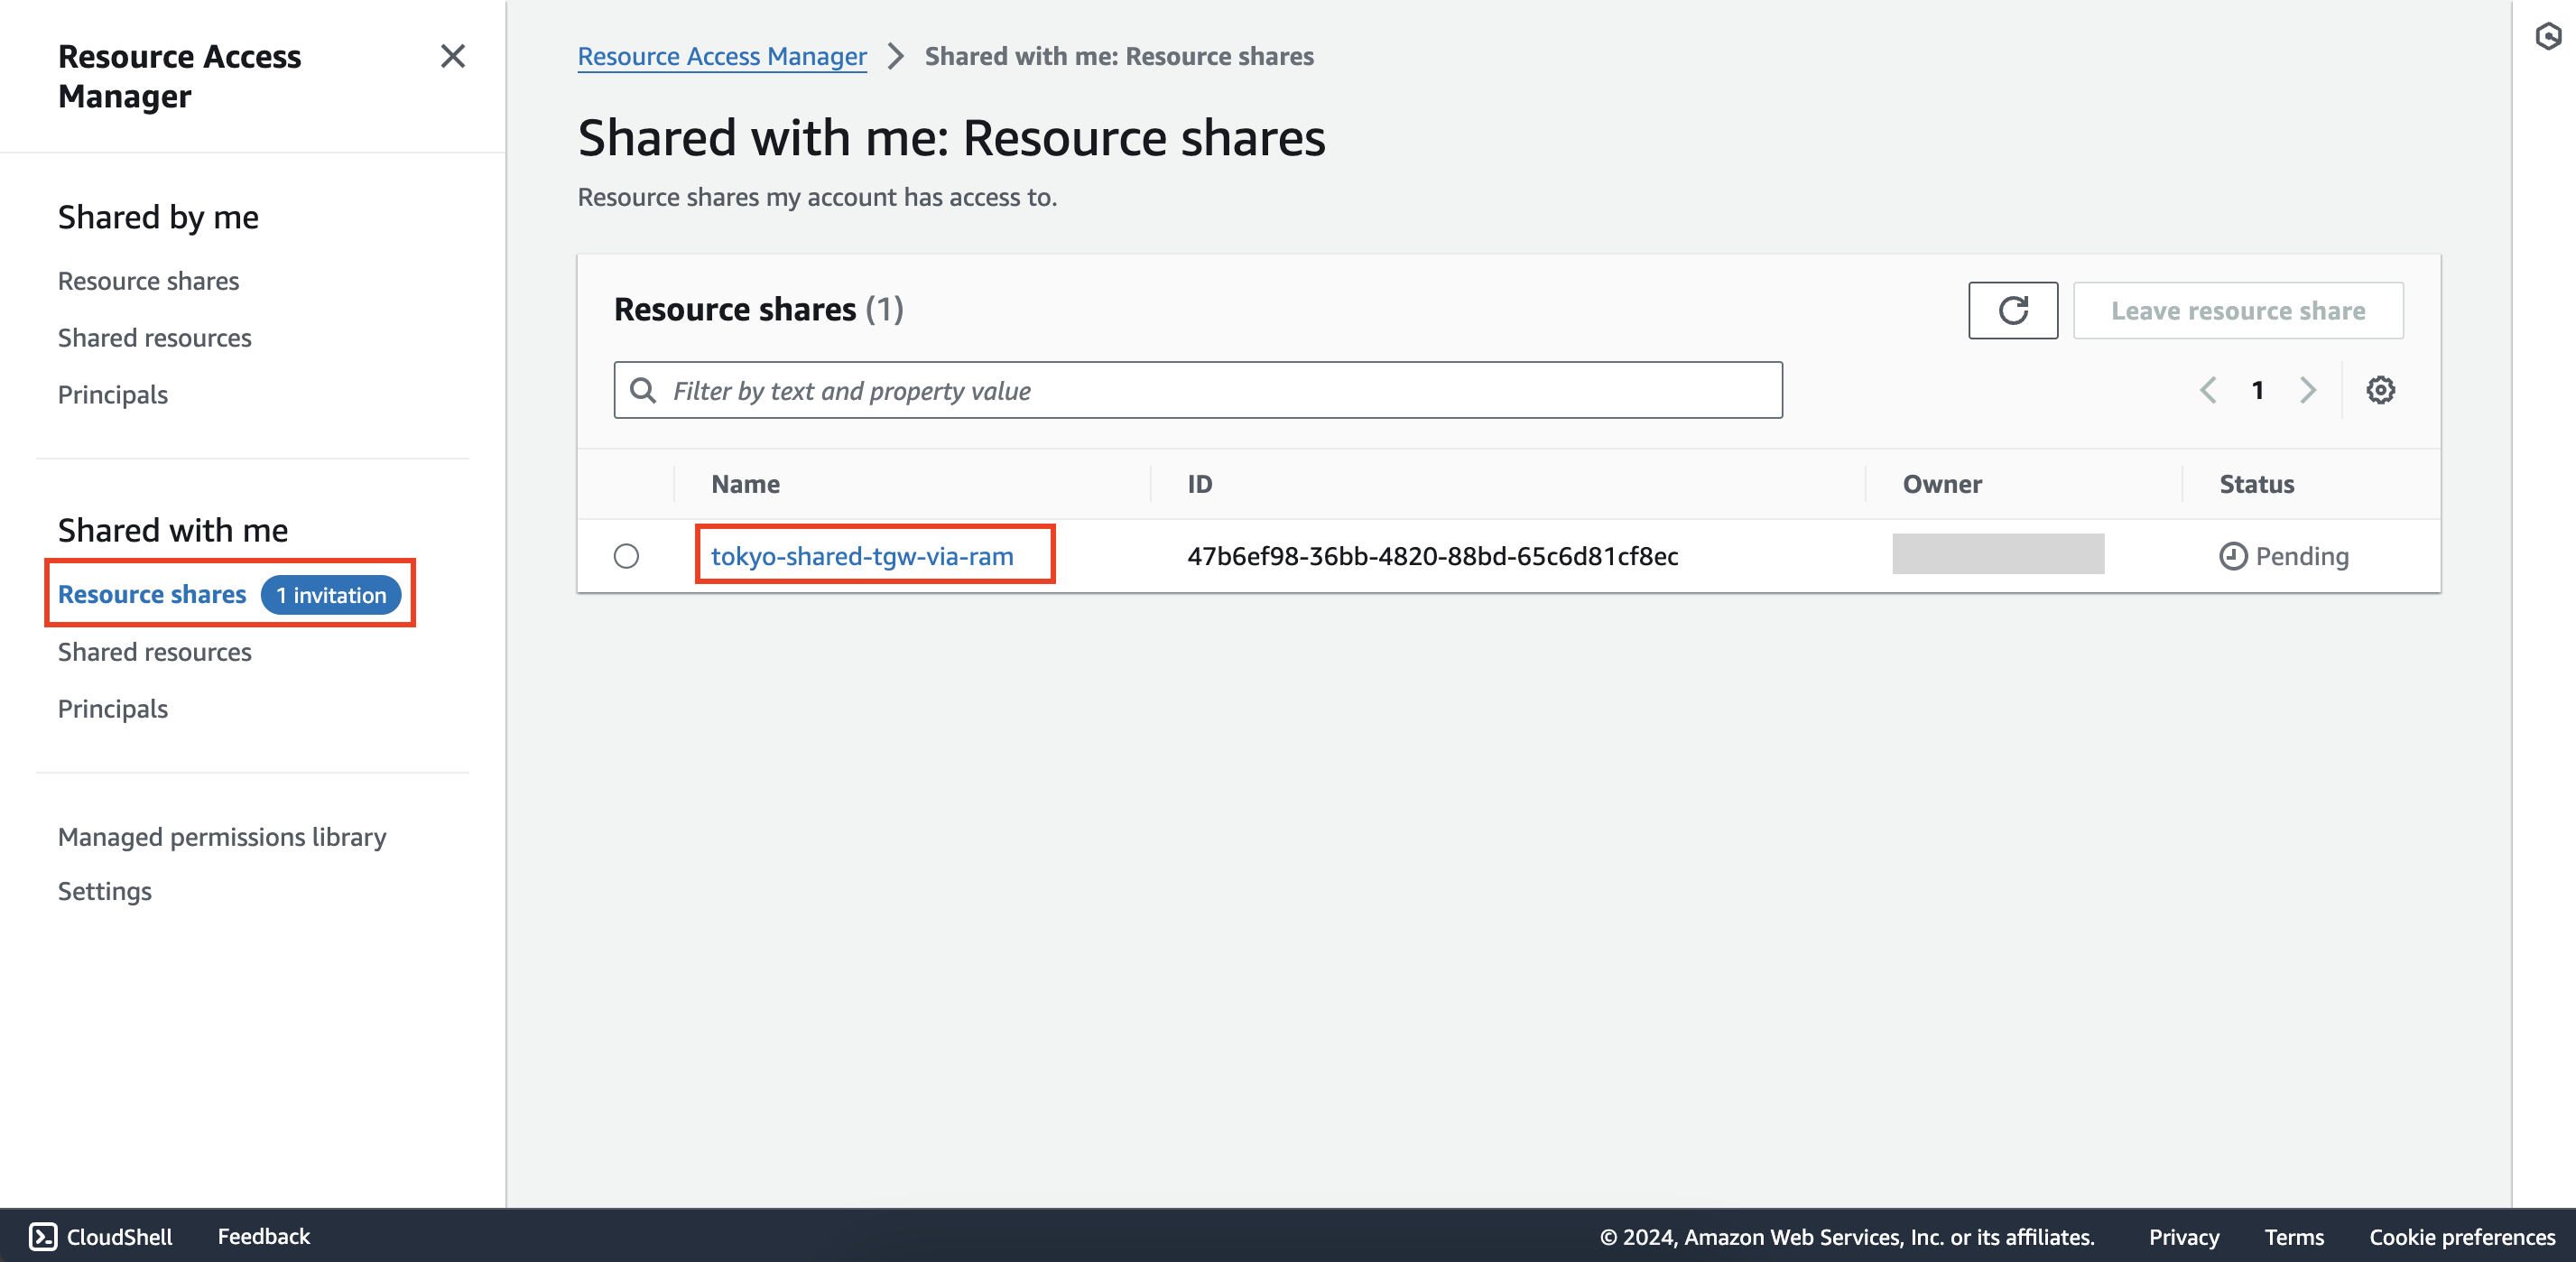
Go back to second account, access the AWS RAM service, select Resource shares under the Shared with me section and you will see an invitation with a status of Pending.
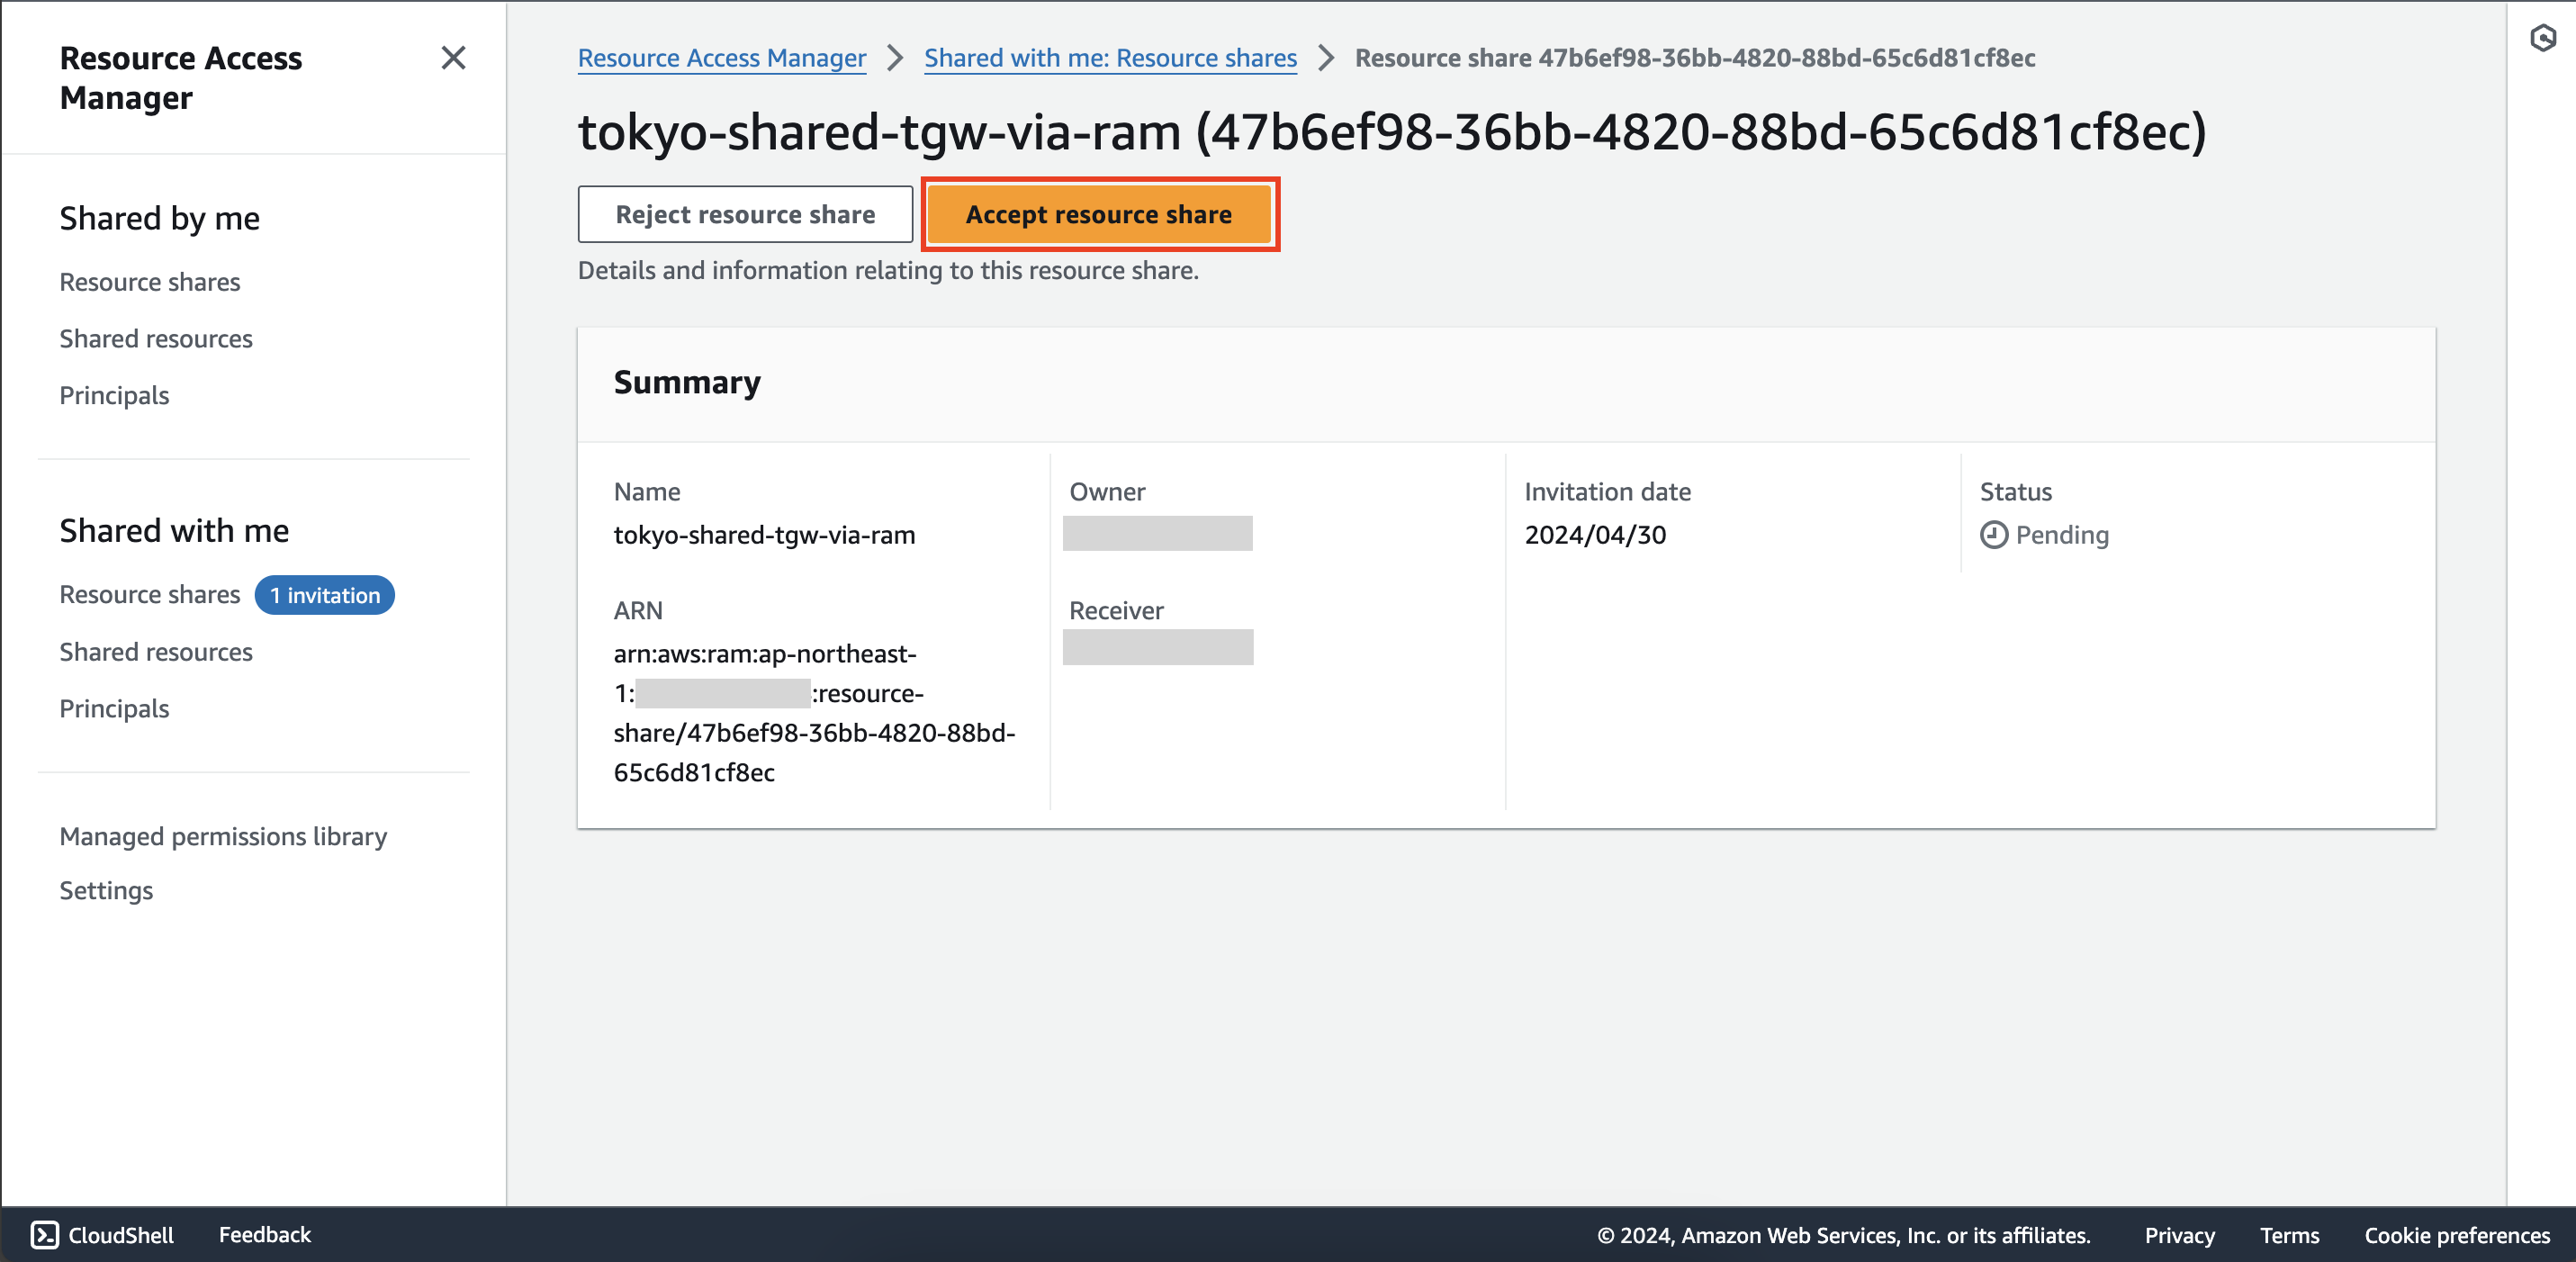
 Click on that invitation and then click Accept resource share
Configure route table
- Create transit gateway attachment for Partner VPC
- Within Transit gateways interface of second account, select the newly shared transit gateway and rename it to
tokyo-shared-tgw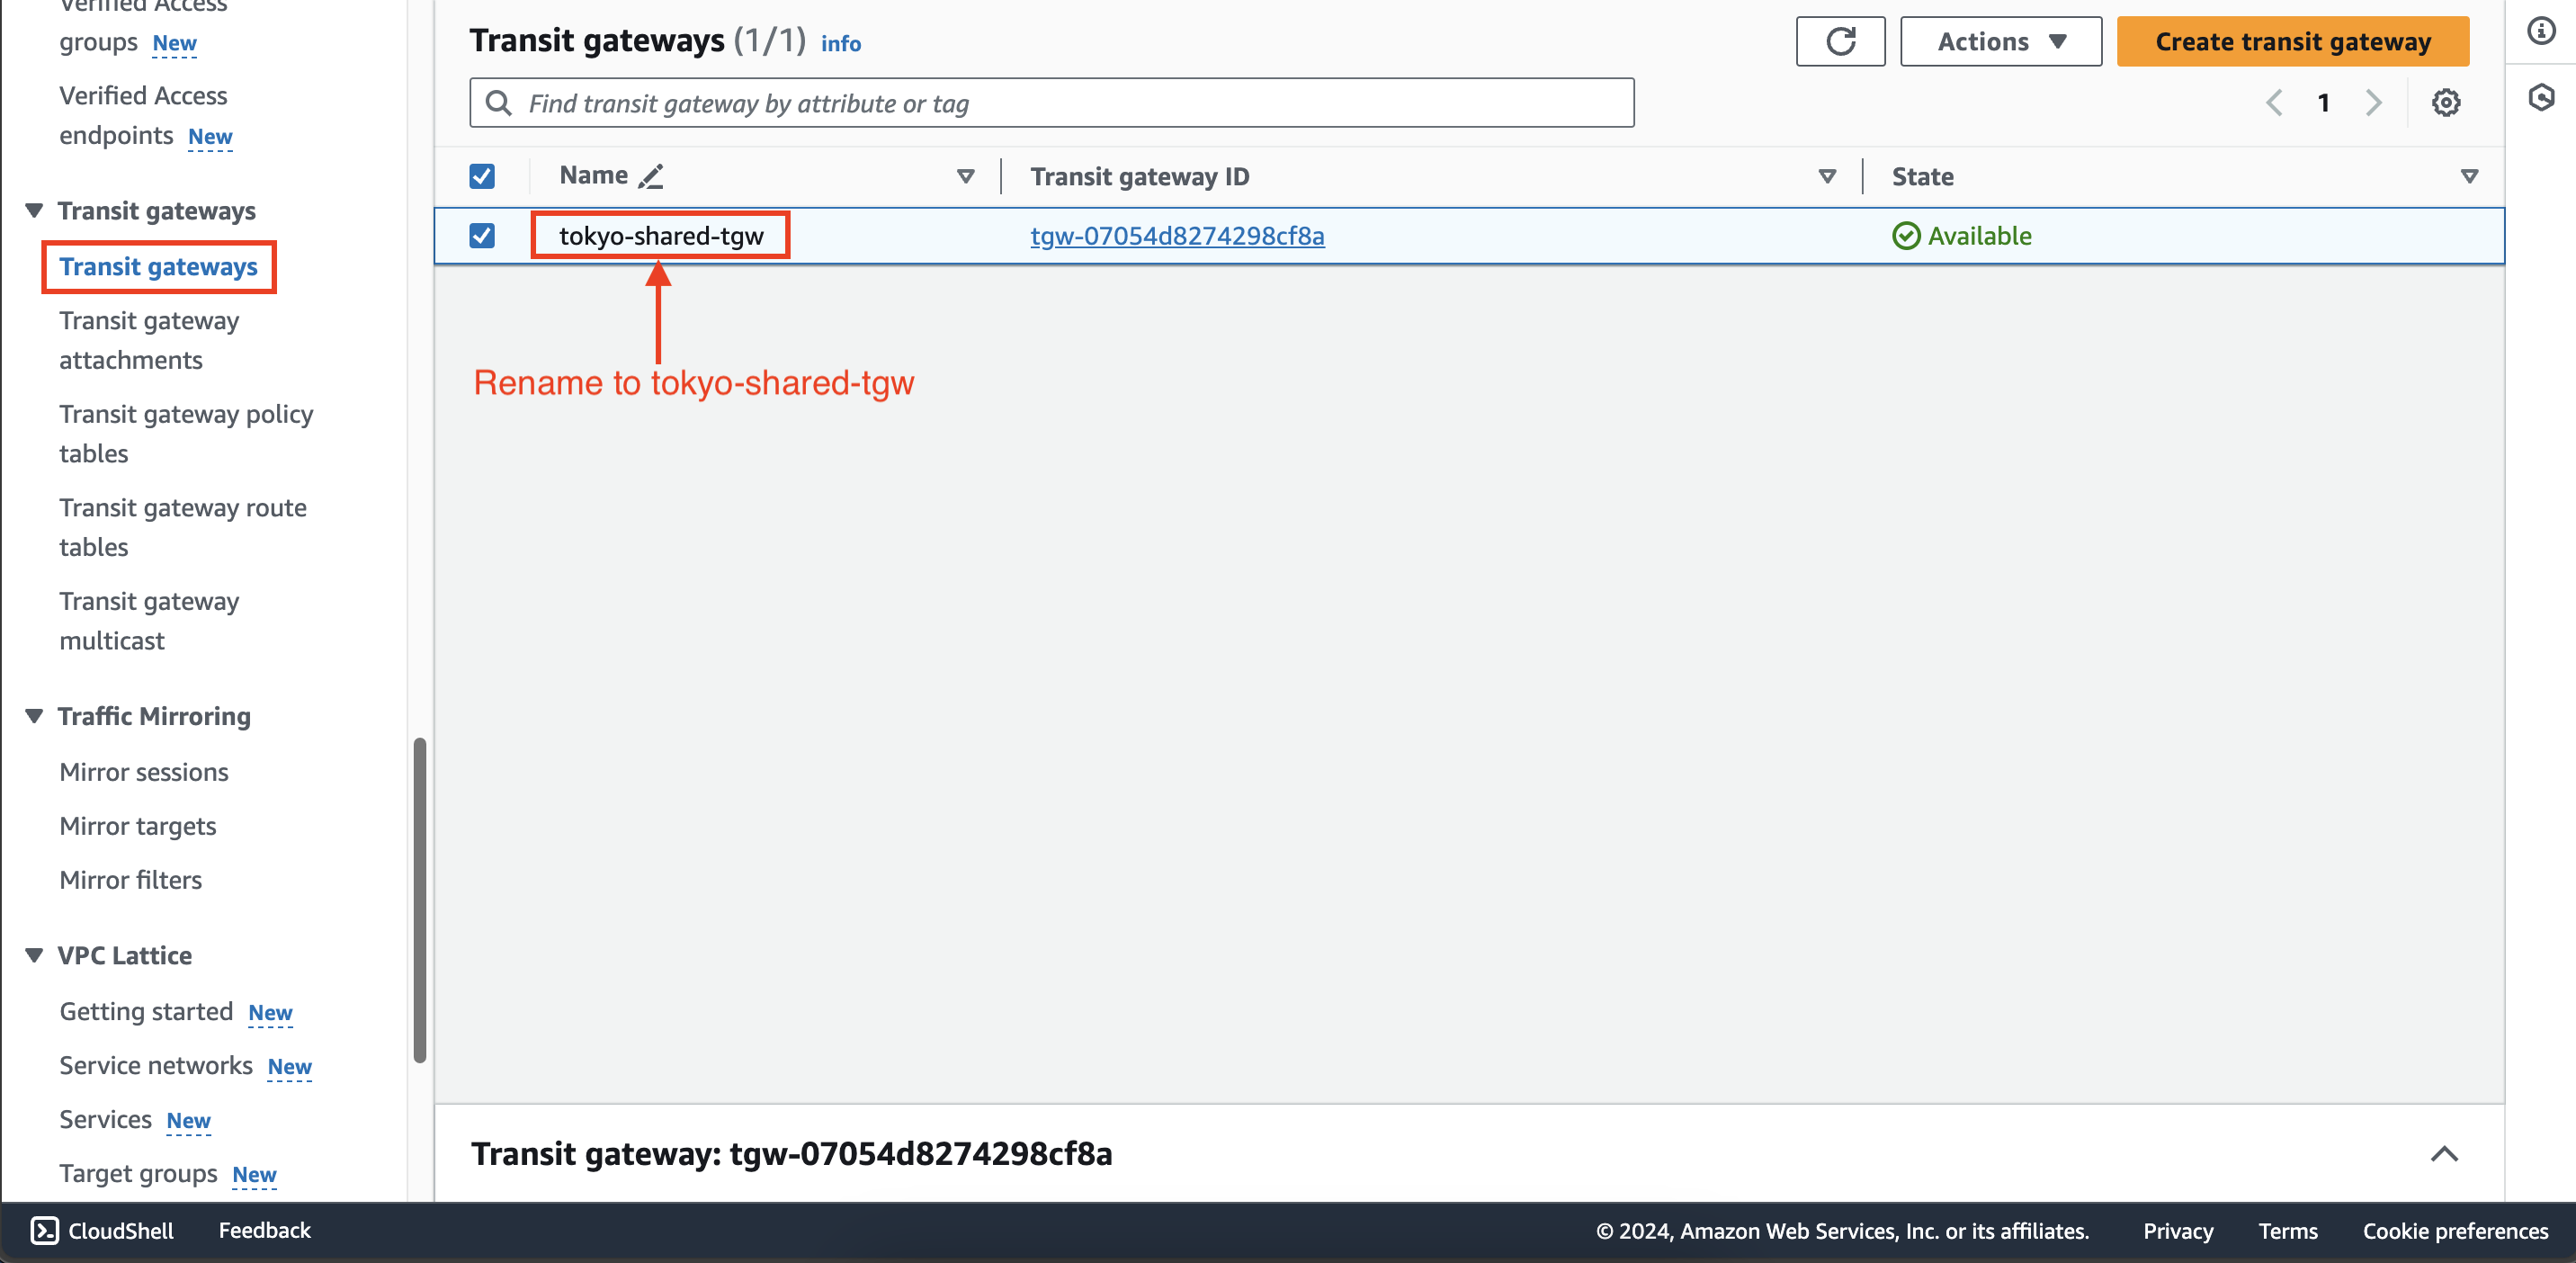
- Create transit gateway attachment partner-att then attach to this transit gateway and partner-vpc
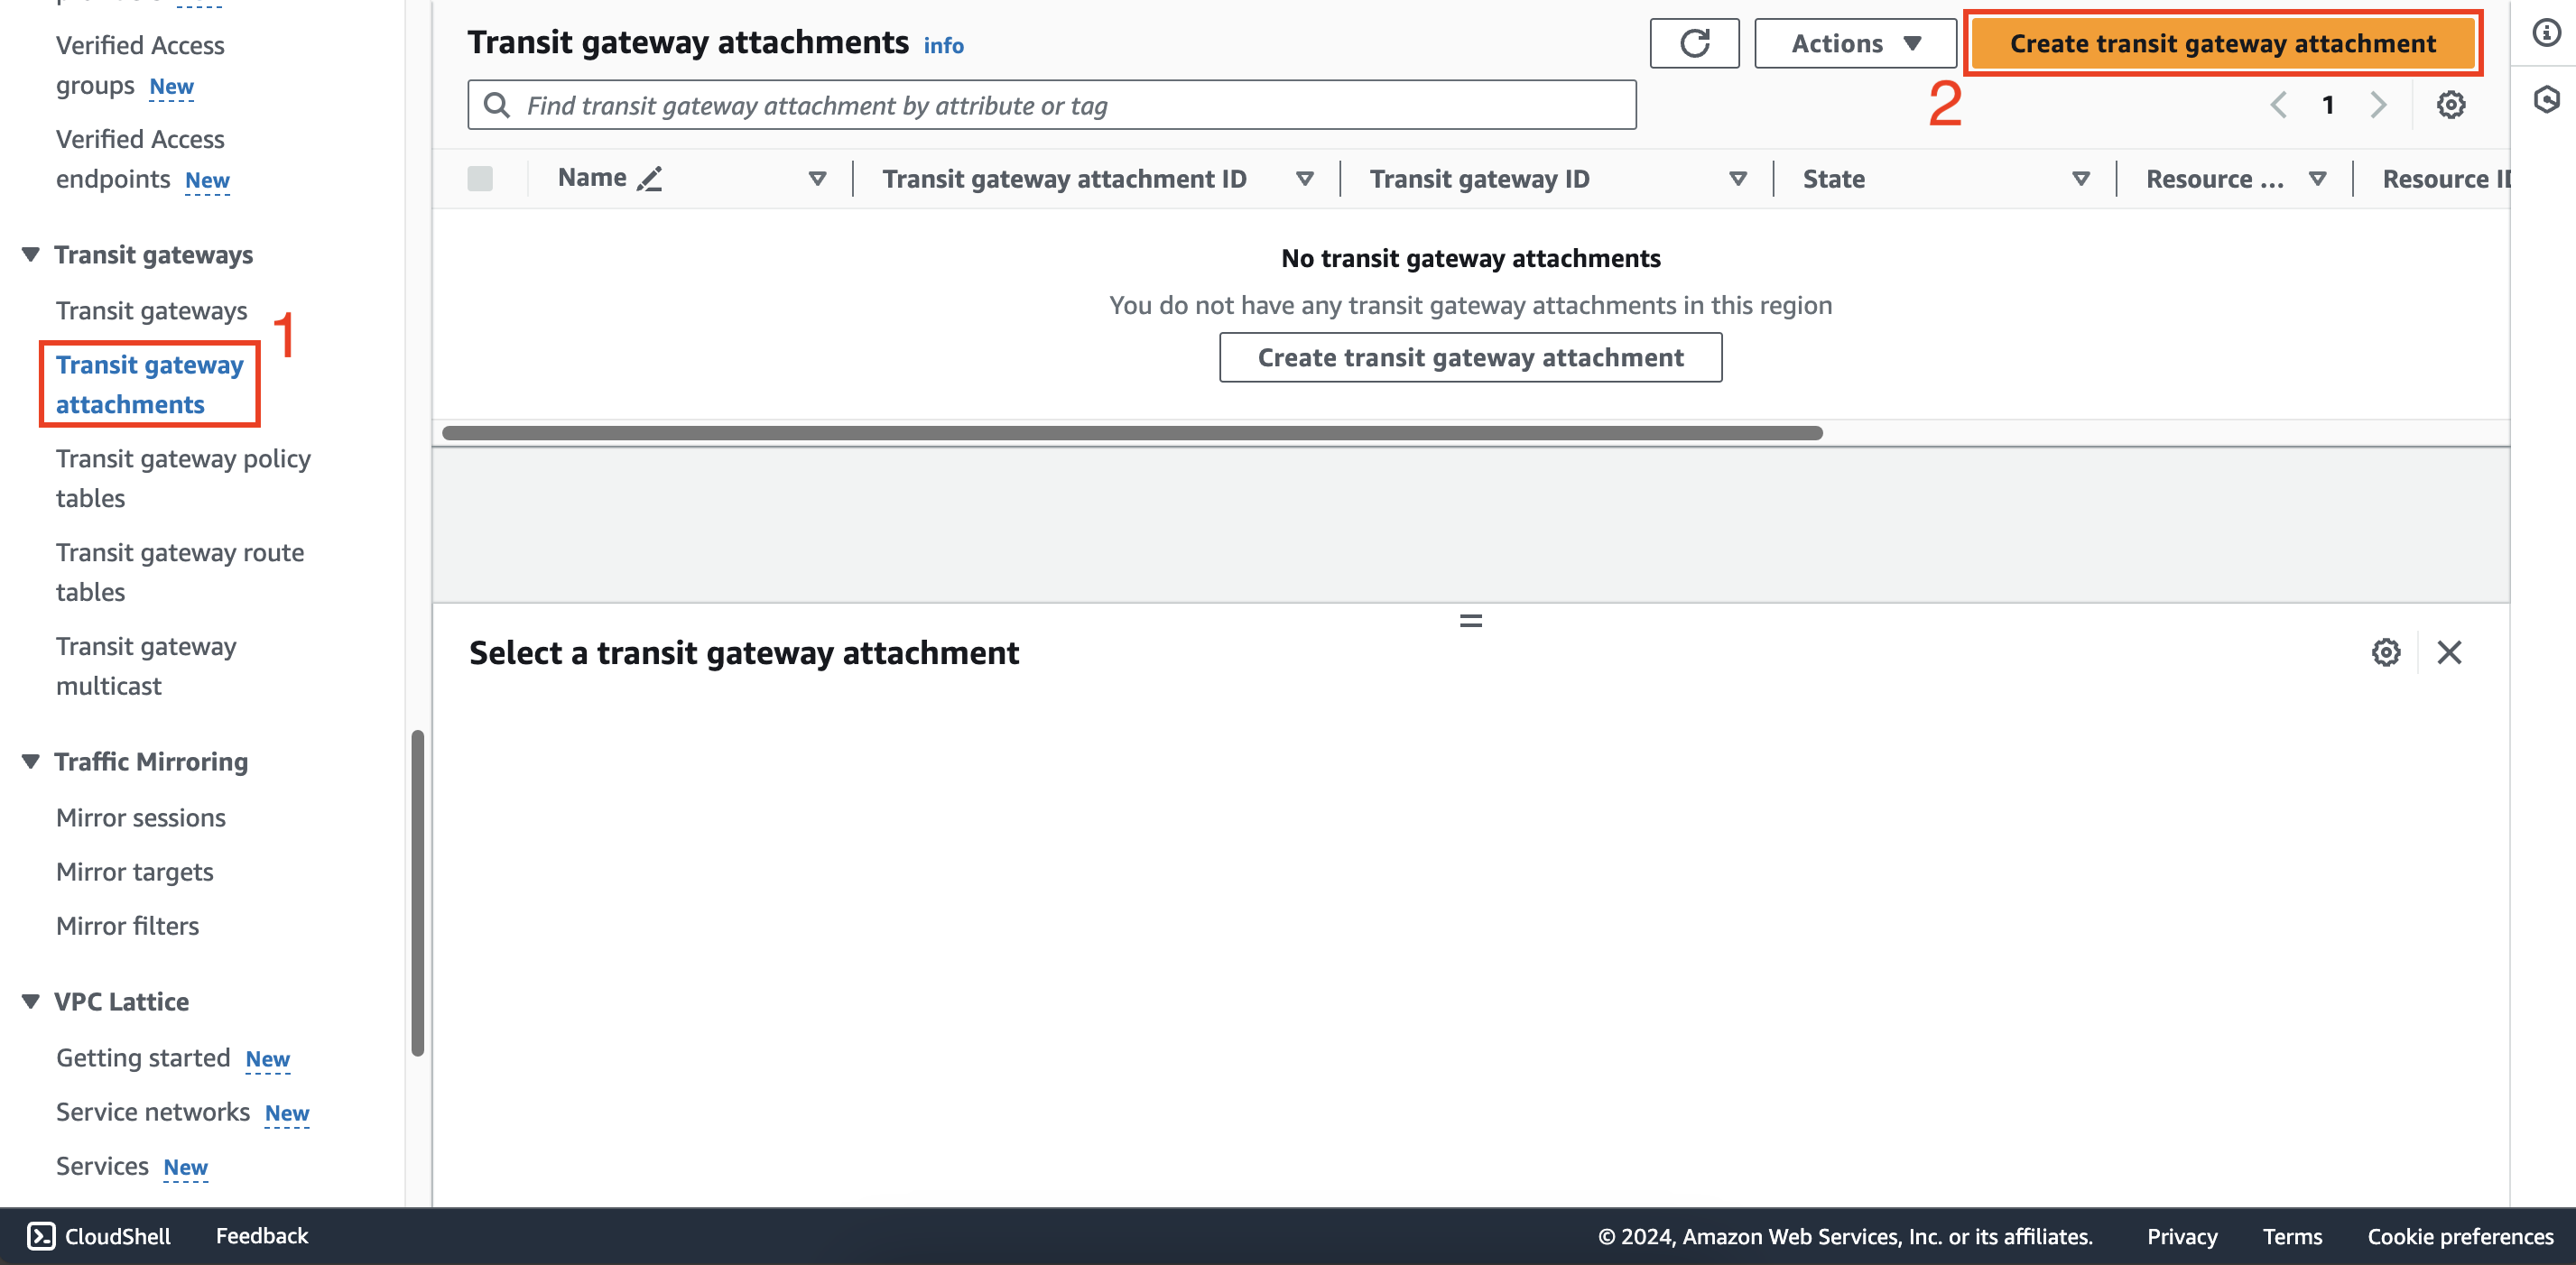
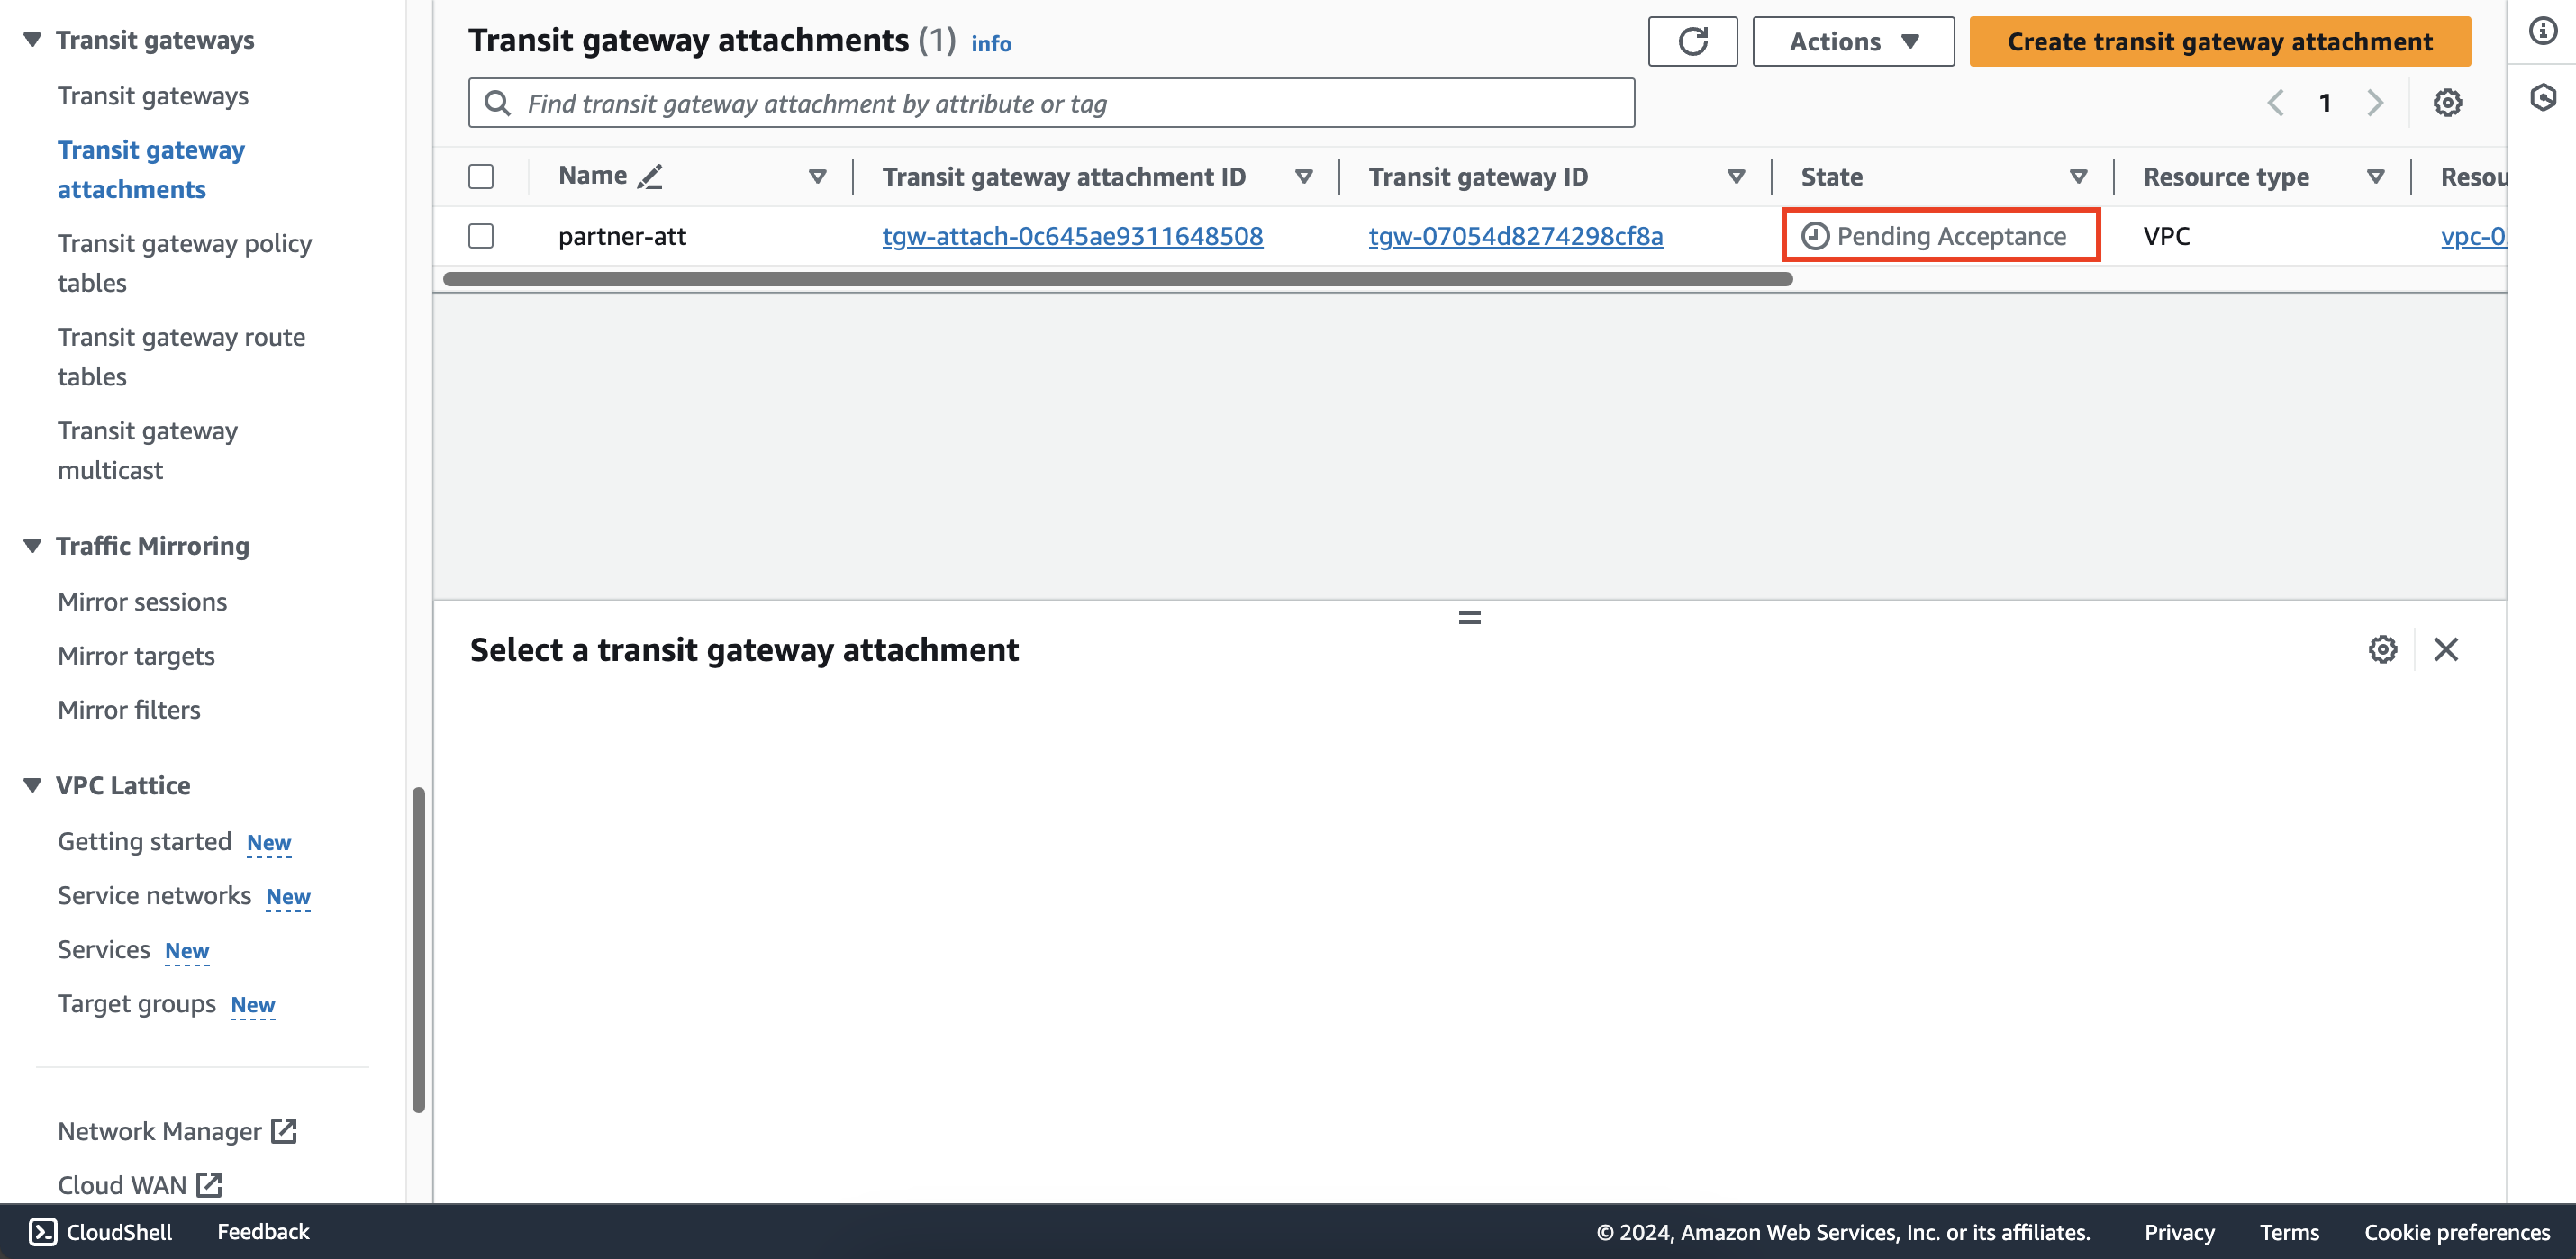
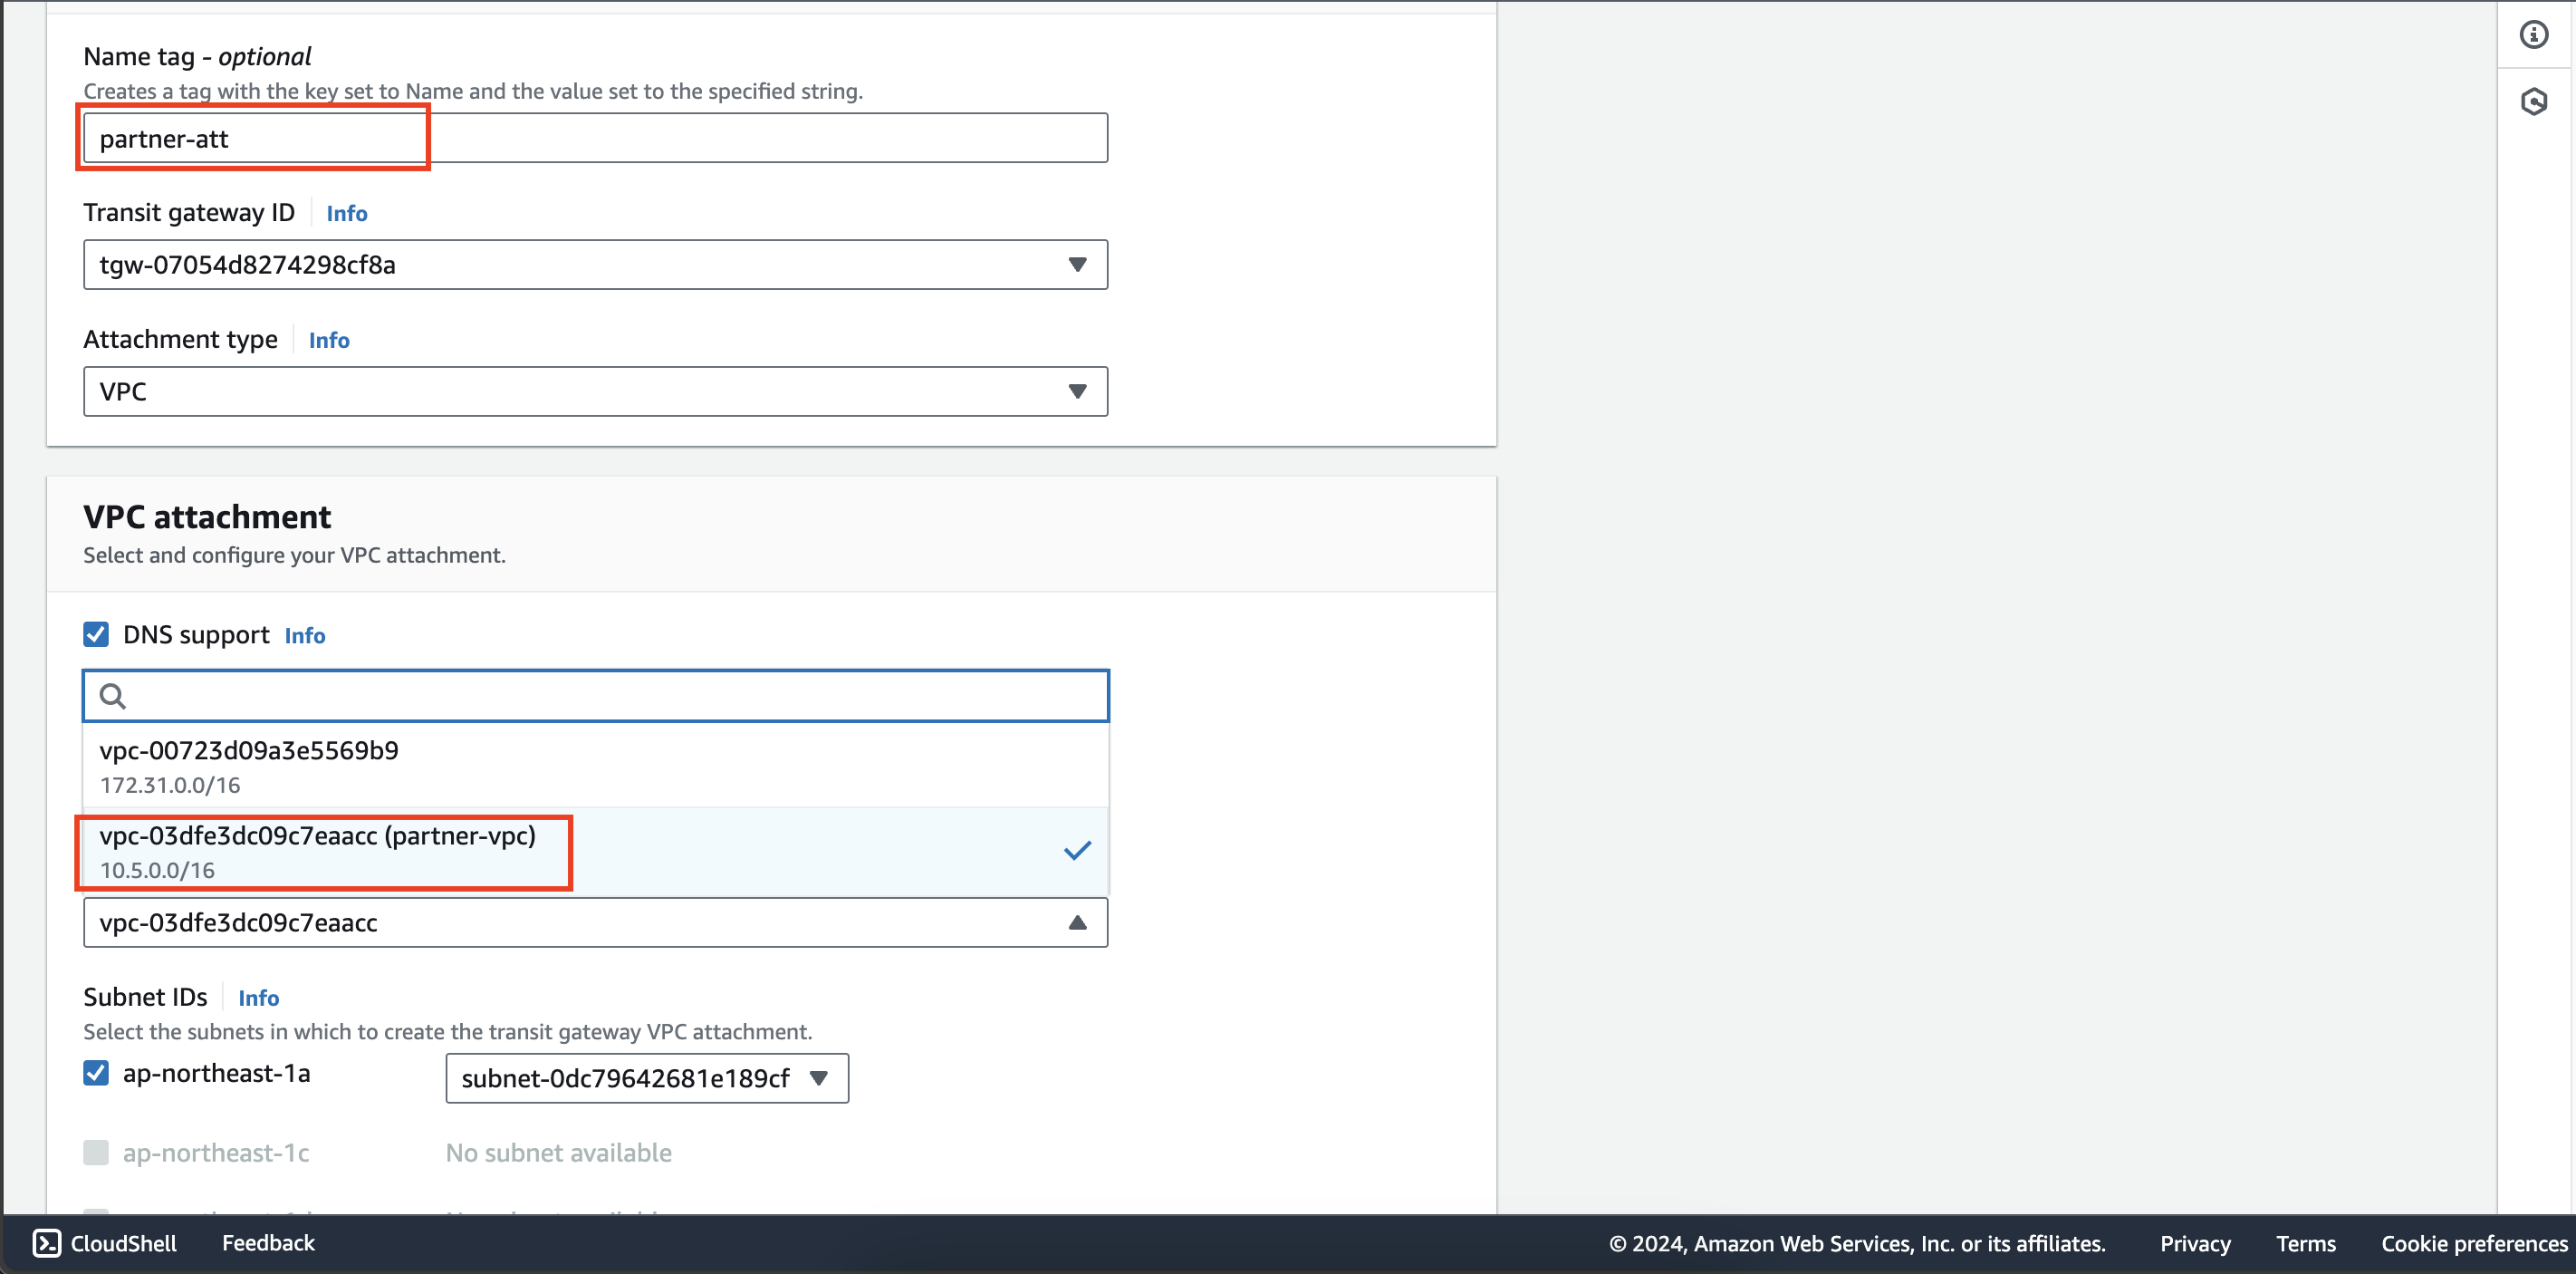 After creating, you will see the status of this attachment is Pending Acceptance because second account is creating
a resource attached to a shared resource from first account, so it needs to be confirmed by first account before creating.
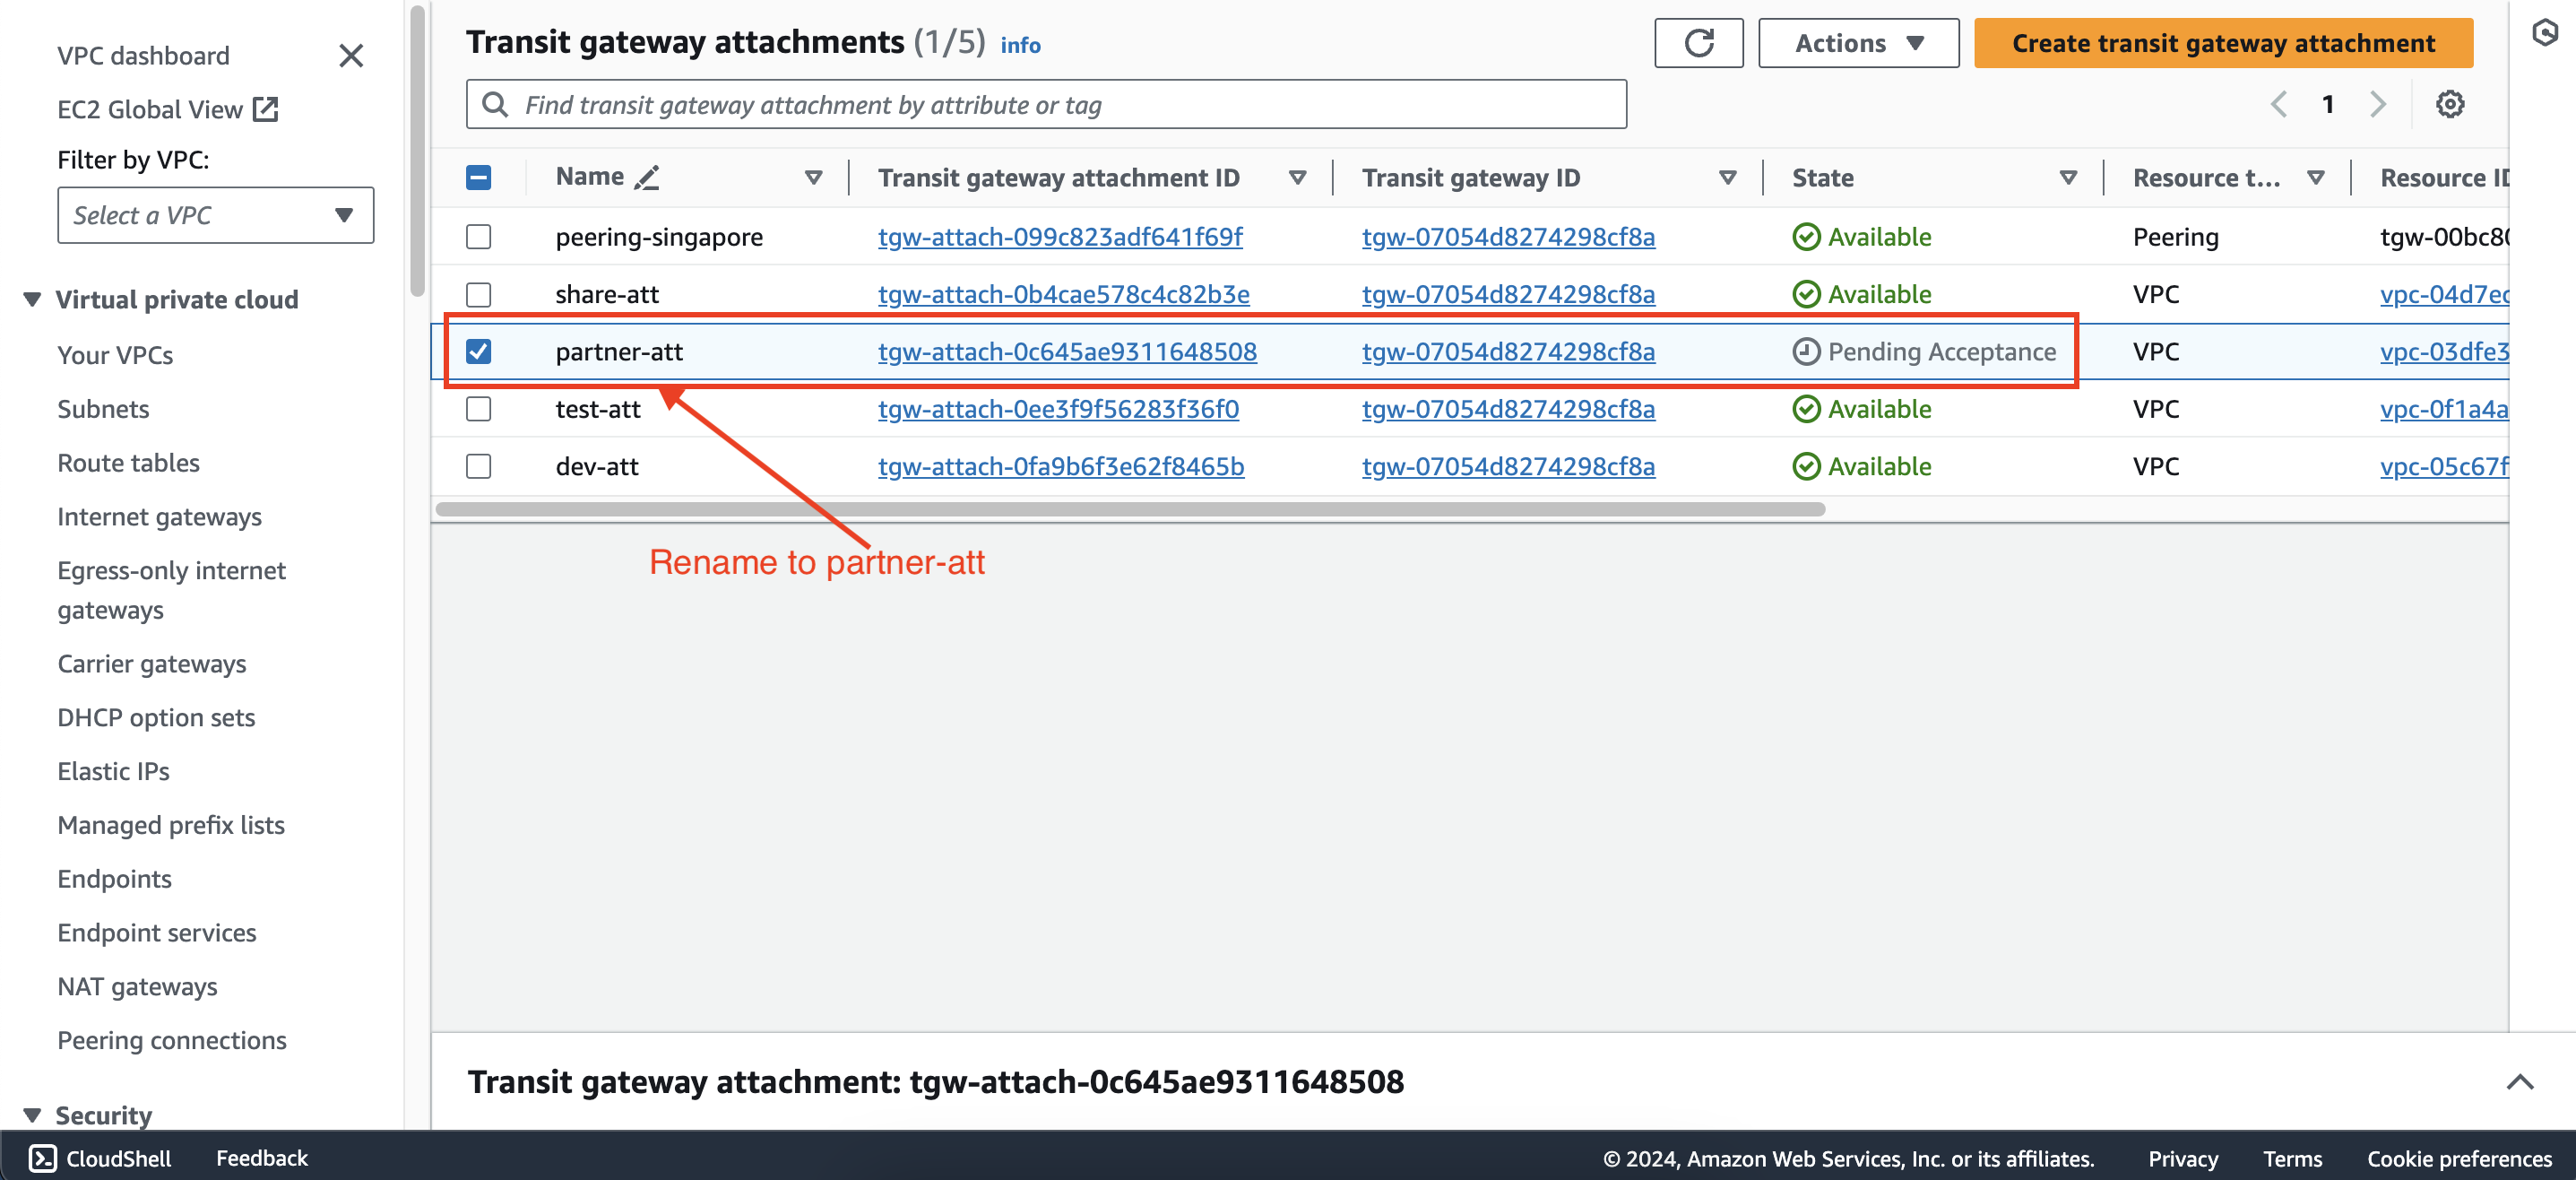
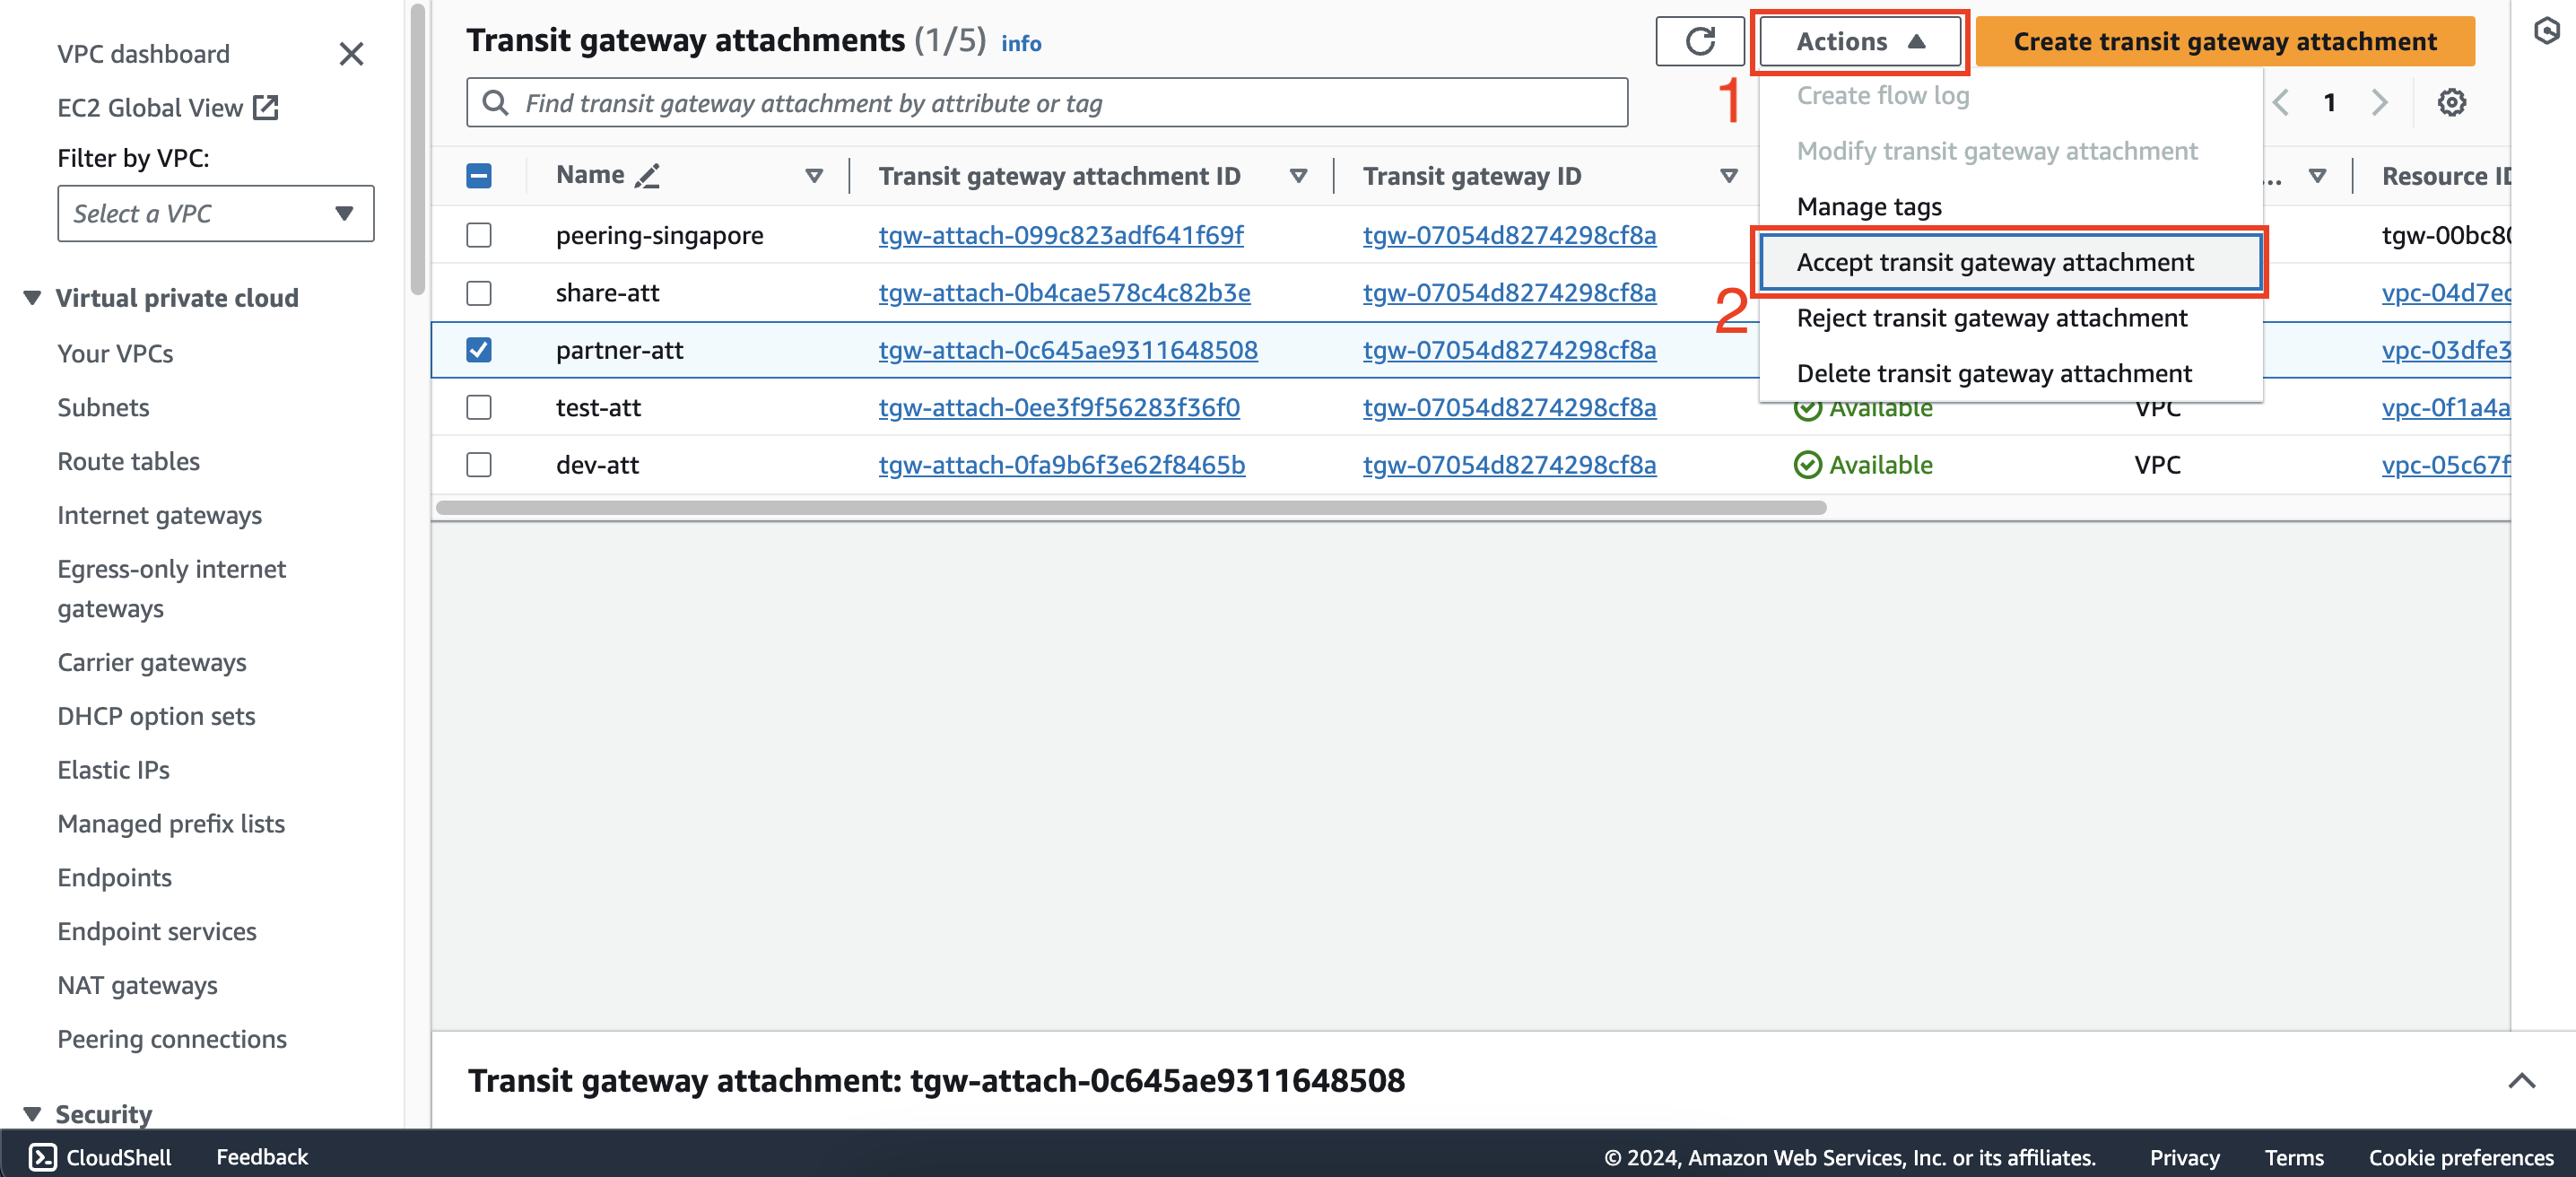
Go back to the Transit gateway attachments interface of first account, you will see the attachment just created by second account. Rename it to partner-att and accept attachment like this:
Configure routing for transit gateway
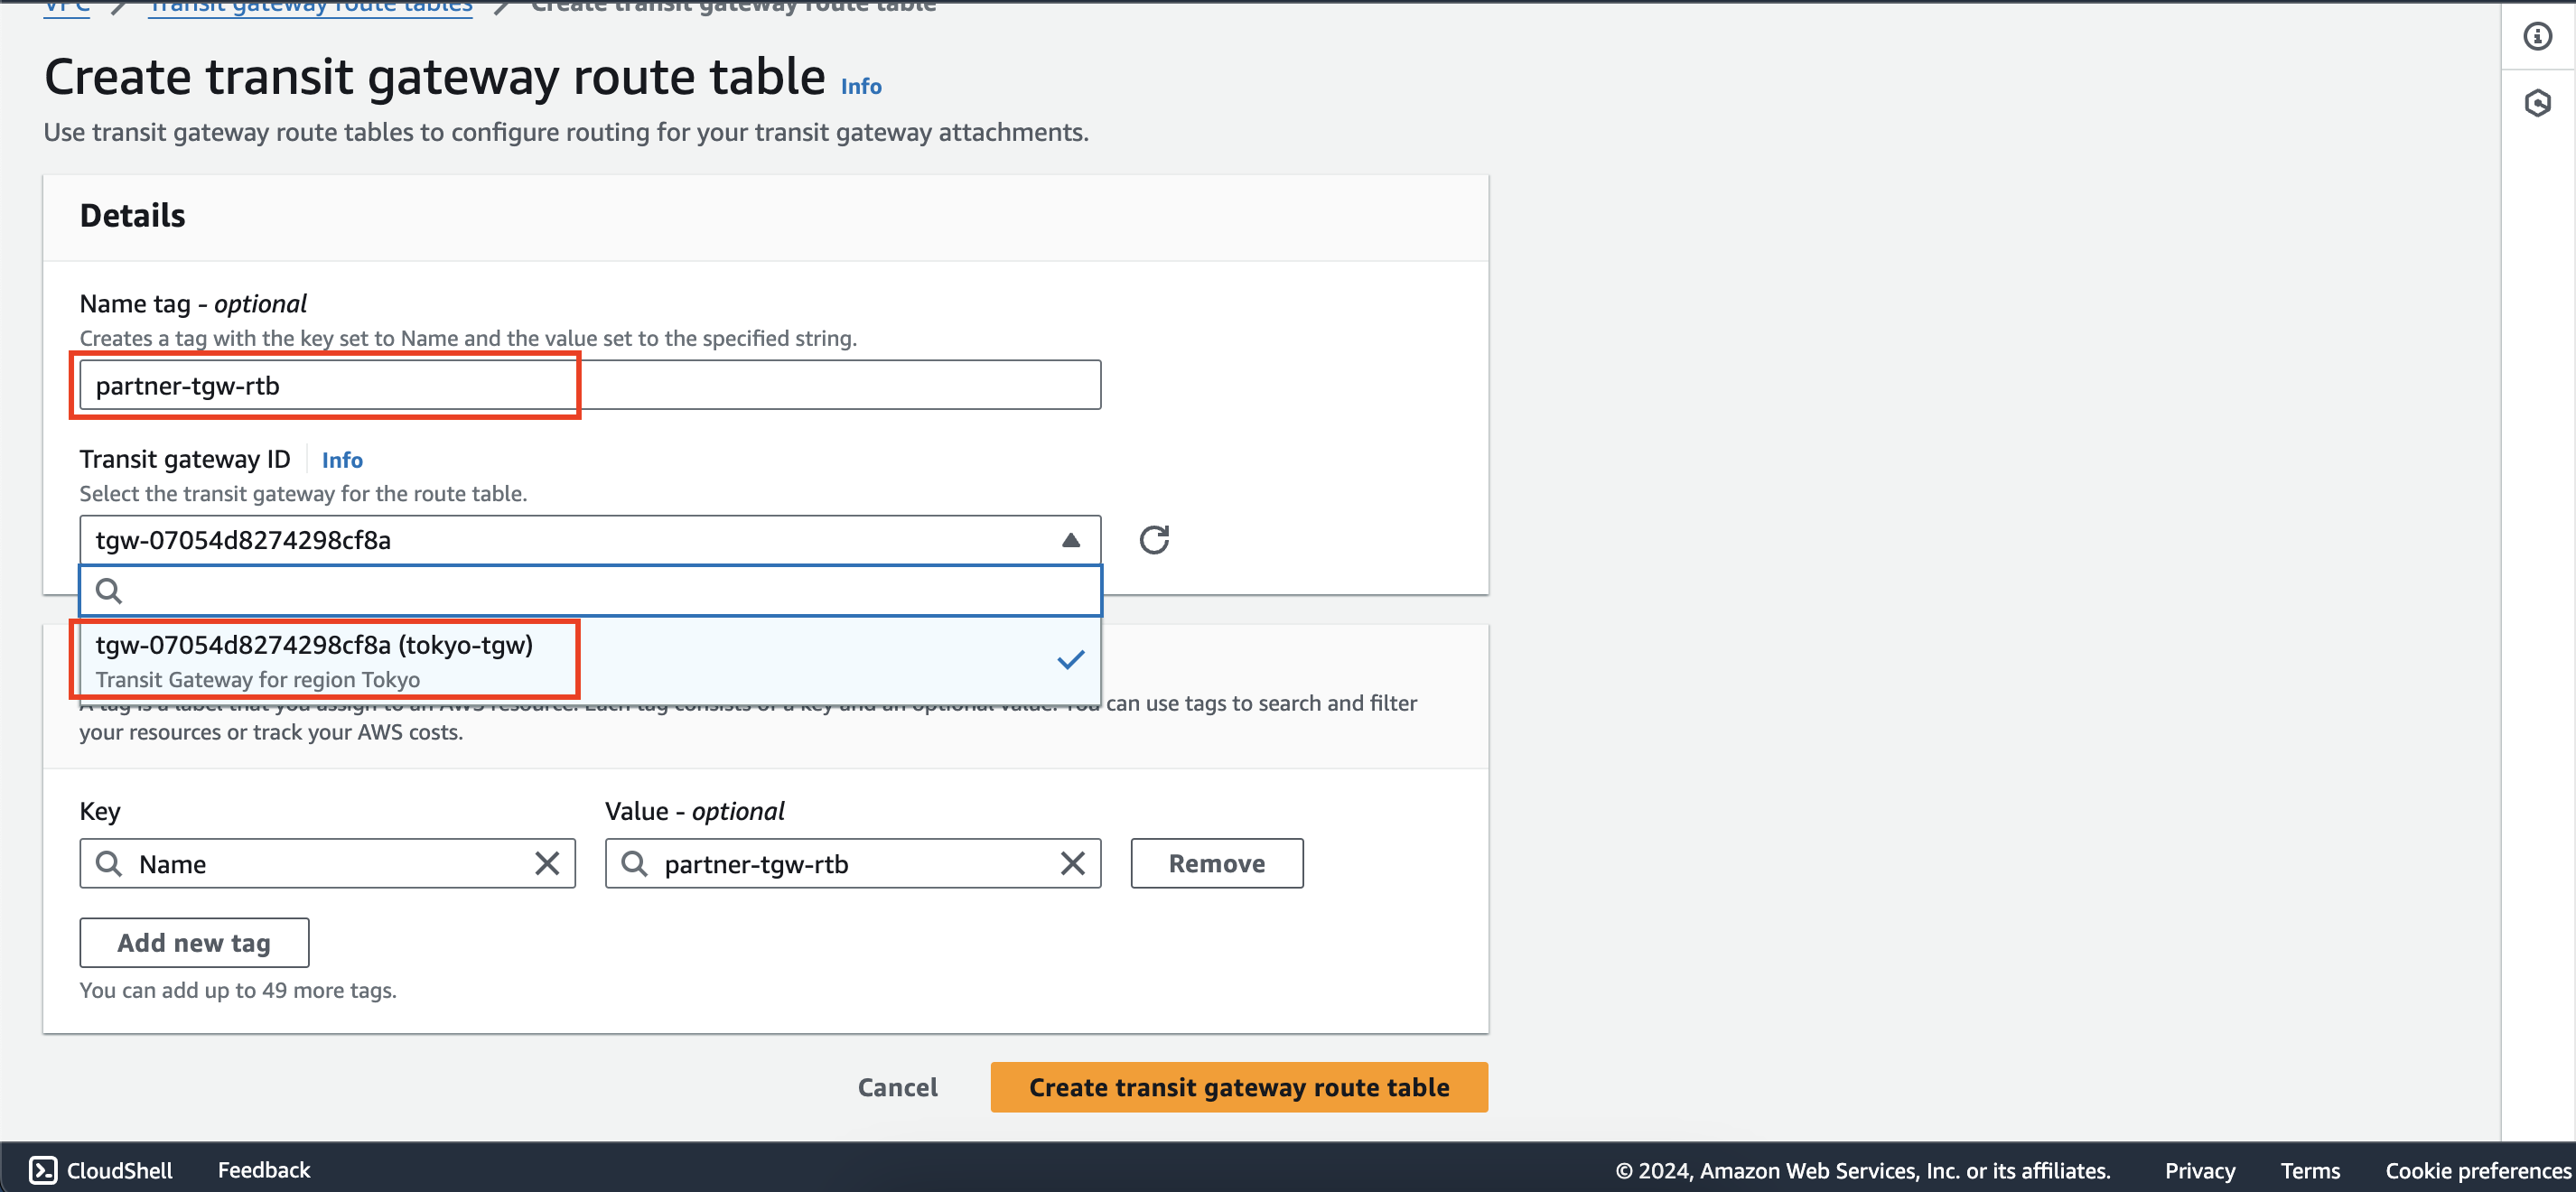
Create a new transit gateway route table partner-tgw-rtb in first account
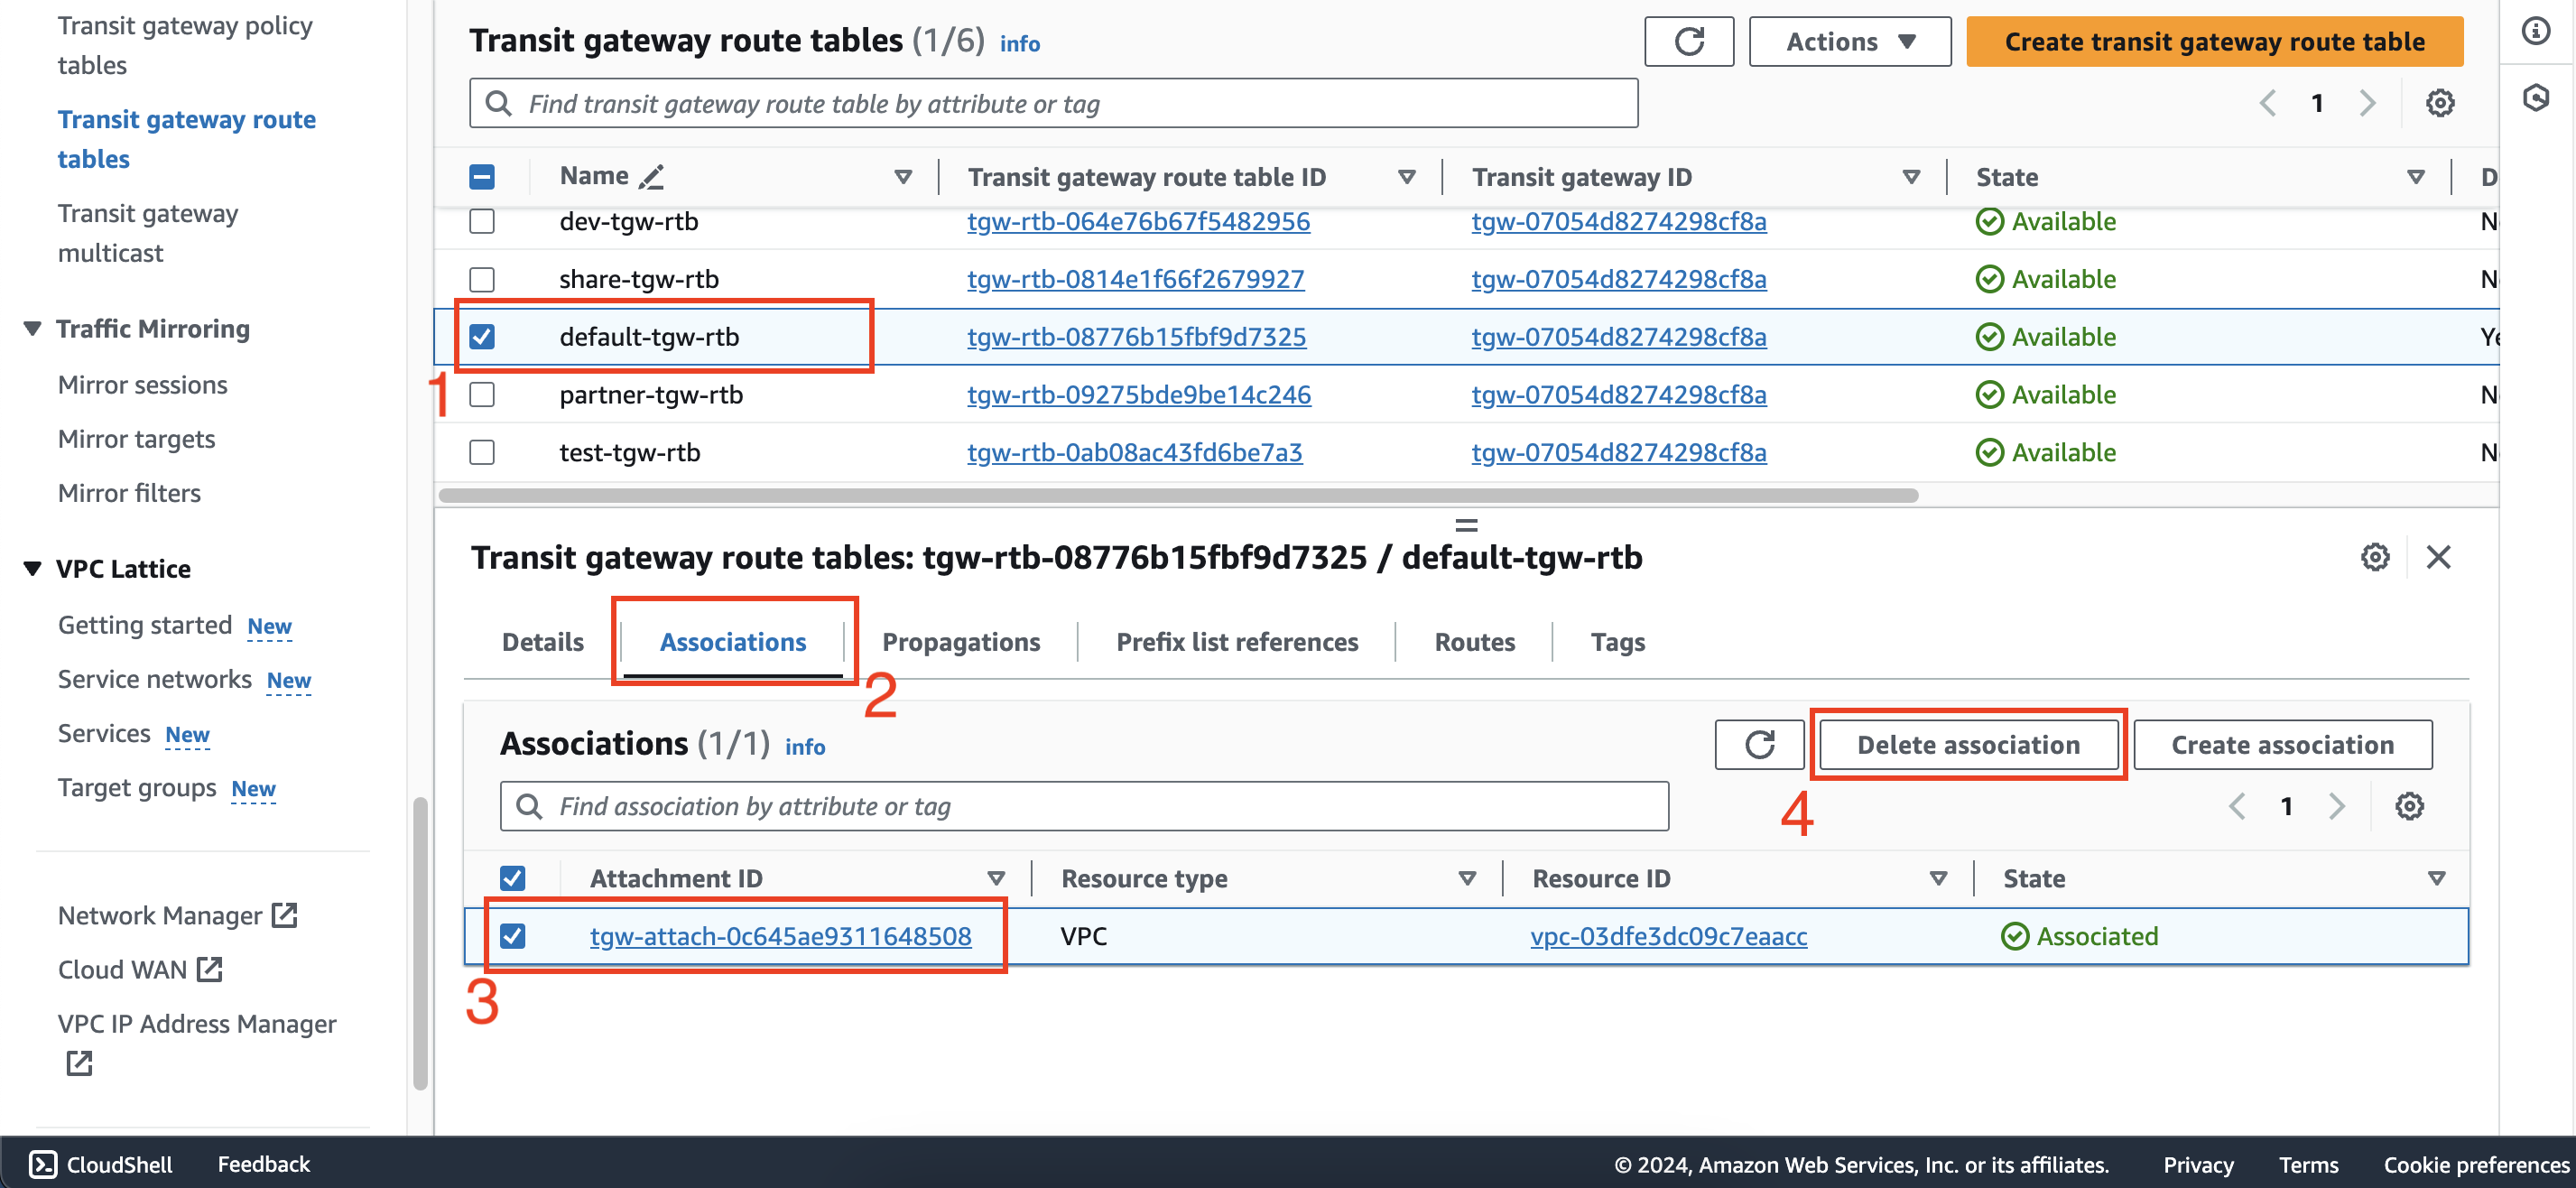
 Delete association between partner-att attachment and default-tgw-rtb route table
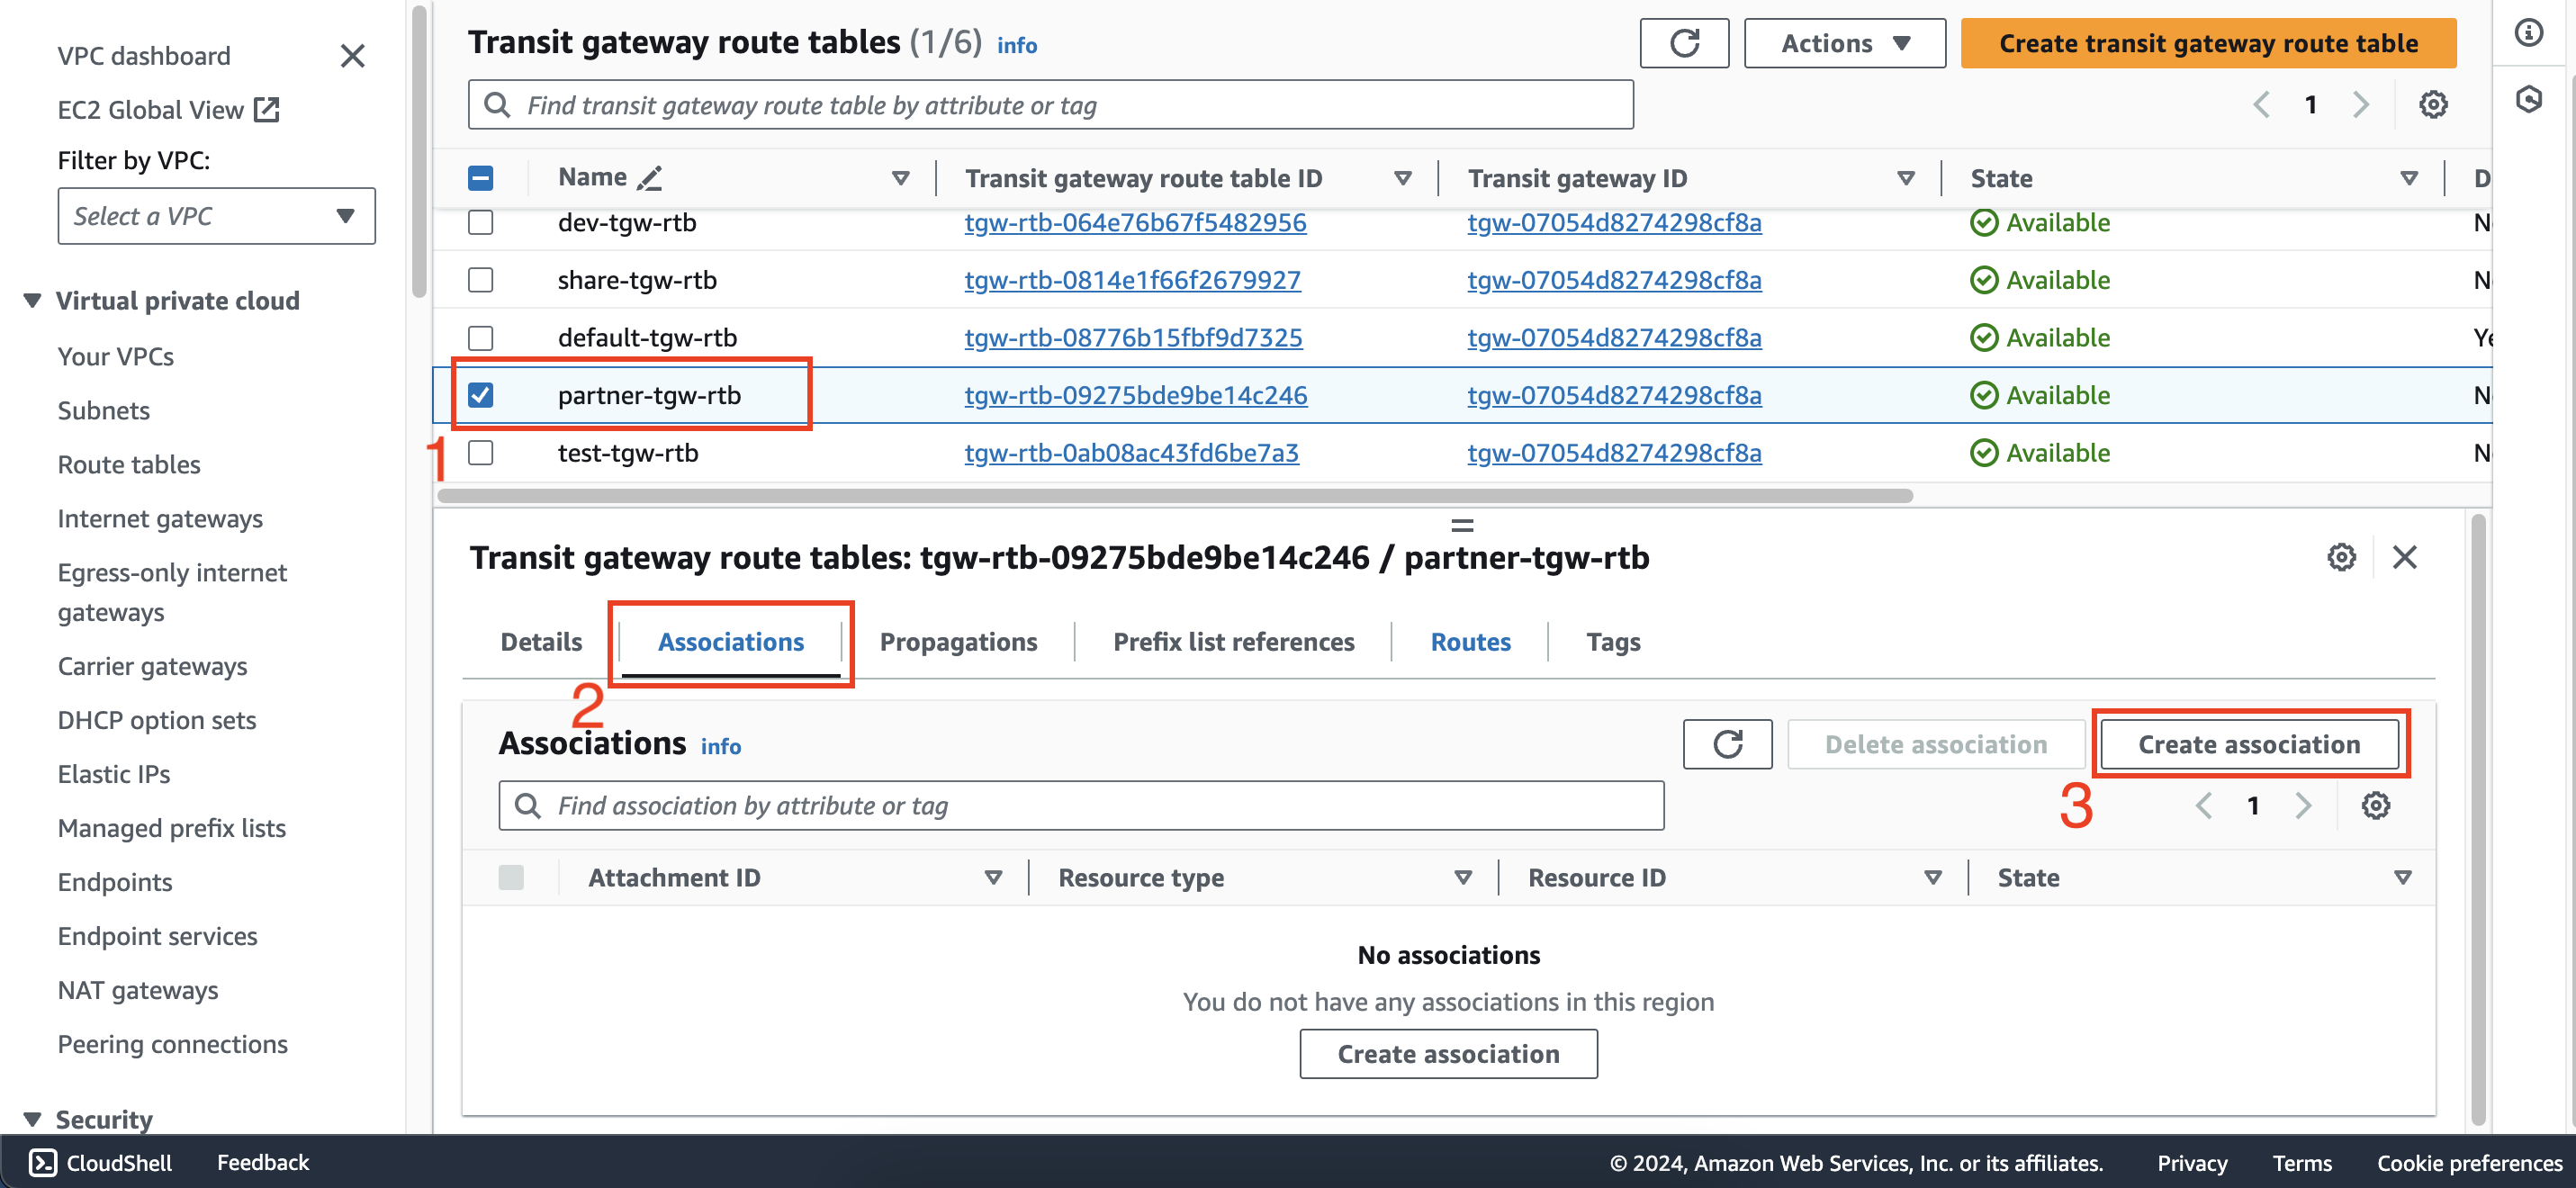
Create new association between partner-tgw-rtb route table and partner-att attachment
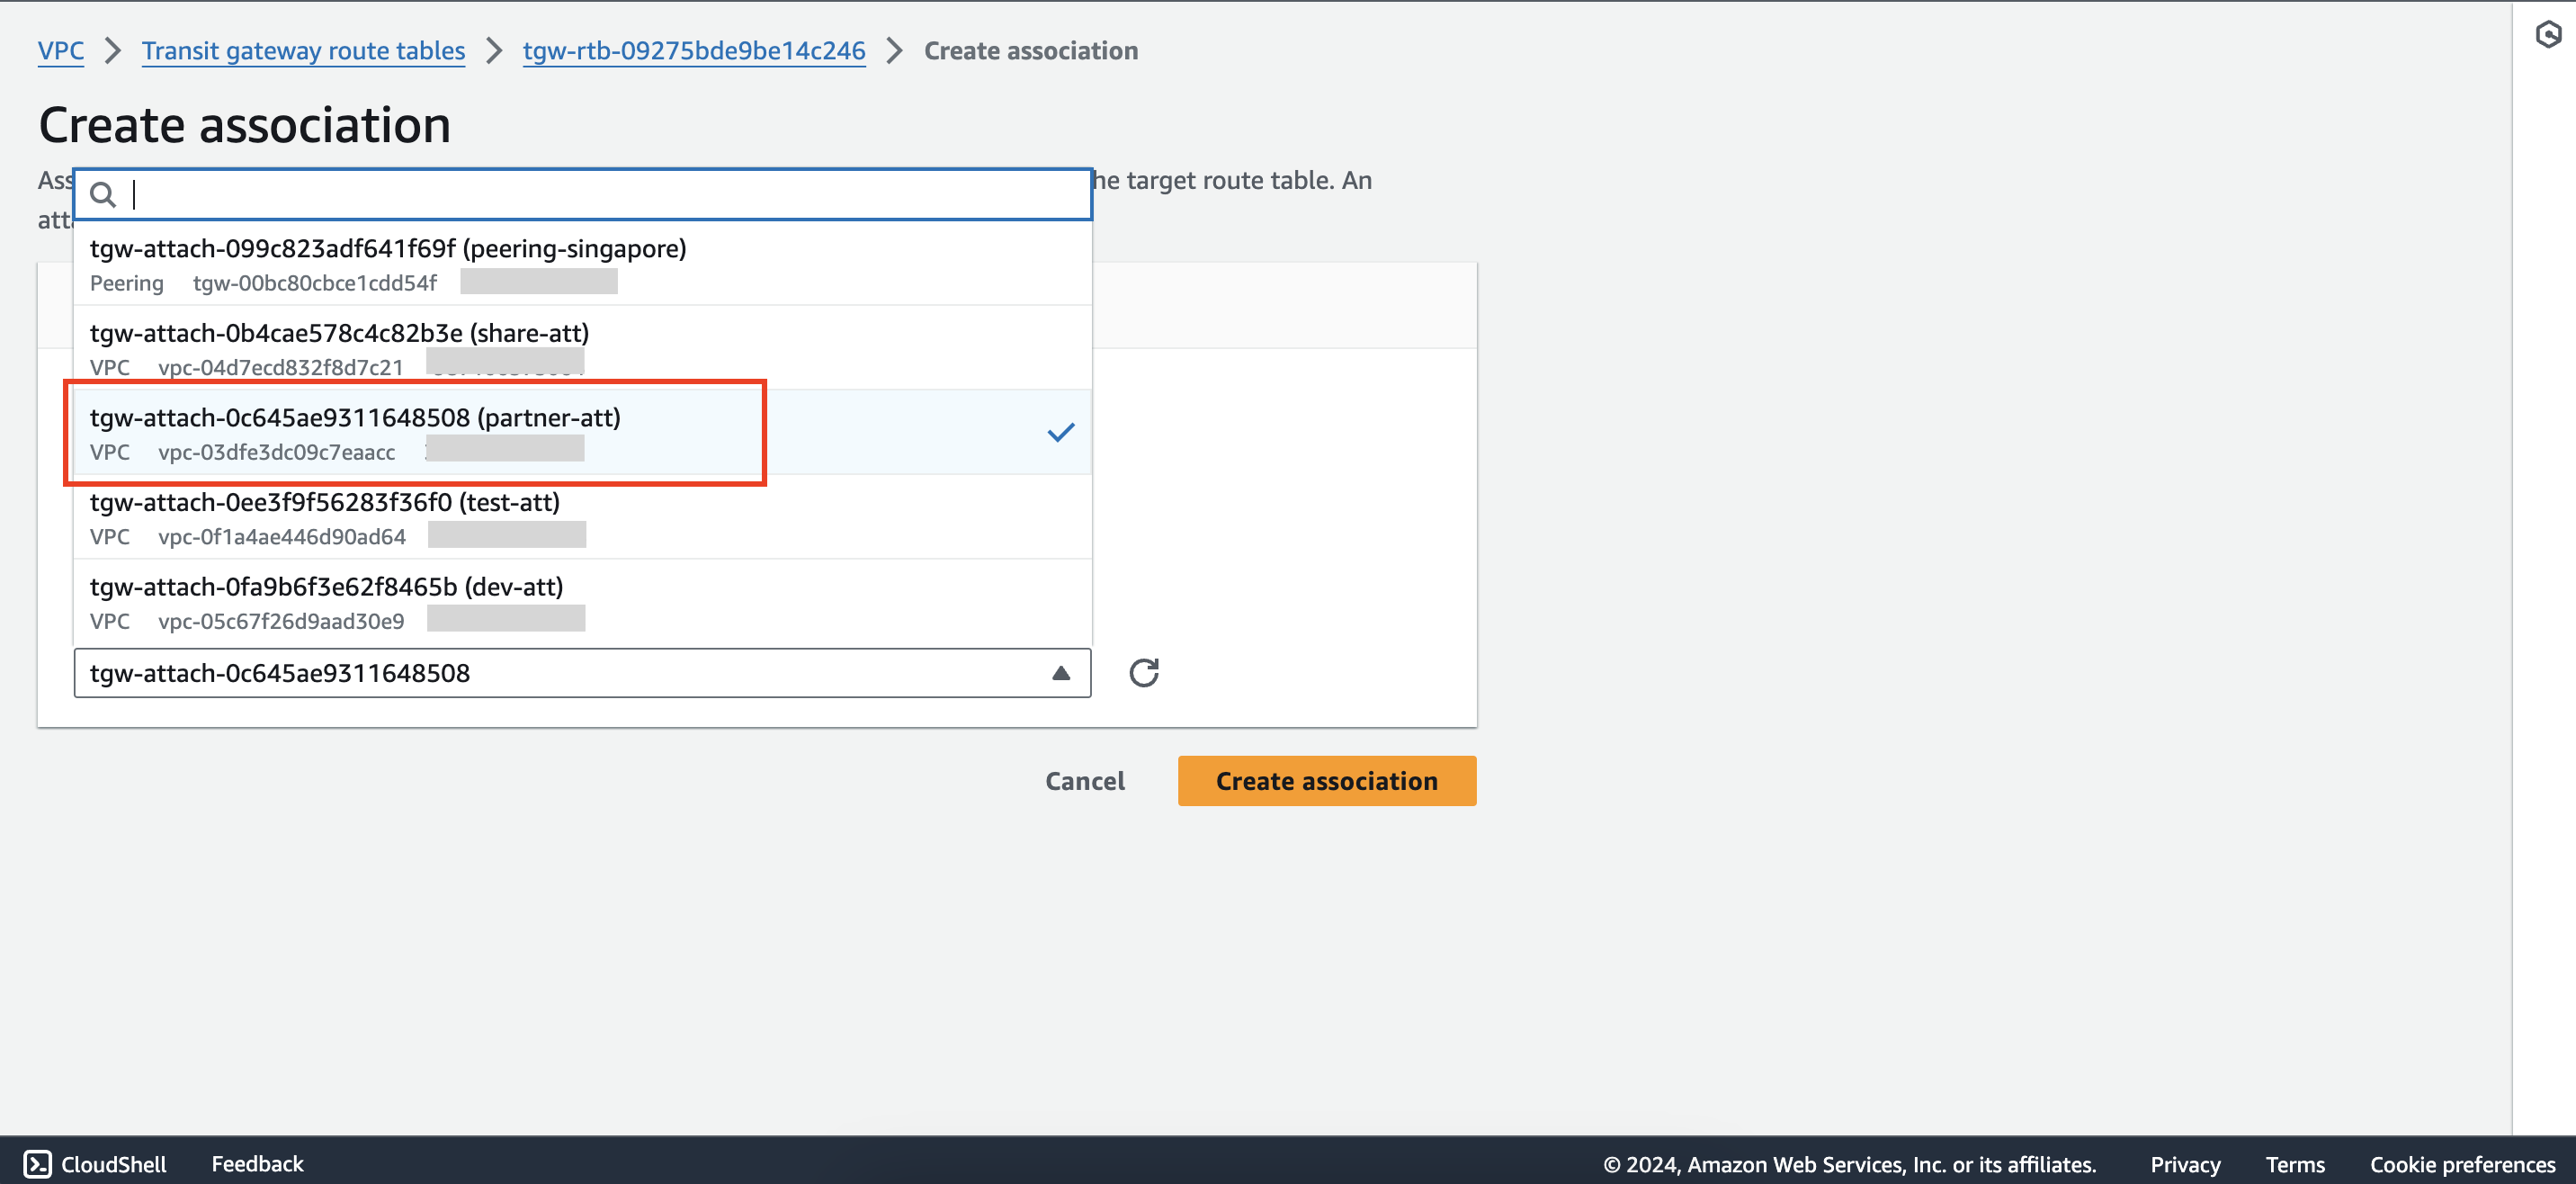
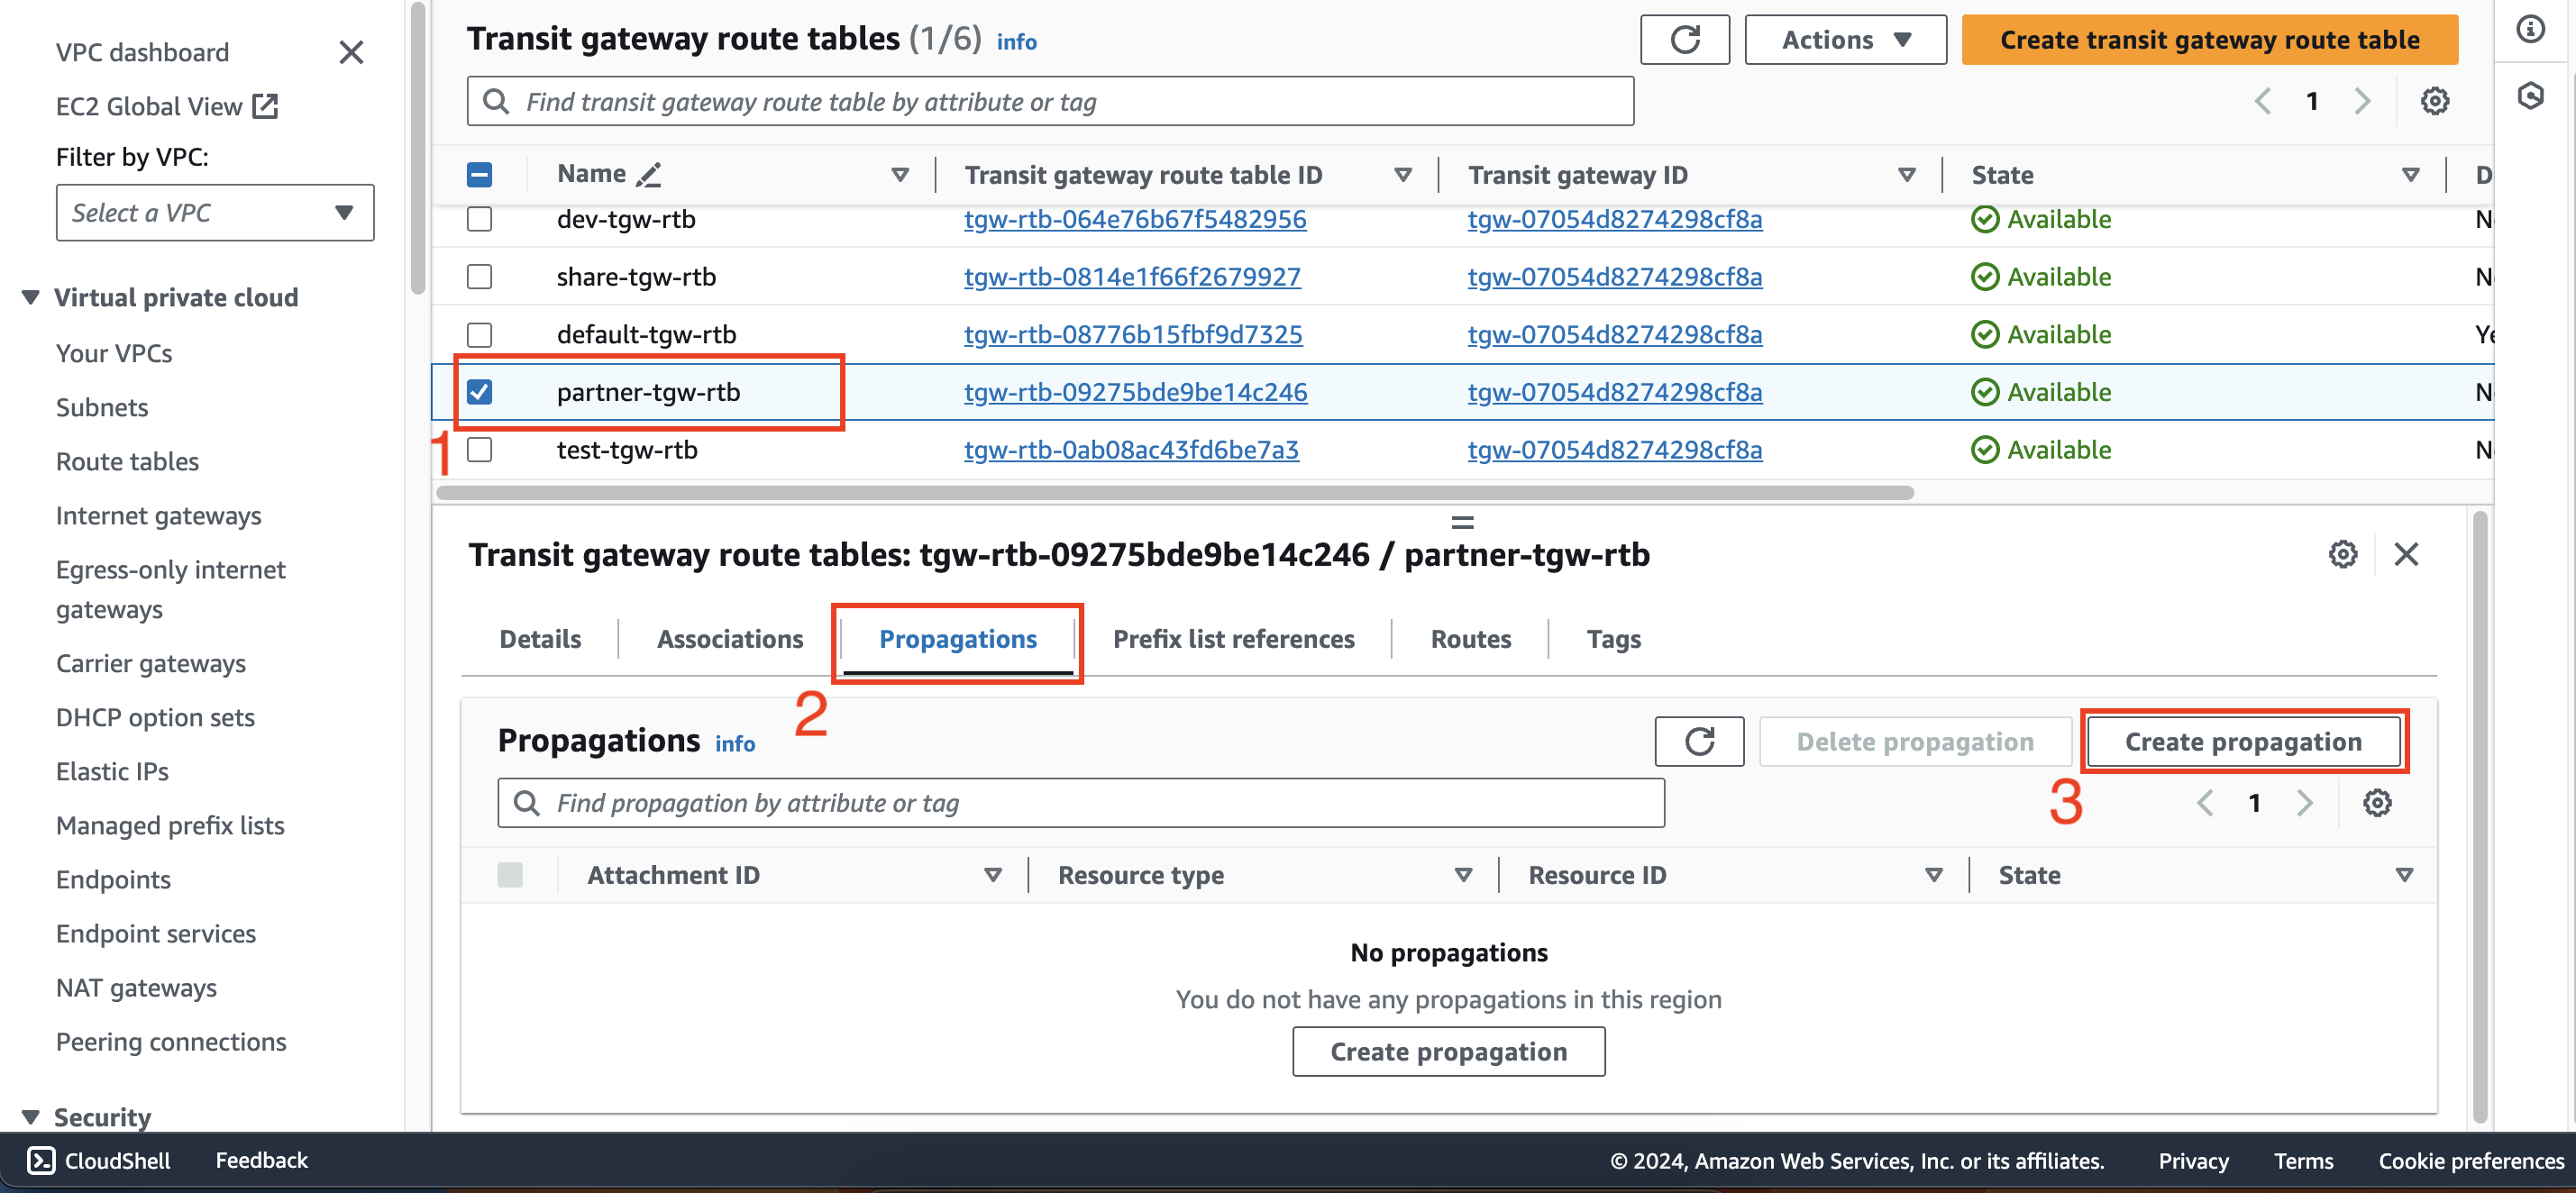
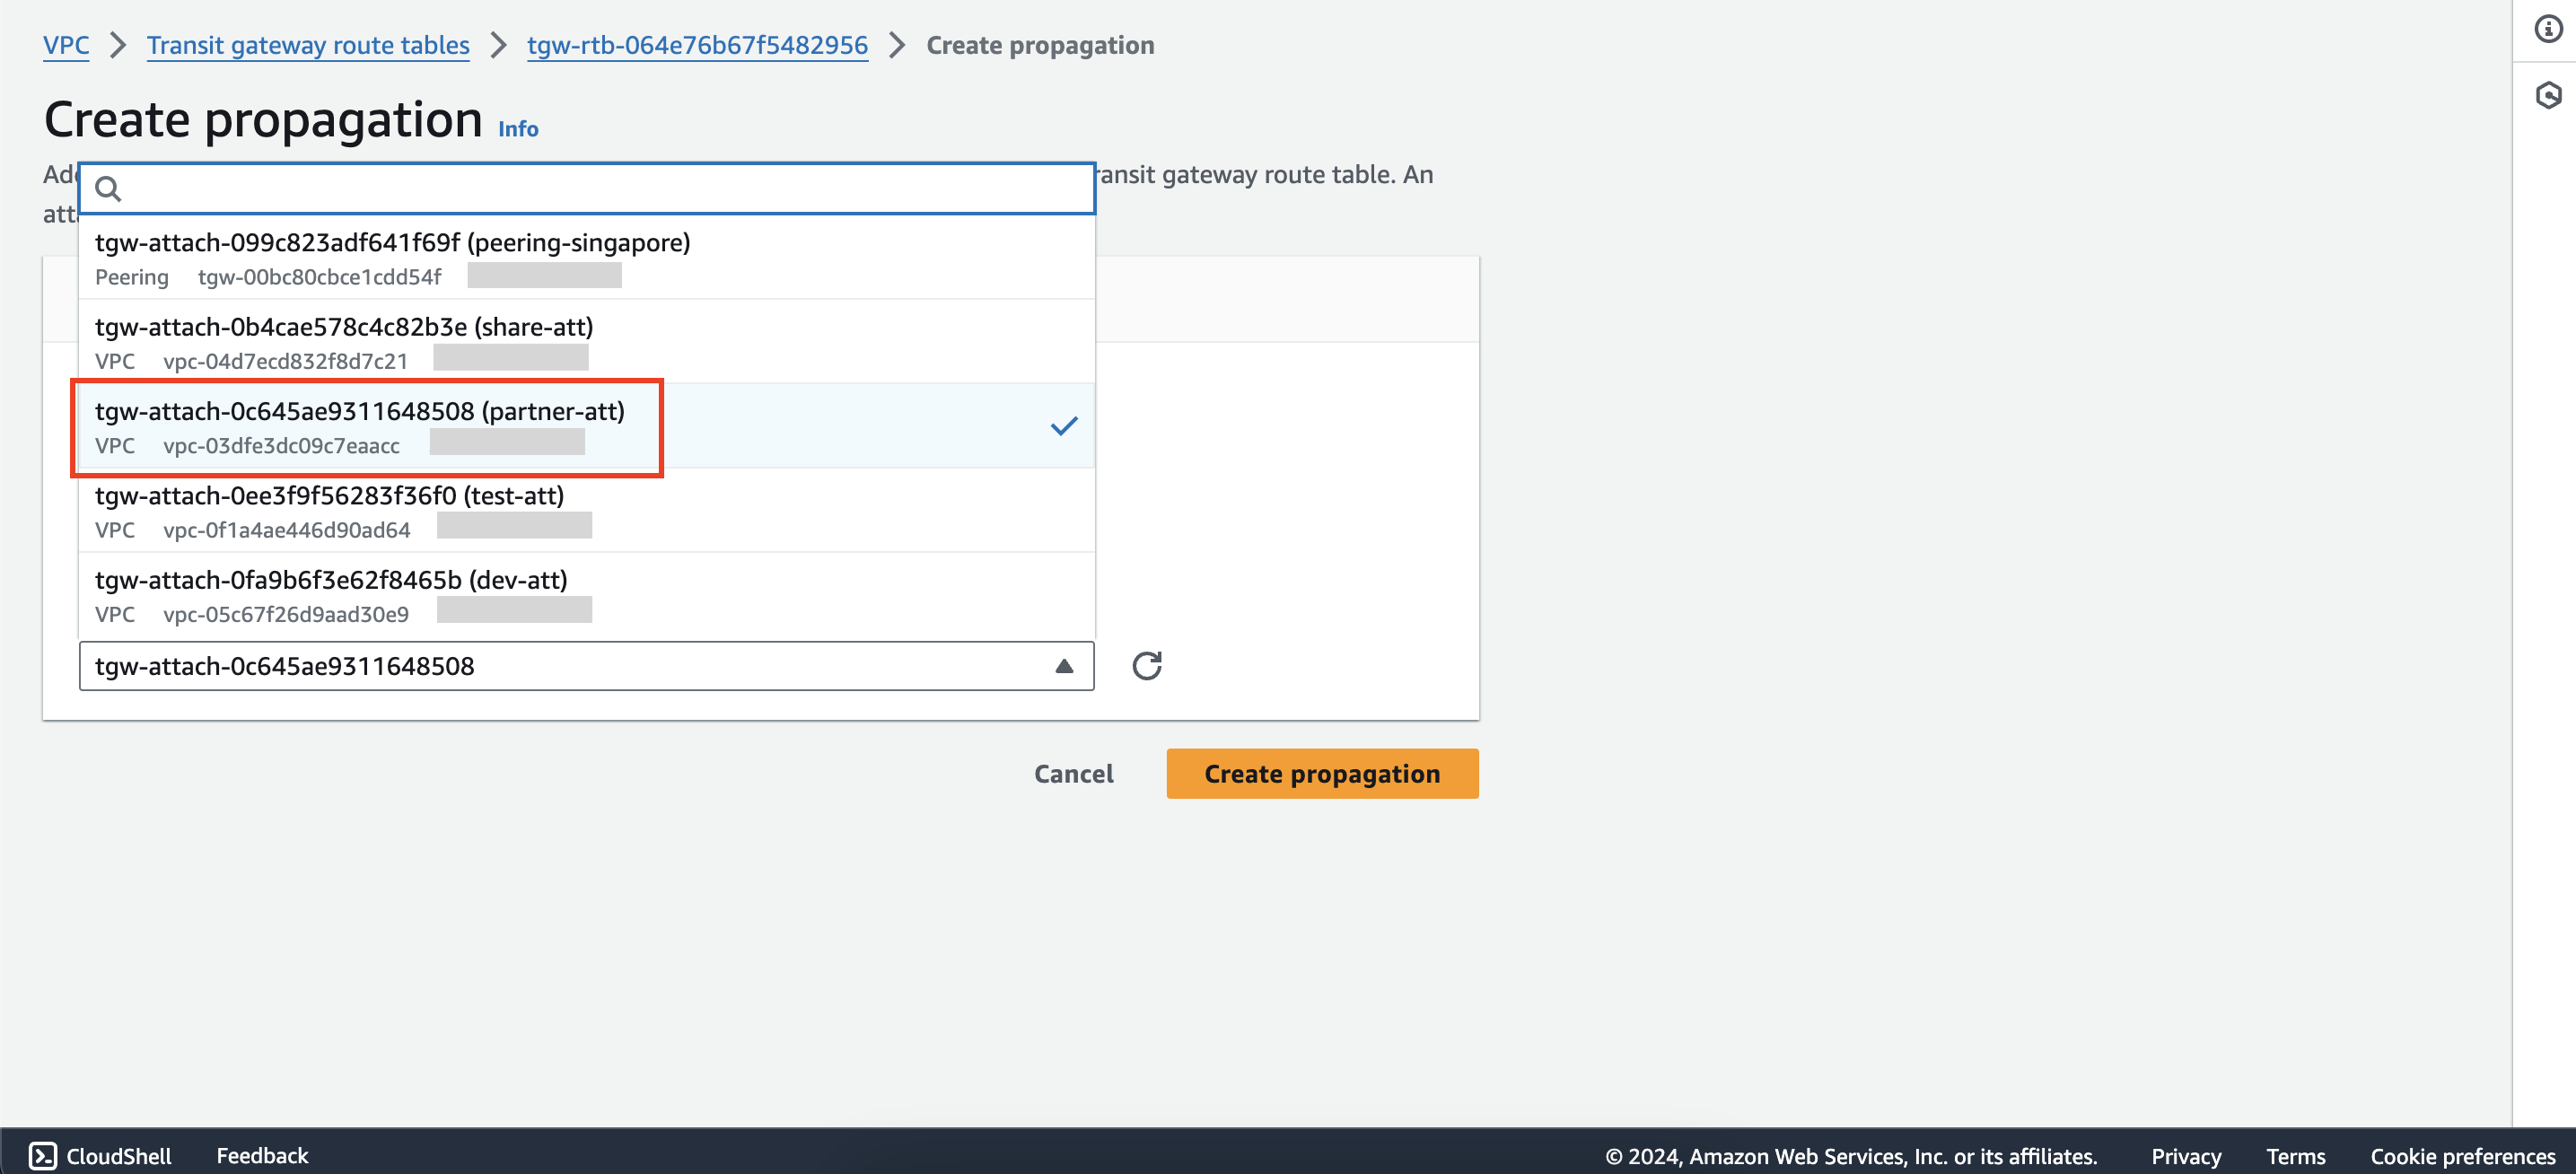
Add propagation from the partner-tgw-rtb route table to the dev-att attachment.
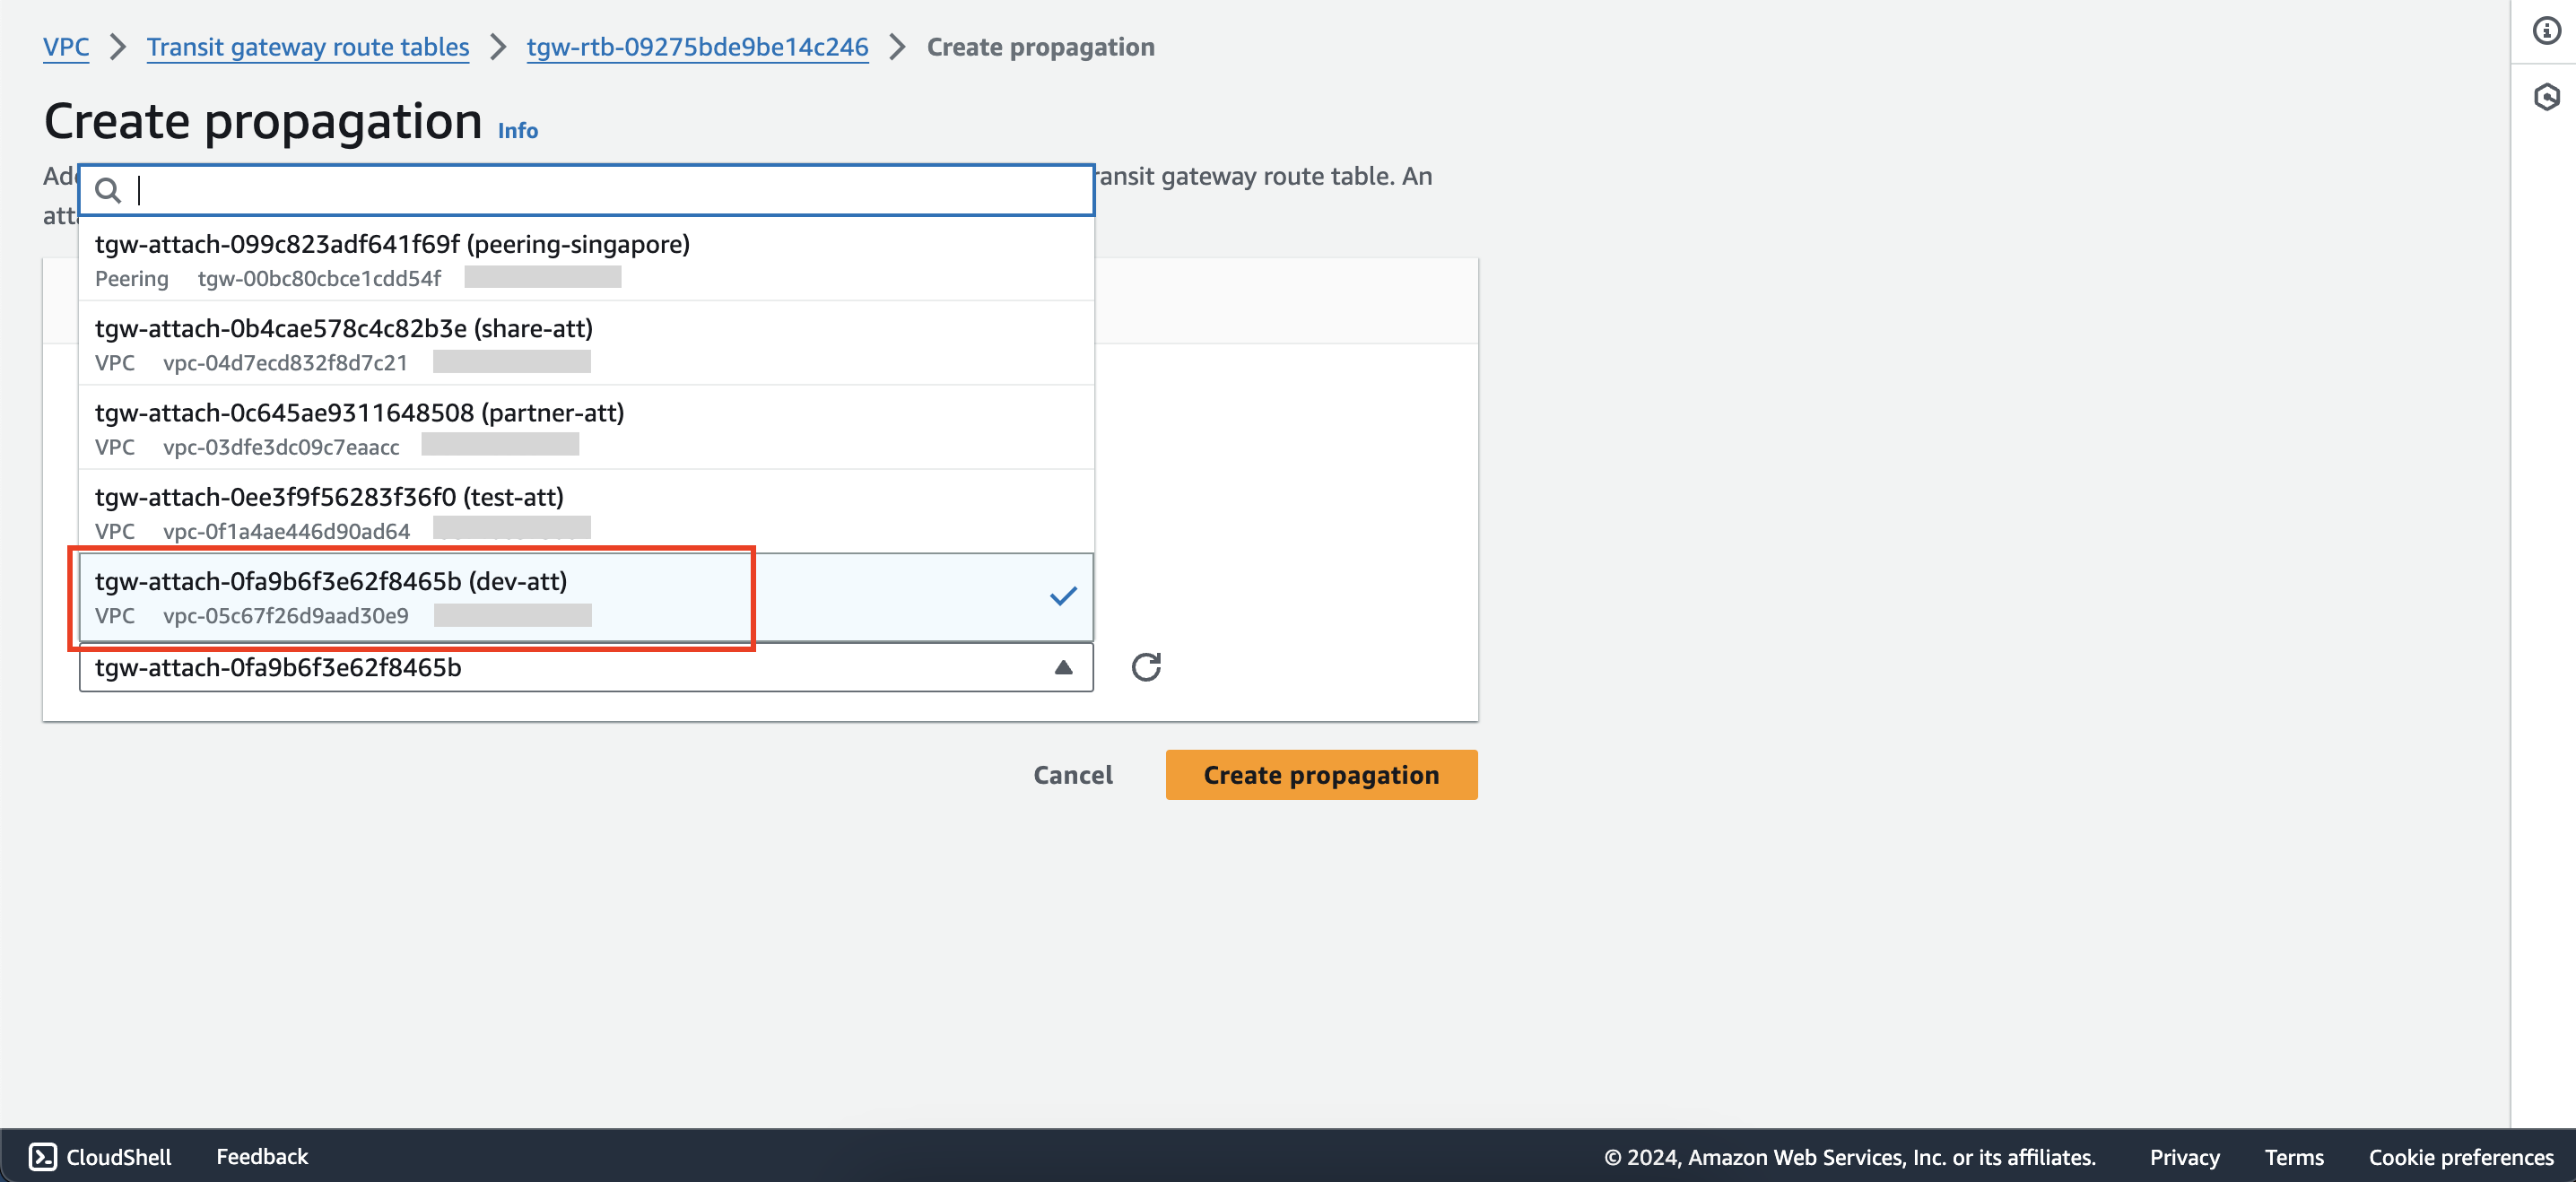
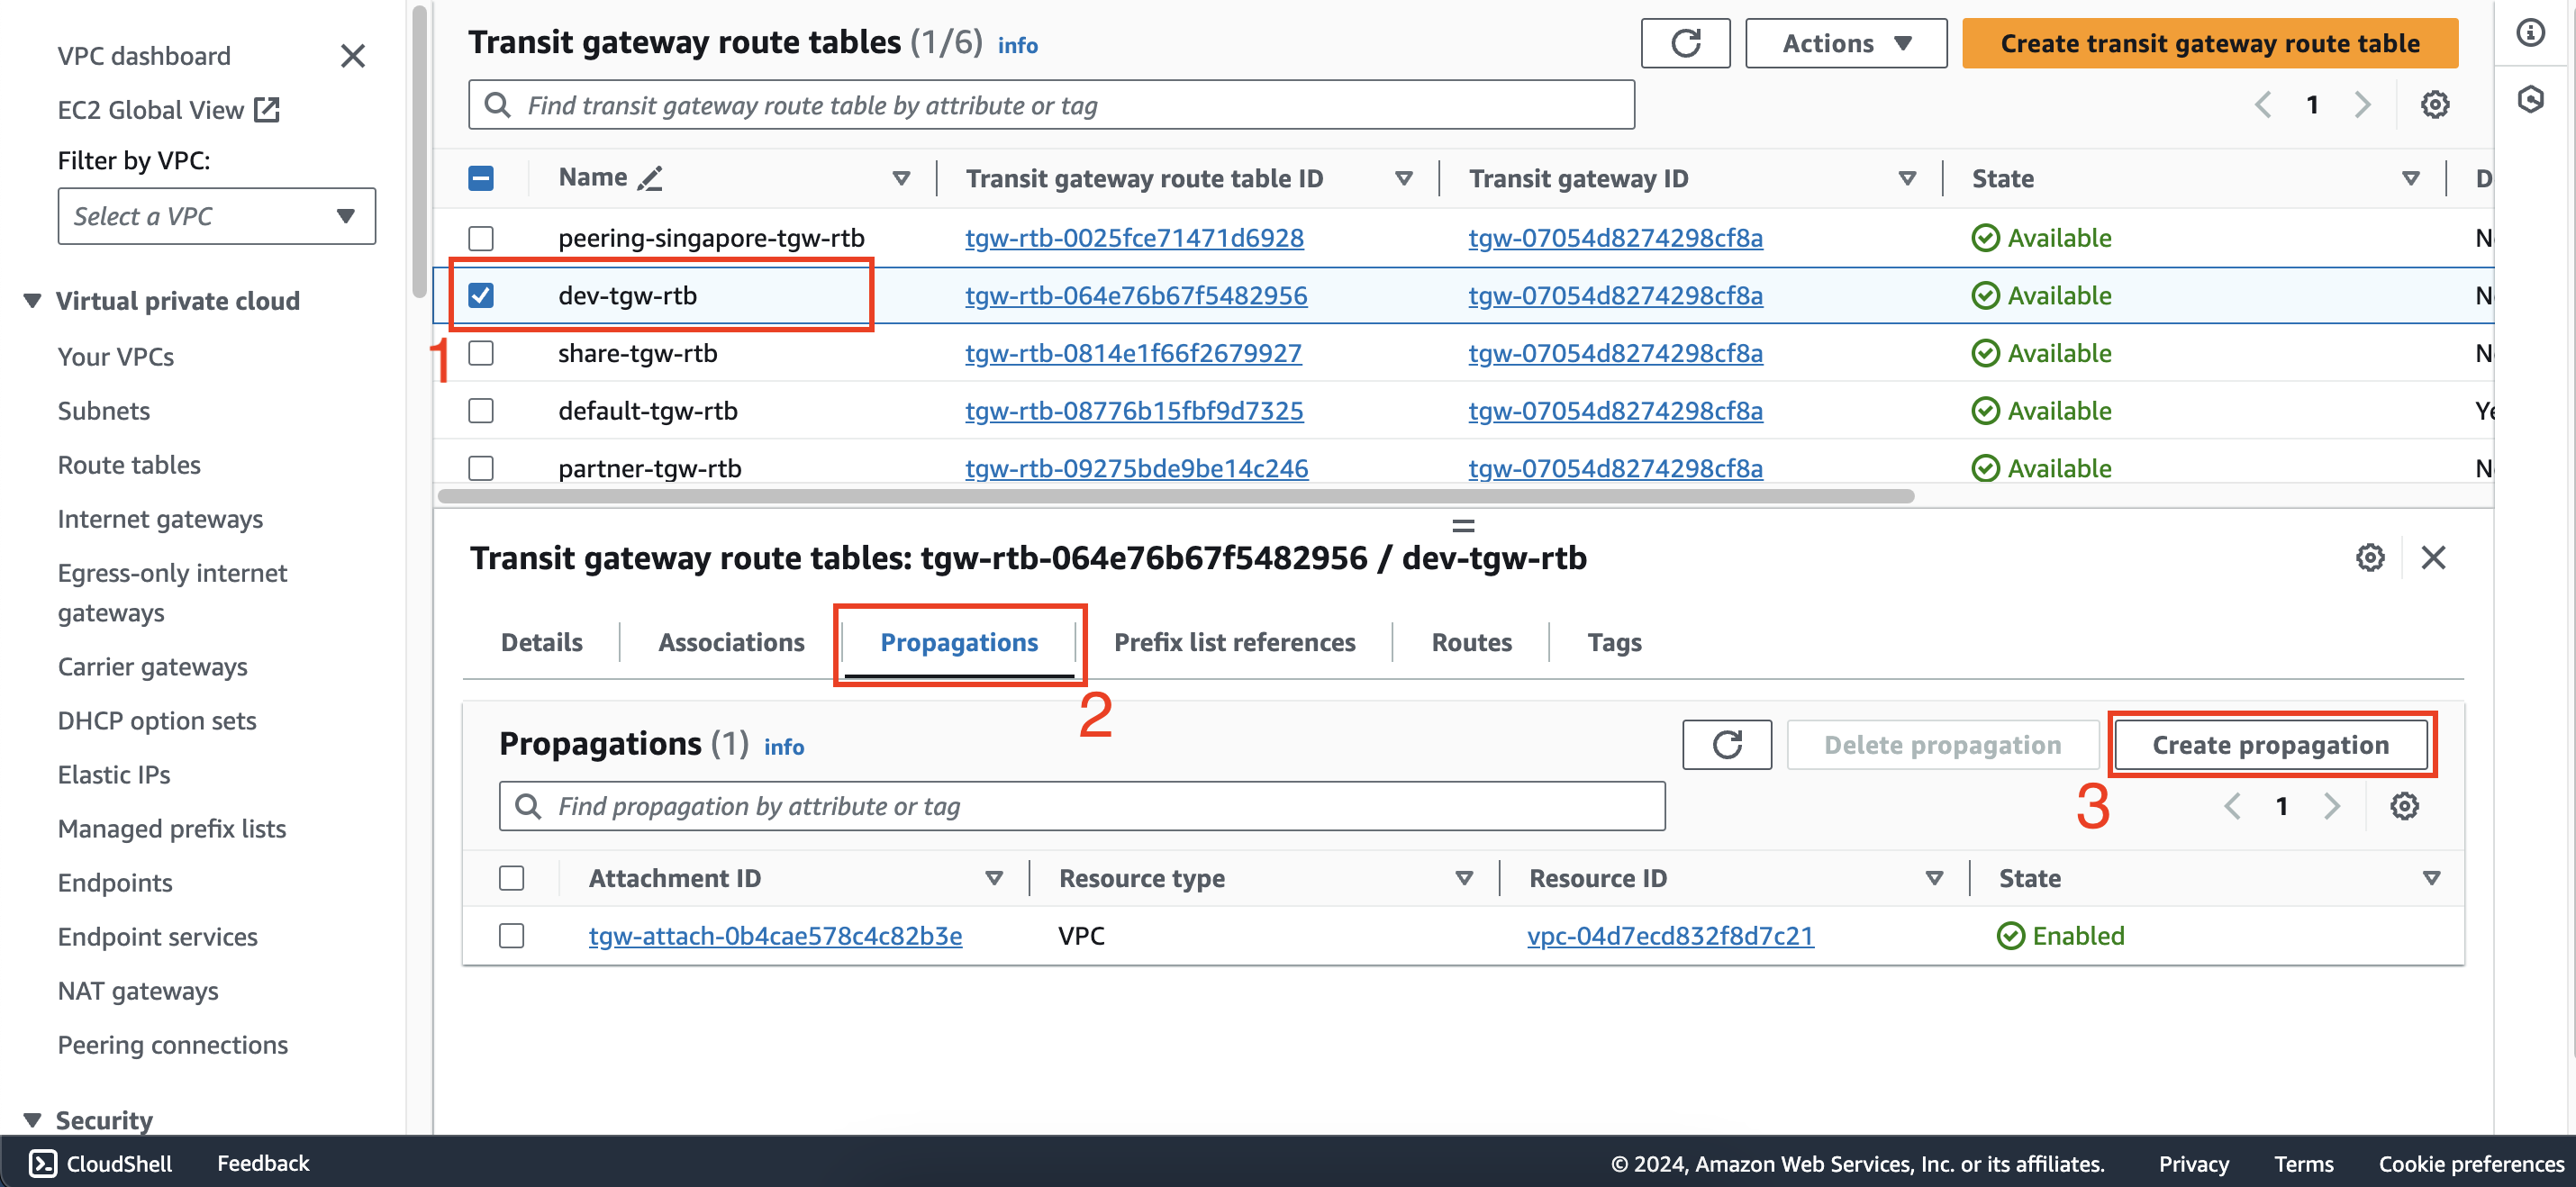
Add propagation from the dev-tgw-rtb route table to the partner-att attachment.
- Configure routing for VPCs
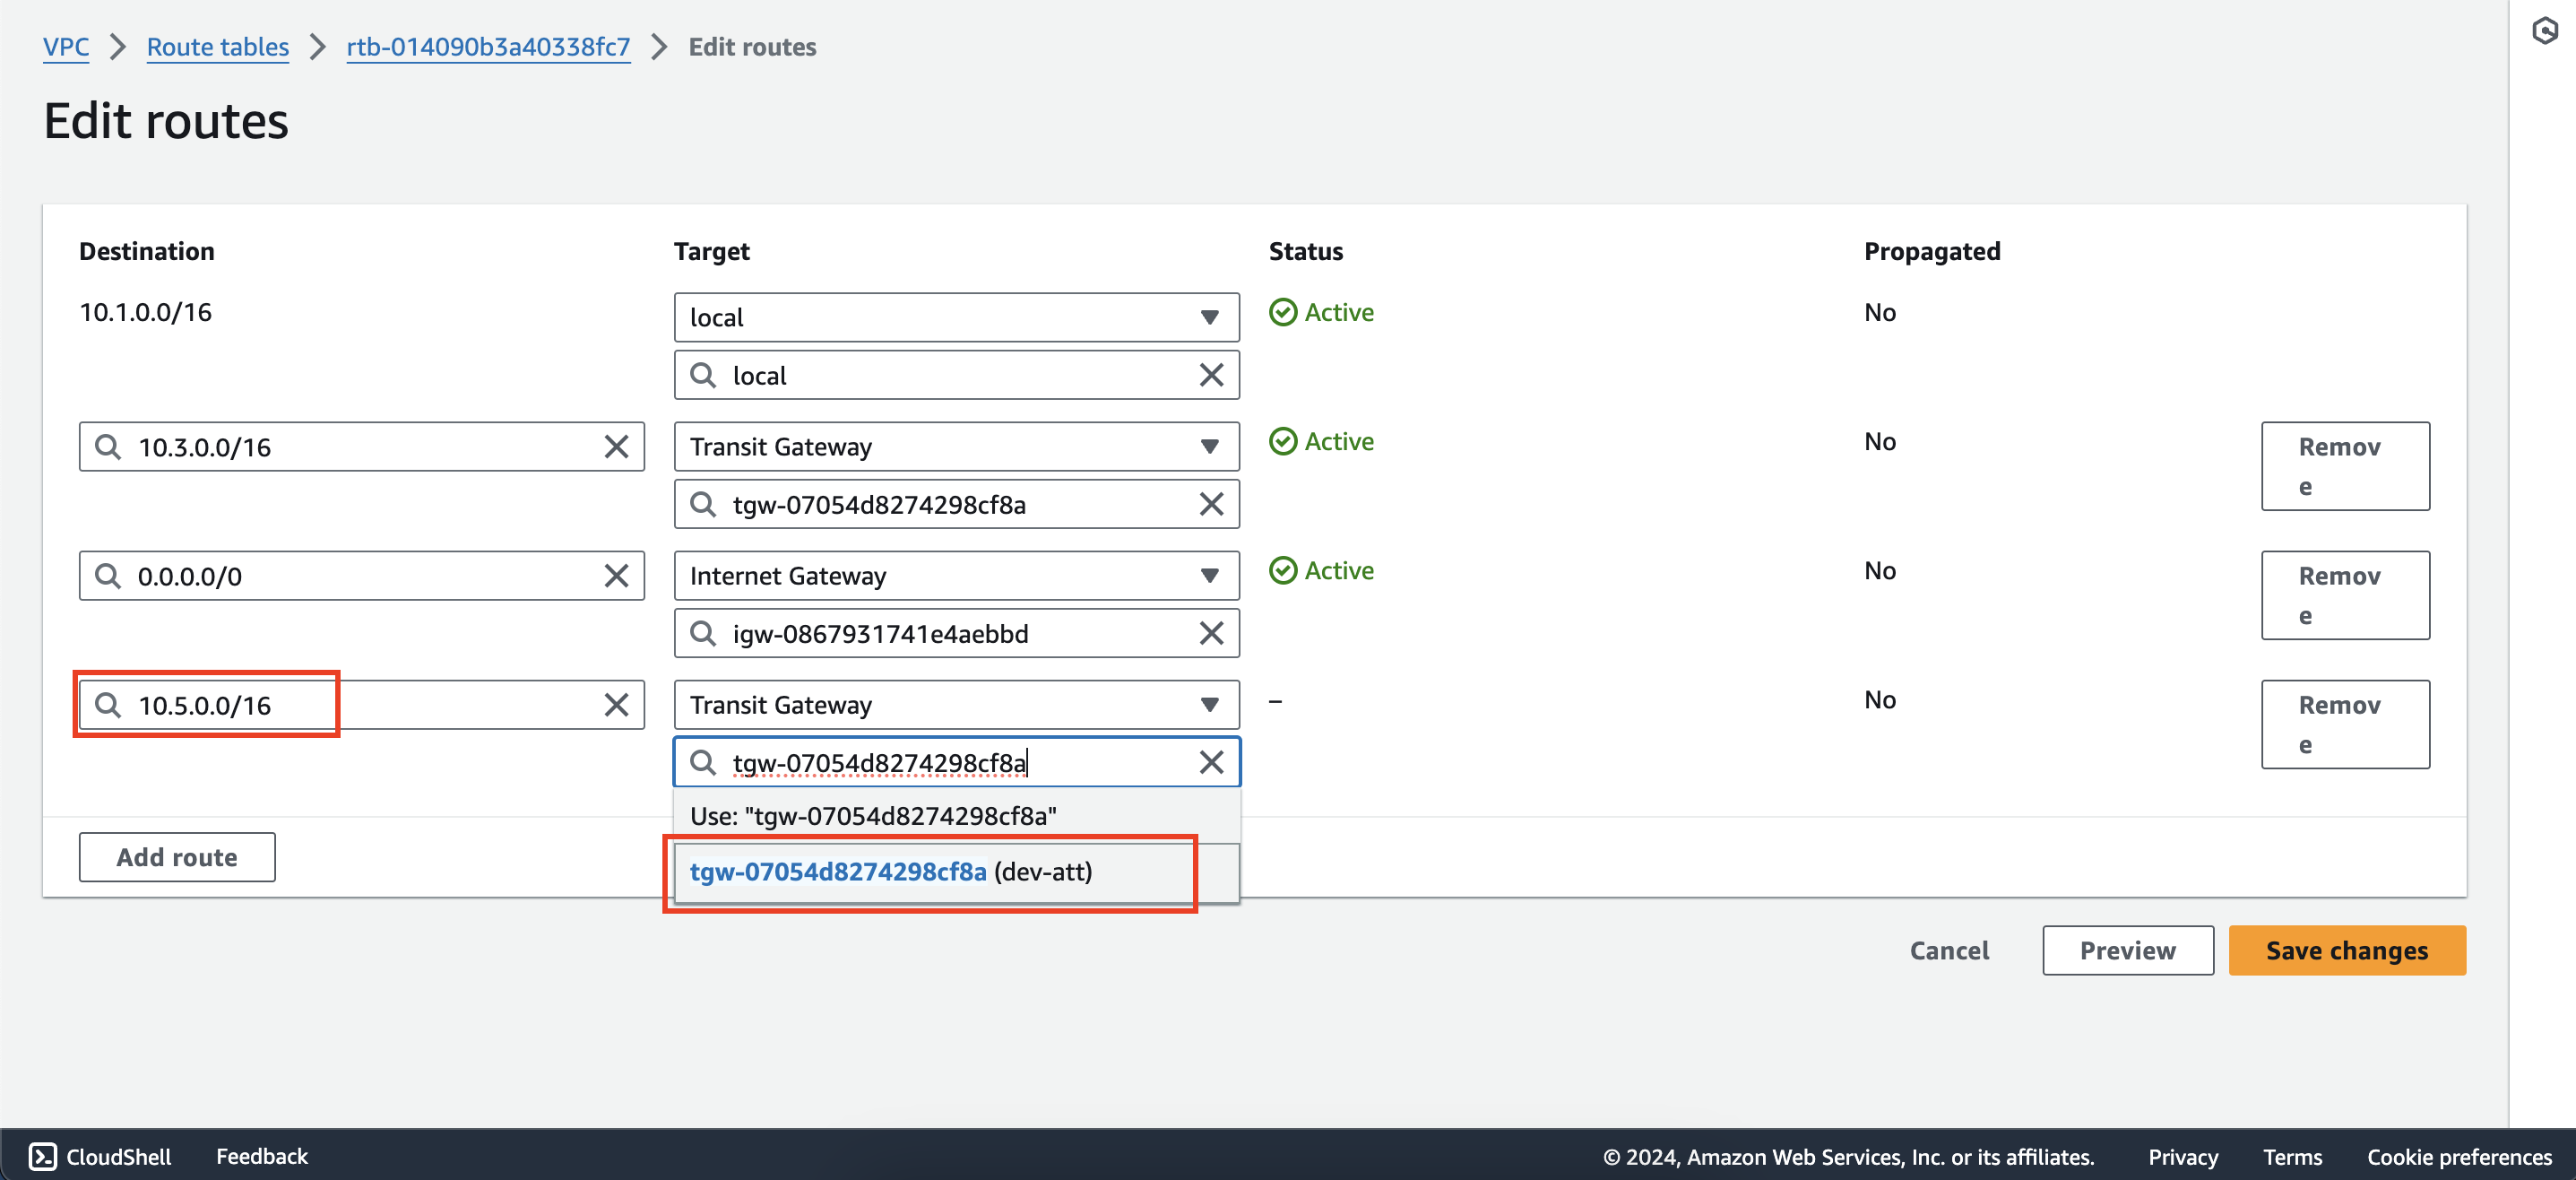
- Within the Route tables interface of first account, select dev-rtb and add a new route with destination
10.5.0.0/16and target is dev-att attachment.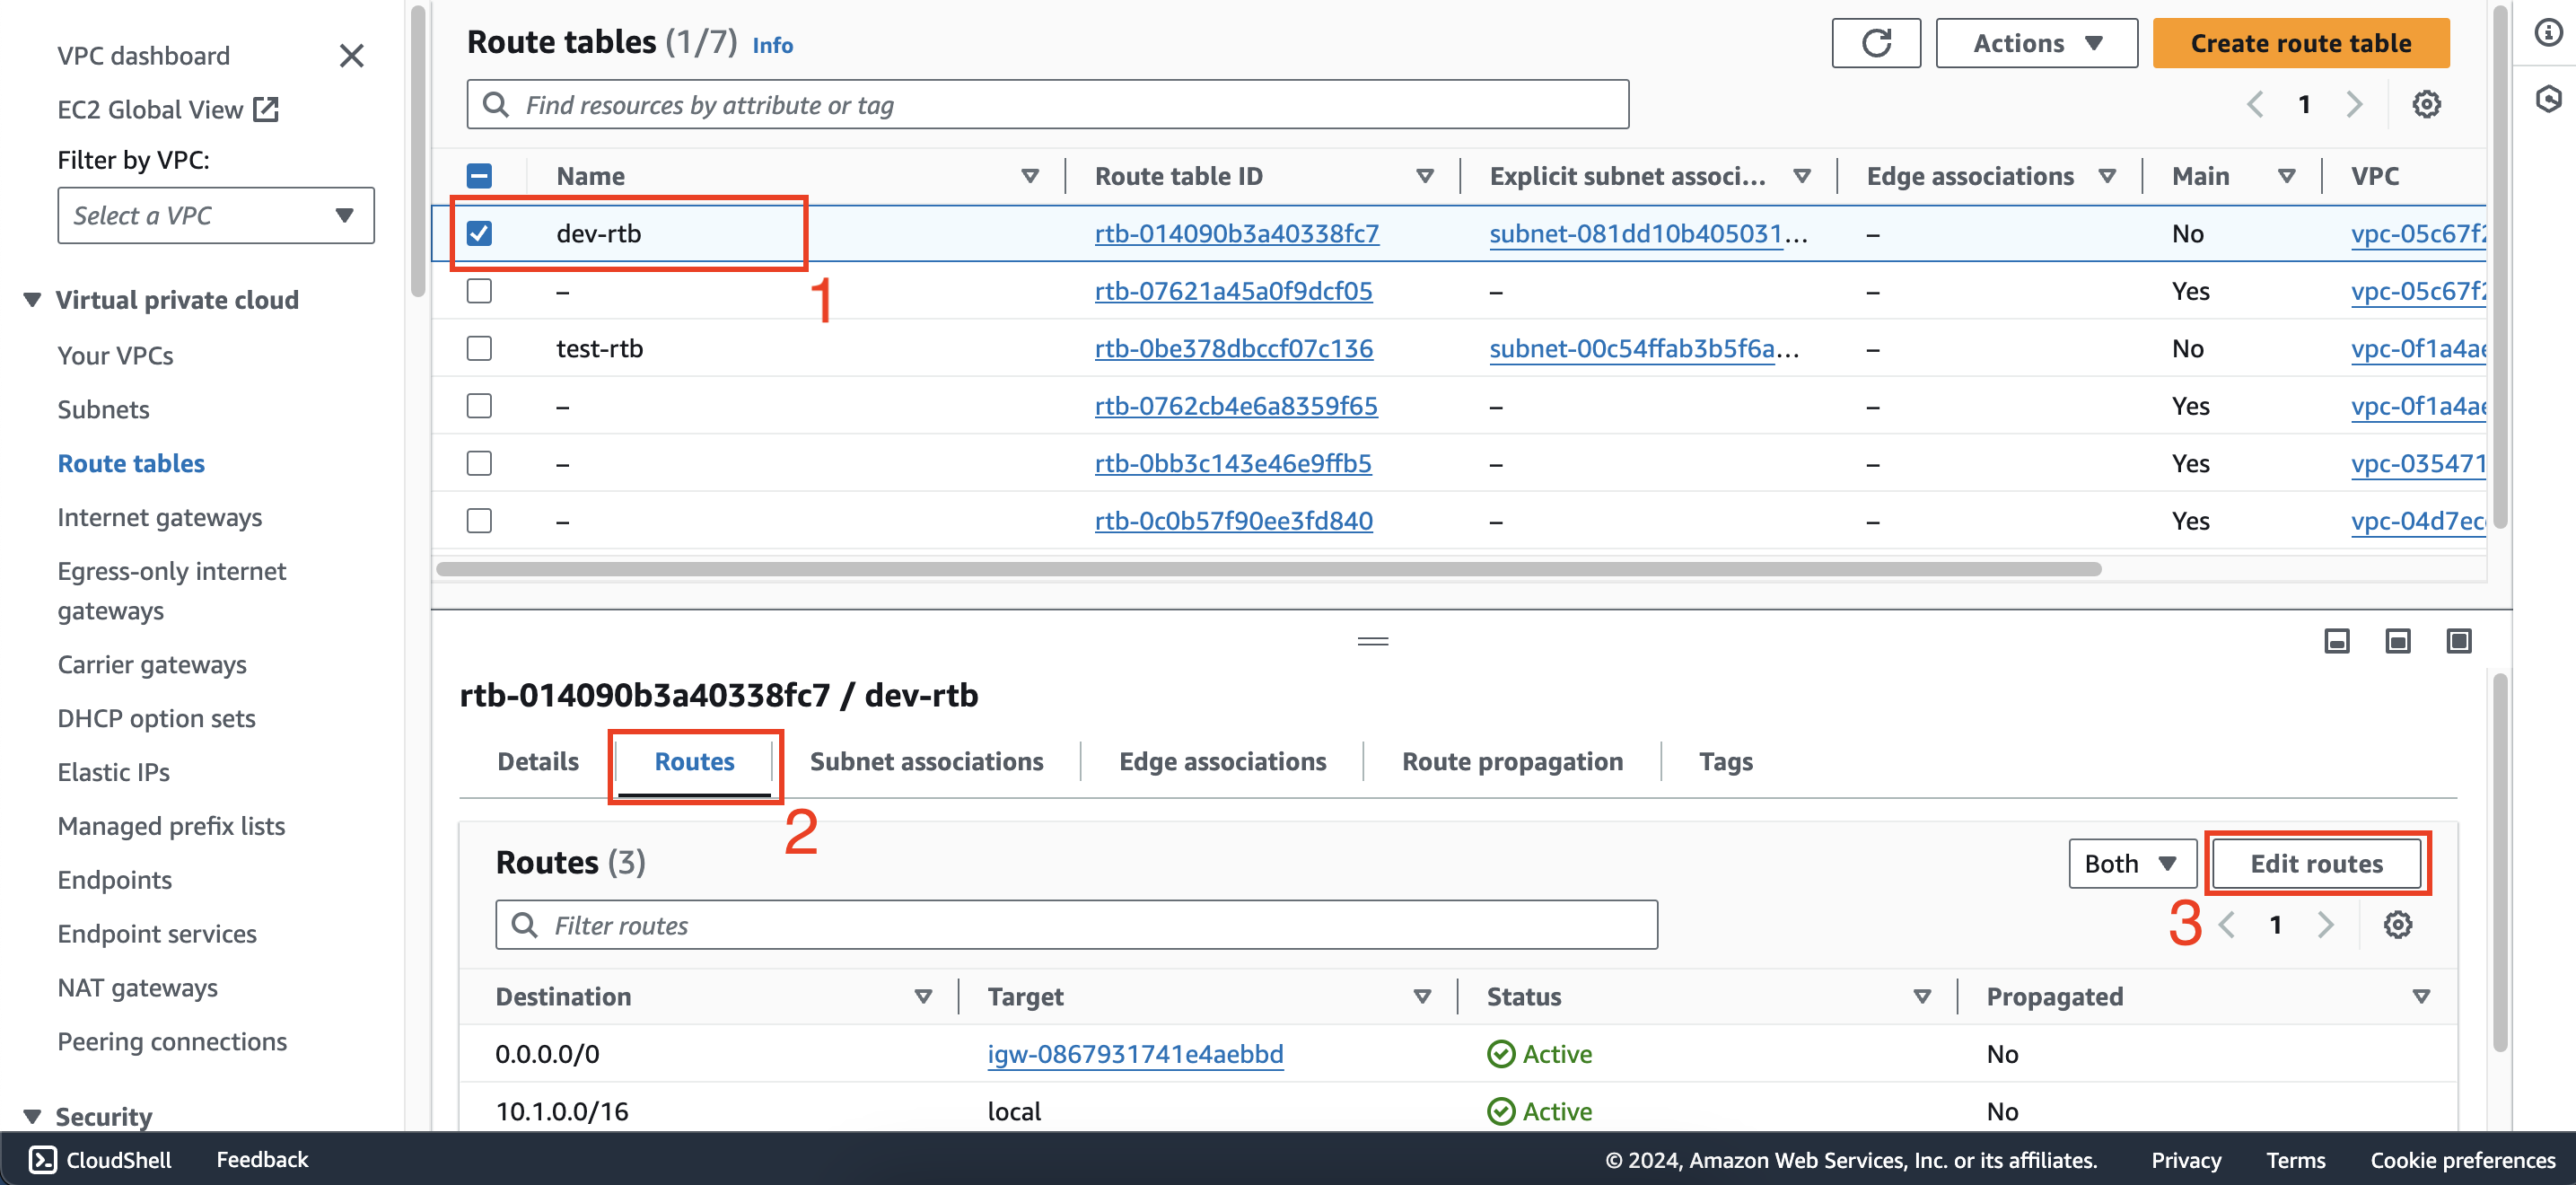
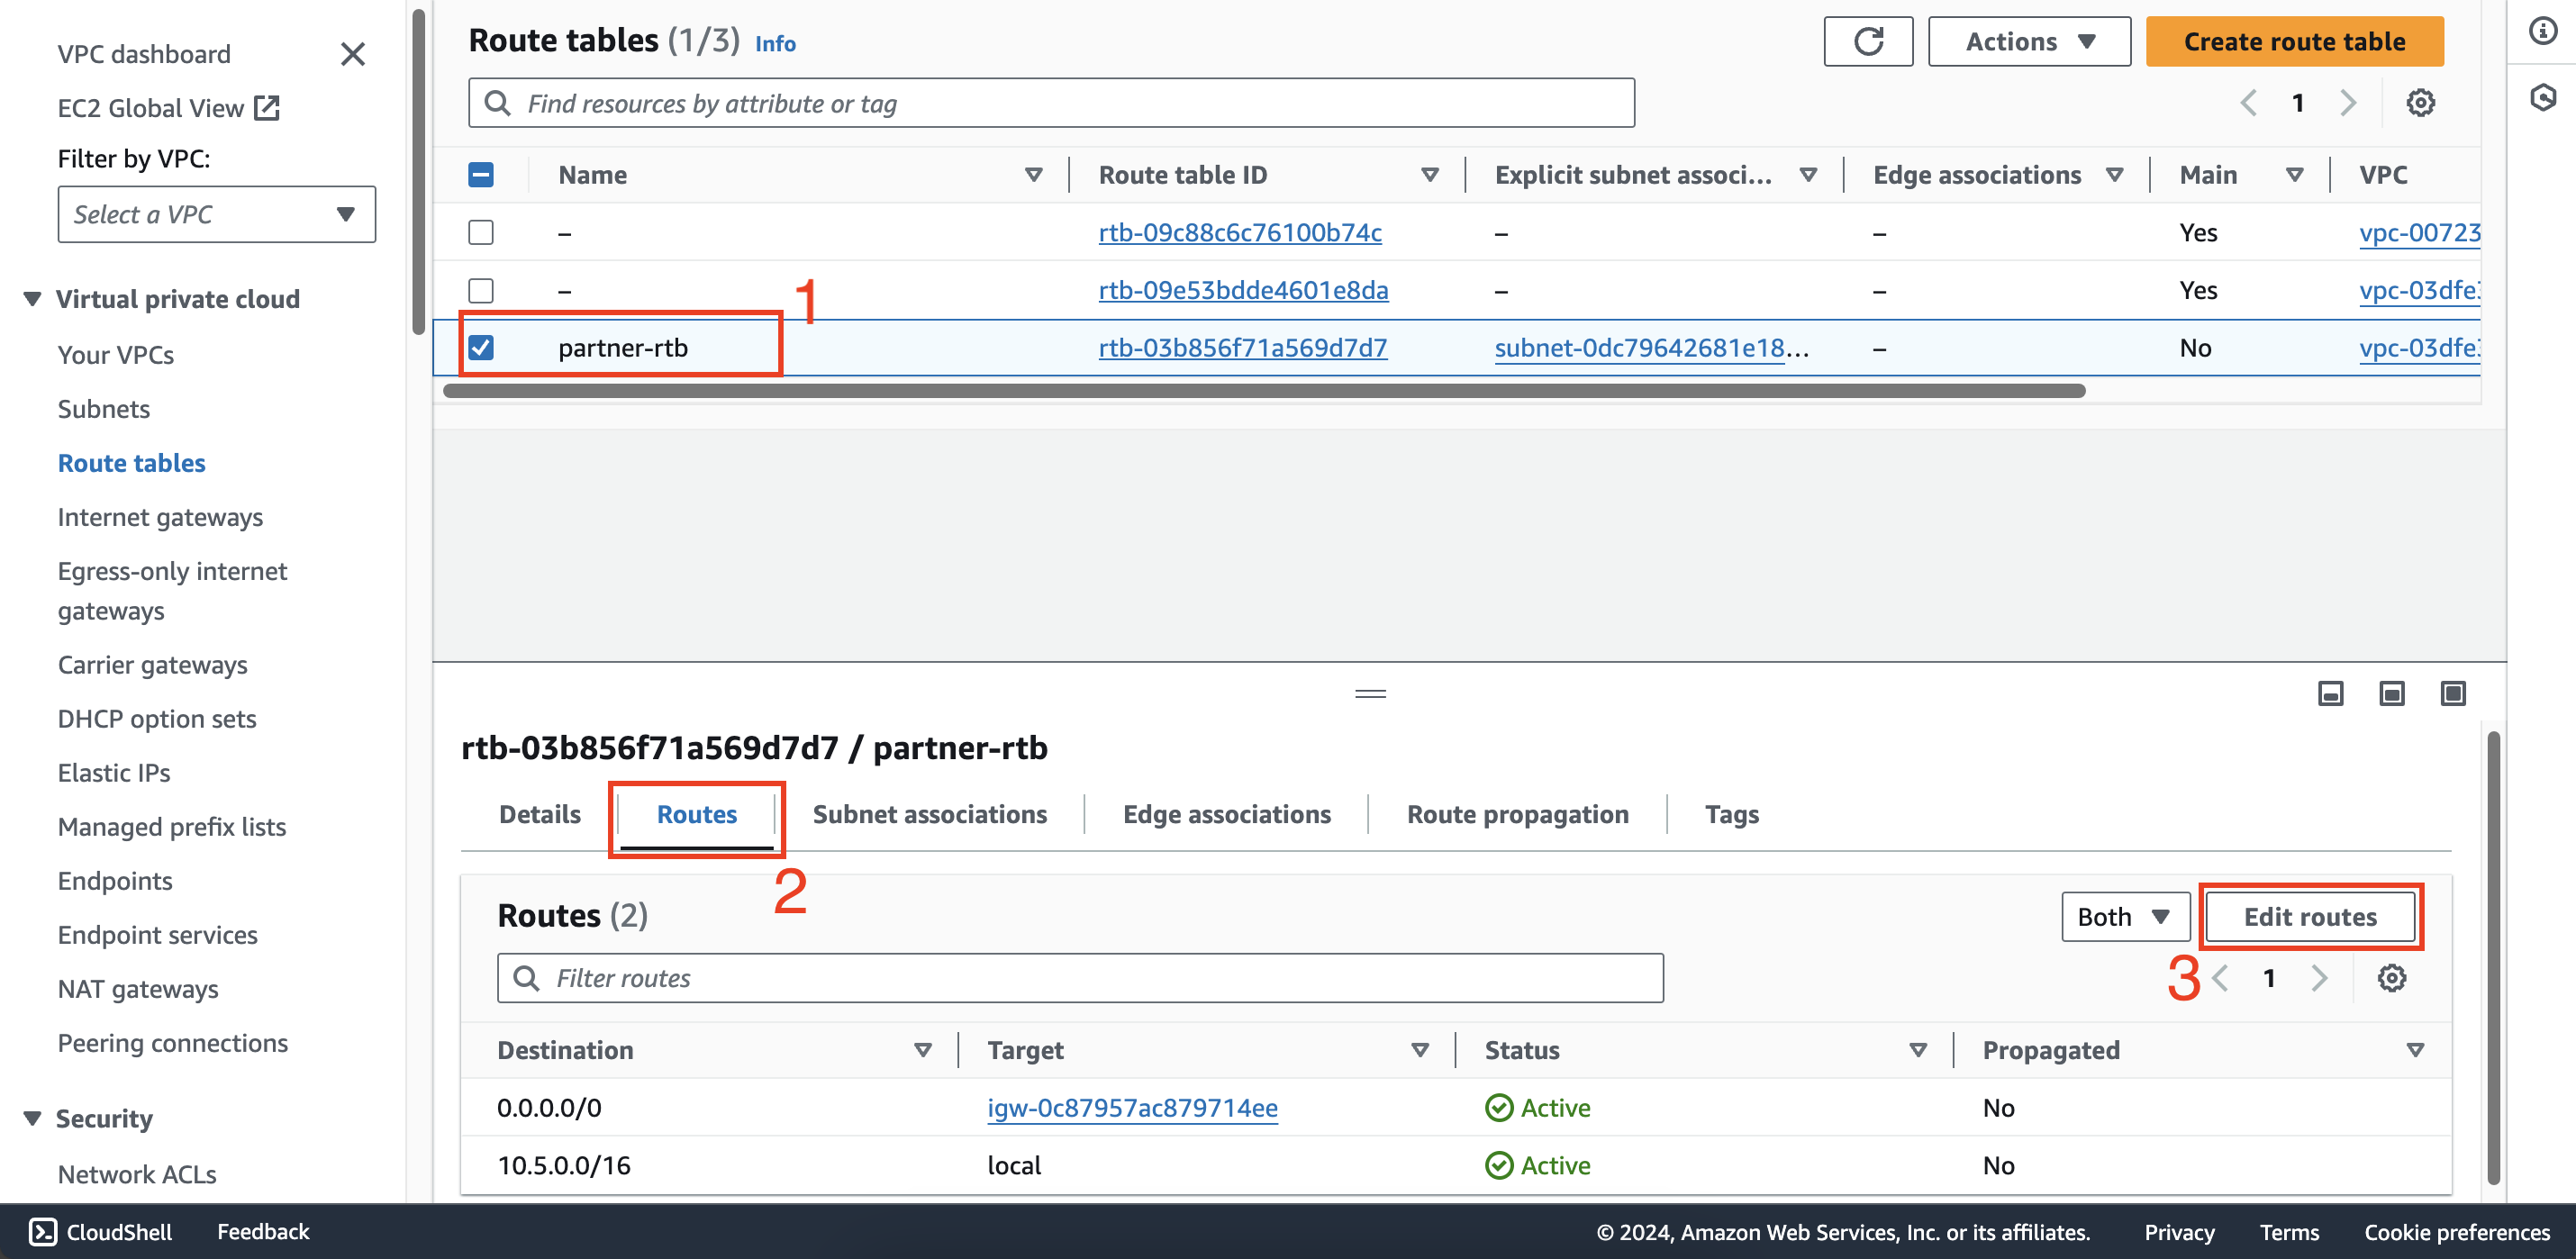
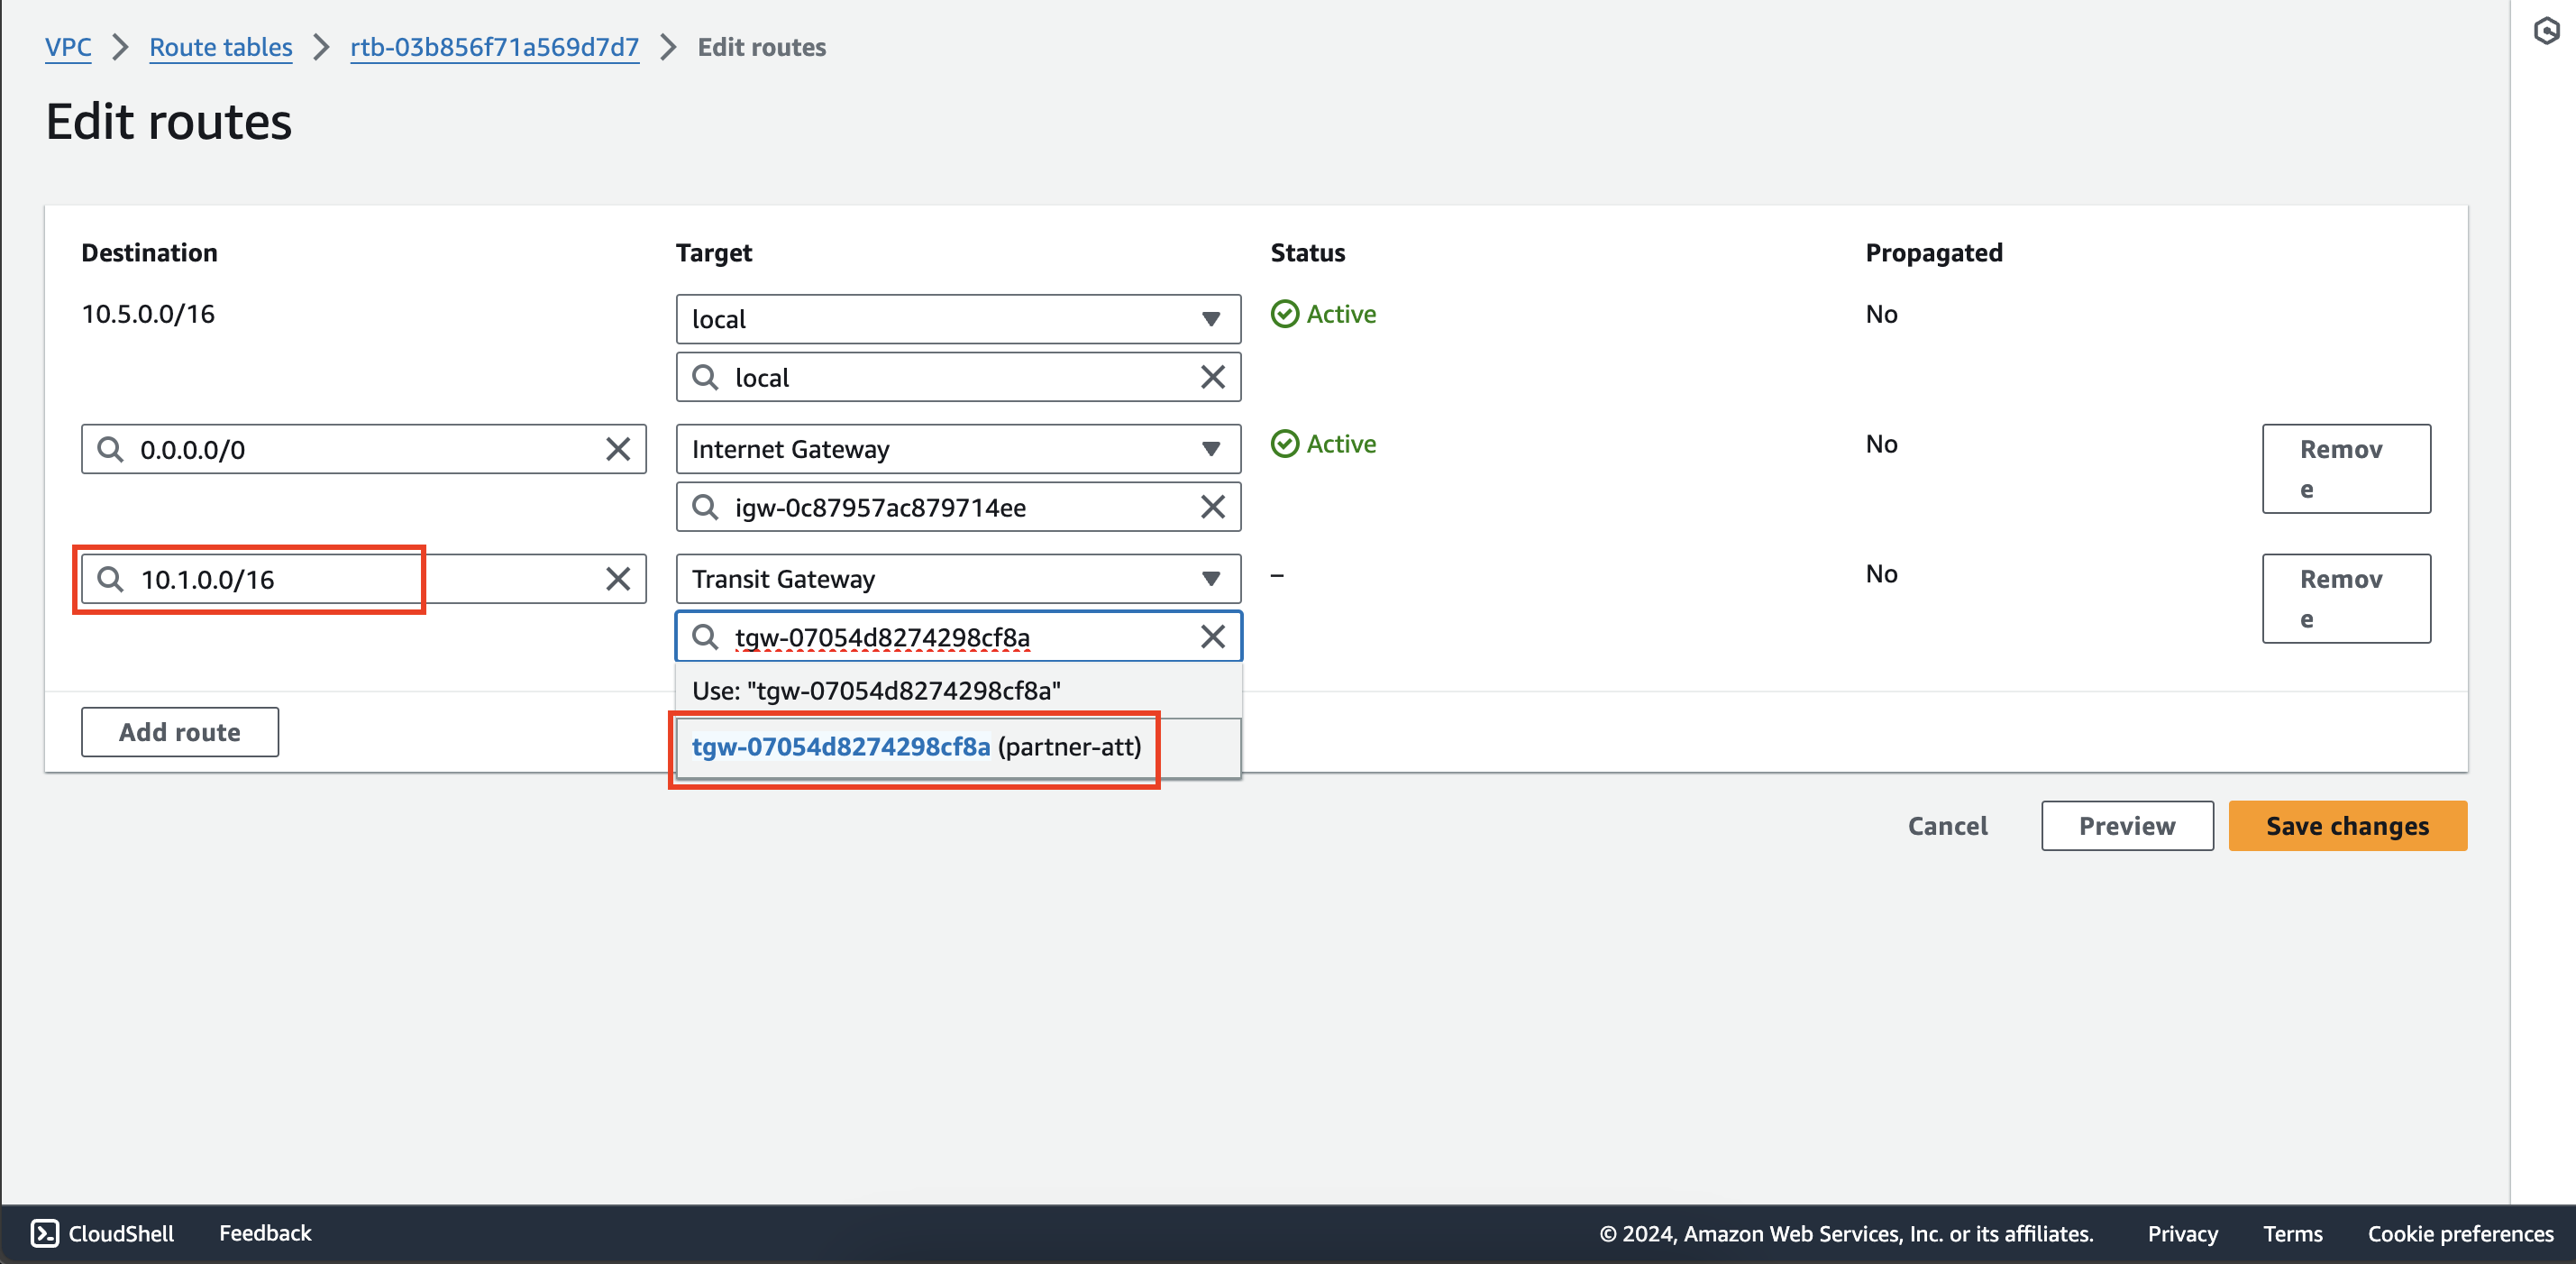
Repeat the above step to add a route with destination 10.1.0.0/16 and target as partner-att attachment to the route
table partner-rtb in second account.
- Check connection between instances
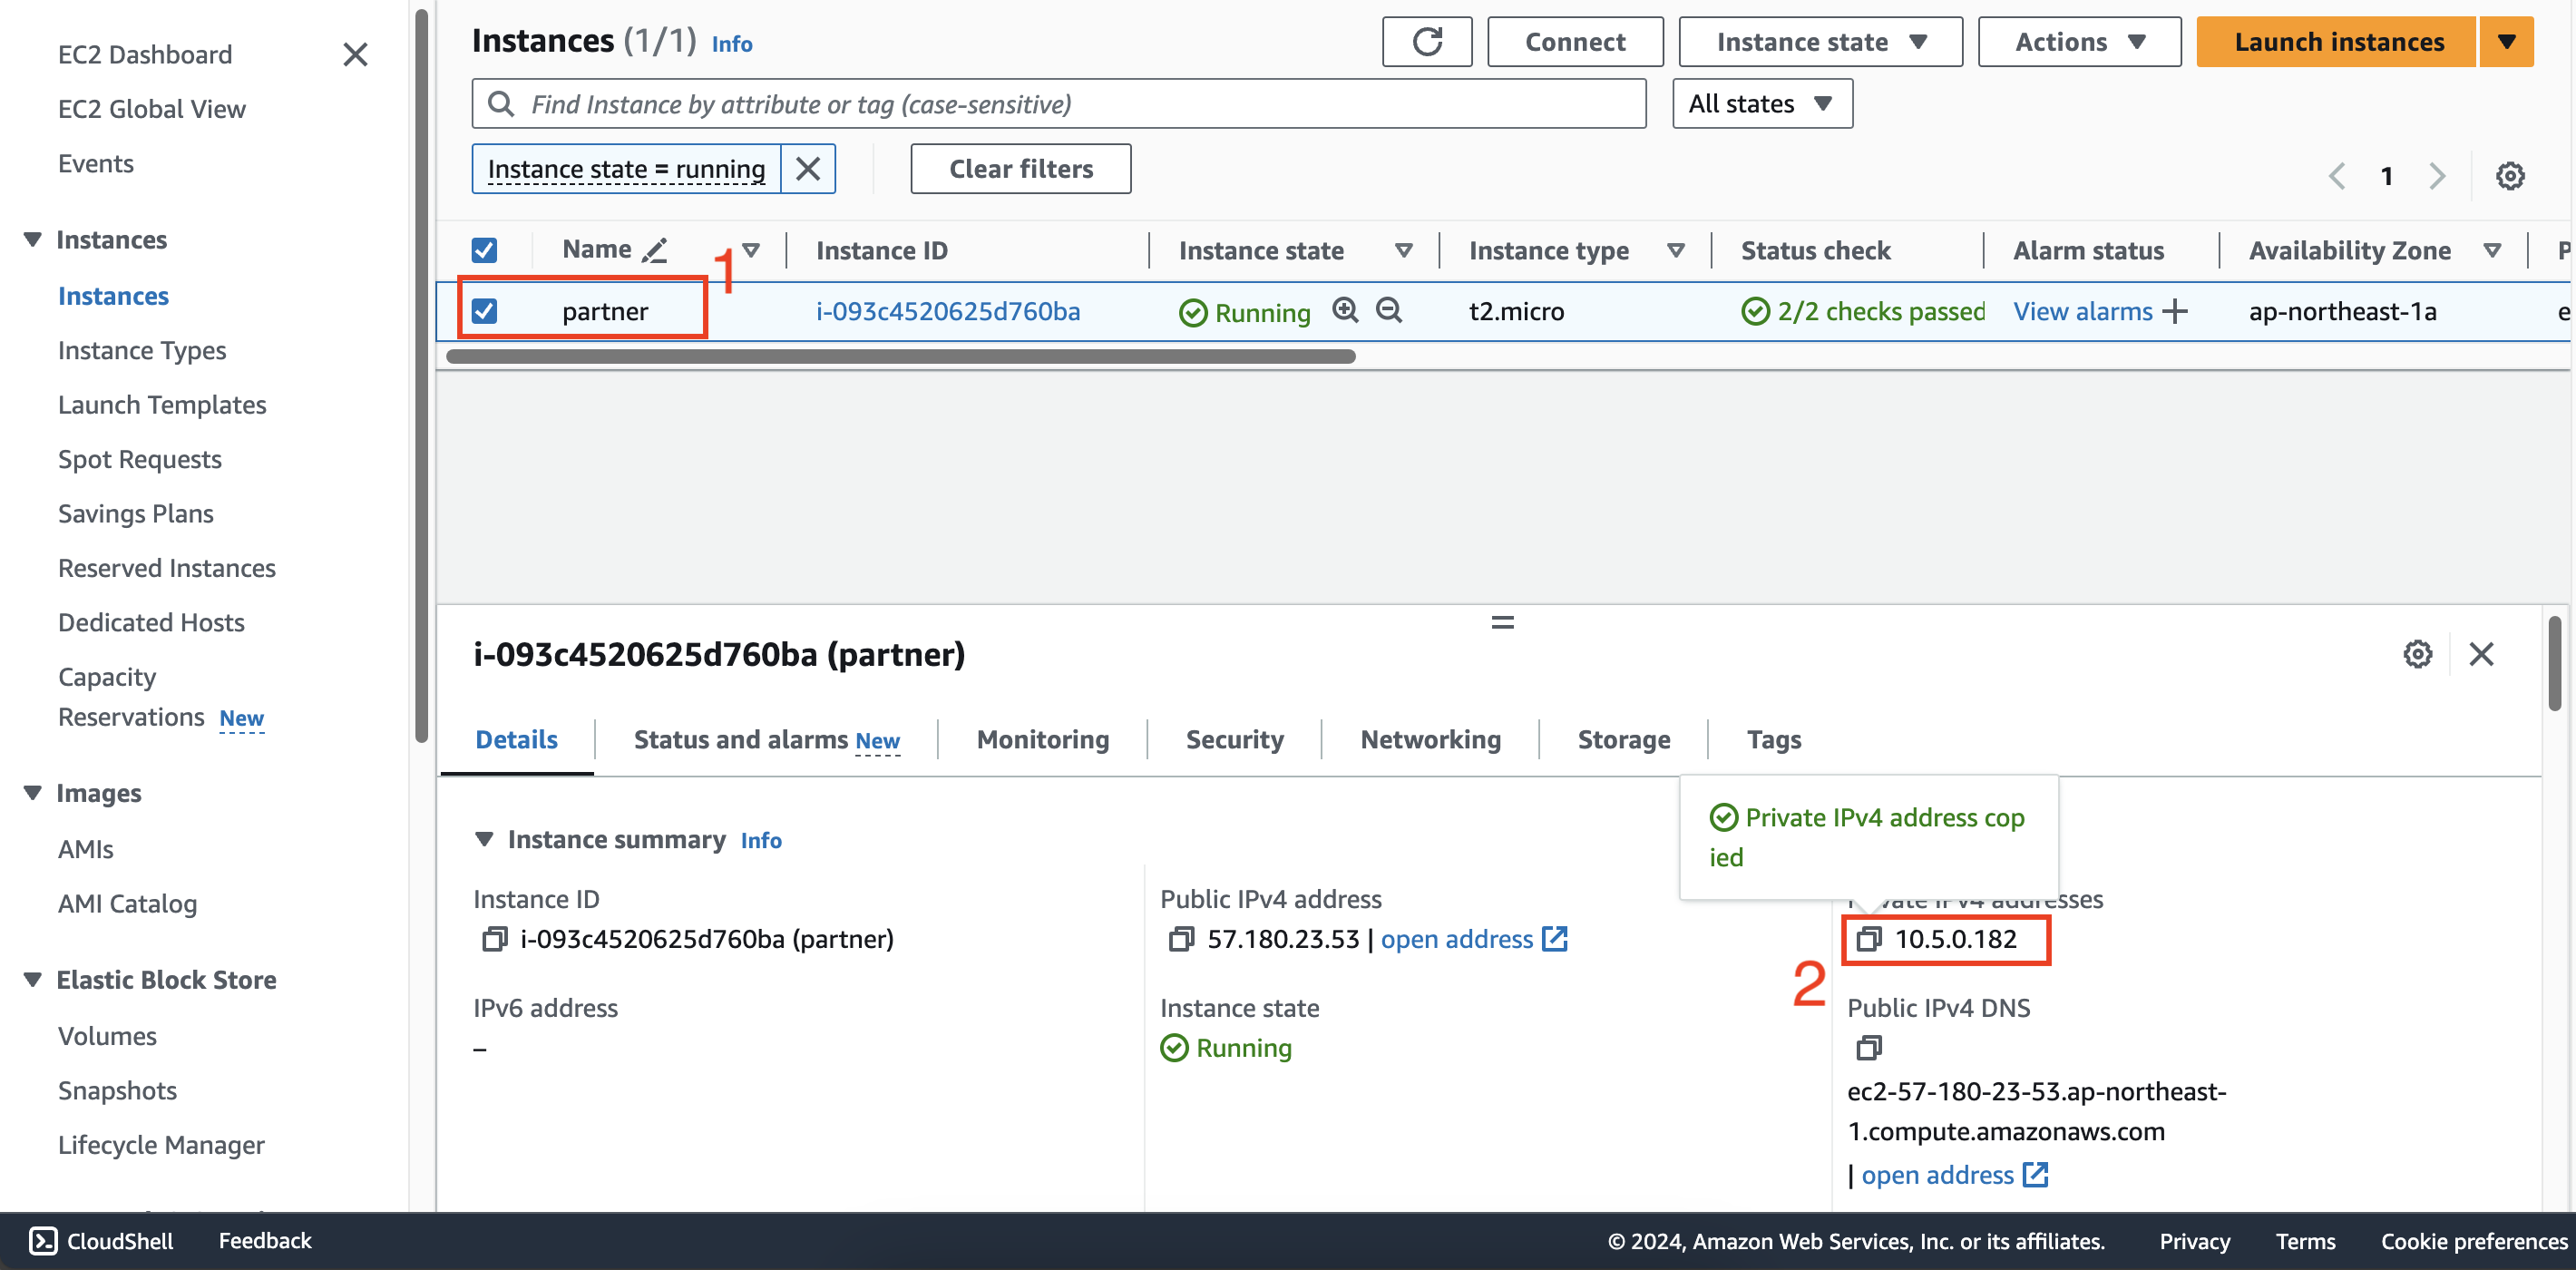
Access the EC2 service of second account, select the partner instance, then copy the private IPv4.
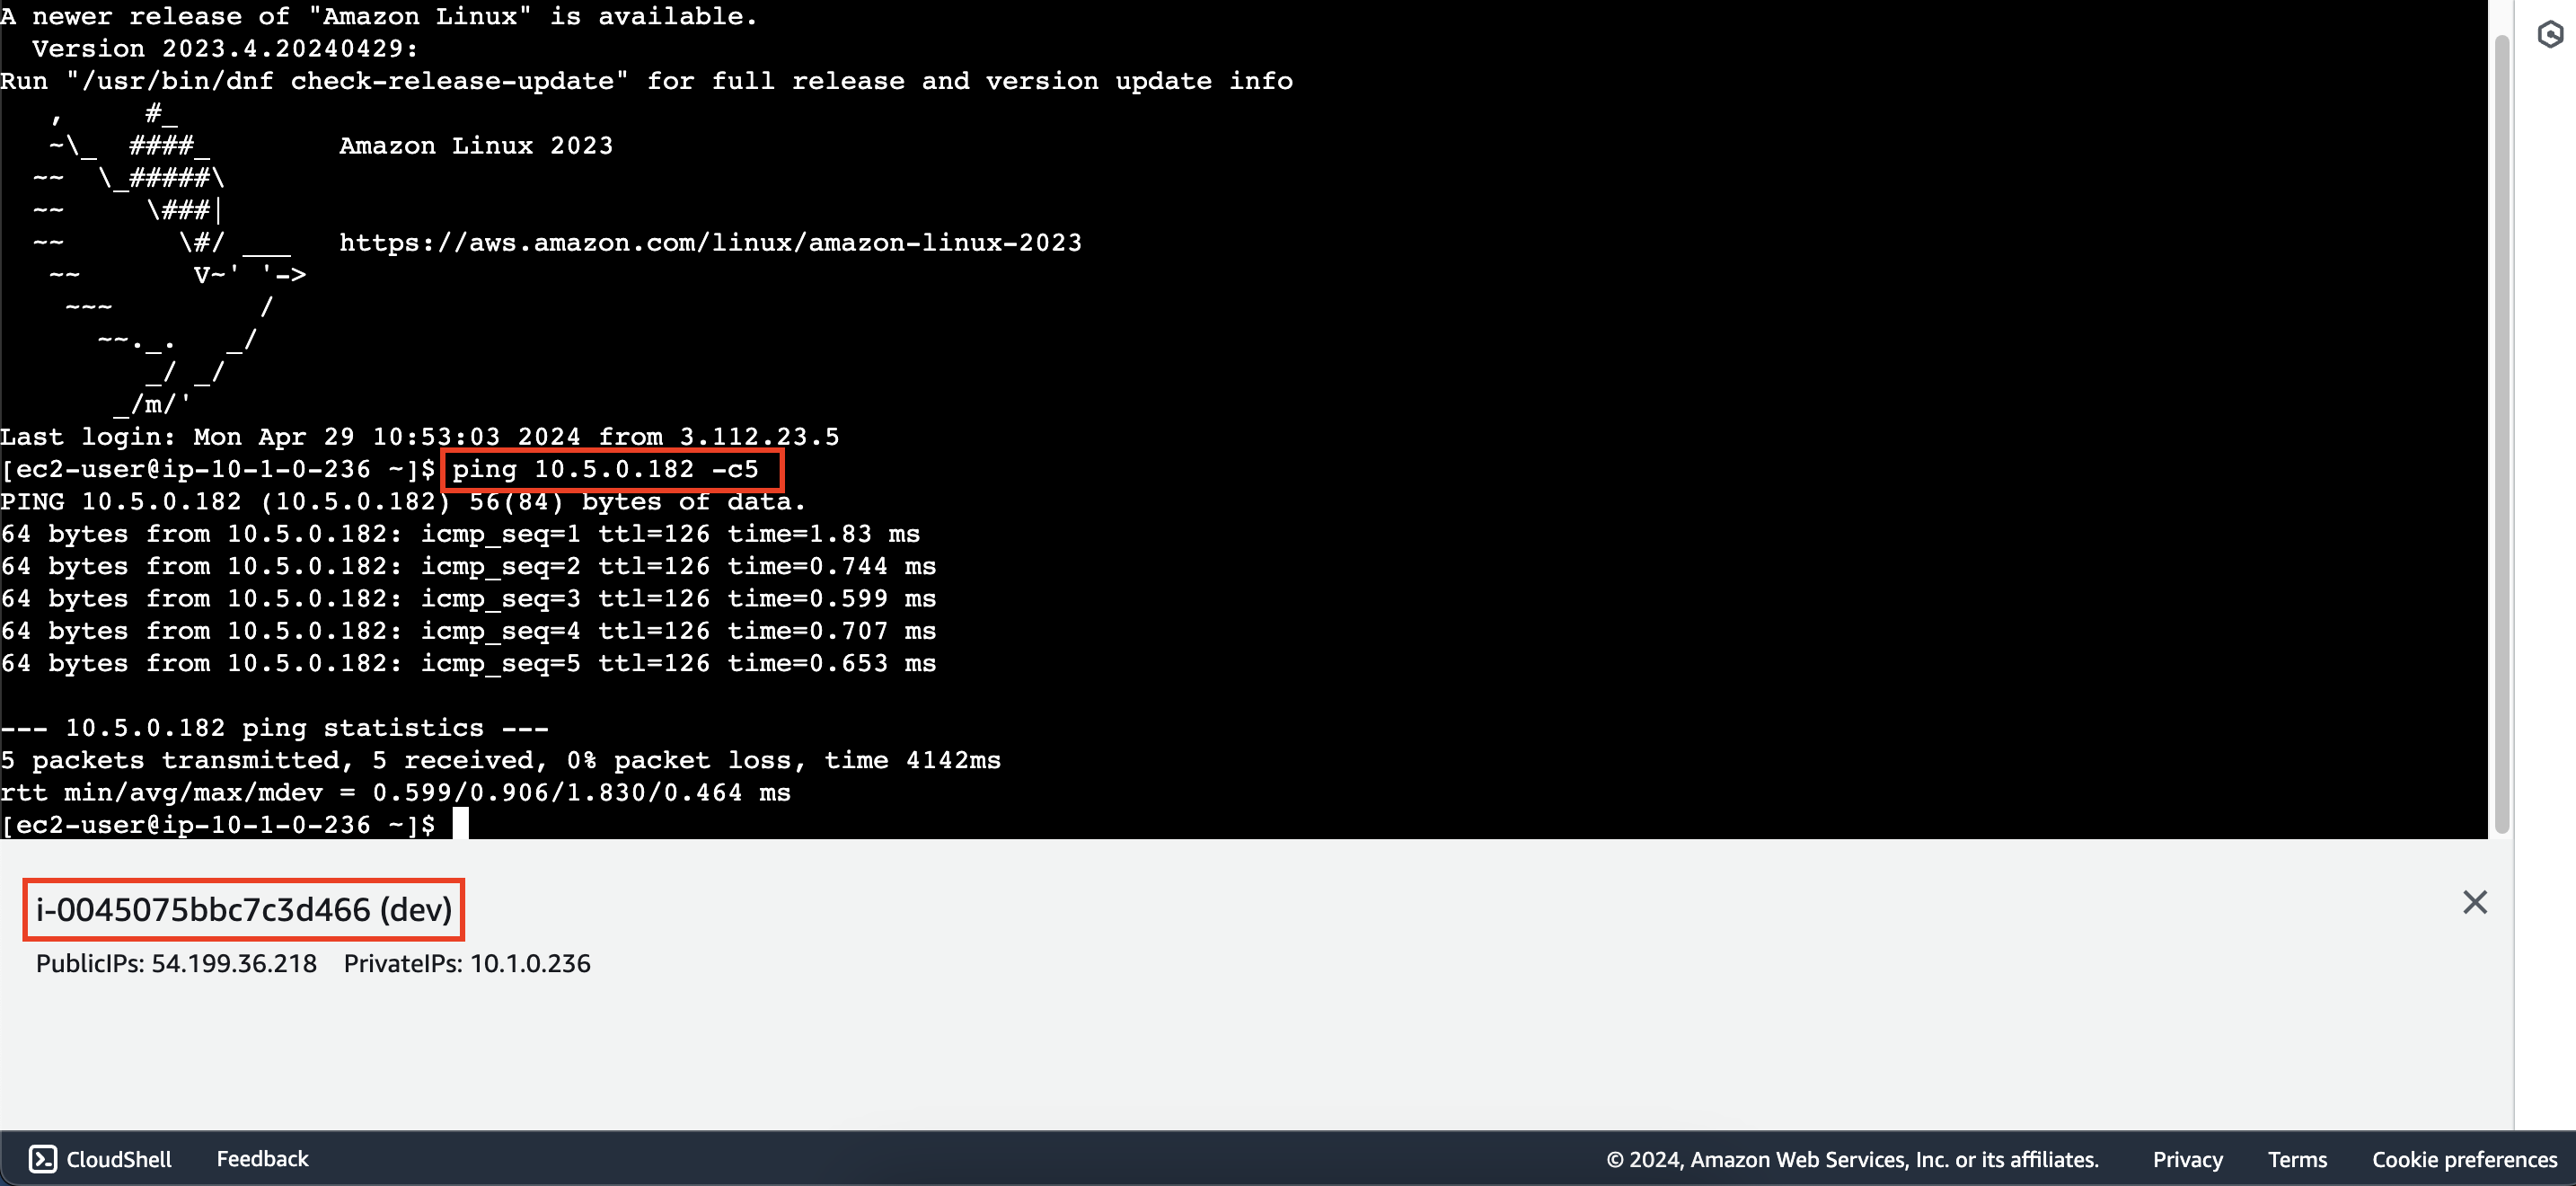
Connect to the dev instance using EC2 instance connect and run the following command to test the connection.
ping <partner_instance_private_ipv4> -c5
The result show that we have successfully configured. You can connect from the partner instance to dev instance as well.
Practice yourself
Try to configure routing to connect Test VPC and Partner VPC to better understand the process.