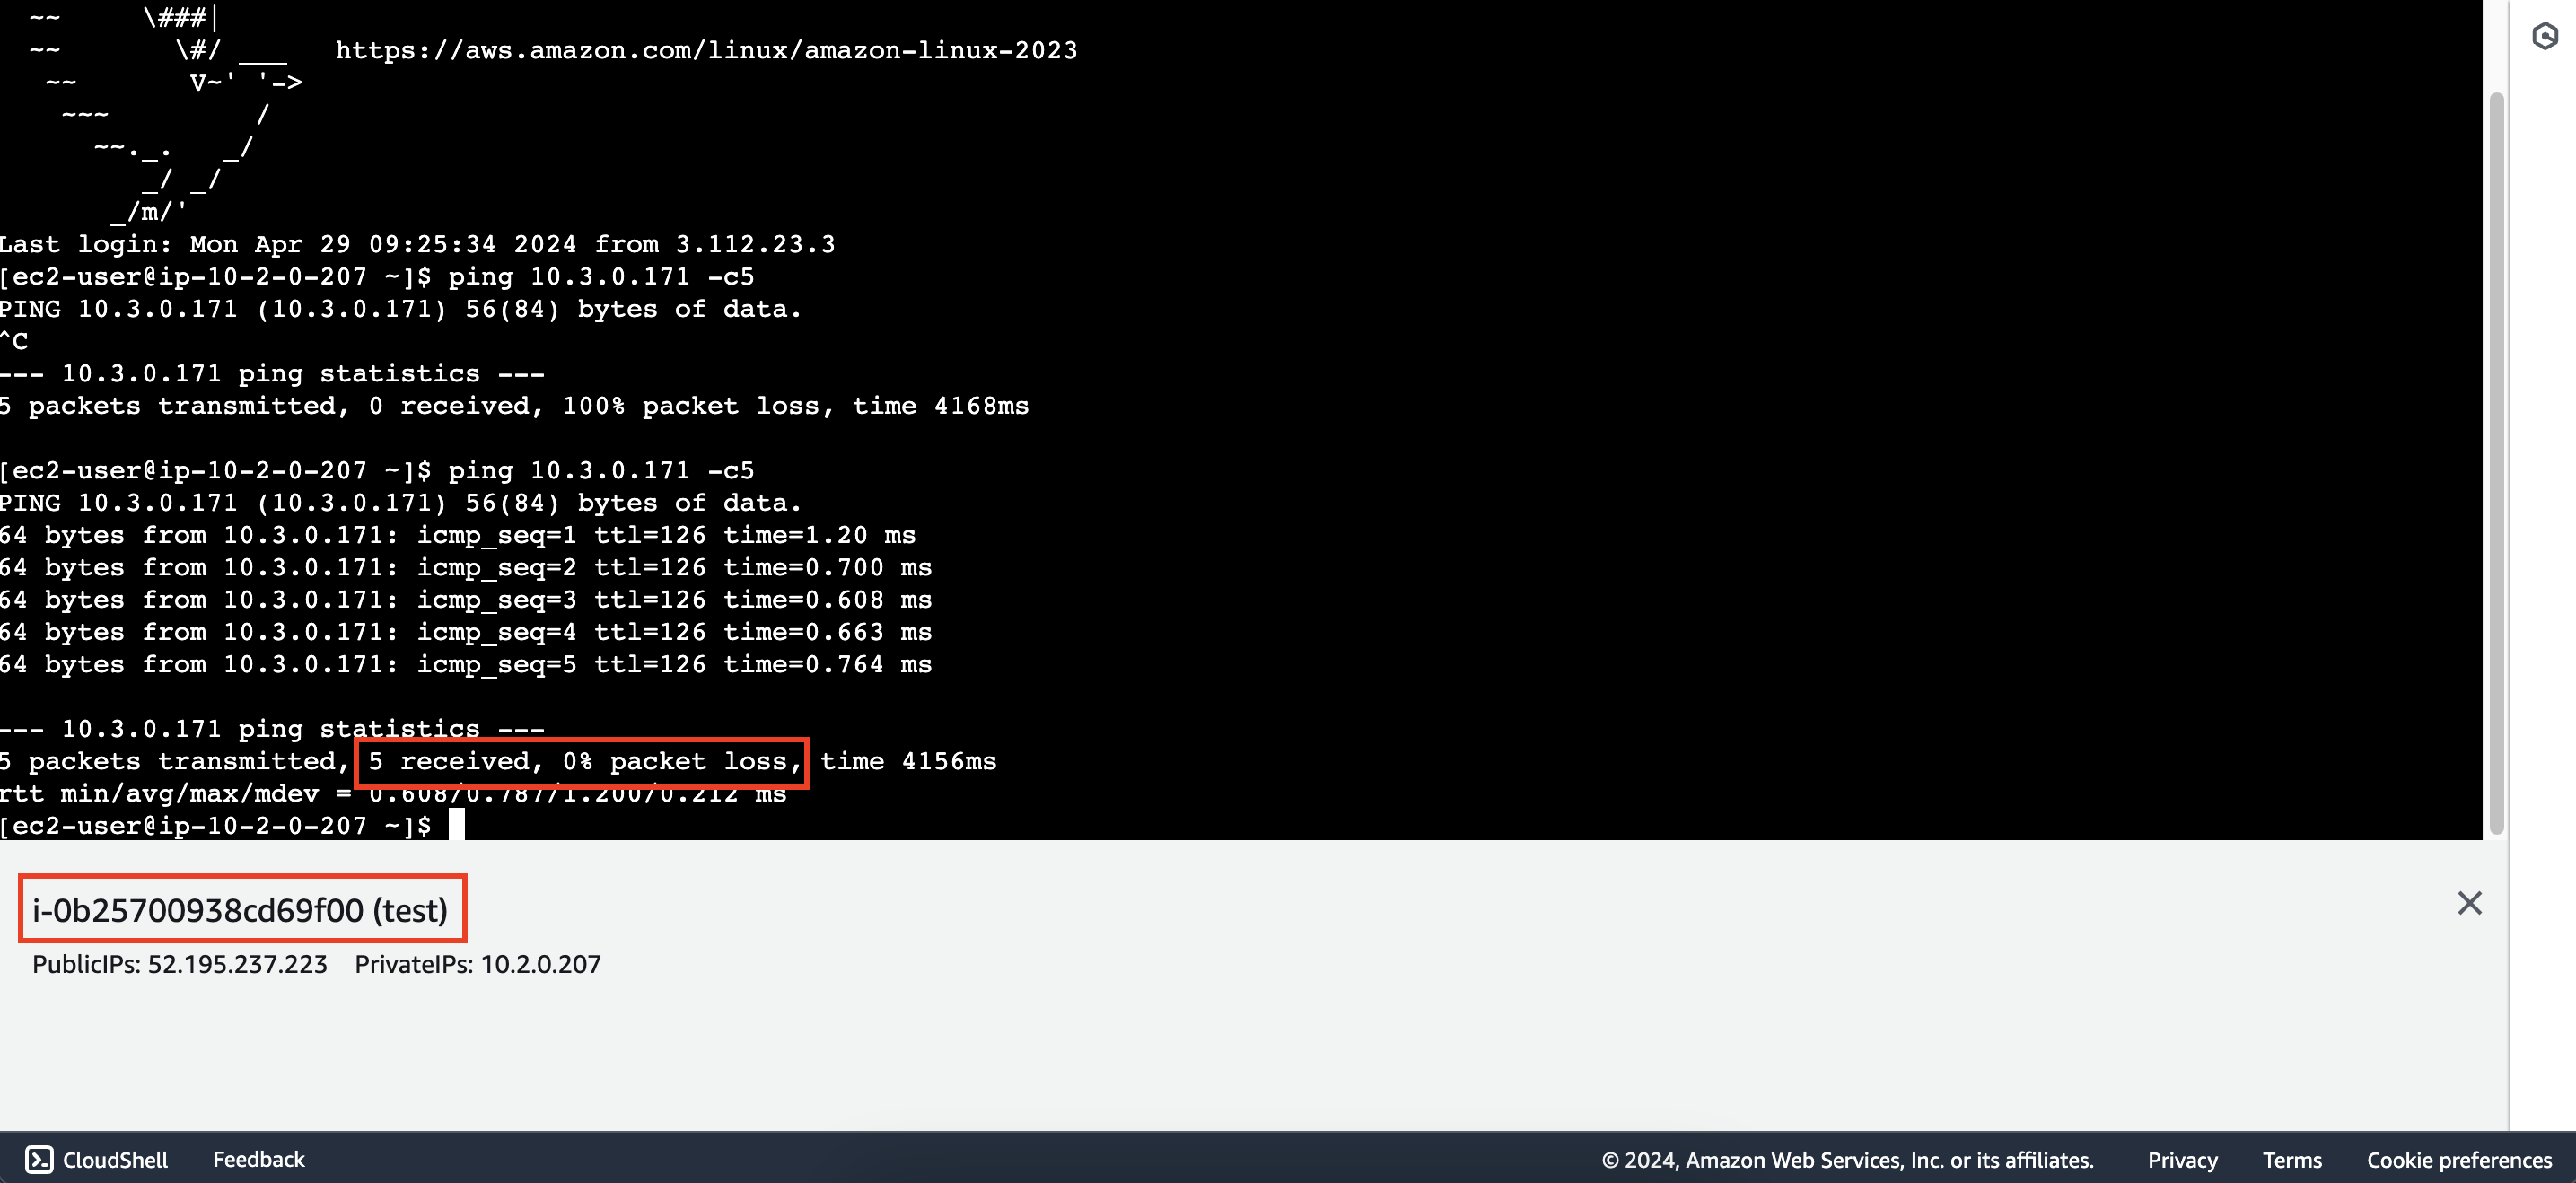
Multiple route tables
From this section forward, we will transition the AWS Transit Gateway configuration from utilizing a single route table to employing multiple route tables.
As mentioned previously, each newly created attachment is automatically associated with the default route table. While this simplifies initial configuration, it can lead to complex, cumbersome, and challenging route table management as the number of attachments and routes grows. Additionally, due to the association and propagation of all attachments, any attachment connected to the Transit Gateway can route to all other attachments. In many scenarios, this is not desirable, and you may instead want finer control over traffic direction for each network component. To achieve this granular control, multiple route tables can be employed.
Configure routing
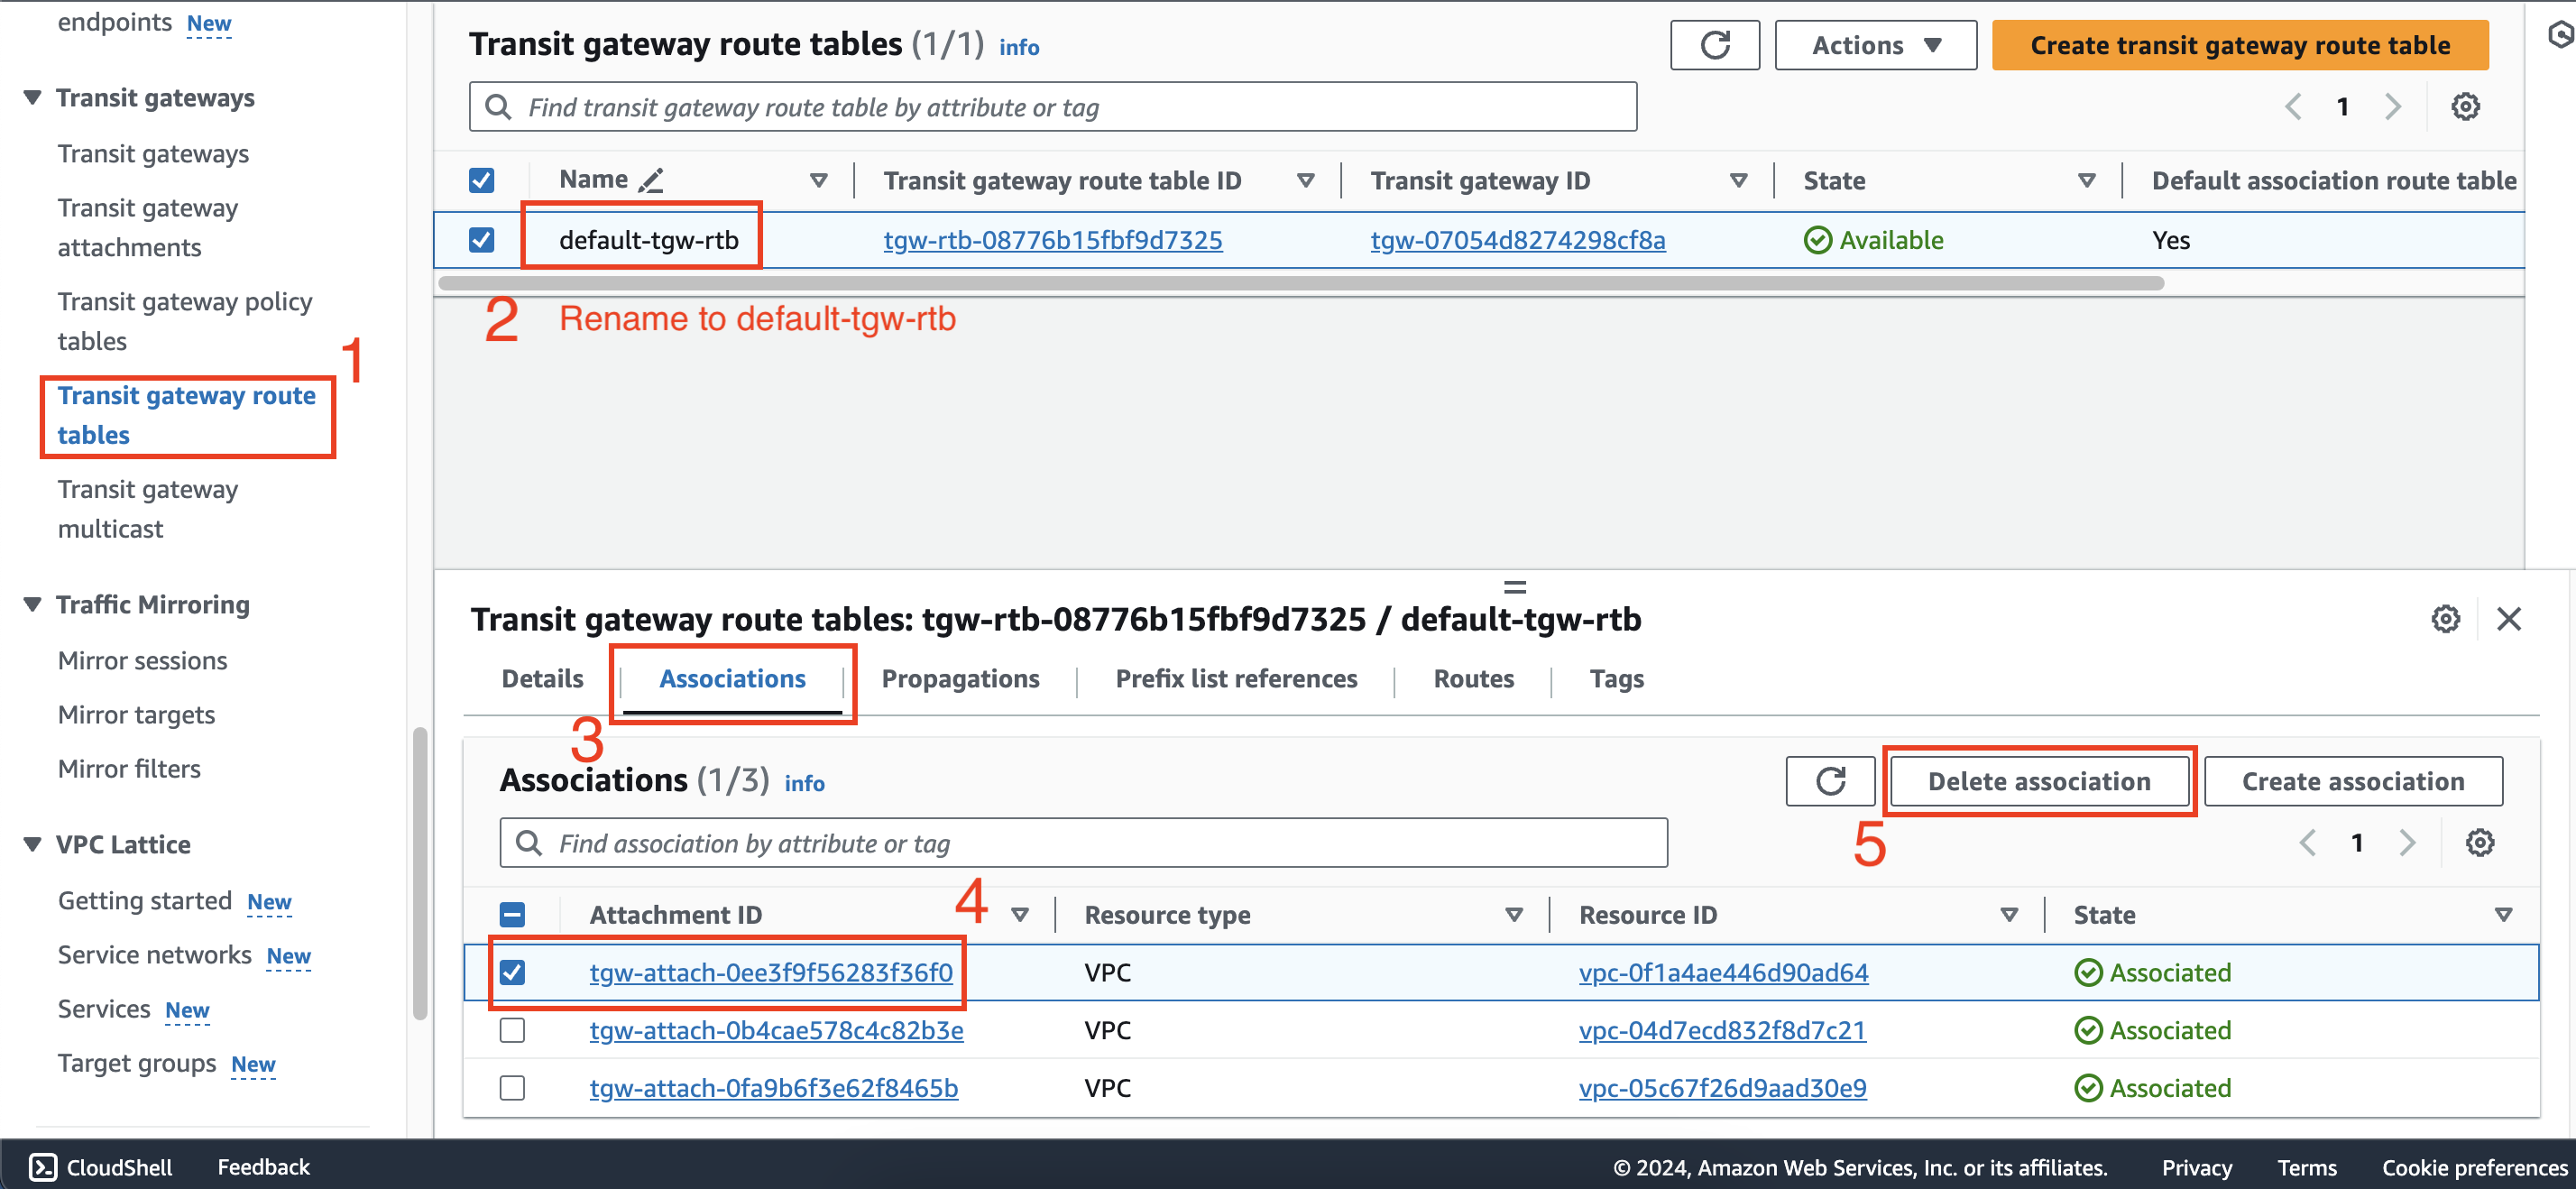
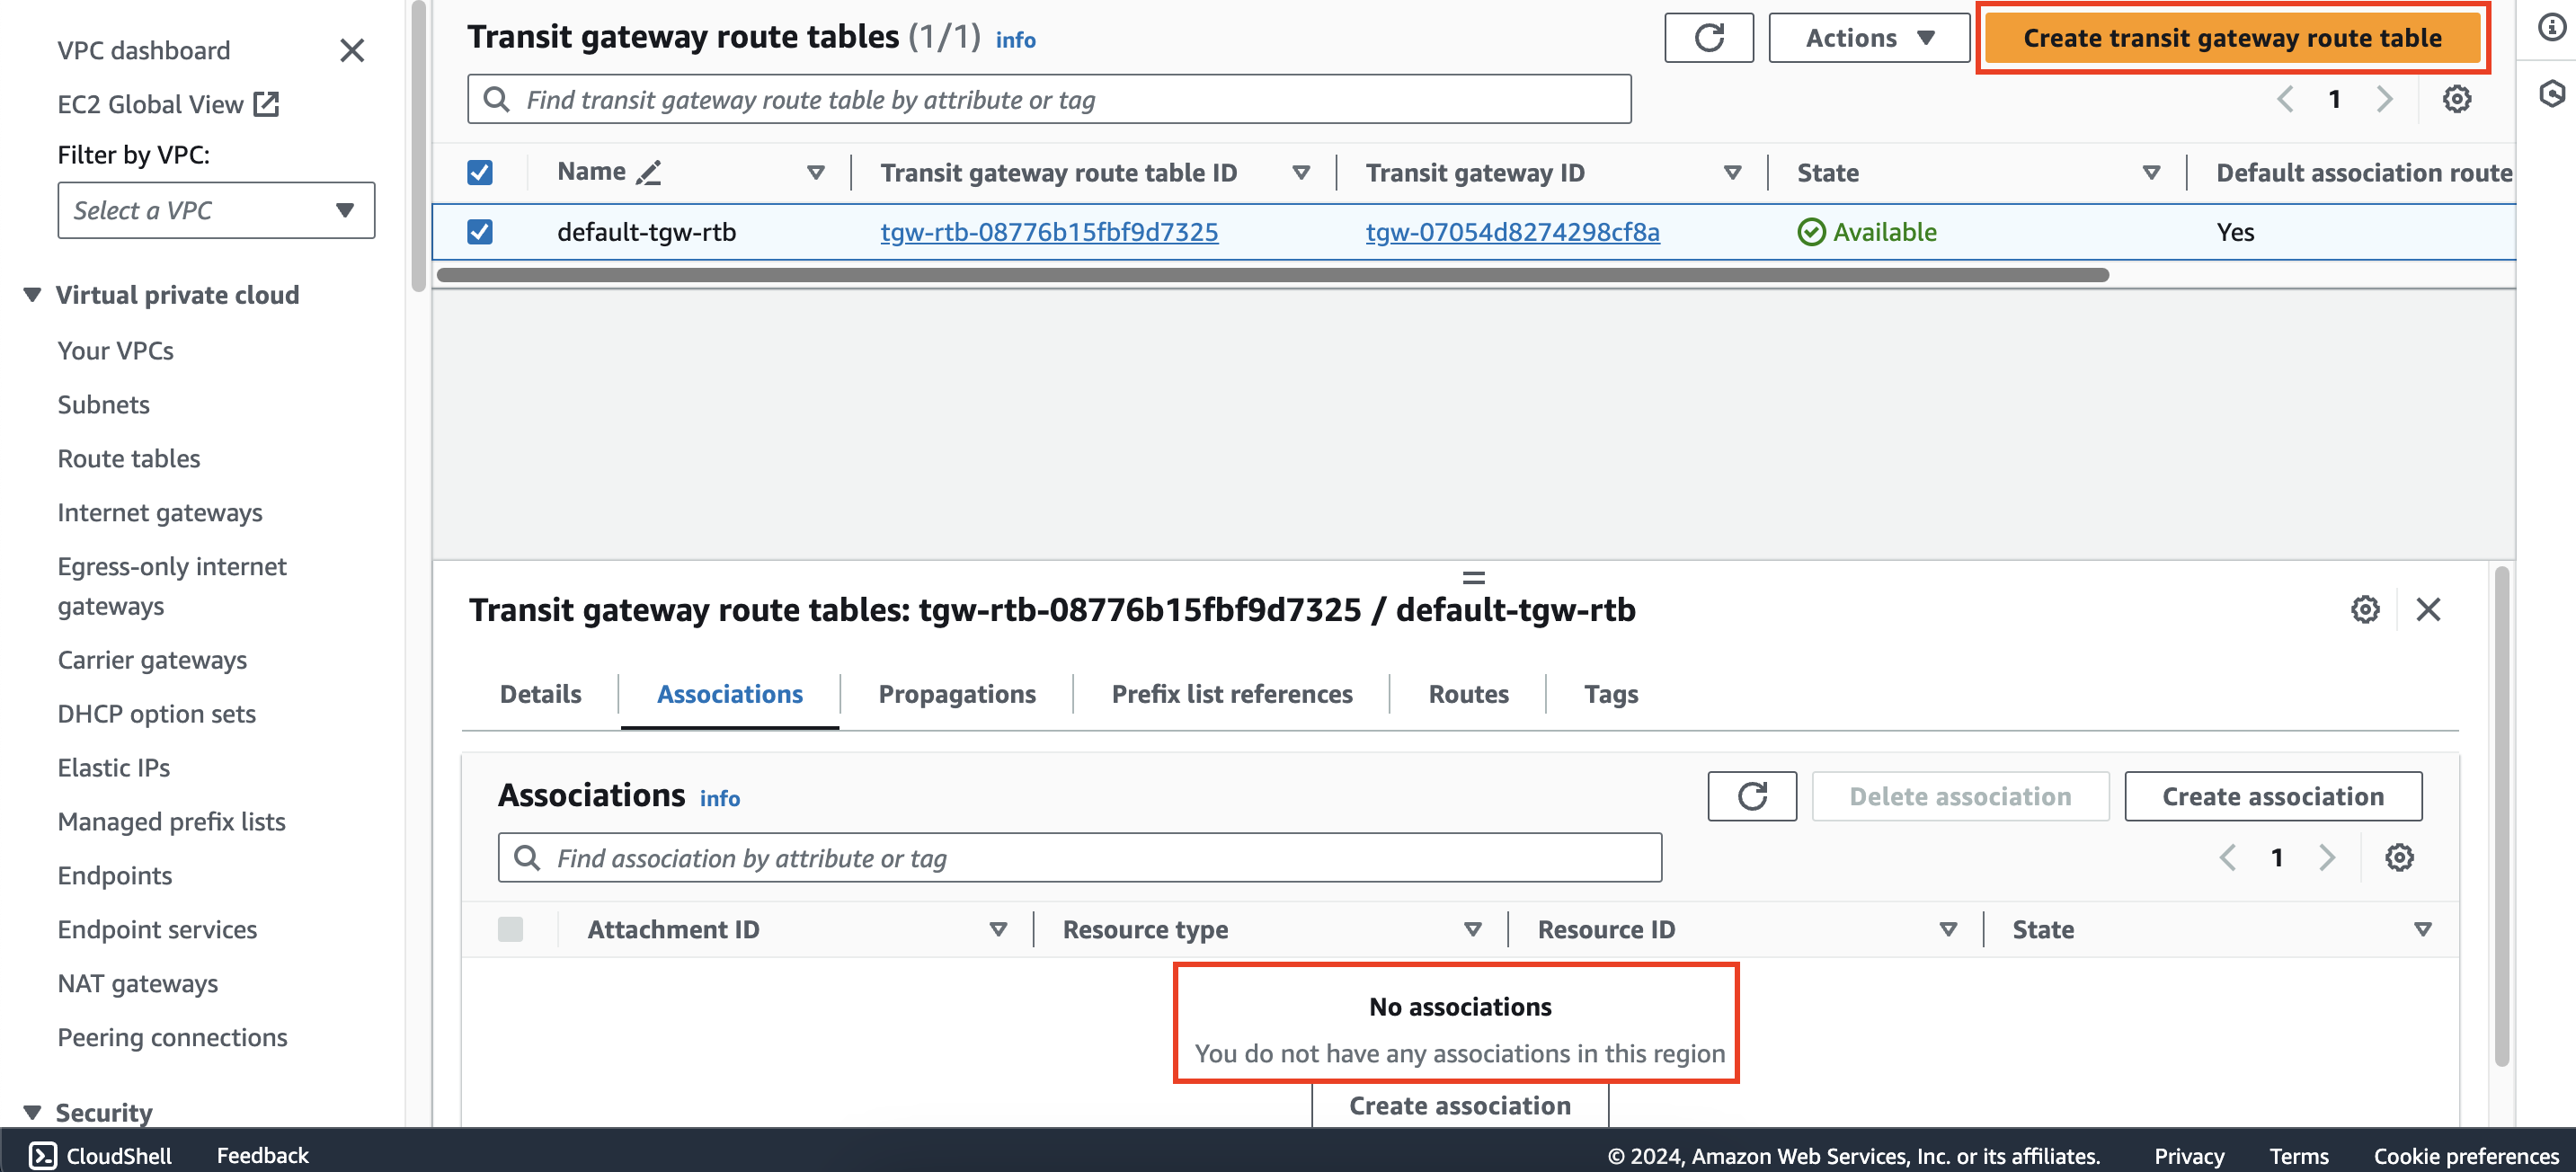
1. Delete the association between transit gateway attachments and the default route table
- Within VPC interface, select Transit gateway route tables
- Select the unique transit gateway route table and change the name to
default-tgw-rtb - Select Associations tab
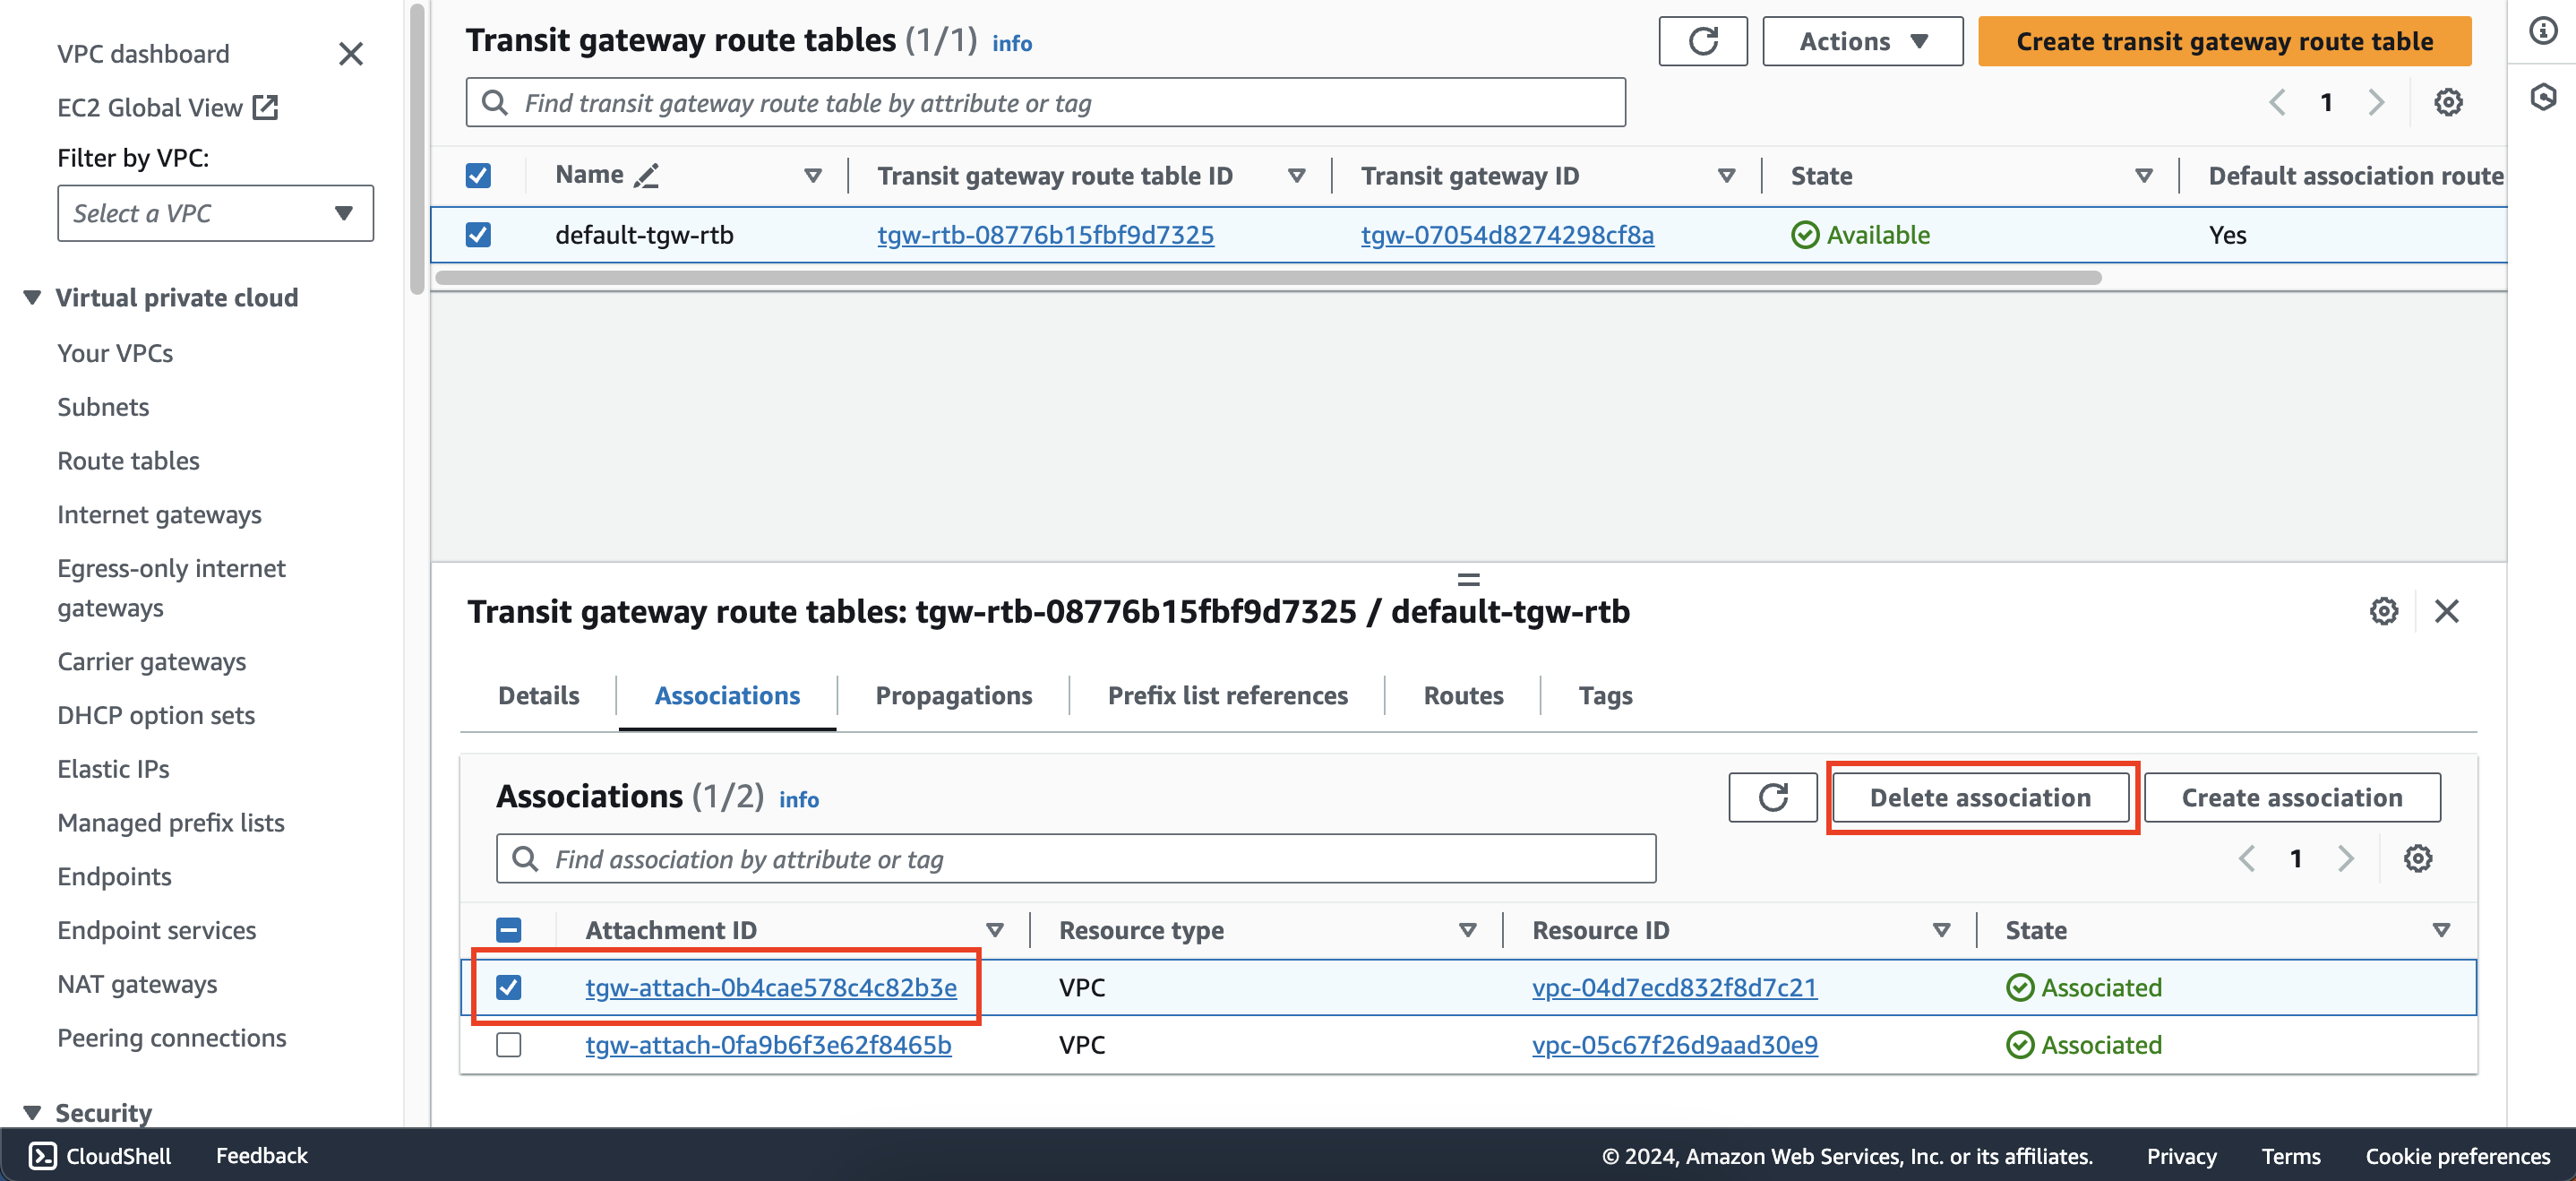
- Select any association and then press Delete association
- Continue deleting the remaining associations until they are gone
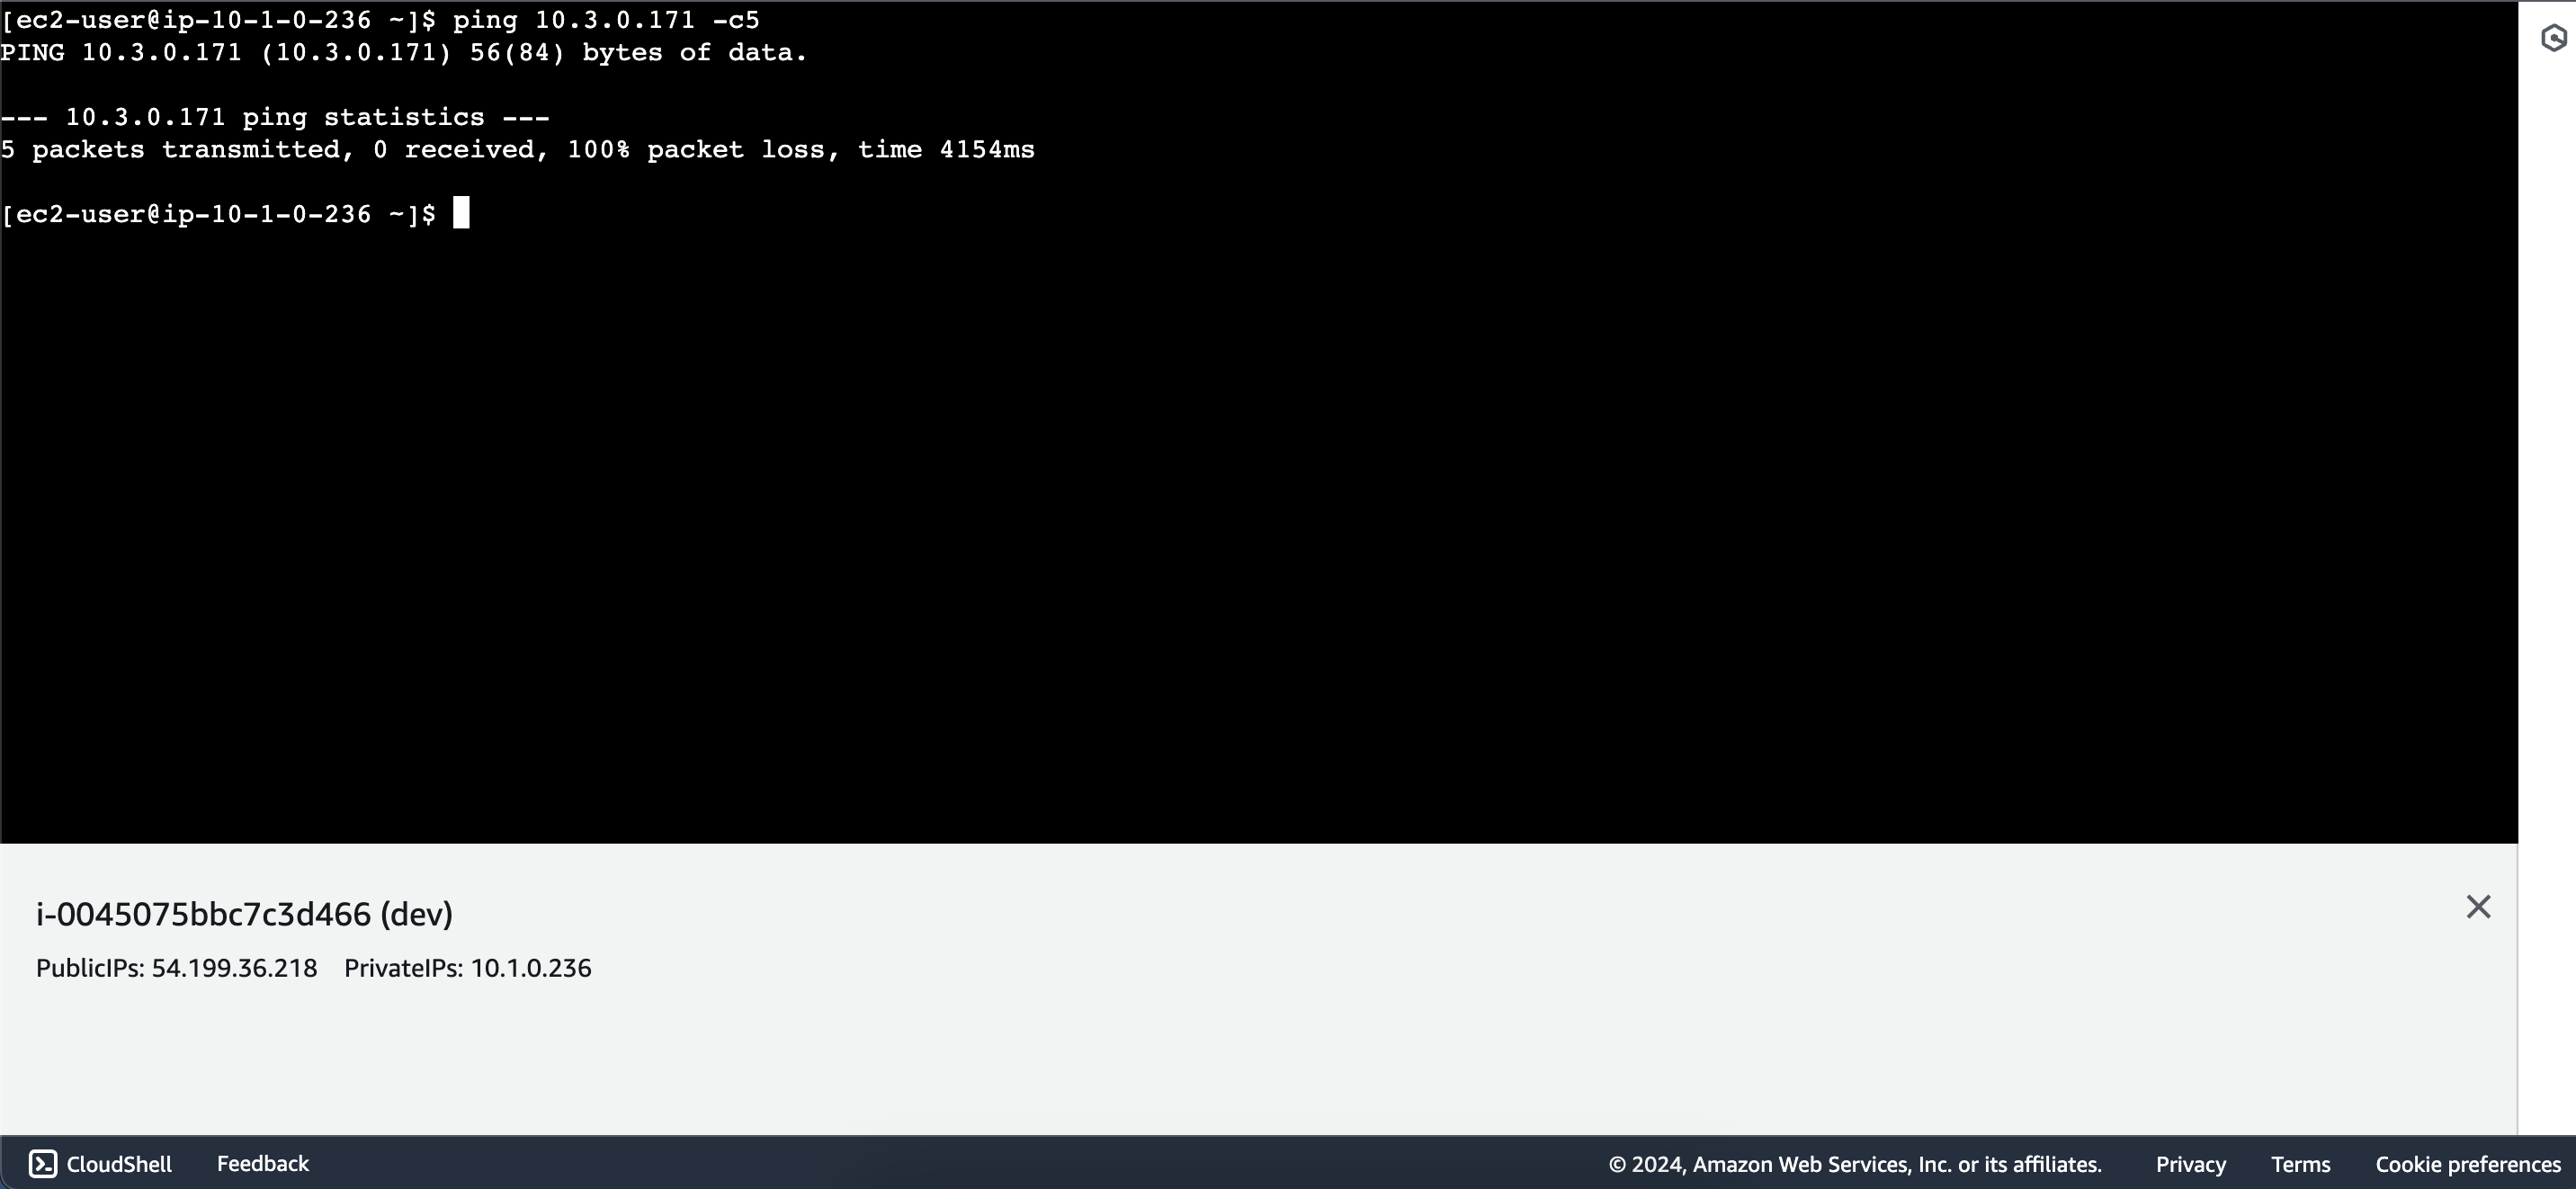
2. Check connection from dev instance to share instance
Return to the EC2 instance connect interface of the dev instance and try to connect to the share instance,
you will see that you cannot connect to it anymore. The reason is because we have removed the link between
transit gateway attachments and the default route table without configuring new route tables.
3. Create new transit route table
Within transit gateway route tables interface, click Create transit gateway route table
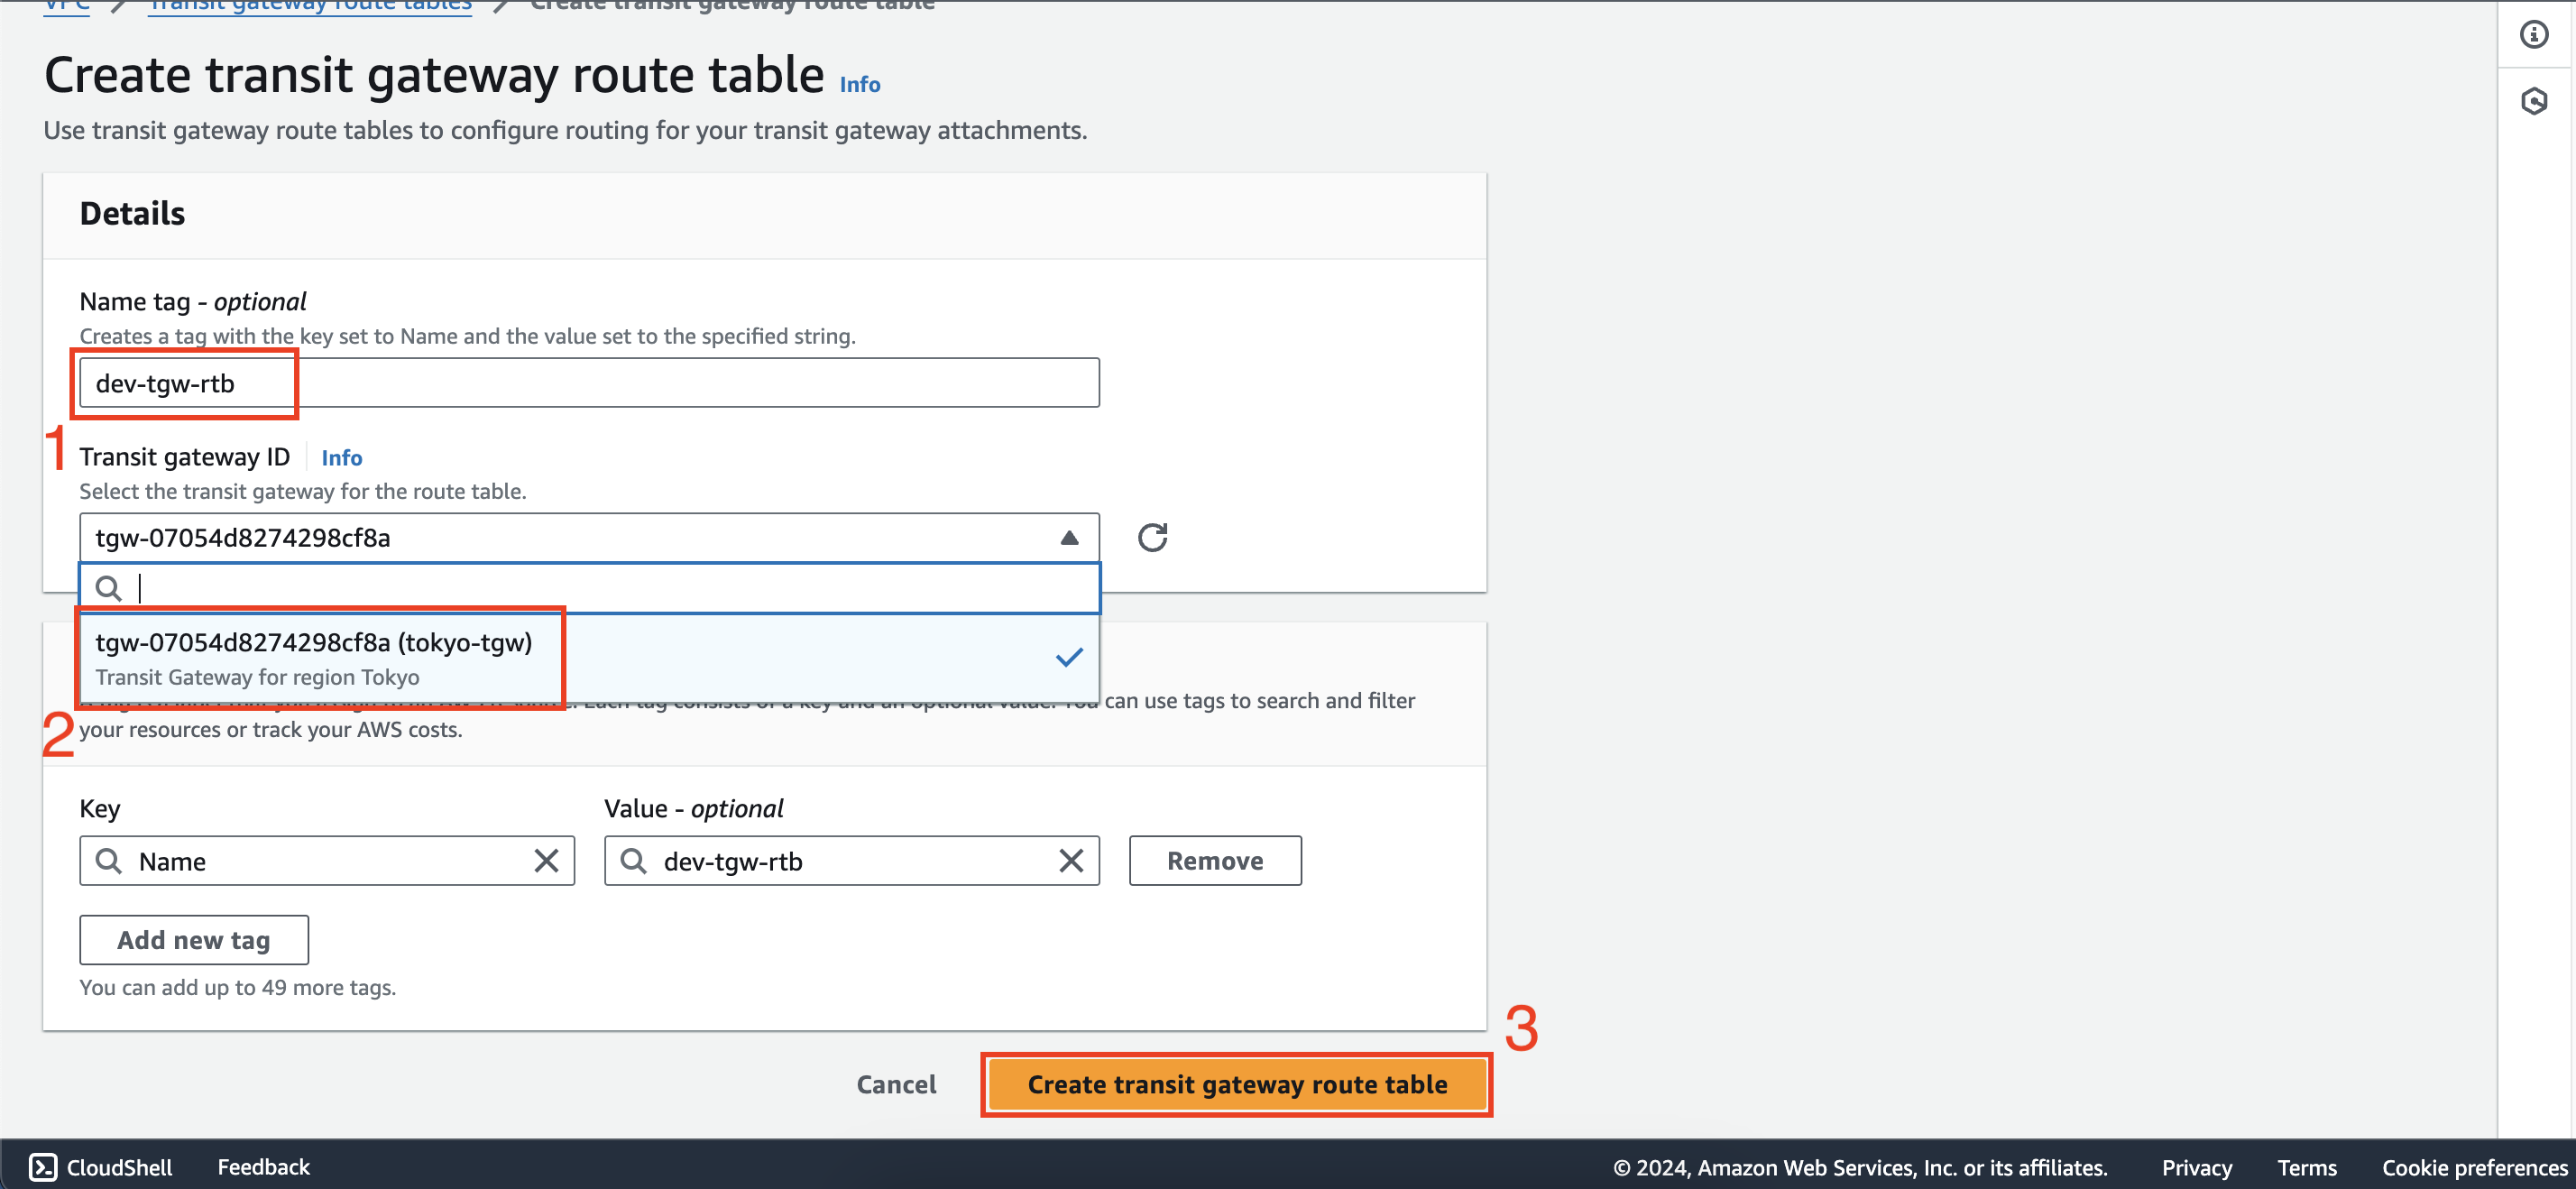
Set new route table name to
dev-tgw-rtbSelect transit gateway for route table then click Create transit gateway route table
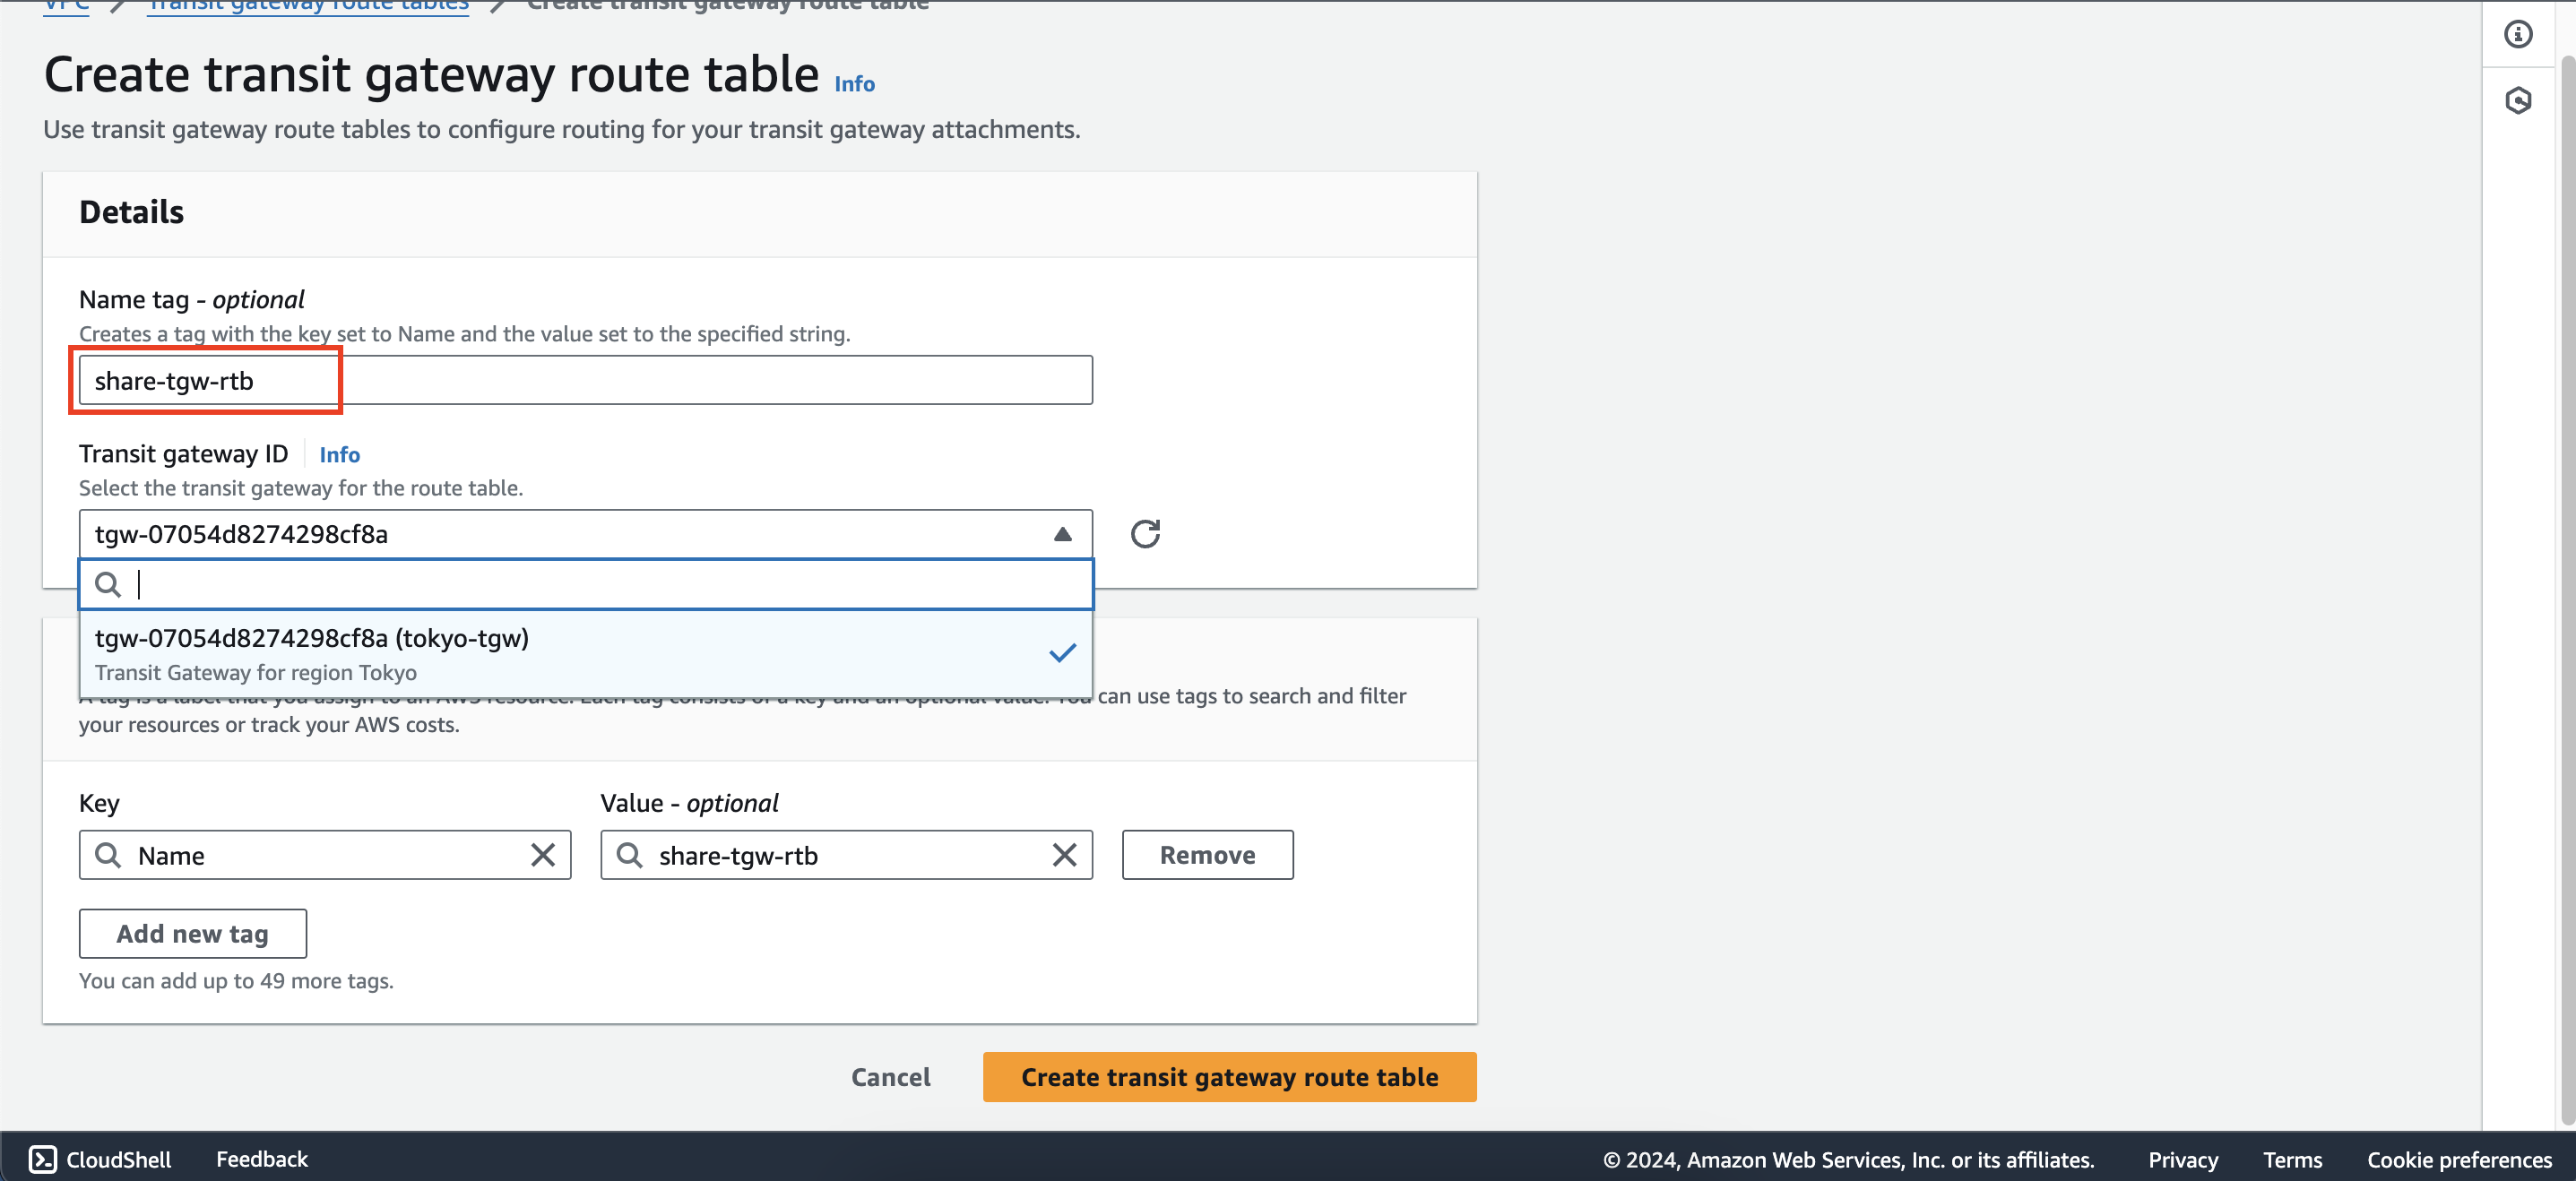
Repeat the above steps to create two new route tables,
test-tgw-rtbandshare-tgw-rtbas follows: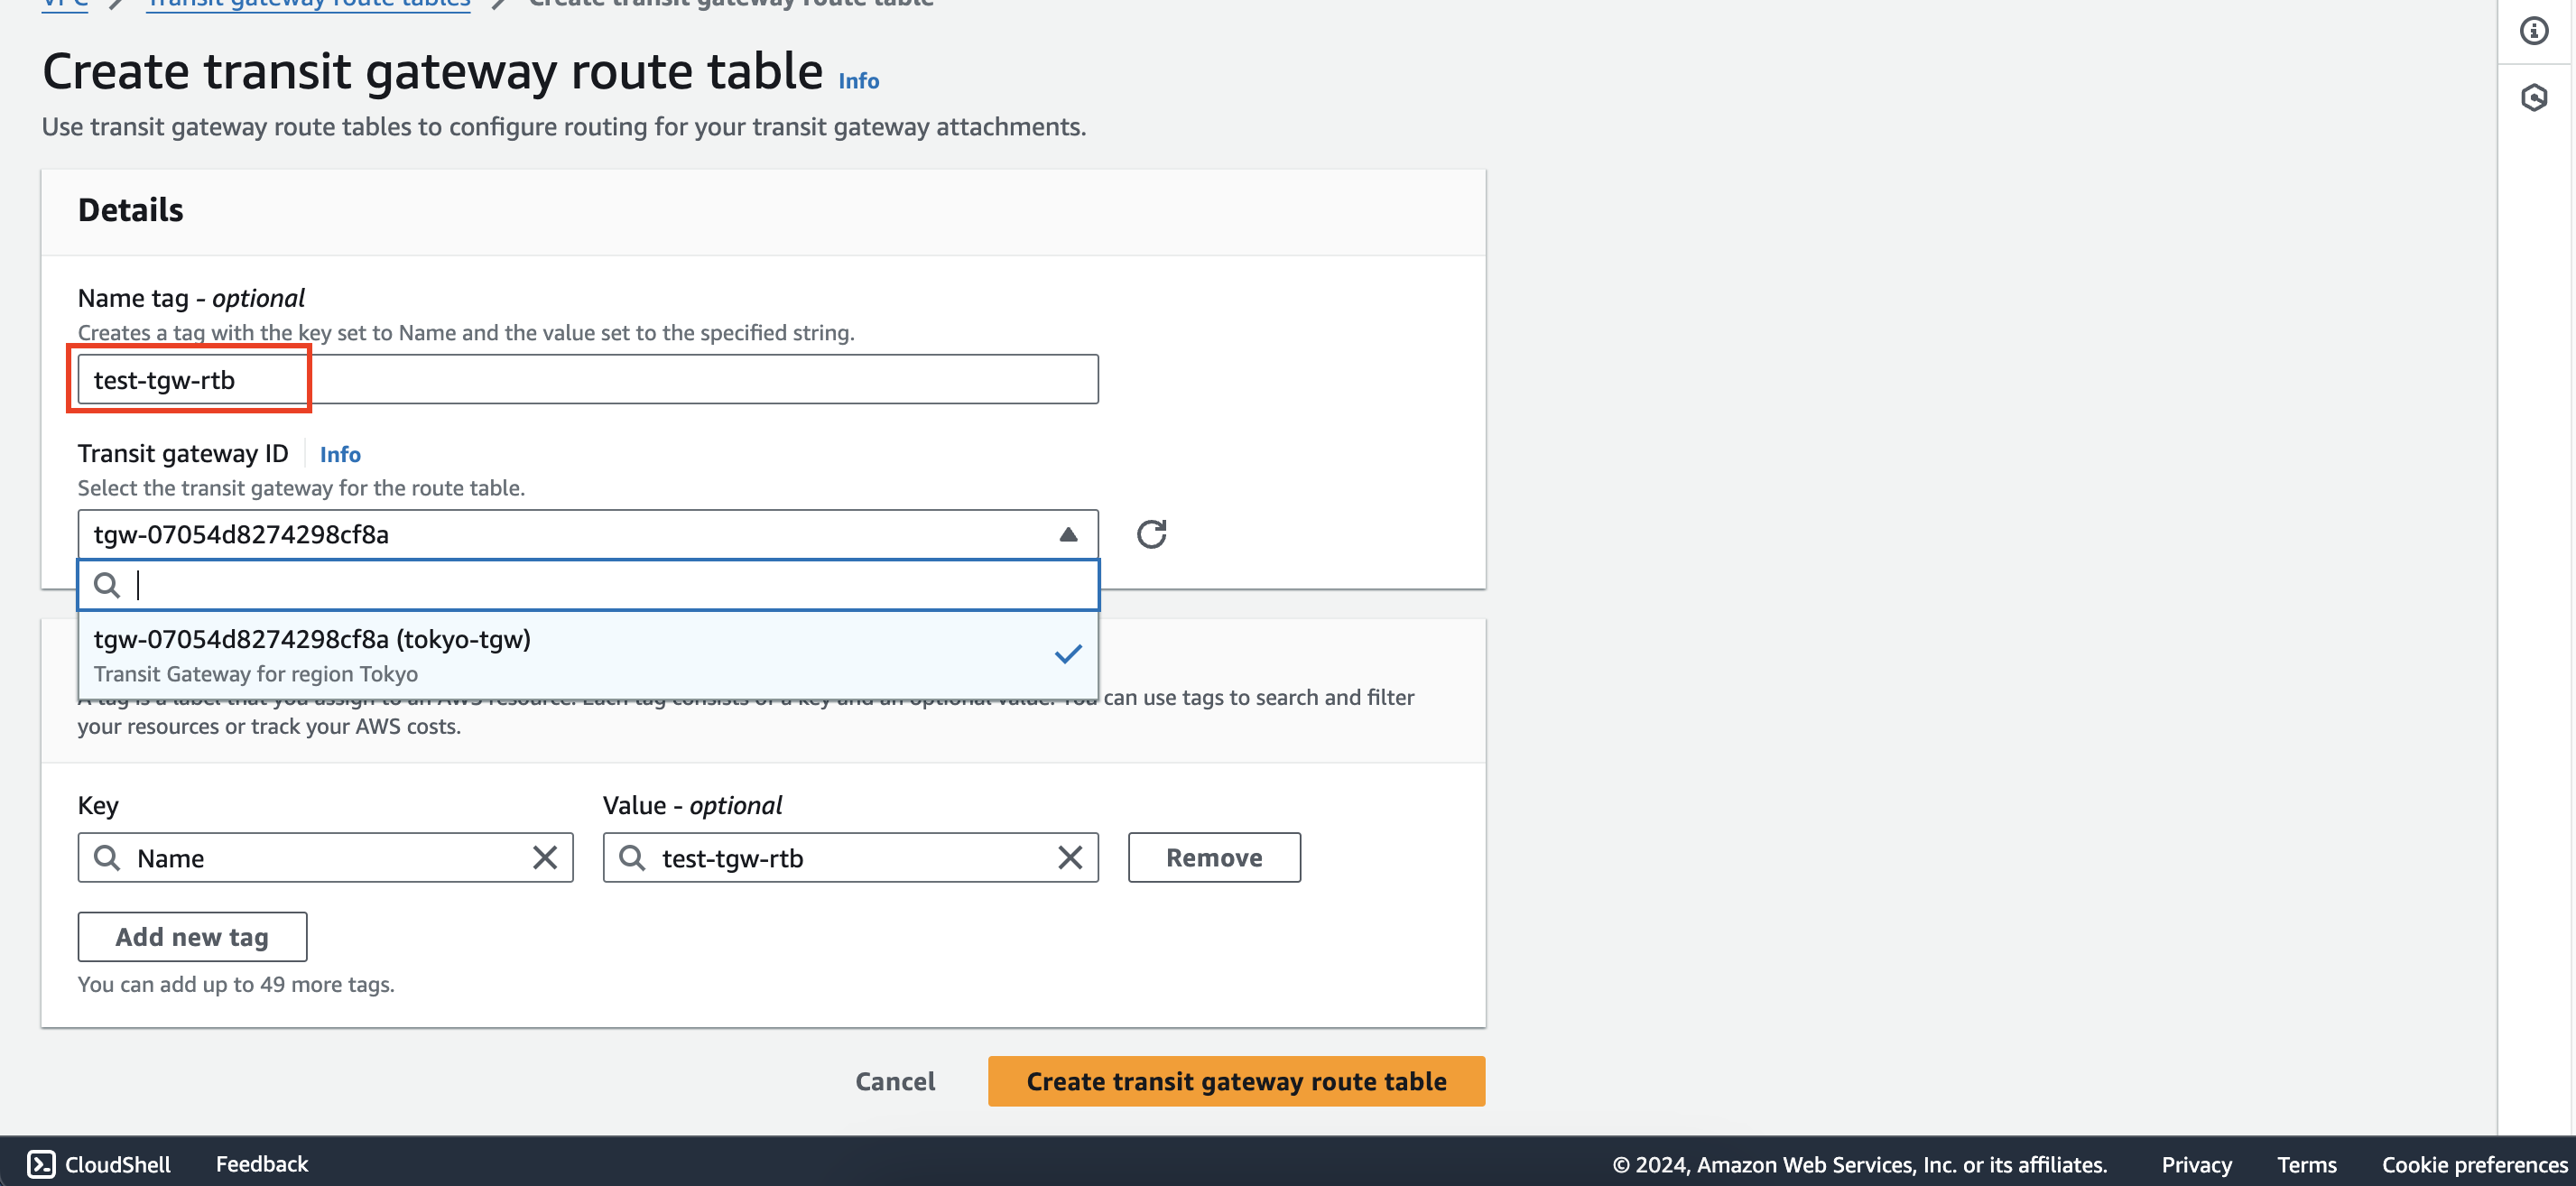
4. Create new association for transit gateway attachments
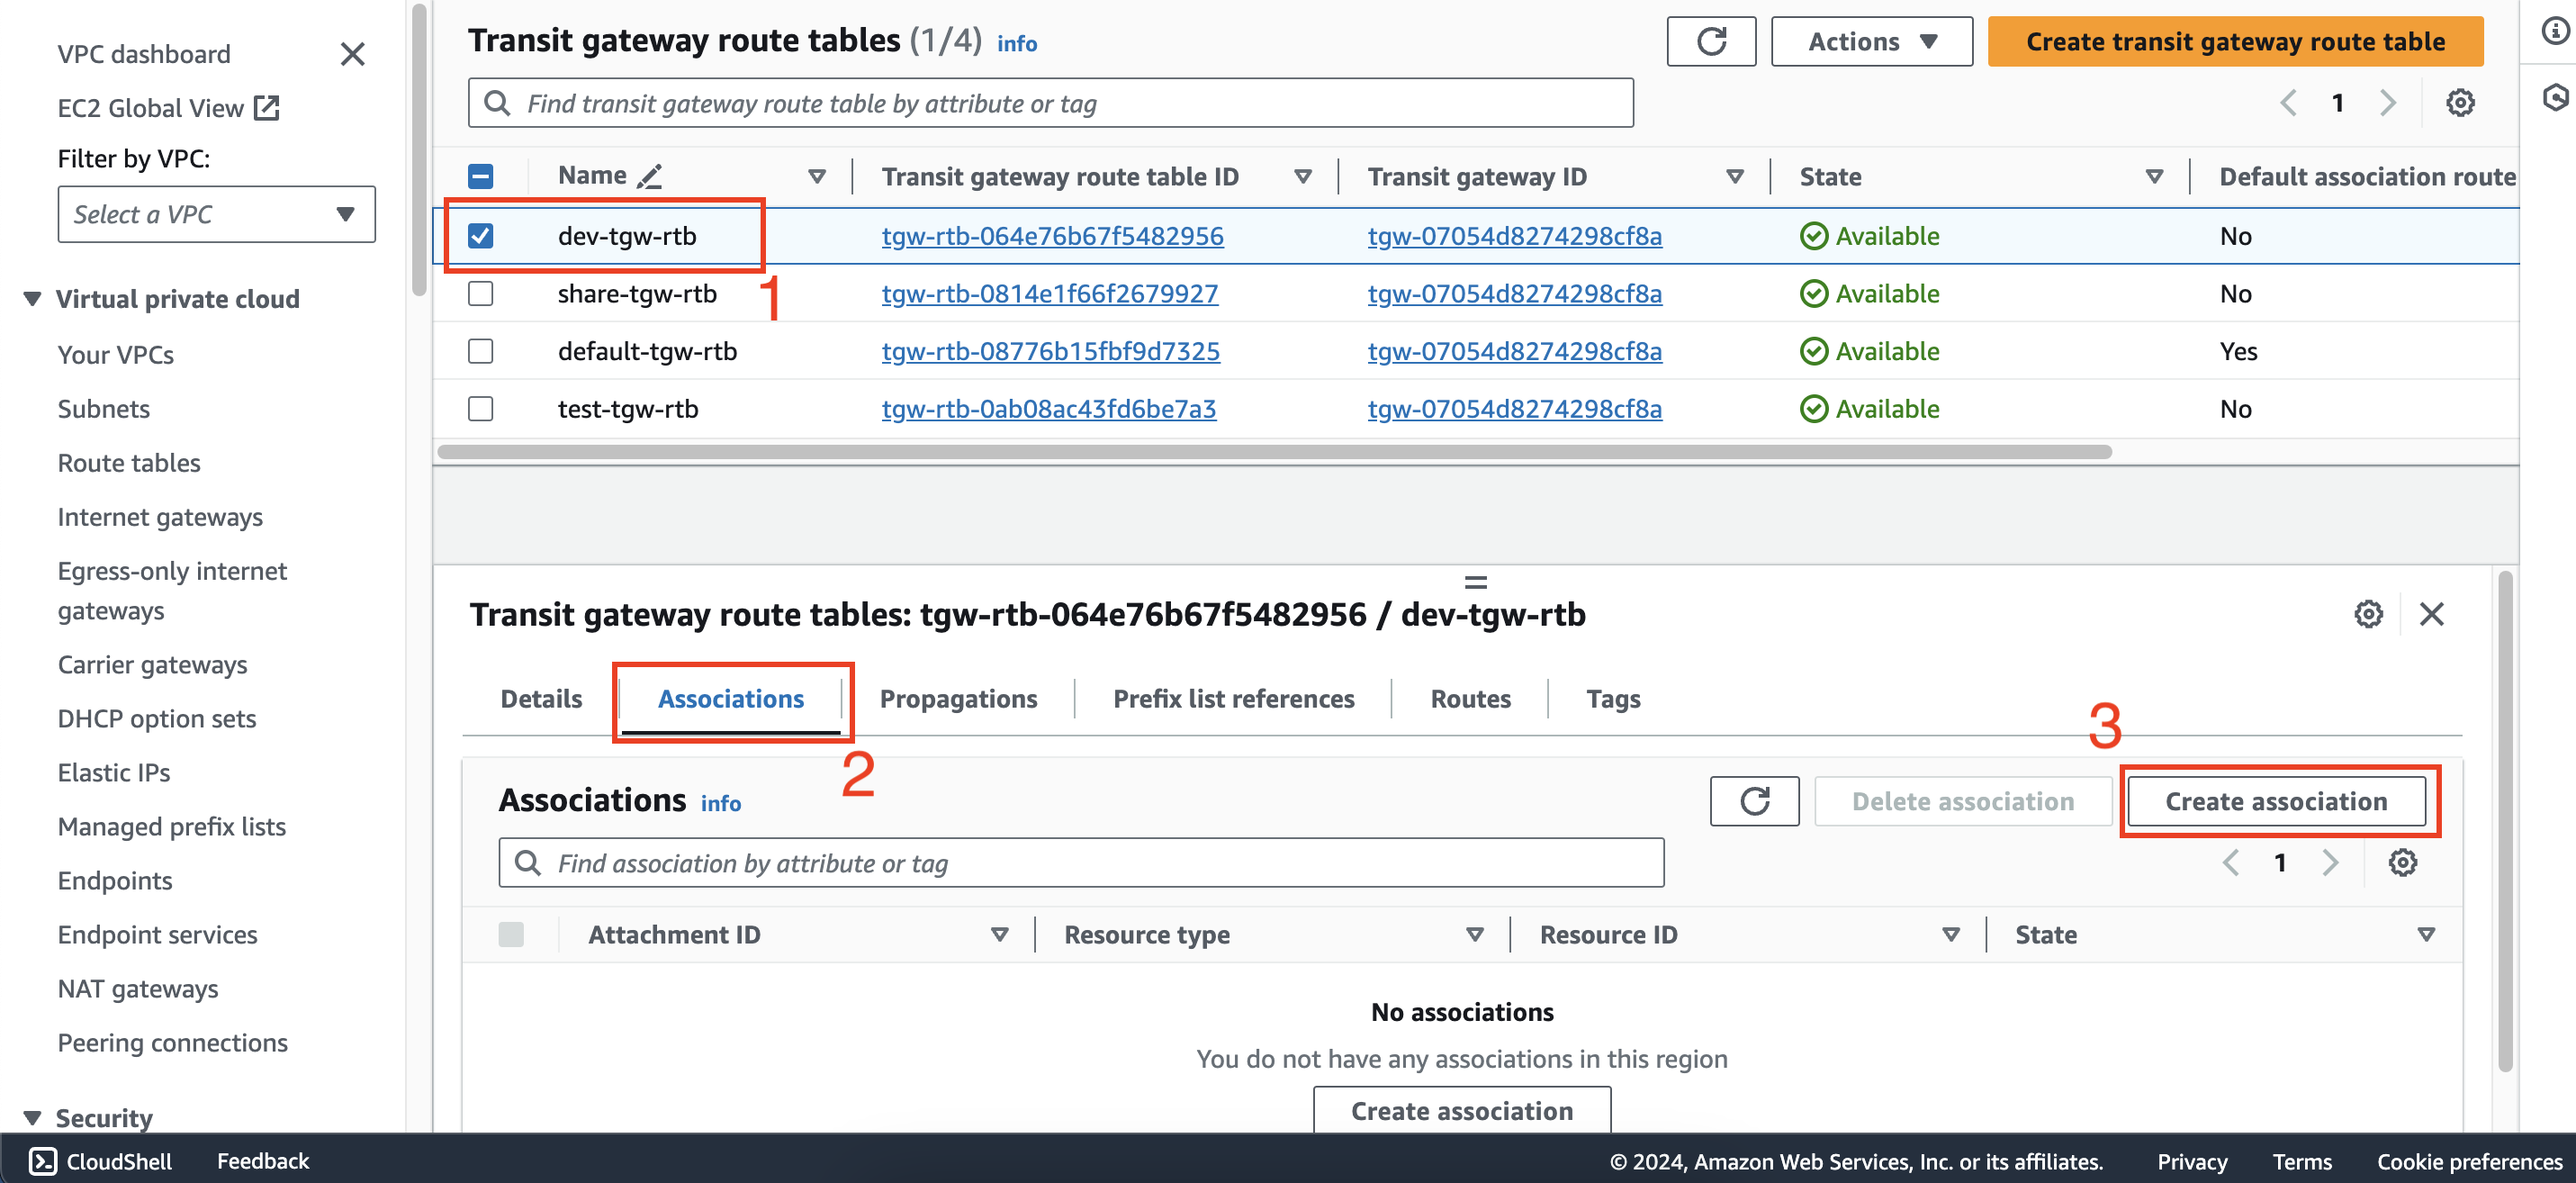
Within transit gateway route tables interface, select dev-tgw-rtb
Select Associations tab
Click Create association
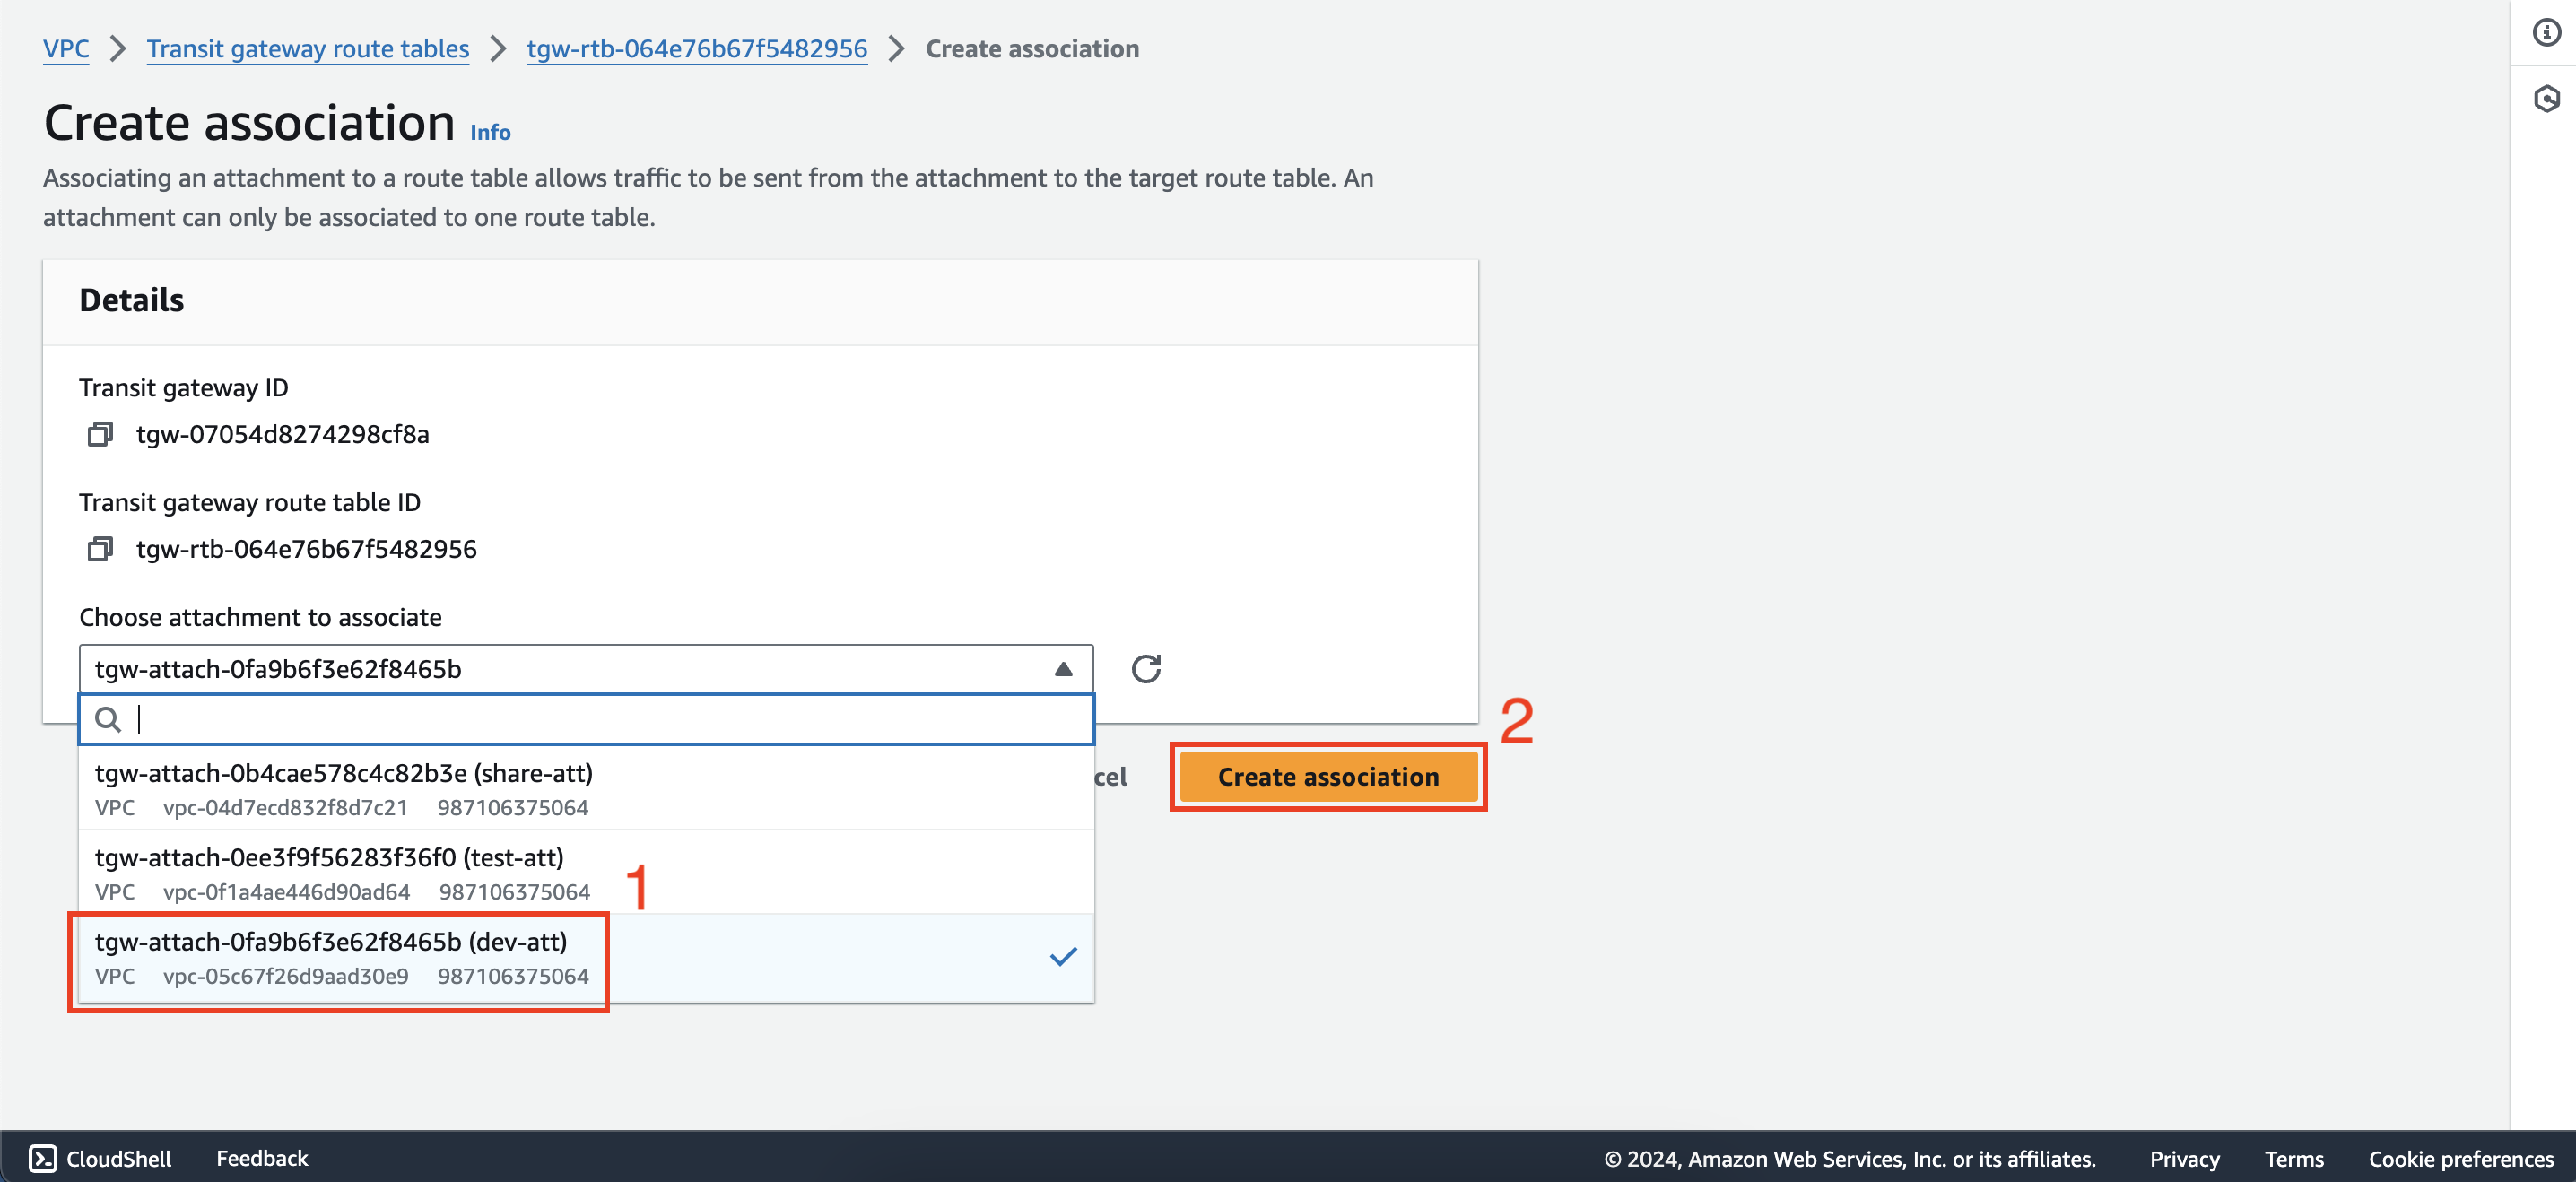
 Select dev-att then click Create association
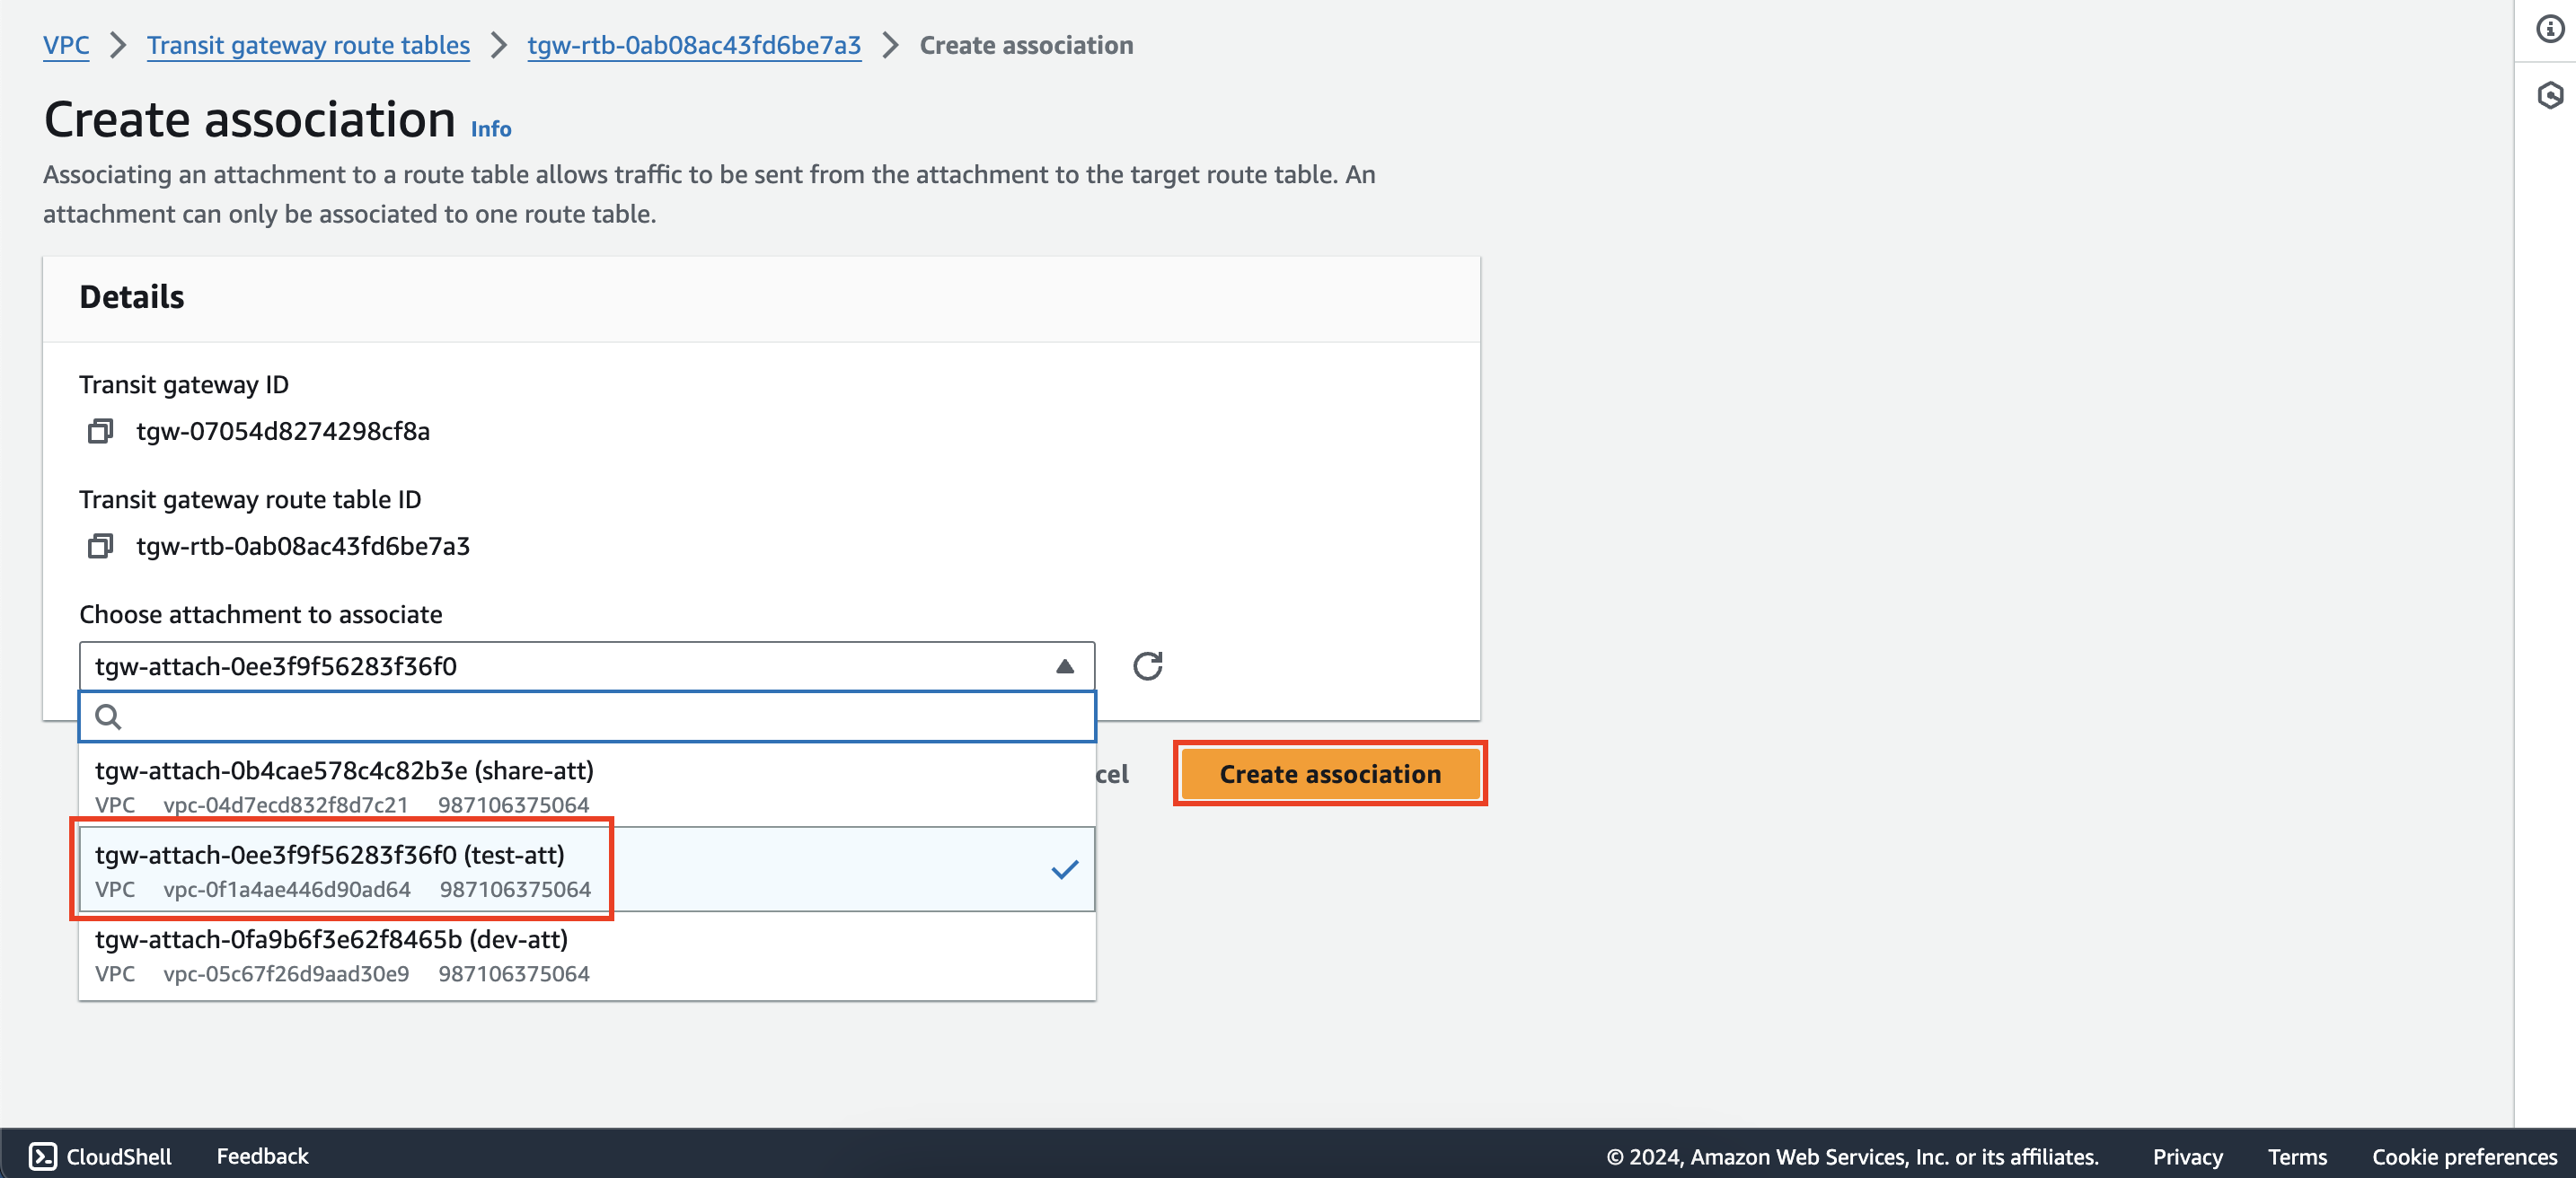
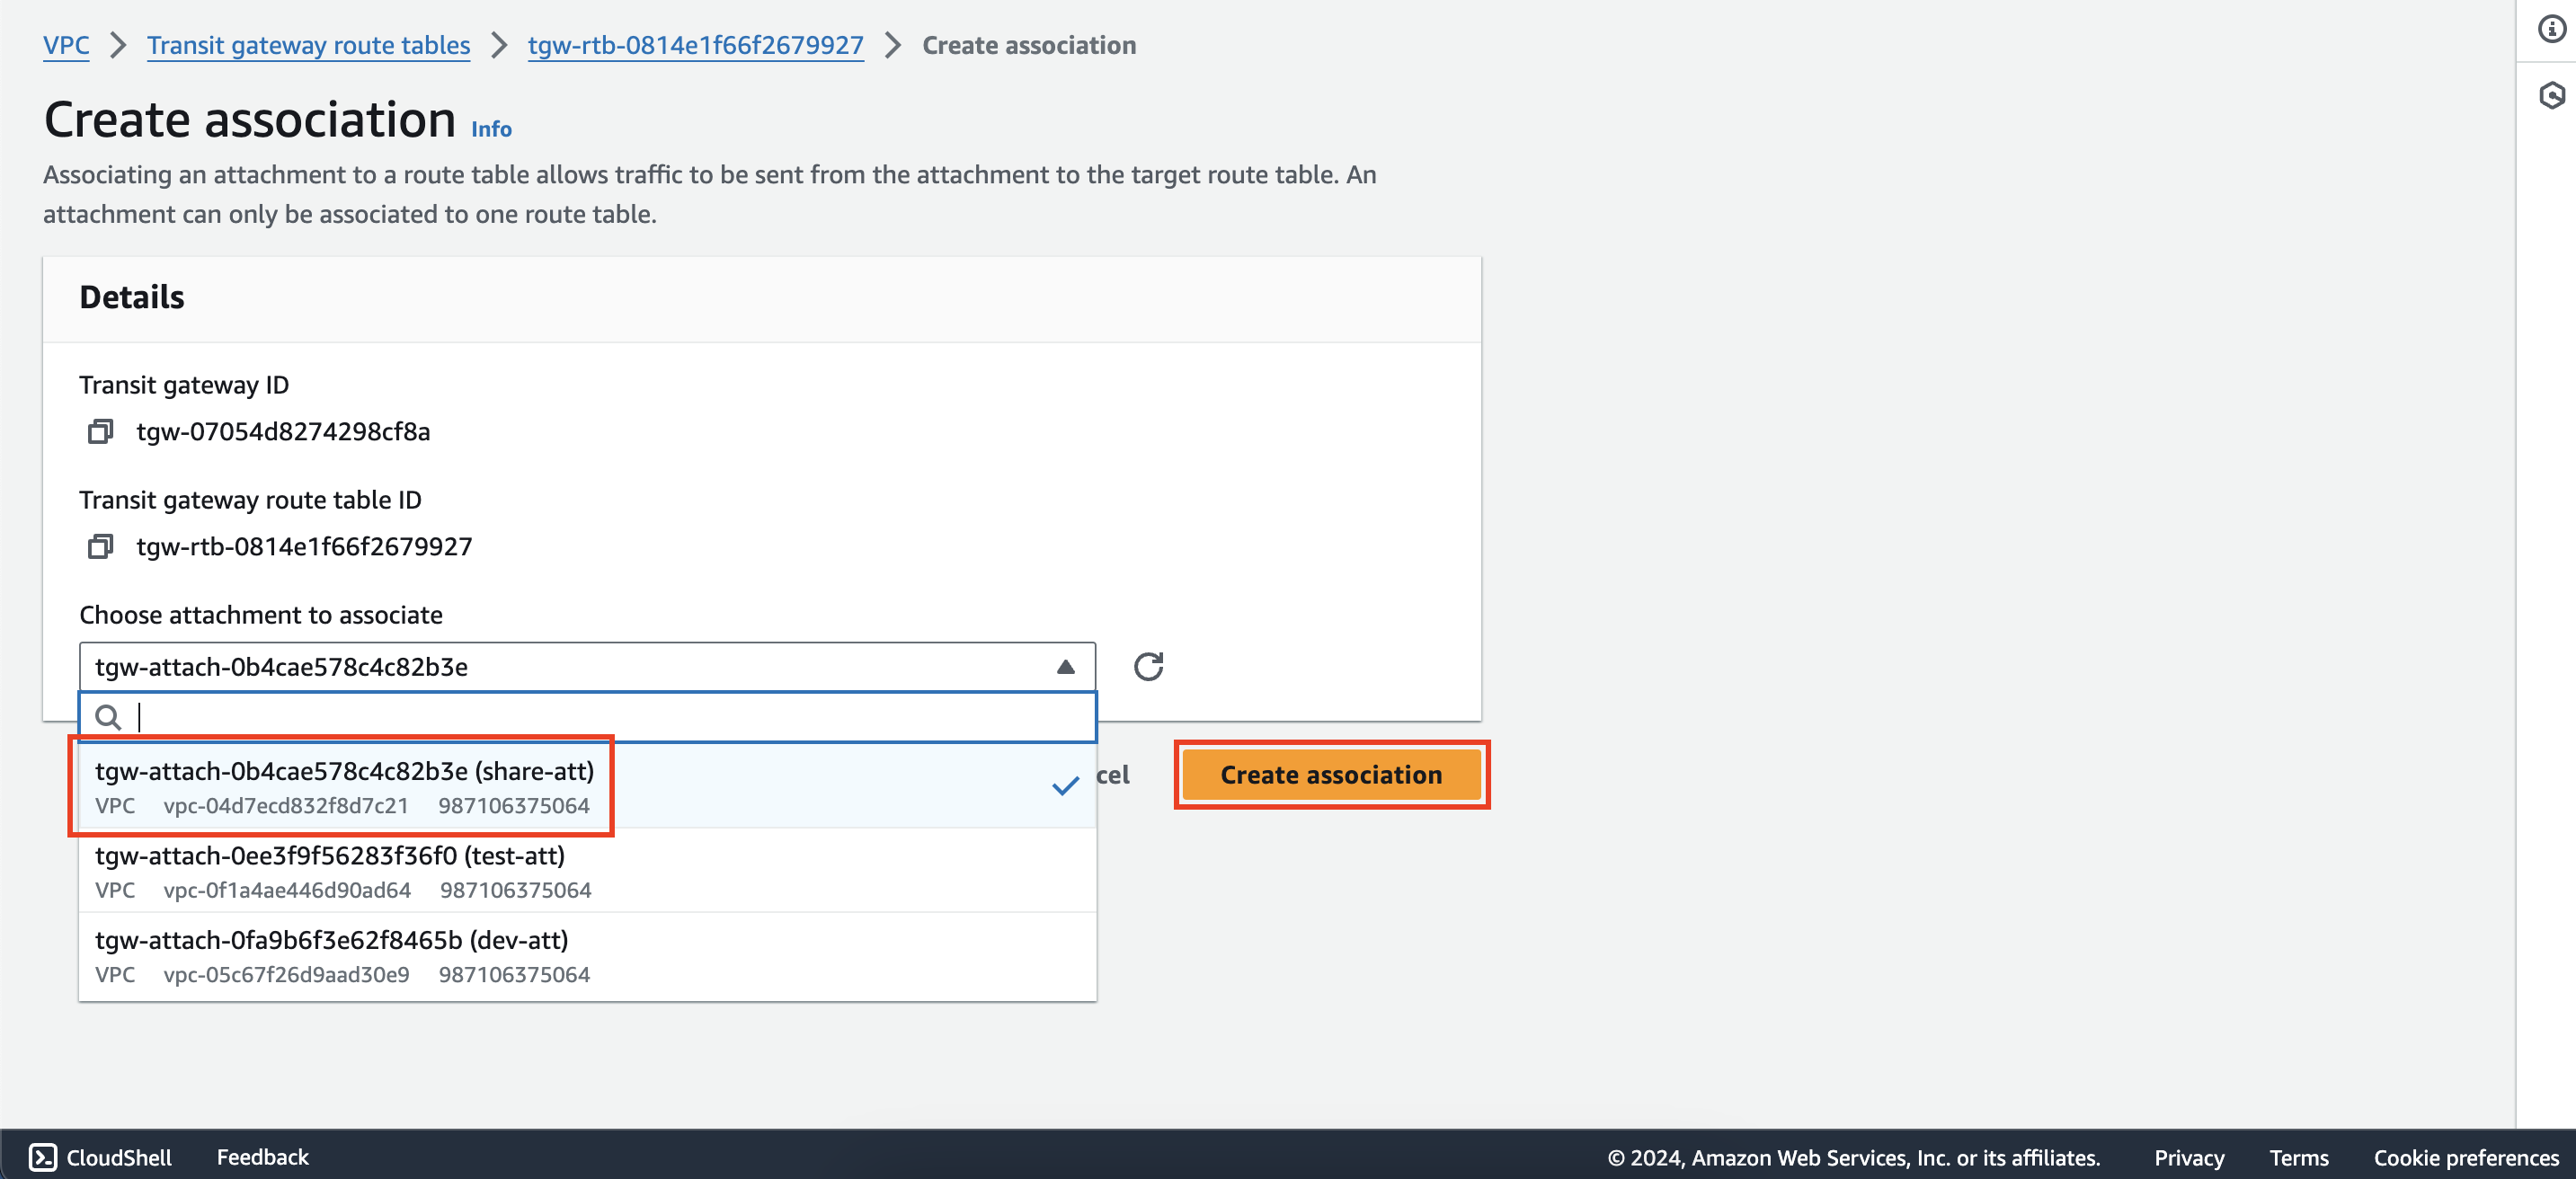
Repeat the above steps to create the association of test-tgw-rtb and share-tgw-rtb as follows:
5. Create propagations
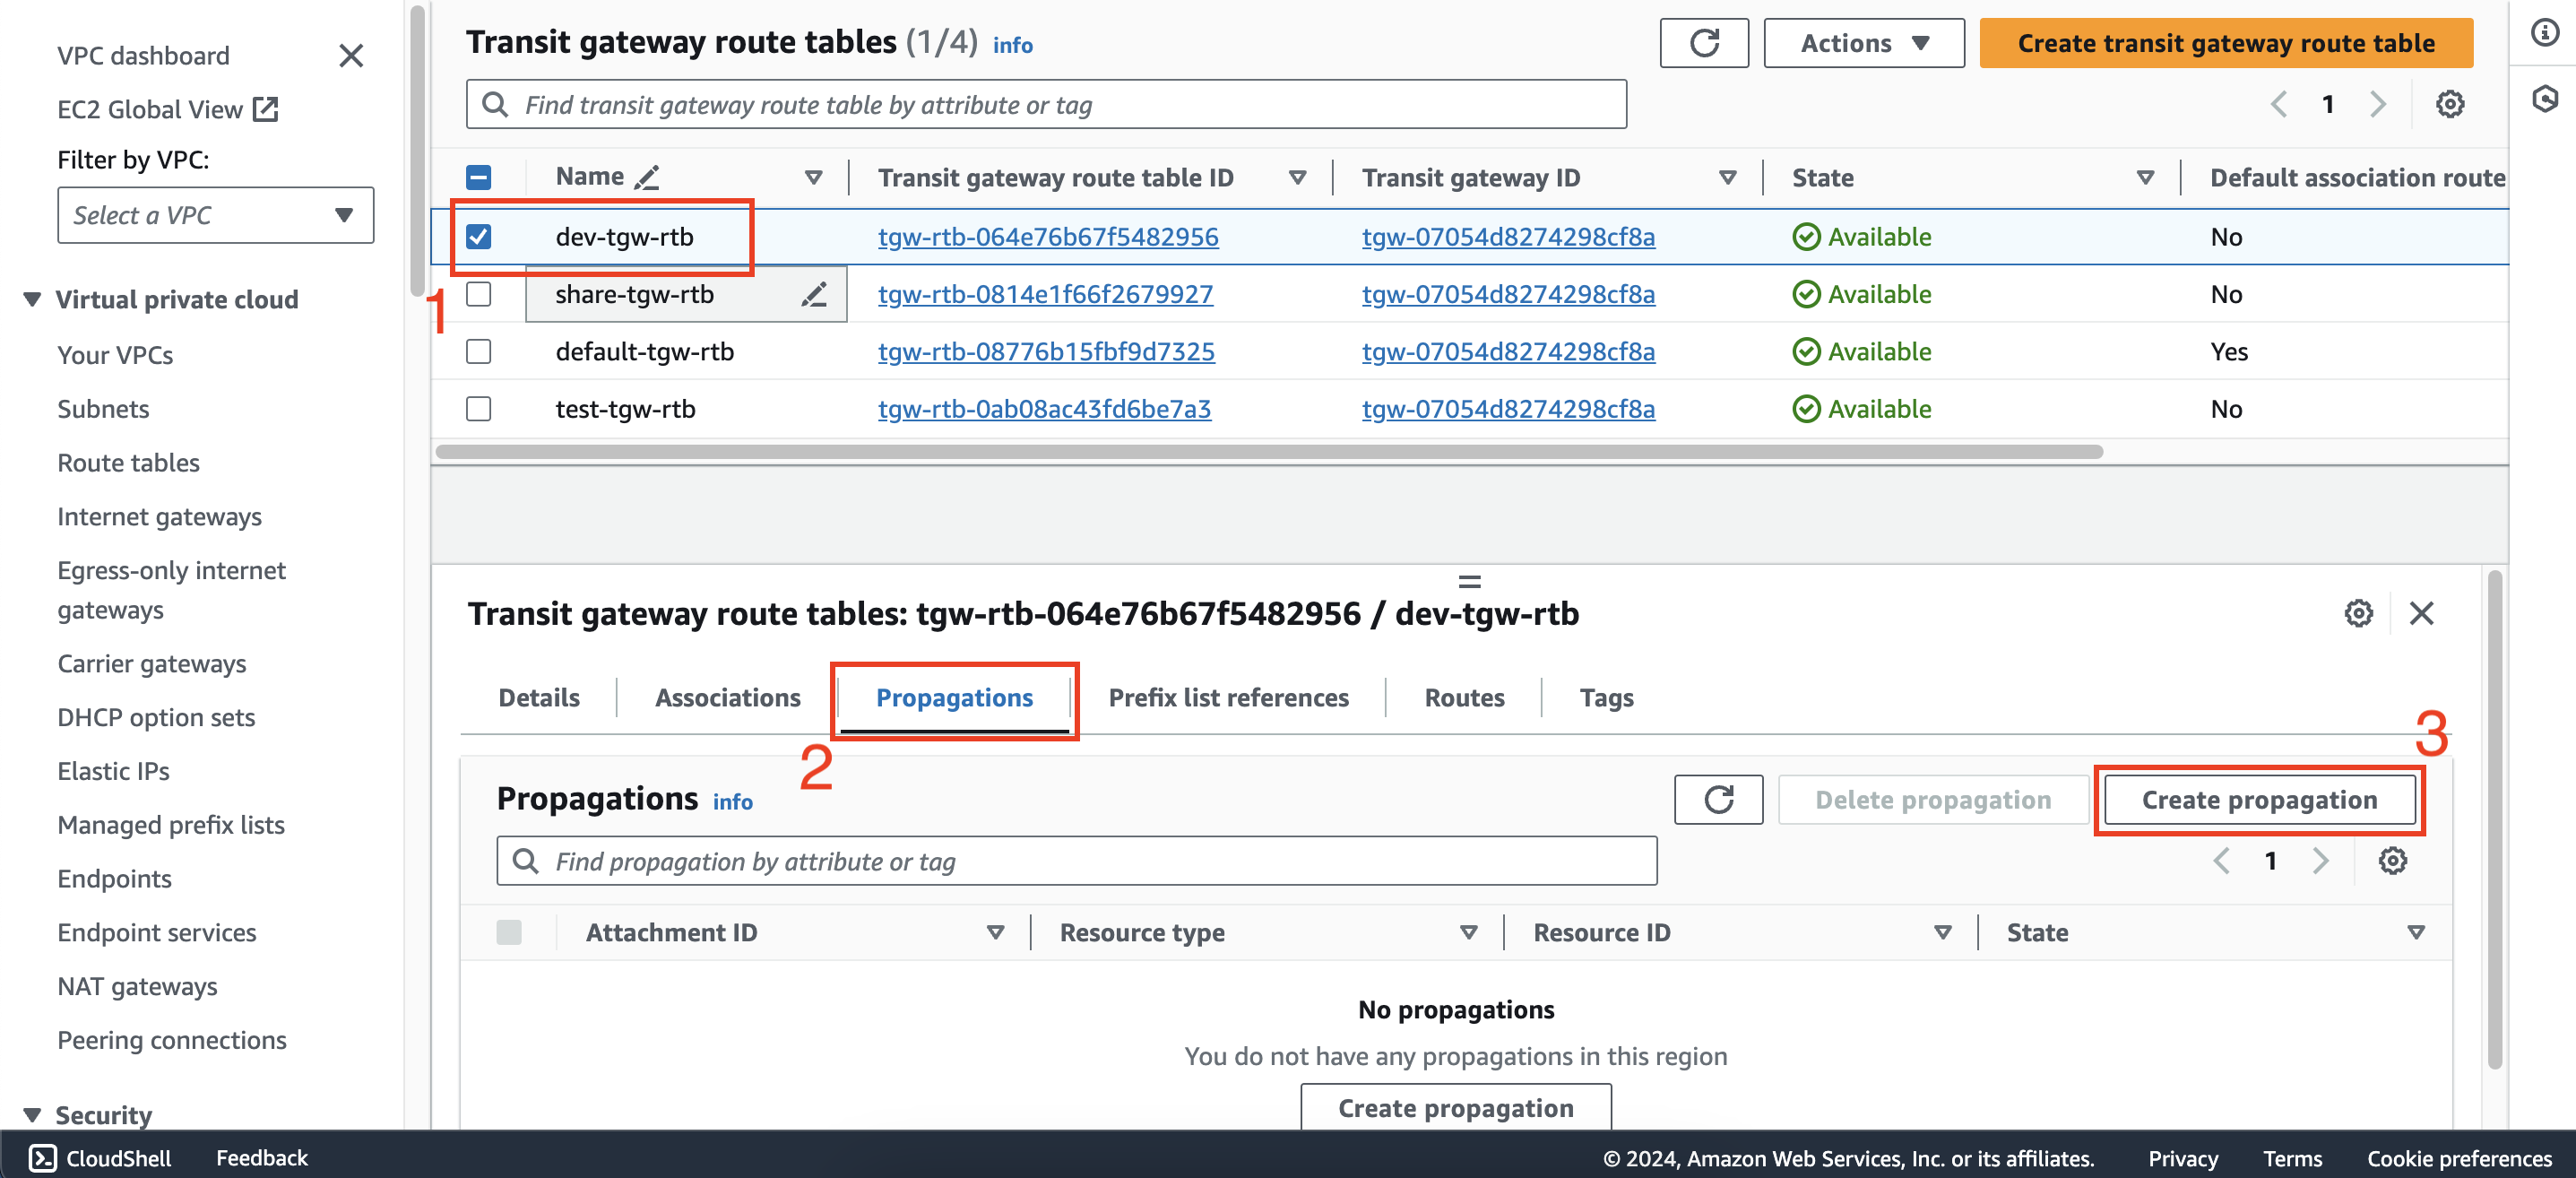
Within transit gateway route tables interface, select dev-tgw-rtb
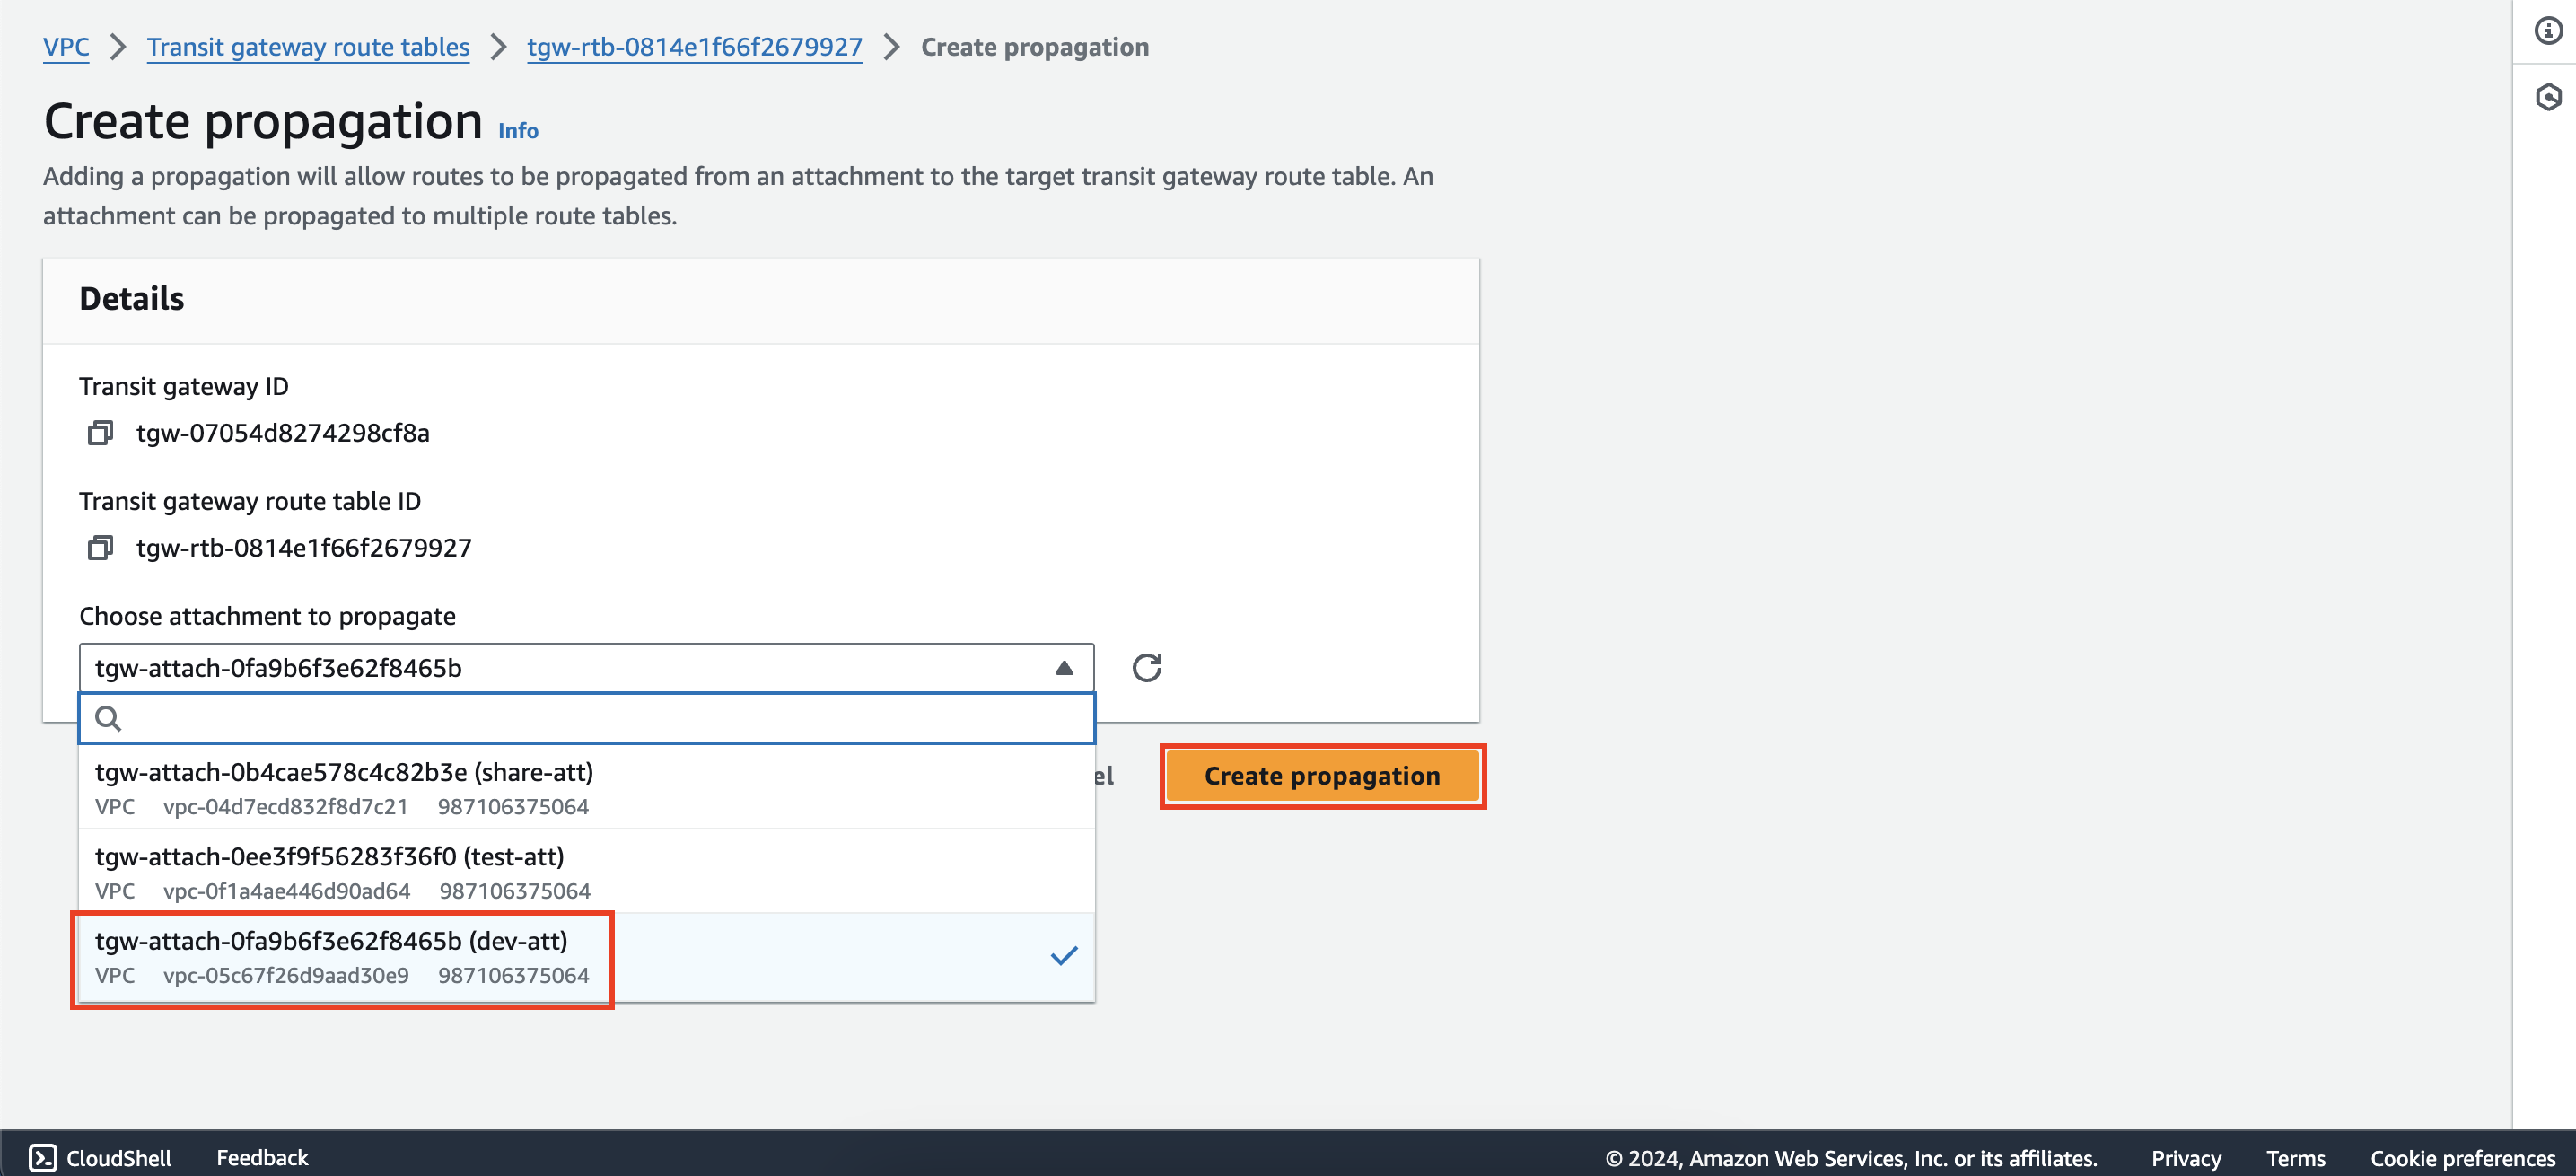
Select Propagations tab then click Create propagation
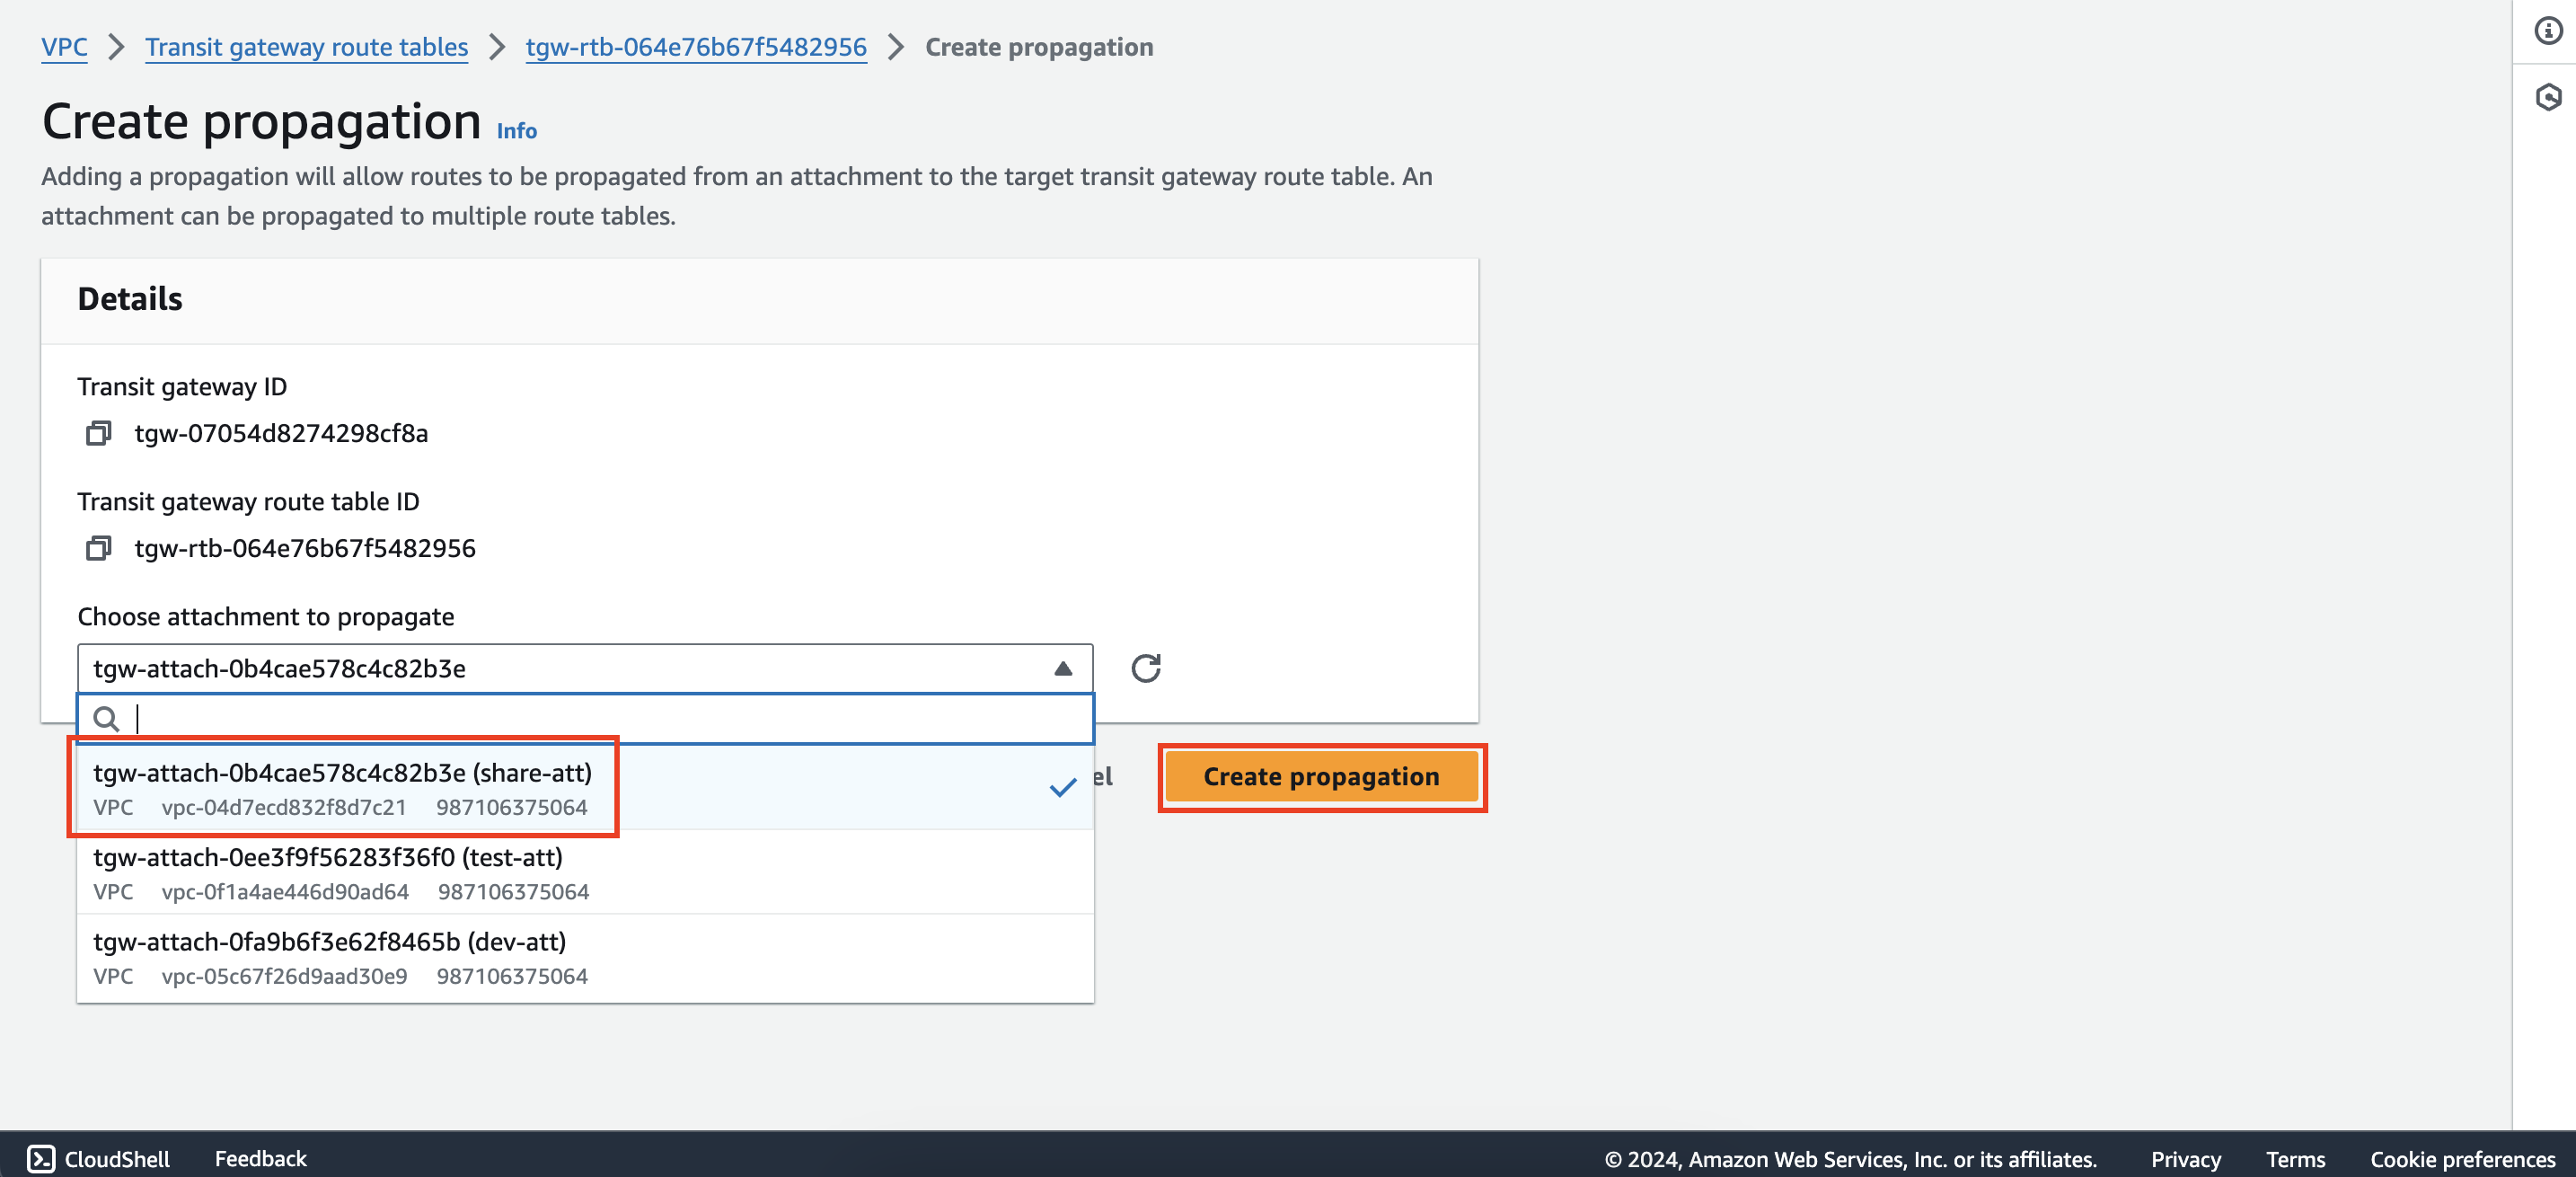
 Select share-att then click Create propagation
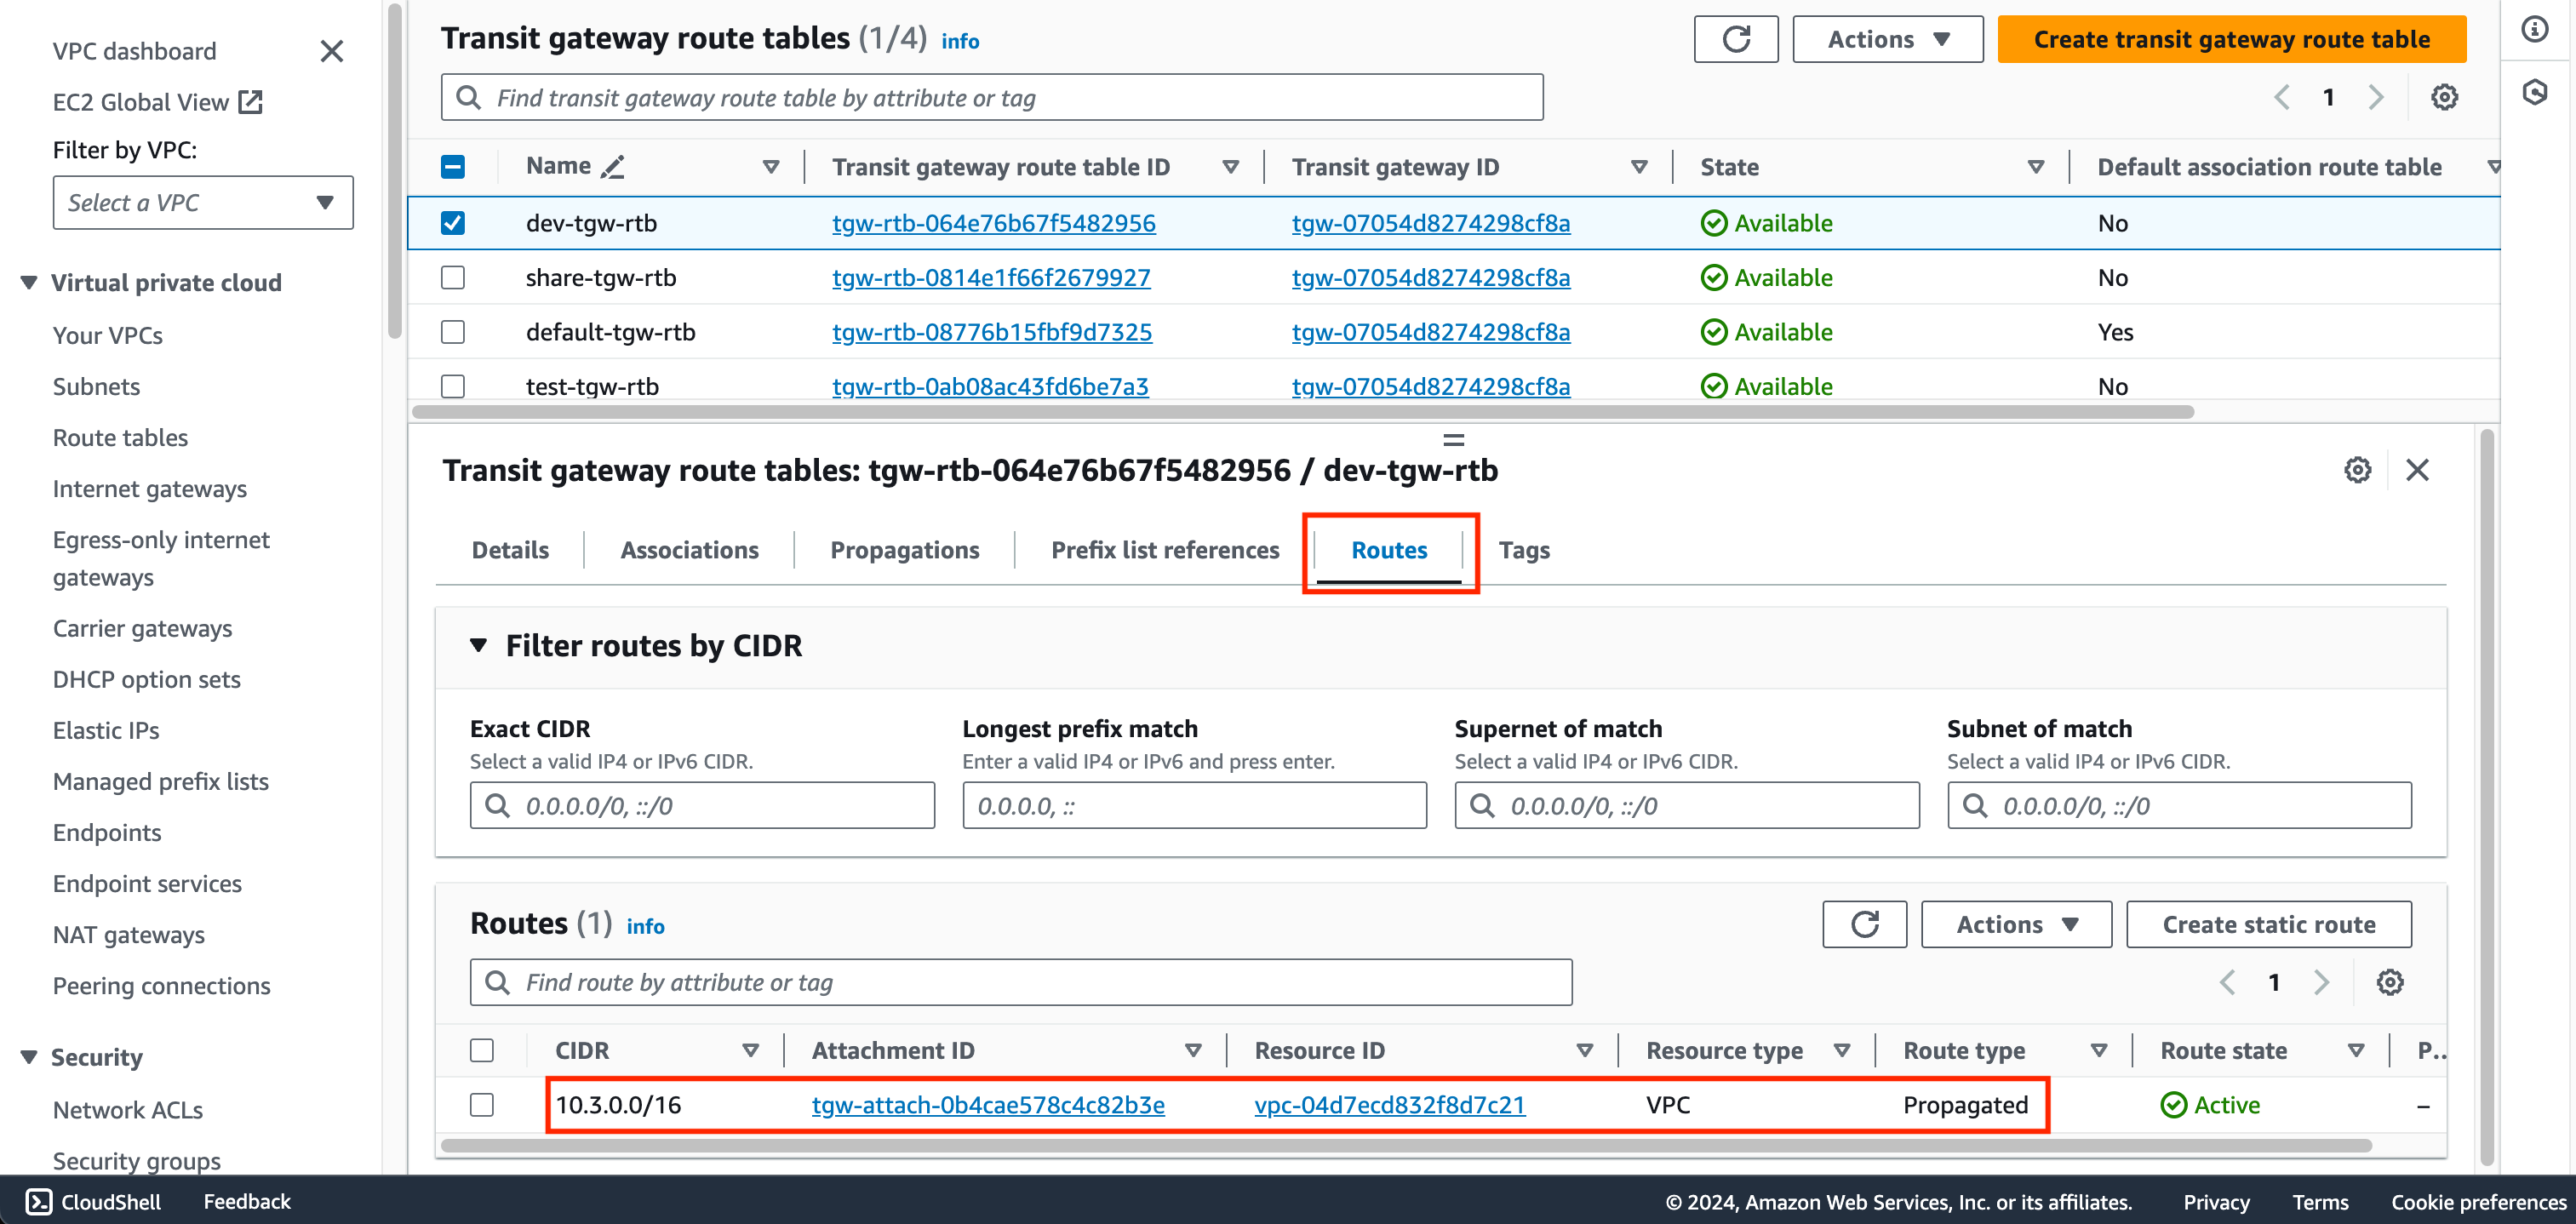
 After creating propagation, a route will be automatically created as follows:
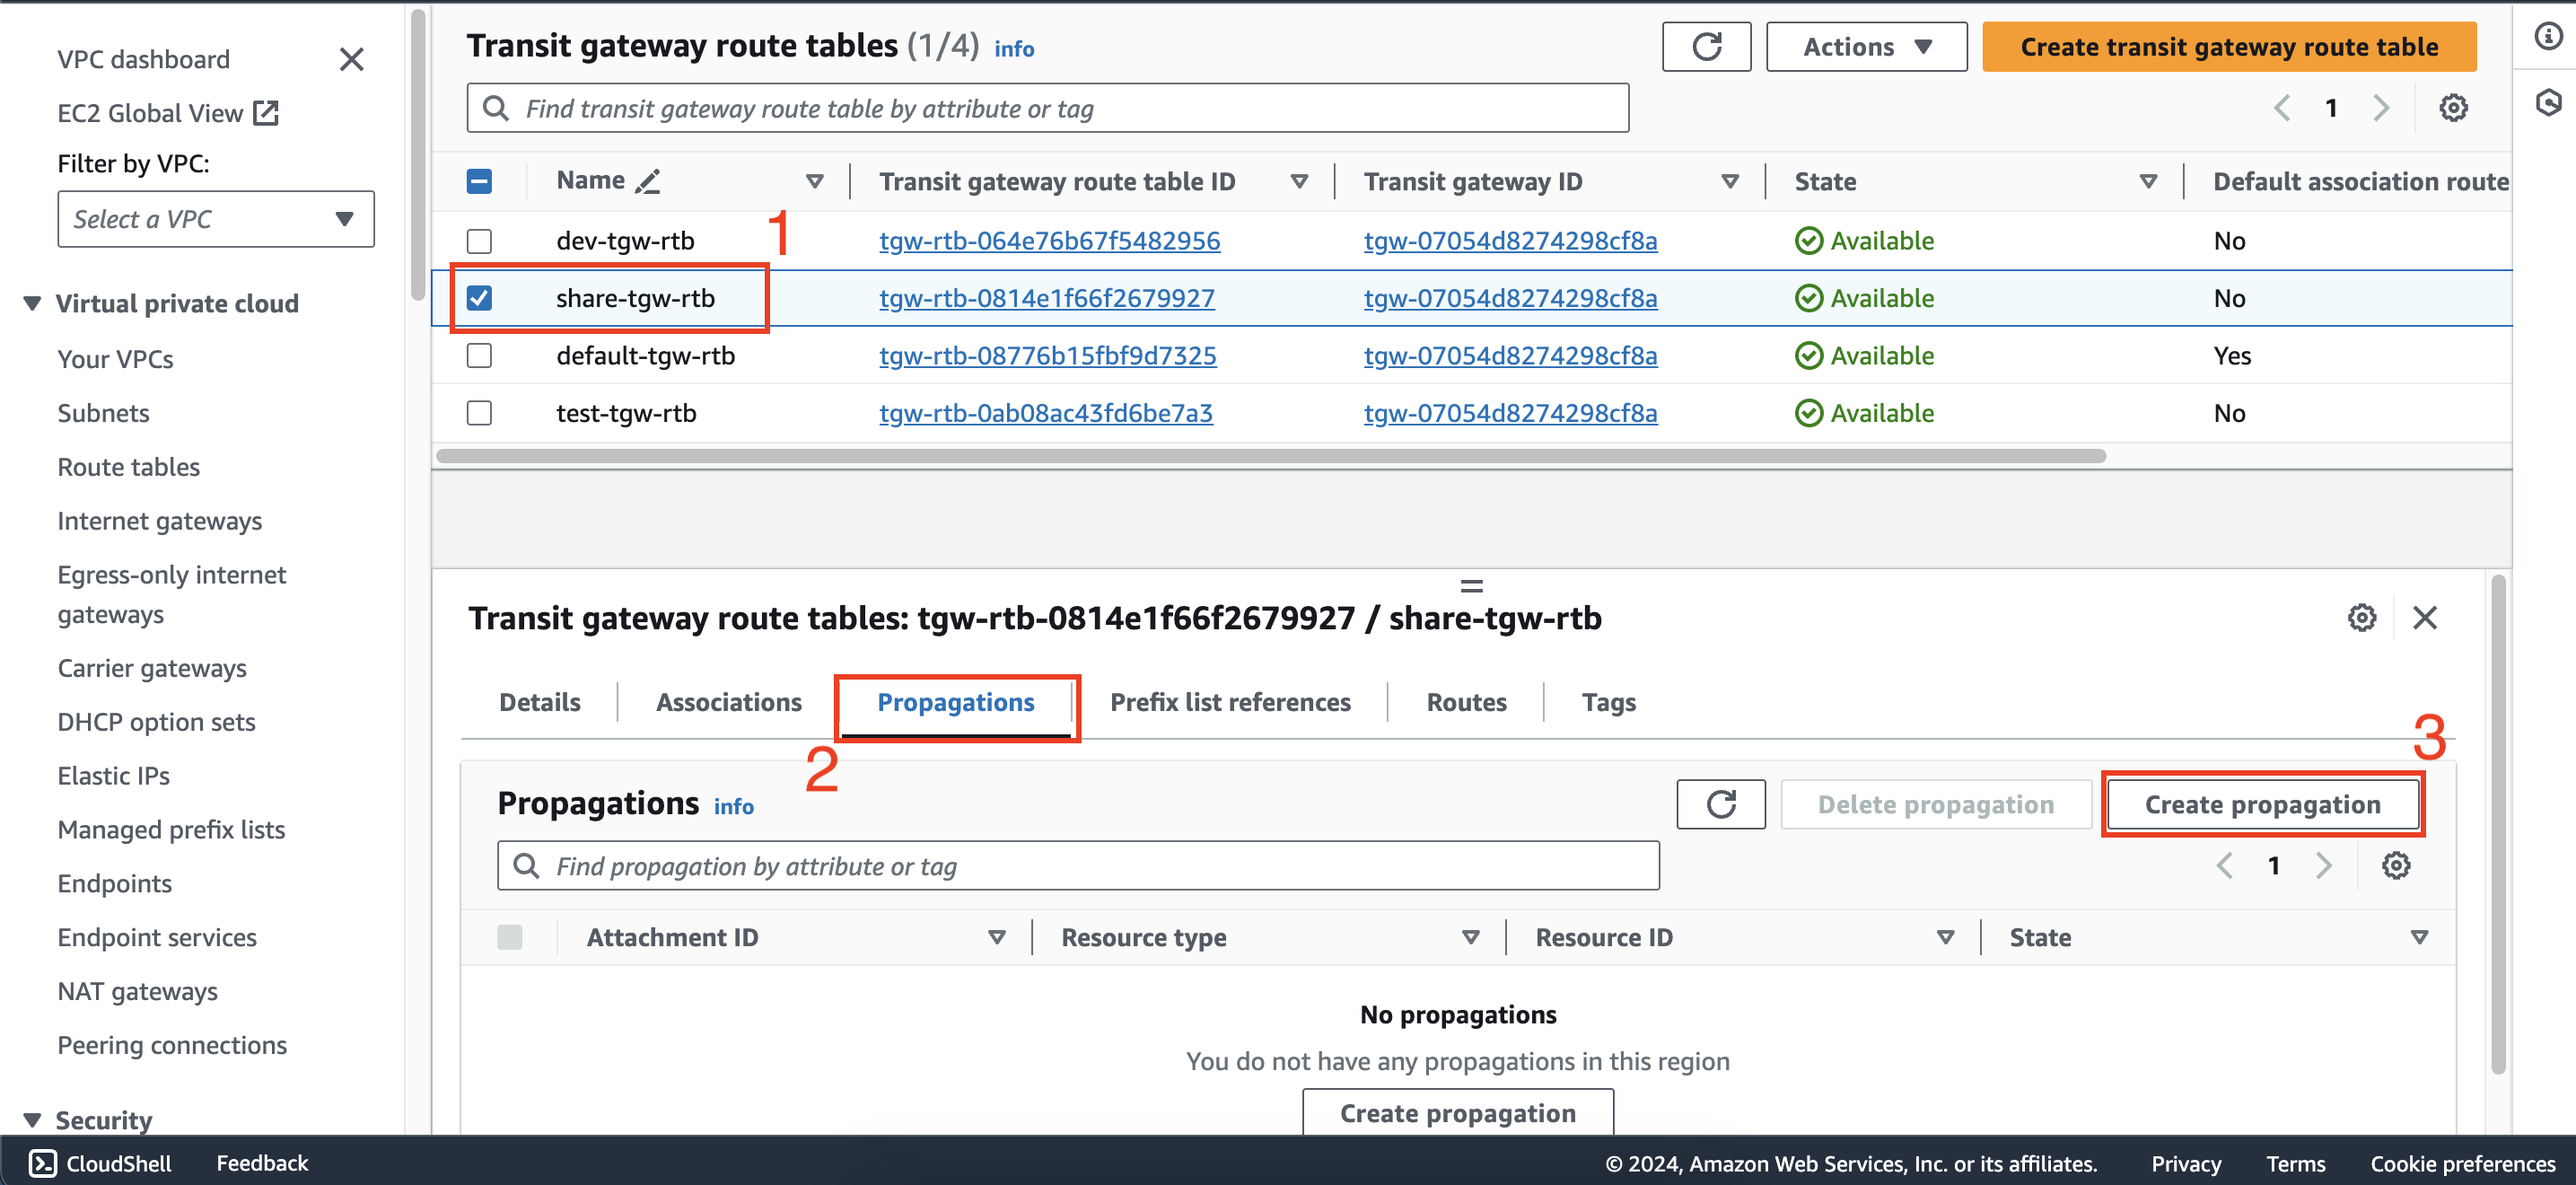
Do the same to create propagation from share-tgw-rtb to dev-att
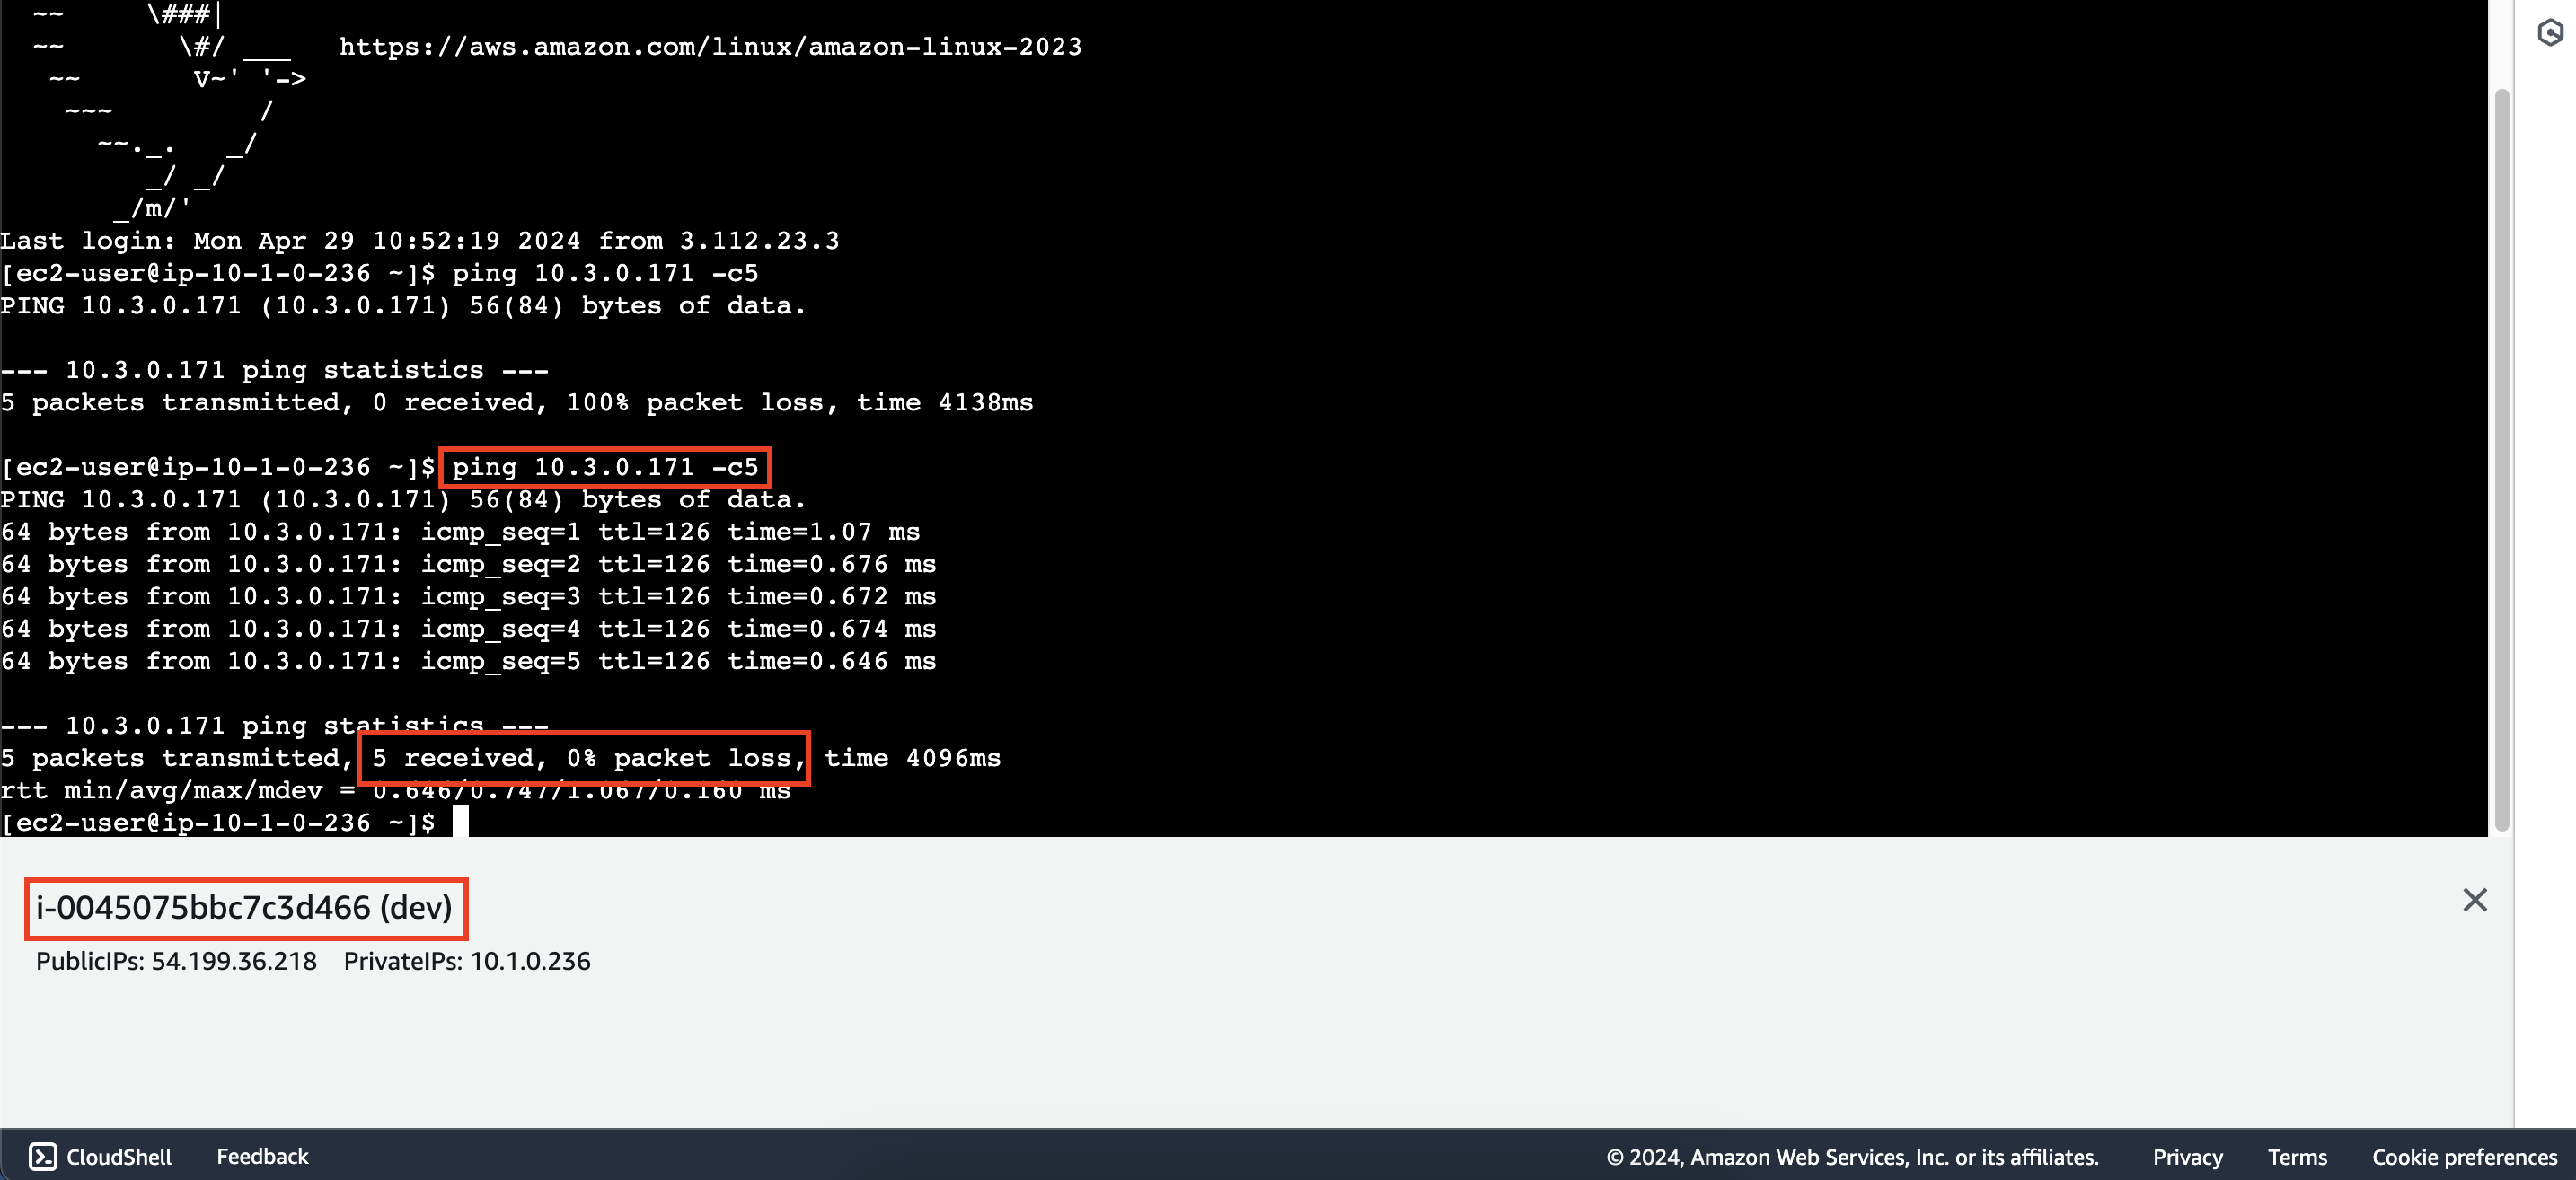
6. Check connection from dev instance to share instance
Practice yourself
Repeat the above steps to configure the connection from test instance to share instance and then check your results.
