Single route table
In this step, we will configure routing for Dev VPC, Test VPC to connect to the Share VPC using only the default route table.
Check the connection between EC2 instances
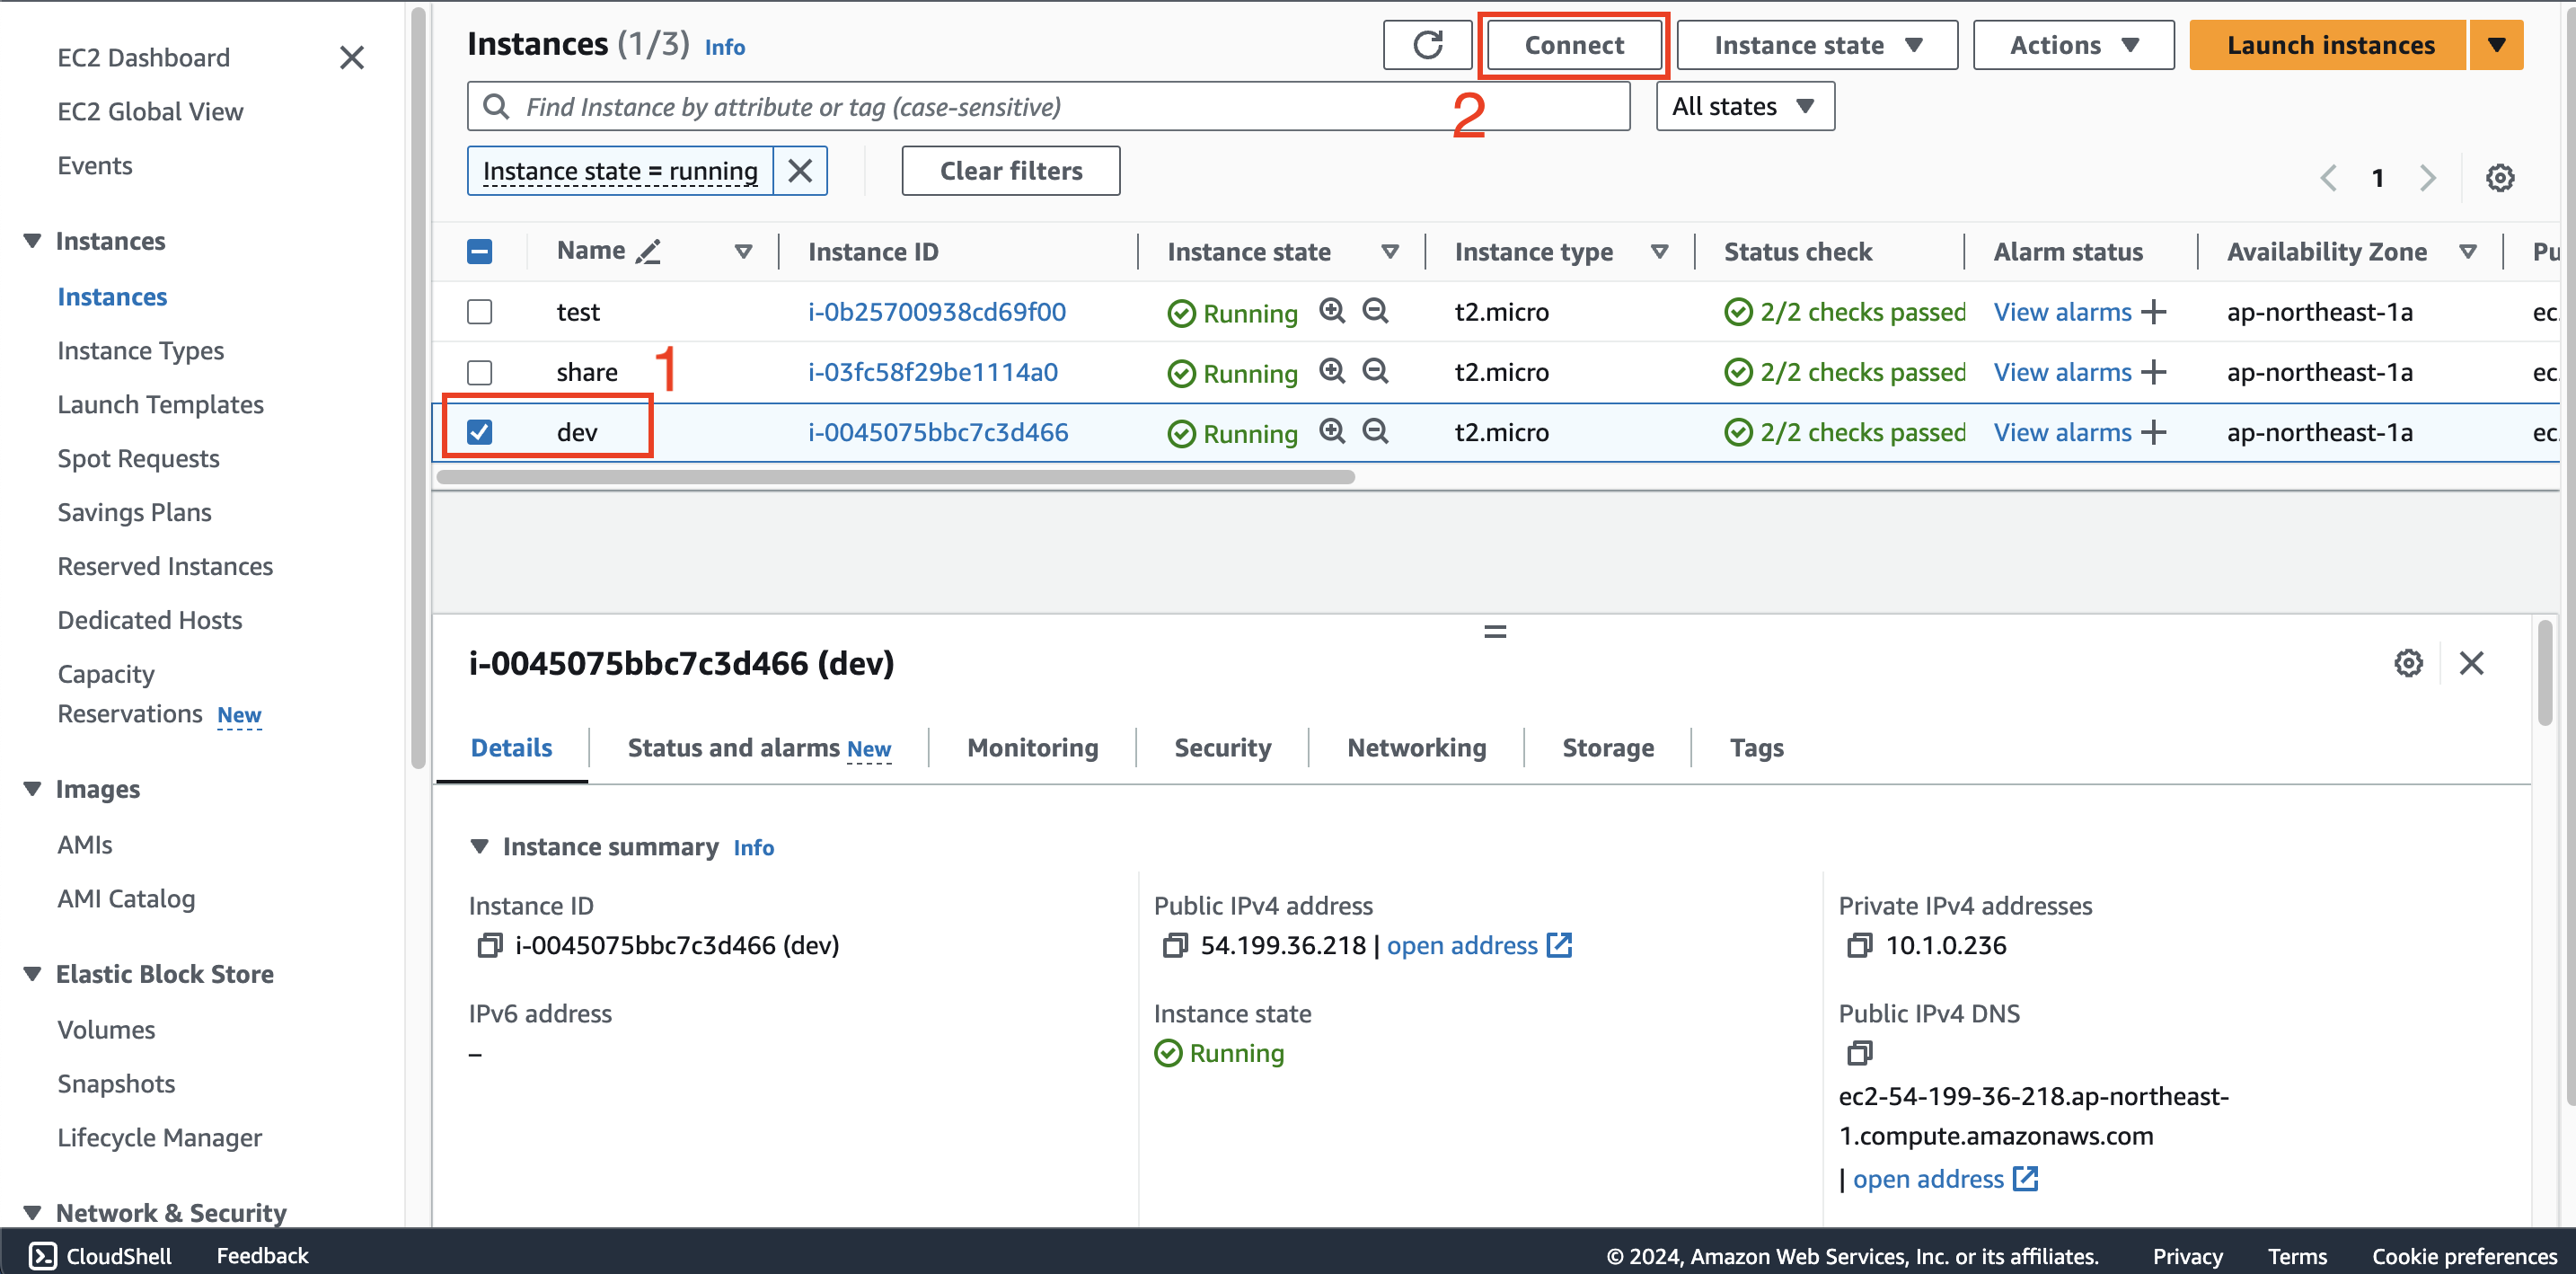
1. Connect to dev instance
- Access EC2 service then navigate to Instances page, then select dev instance
- Click Connect
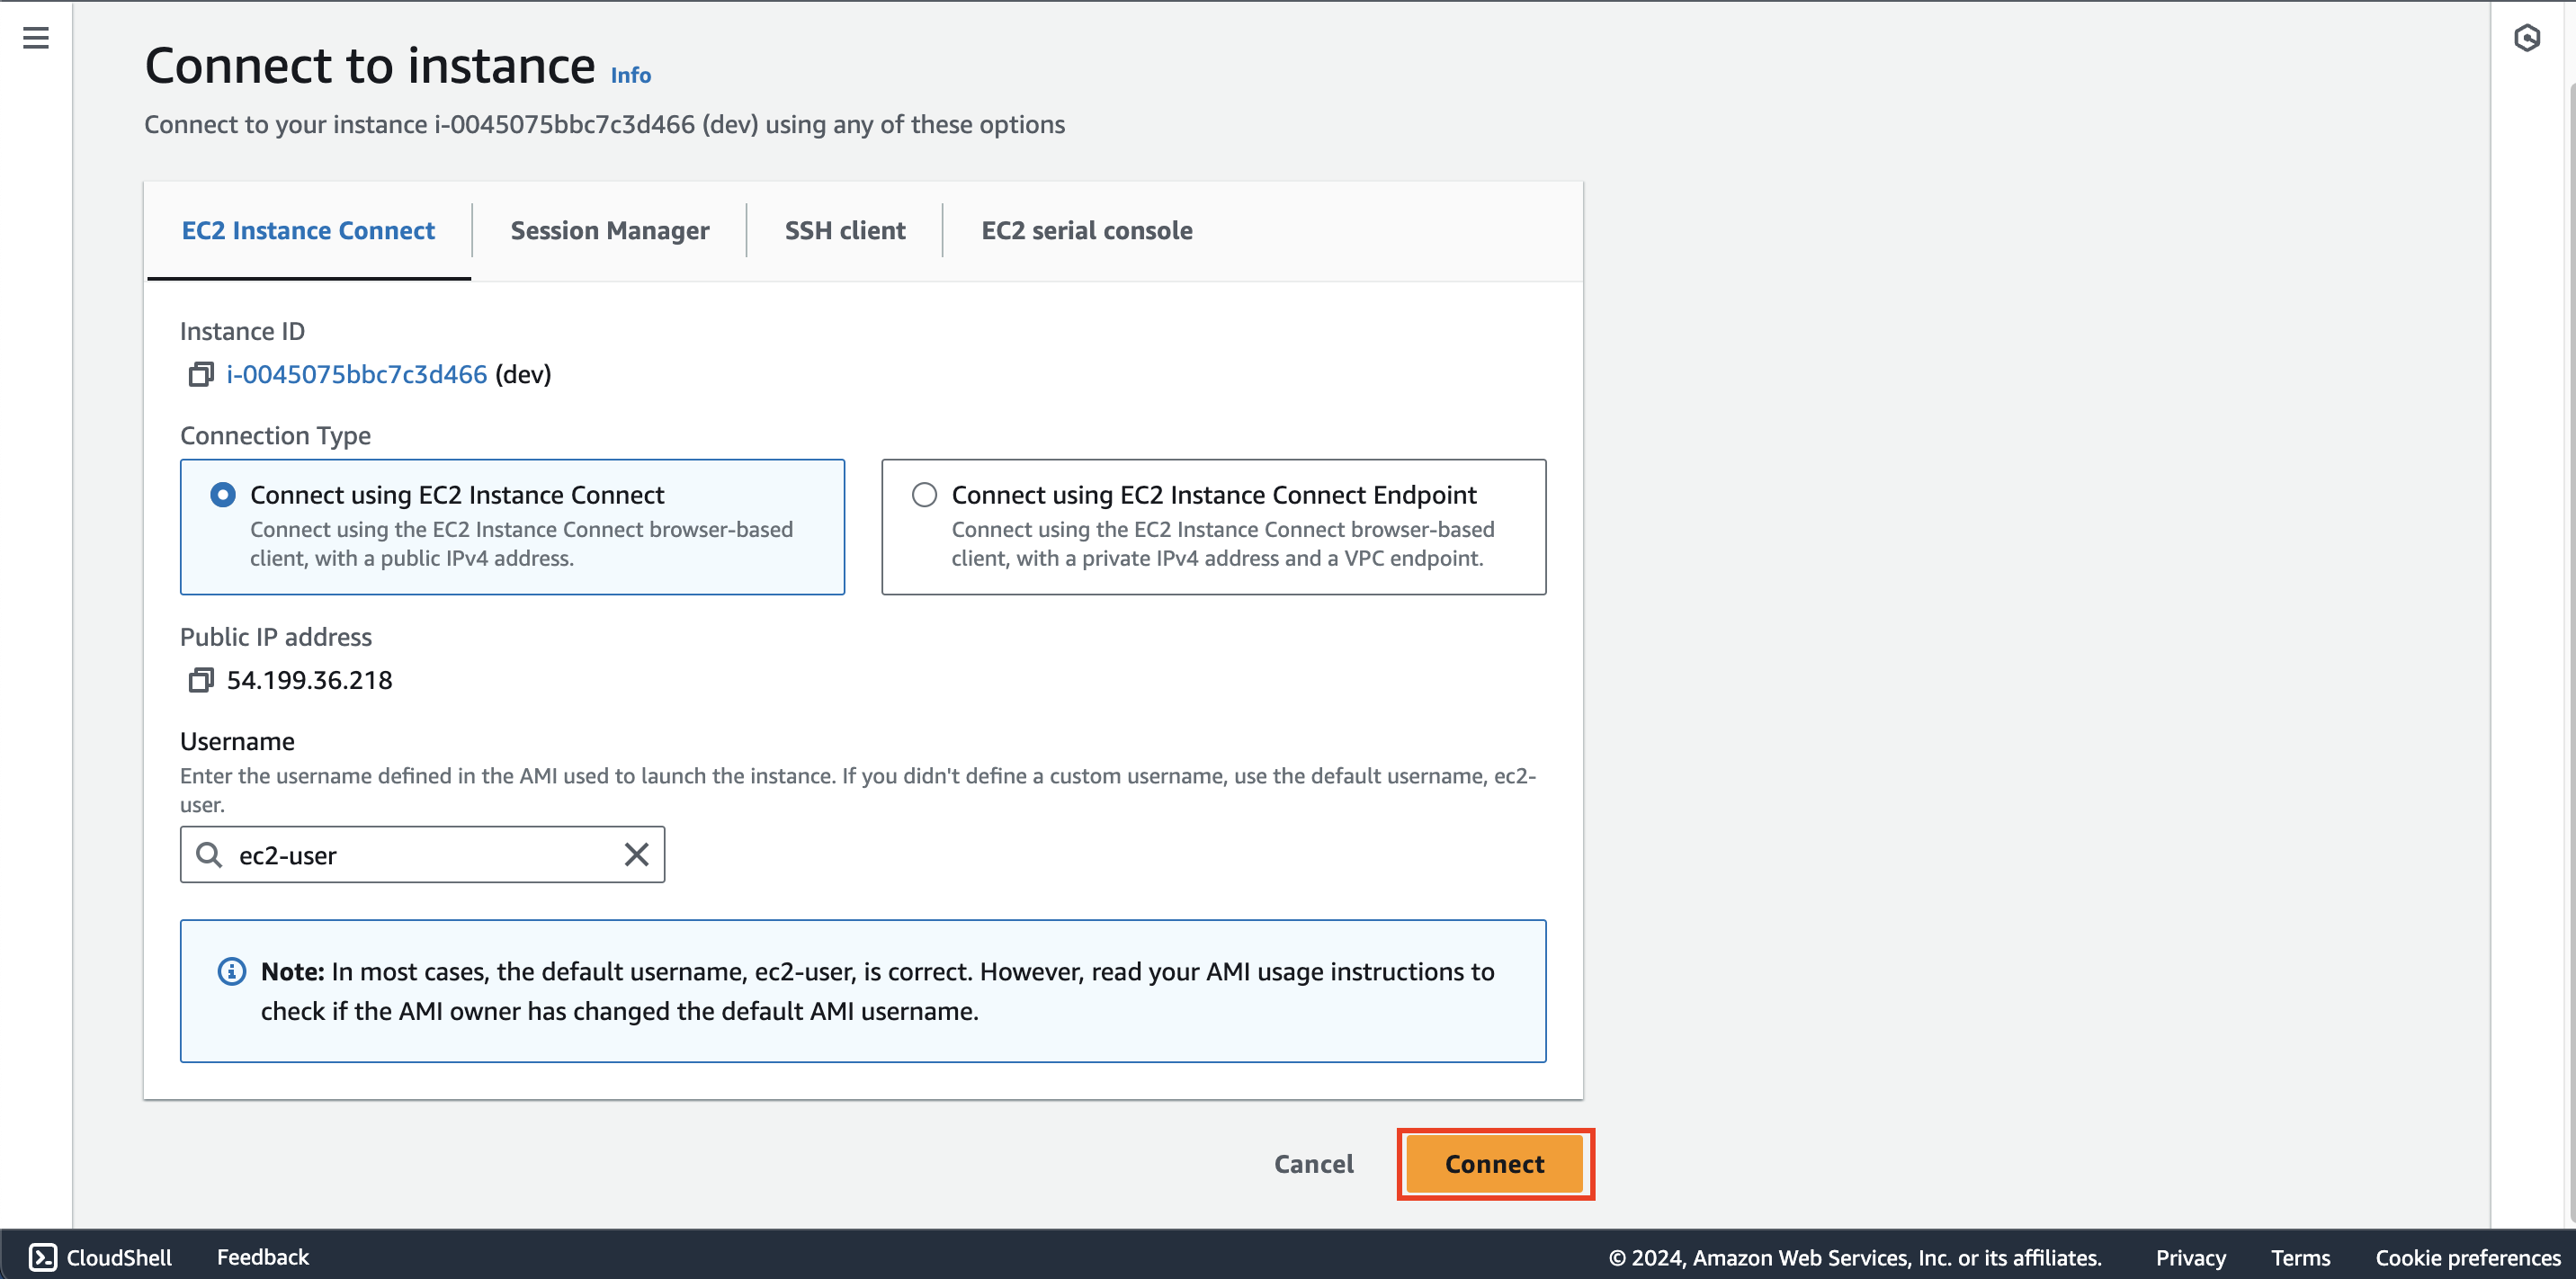
- Keep the default configurations then click Connect
2. Check connection from dev to share instance
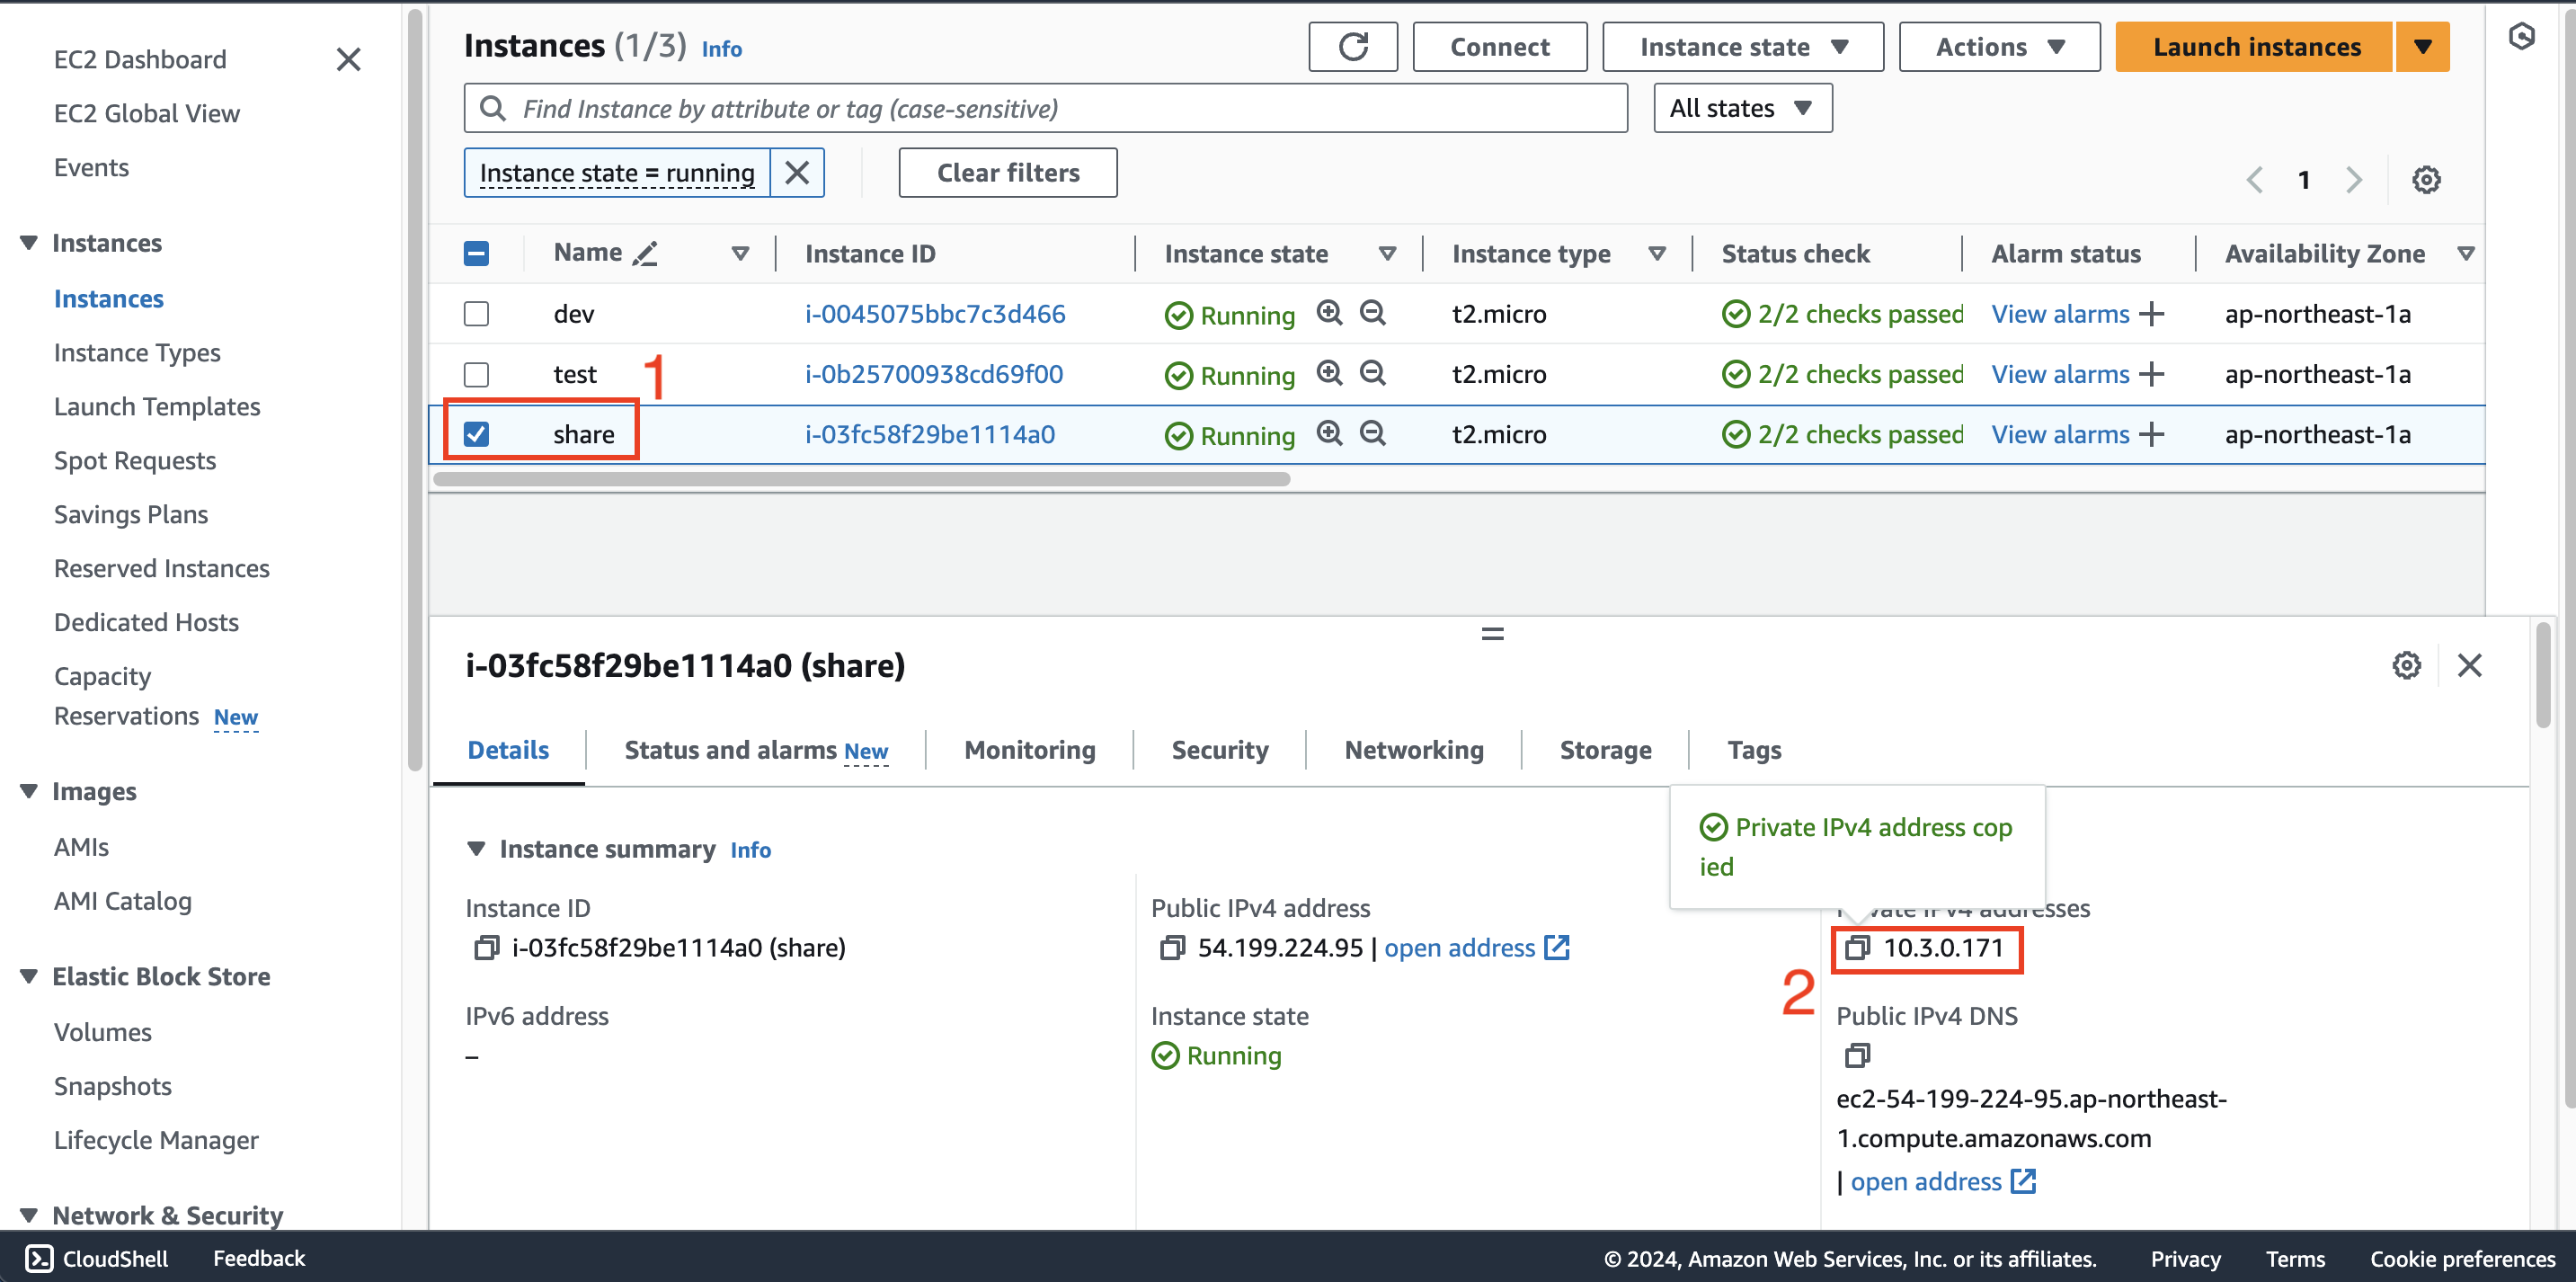
- Return to the list of instances page and select share instance
- Copy private IPv4 address of this instance
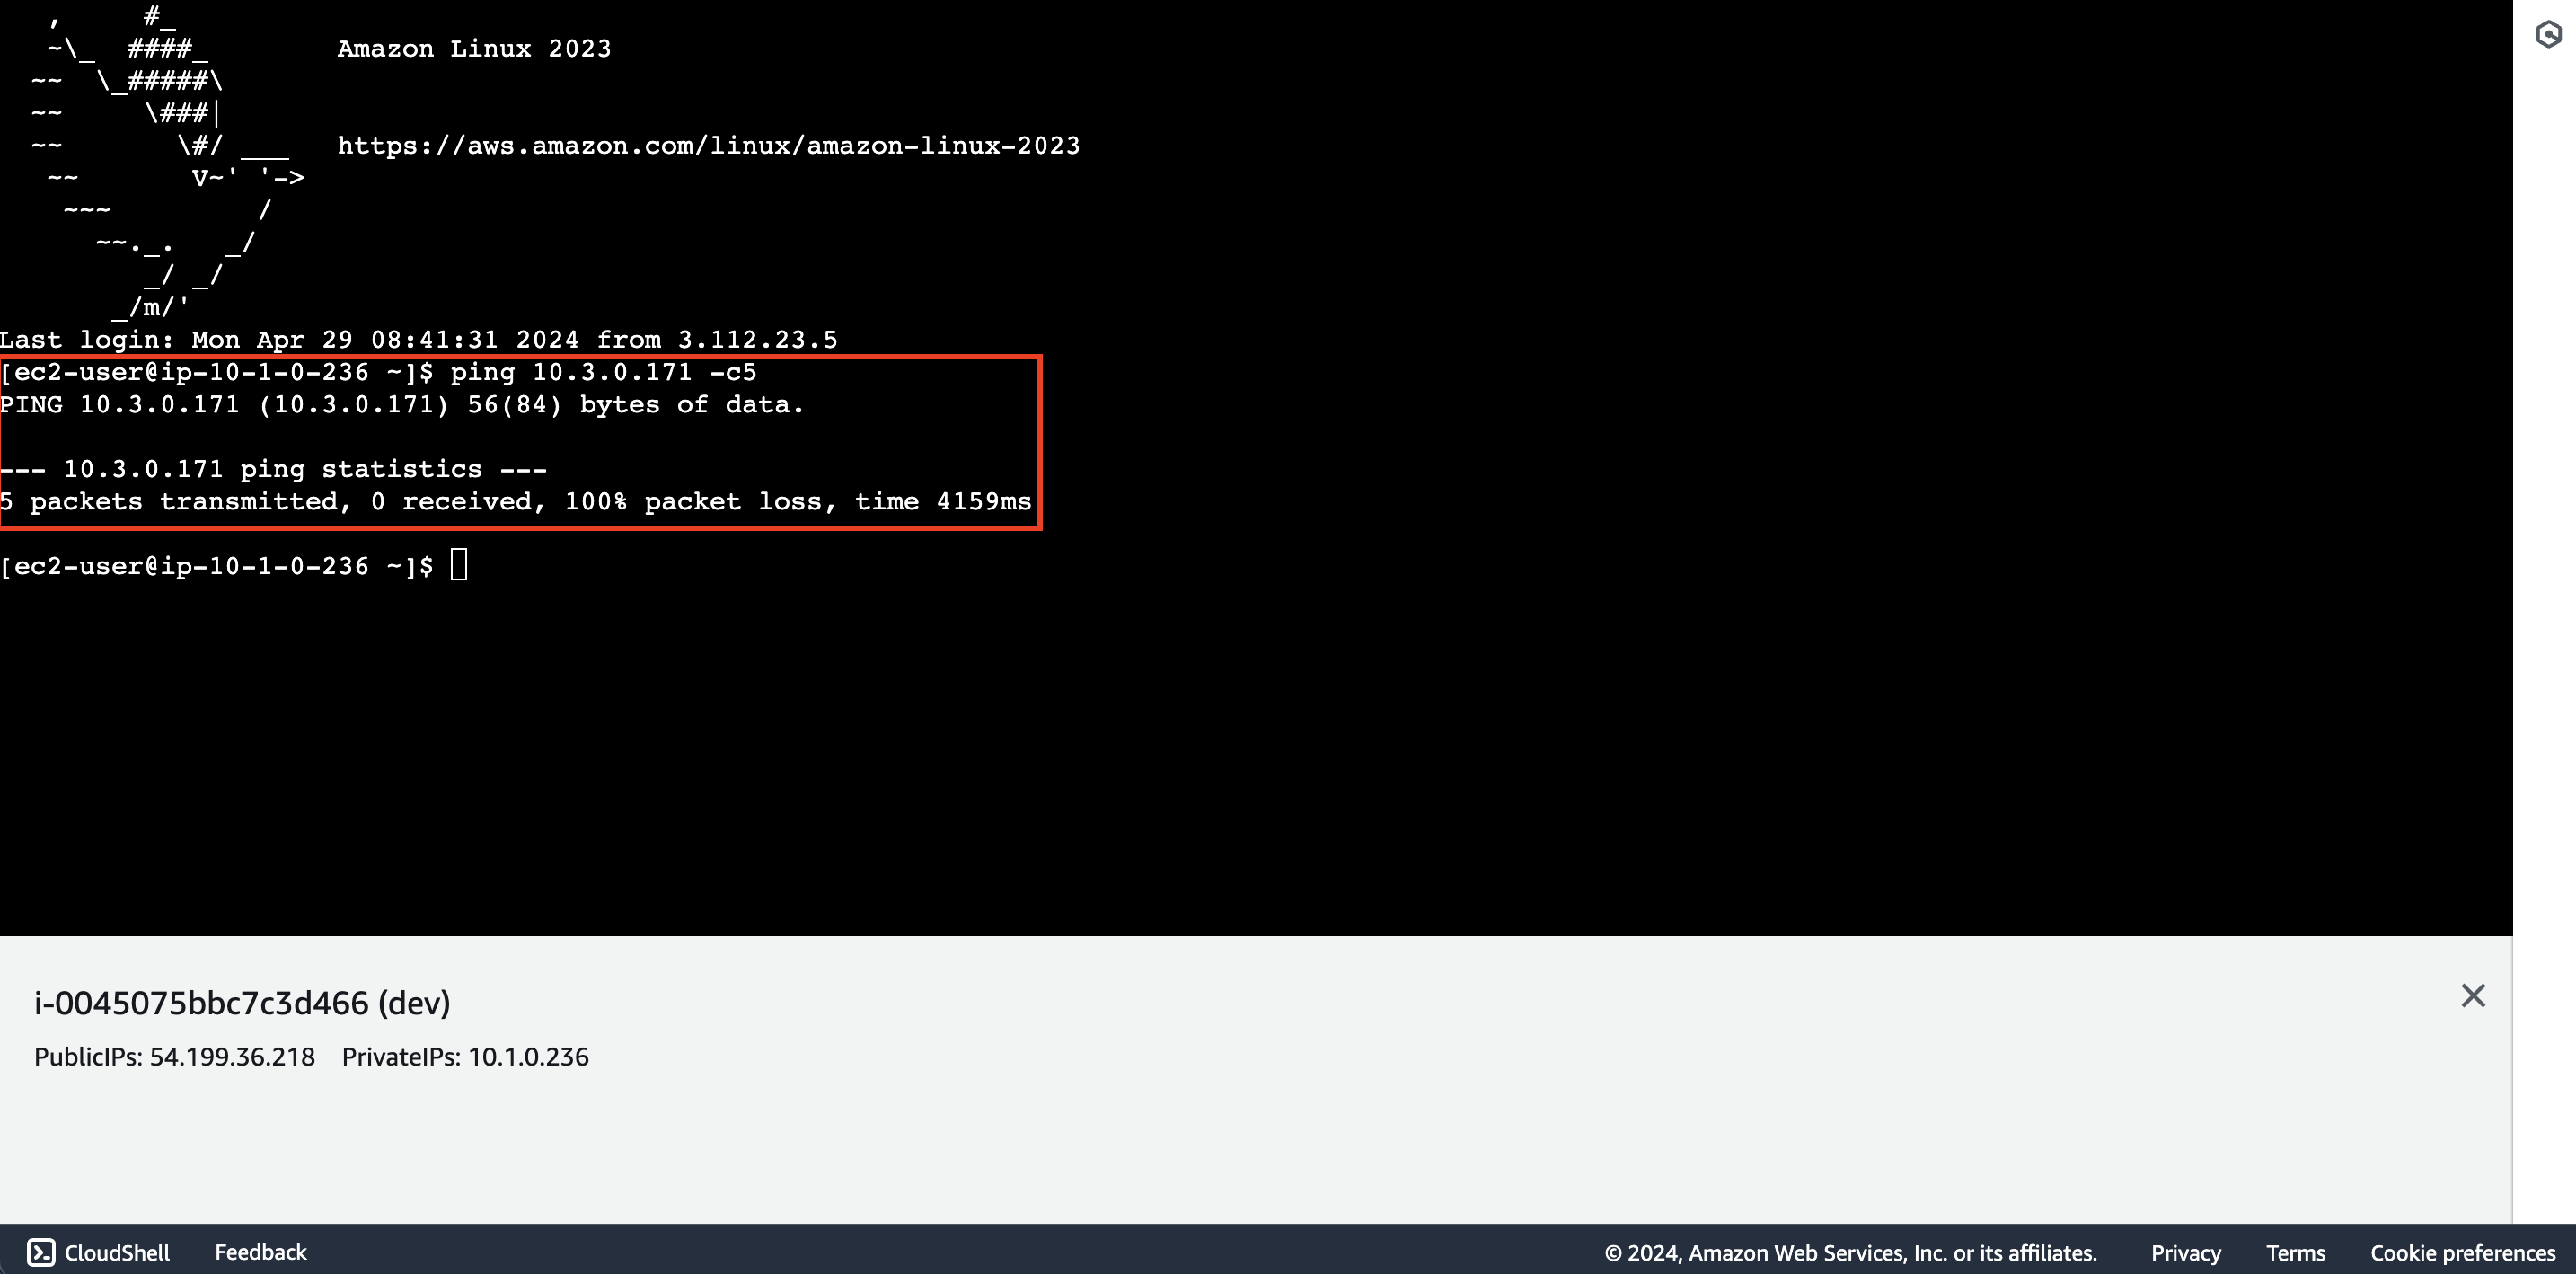
- Return to the EC2 instance connect interface of the dev instance and run the following command:
ping <share_instance_private_ipv4> -c5 - After few minutes, we receive a message saying we cannot connect to the share instance. The reason is because
these 2 virtual machines are located in 2 VPCs that are not connected to each other.
Configure routing for Dev VPC
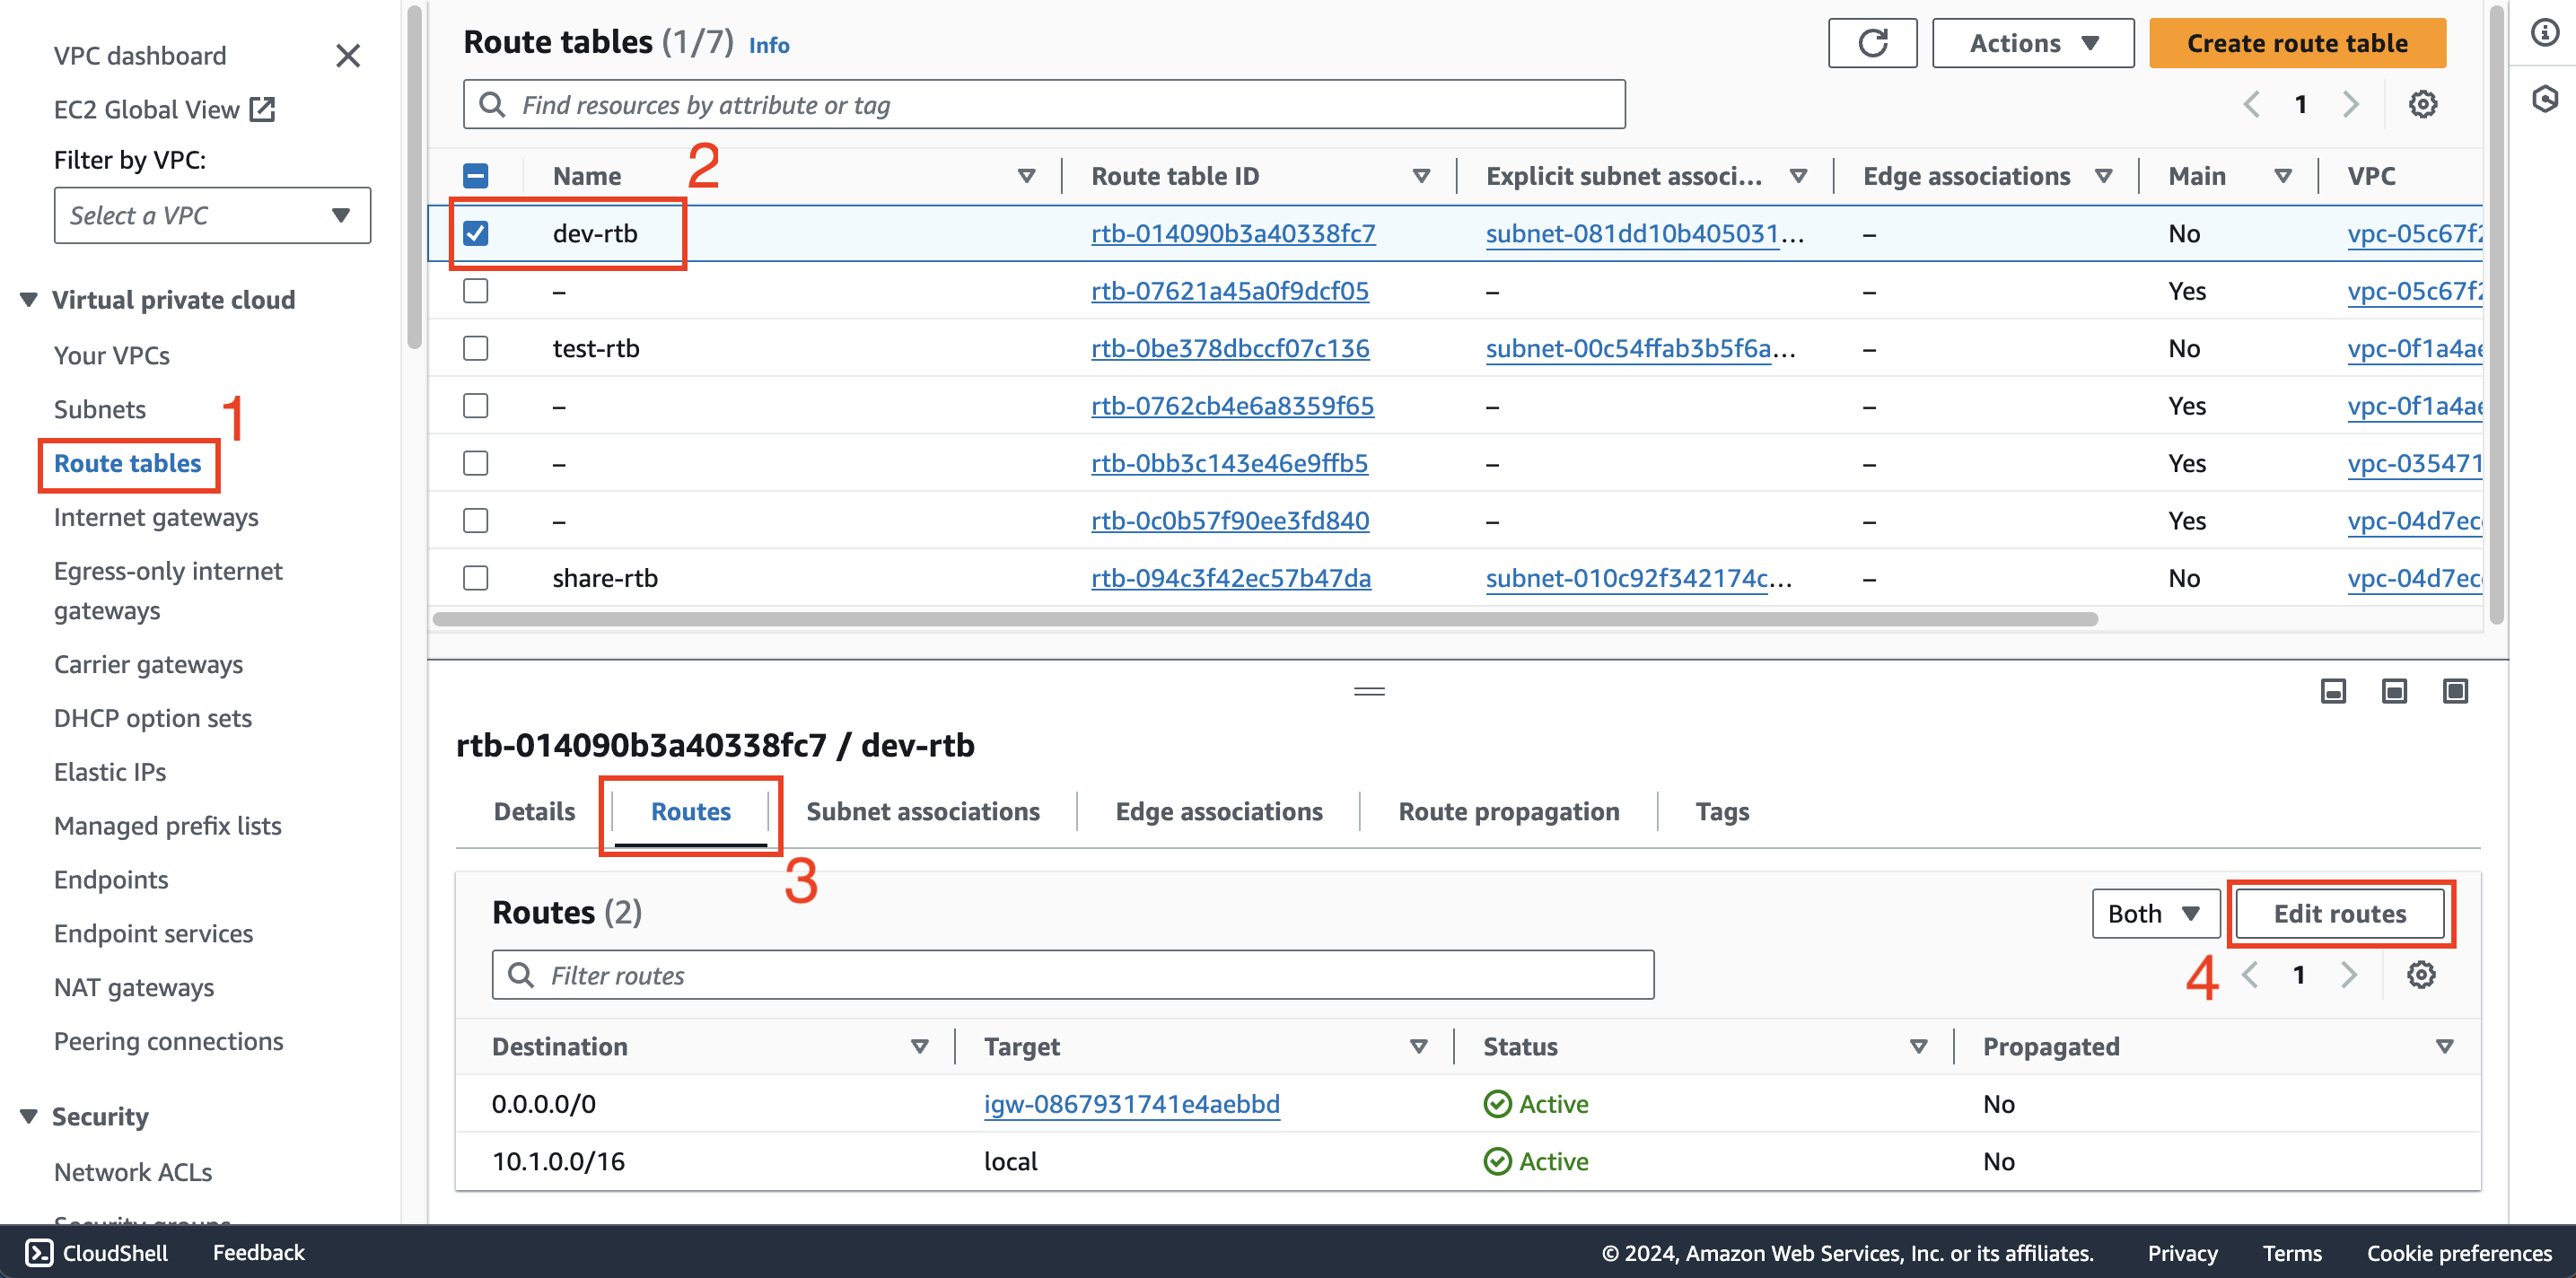
1. Configure route table for Dev VPC
Return to VPC interface, select Route tables
Select dev-rtb
Select Routes tab then click Edit routes
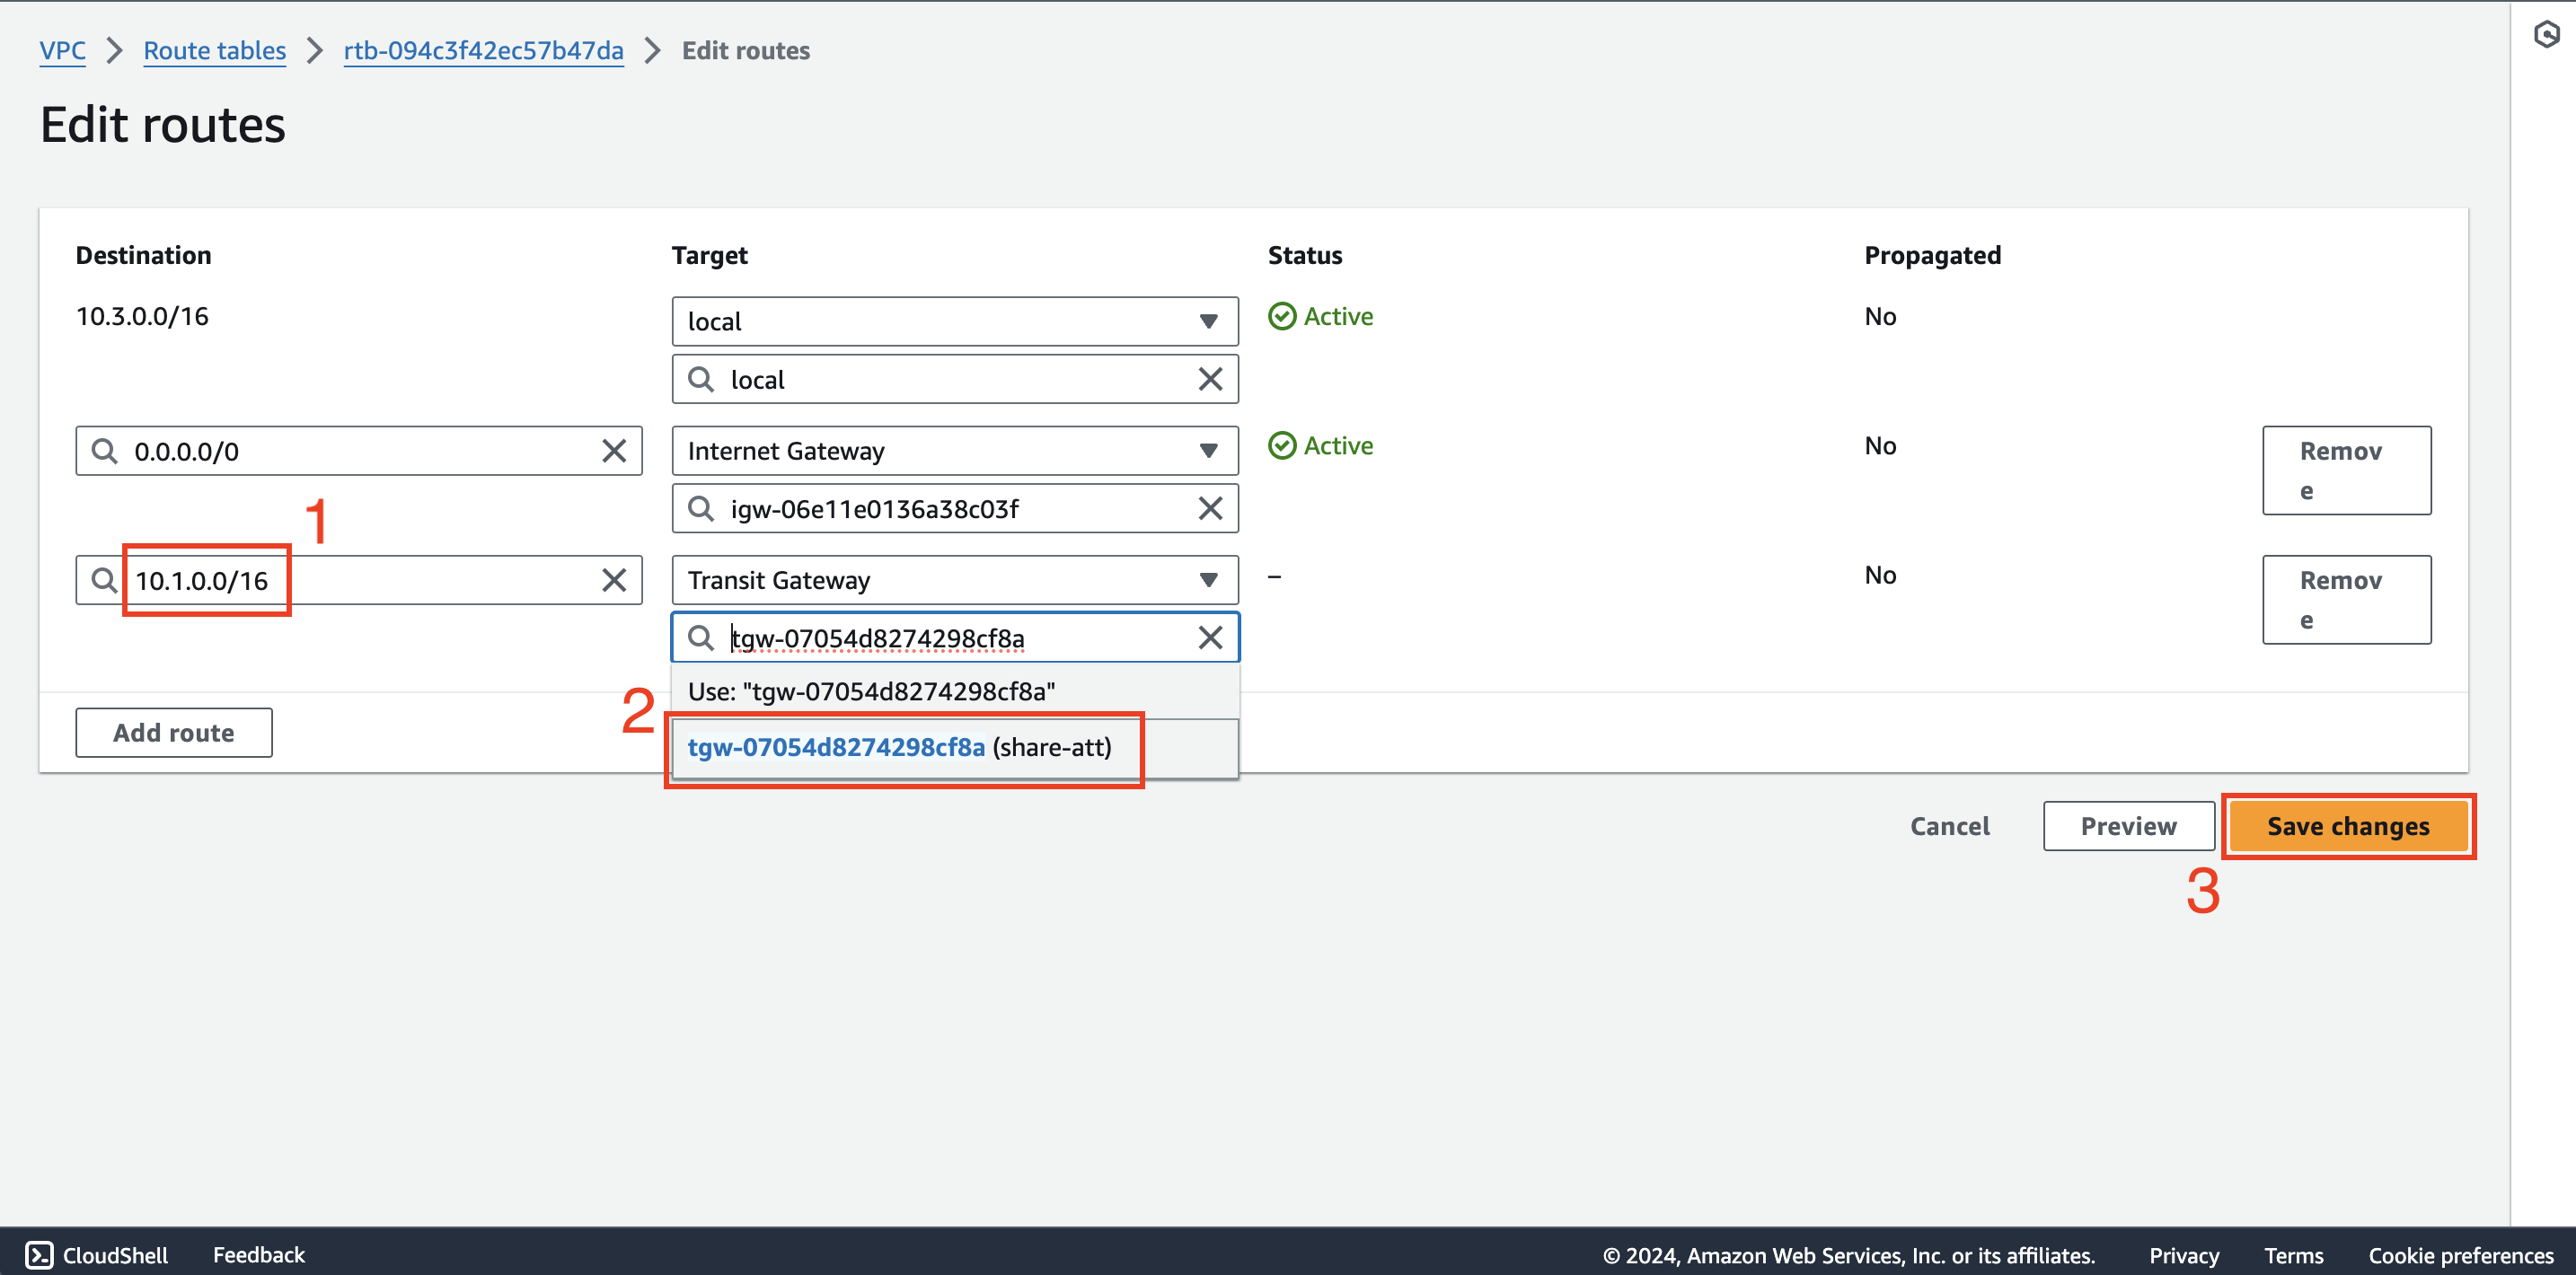
Add a new route with destination
10.3.0.0/16(CIDR of Share VPC), select Transit Gateway for target then select dev-att and click Save changes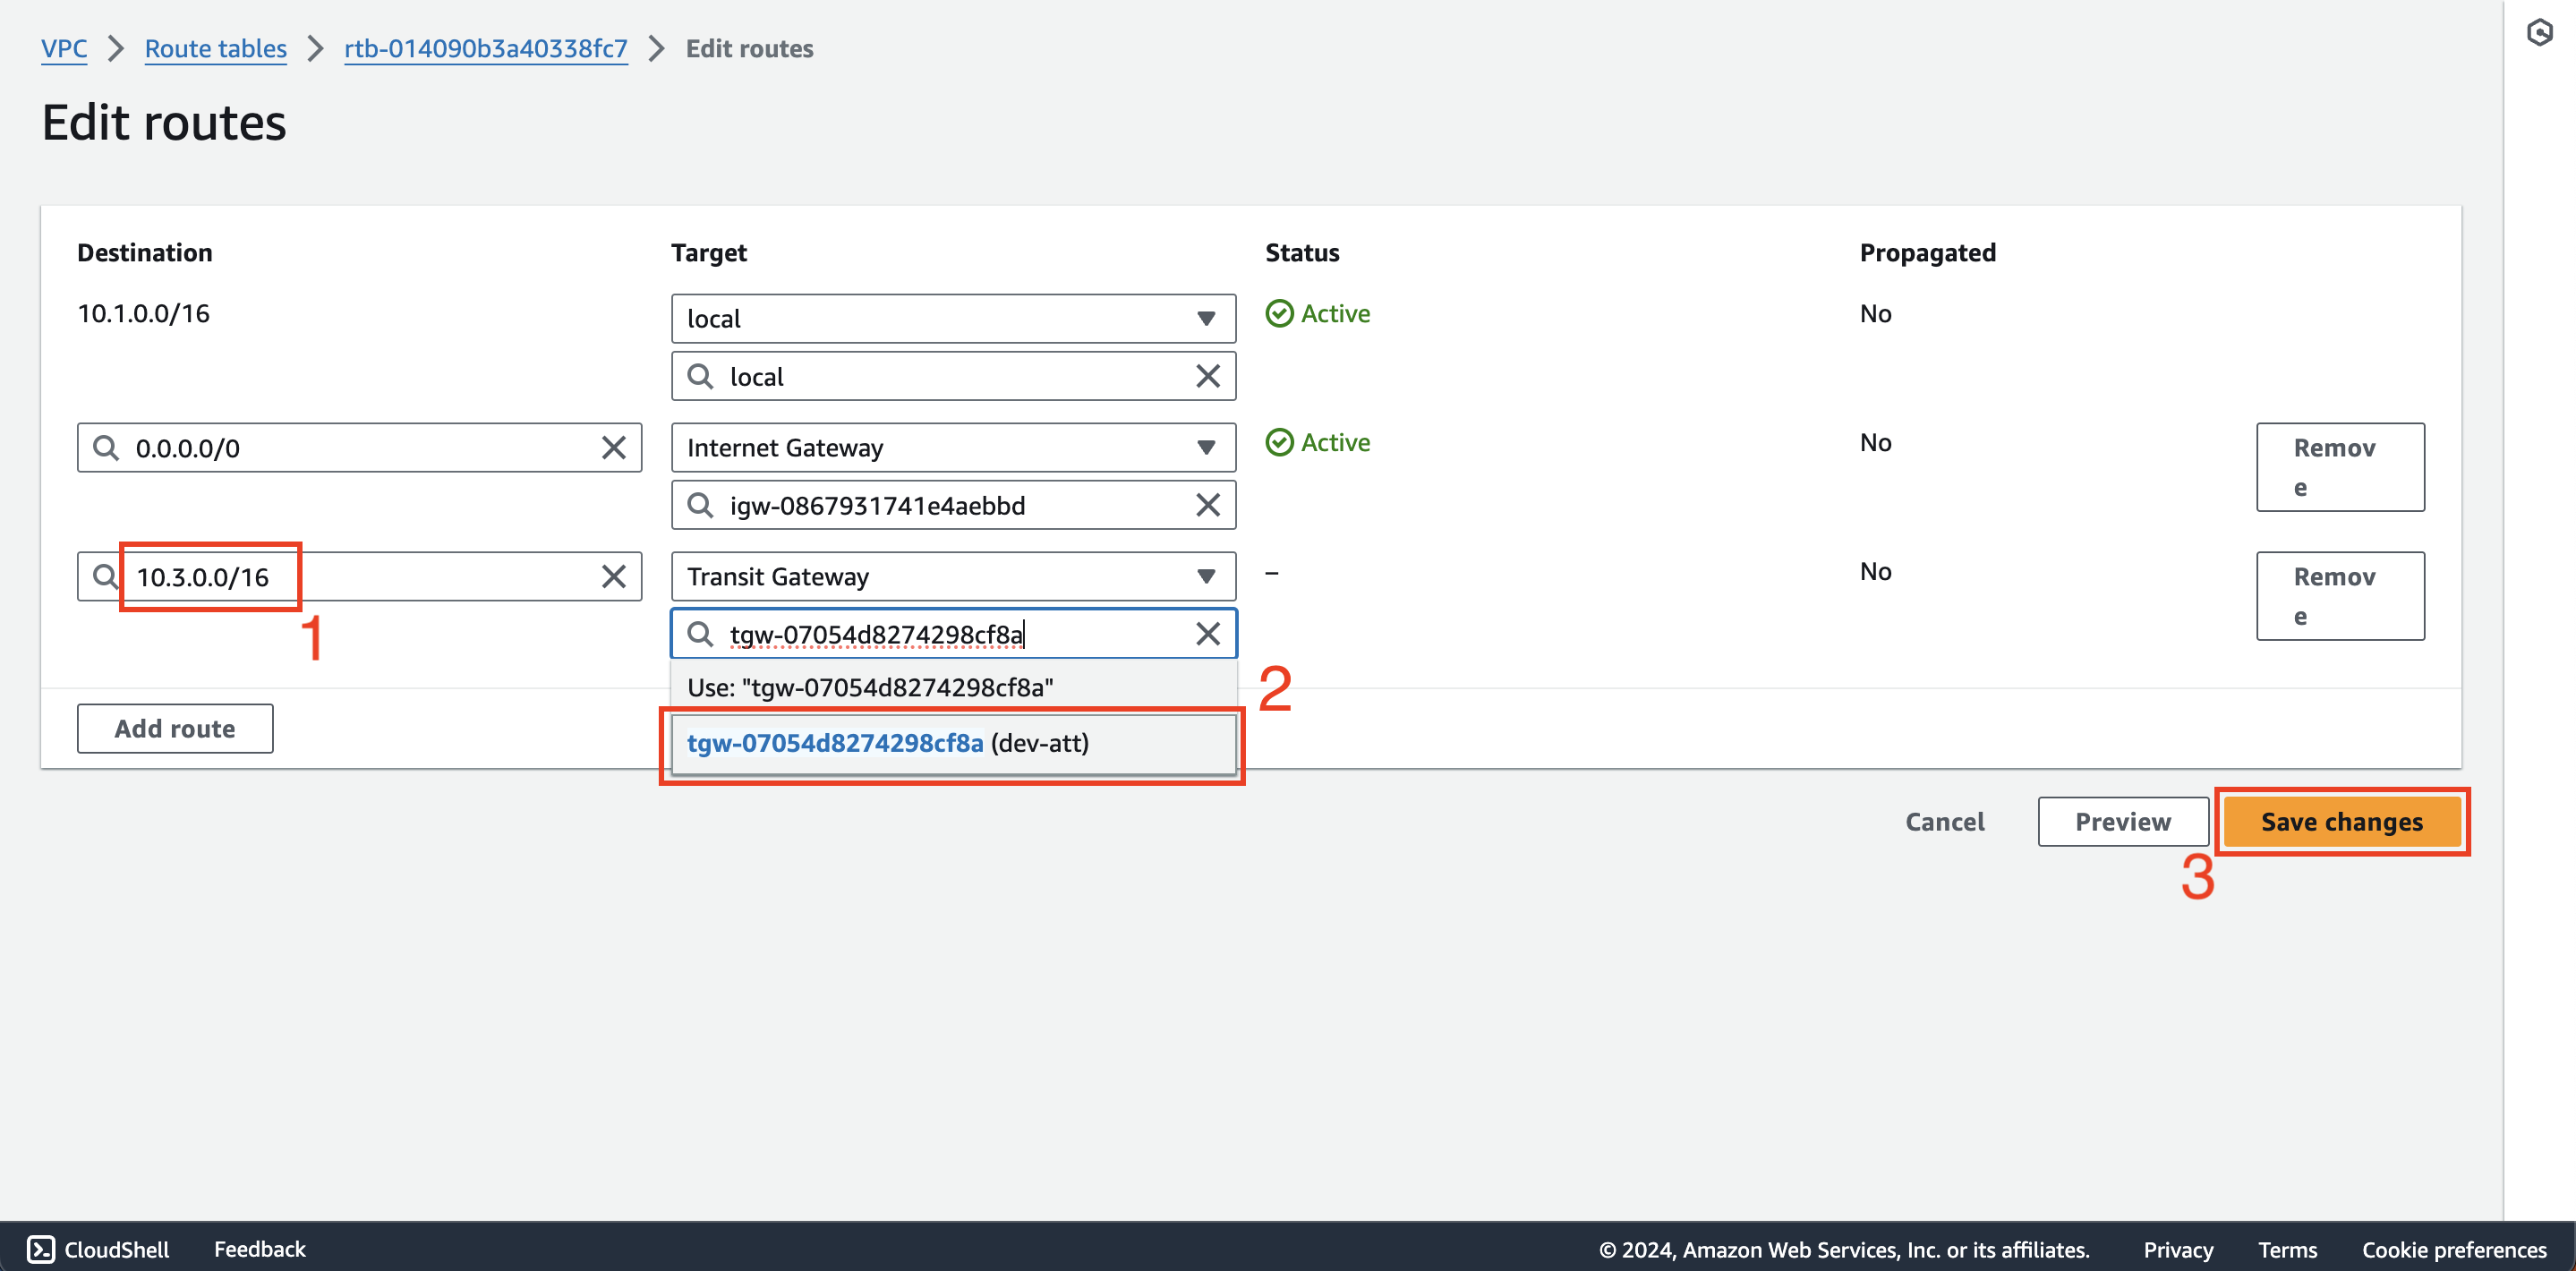
2. Configure the routing table for Share VPC by repeating the above step
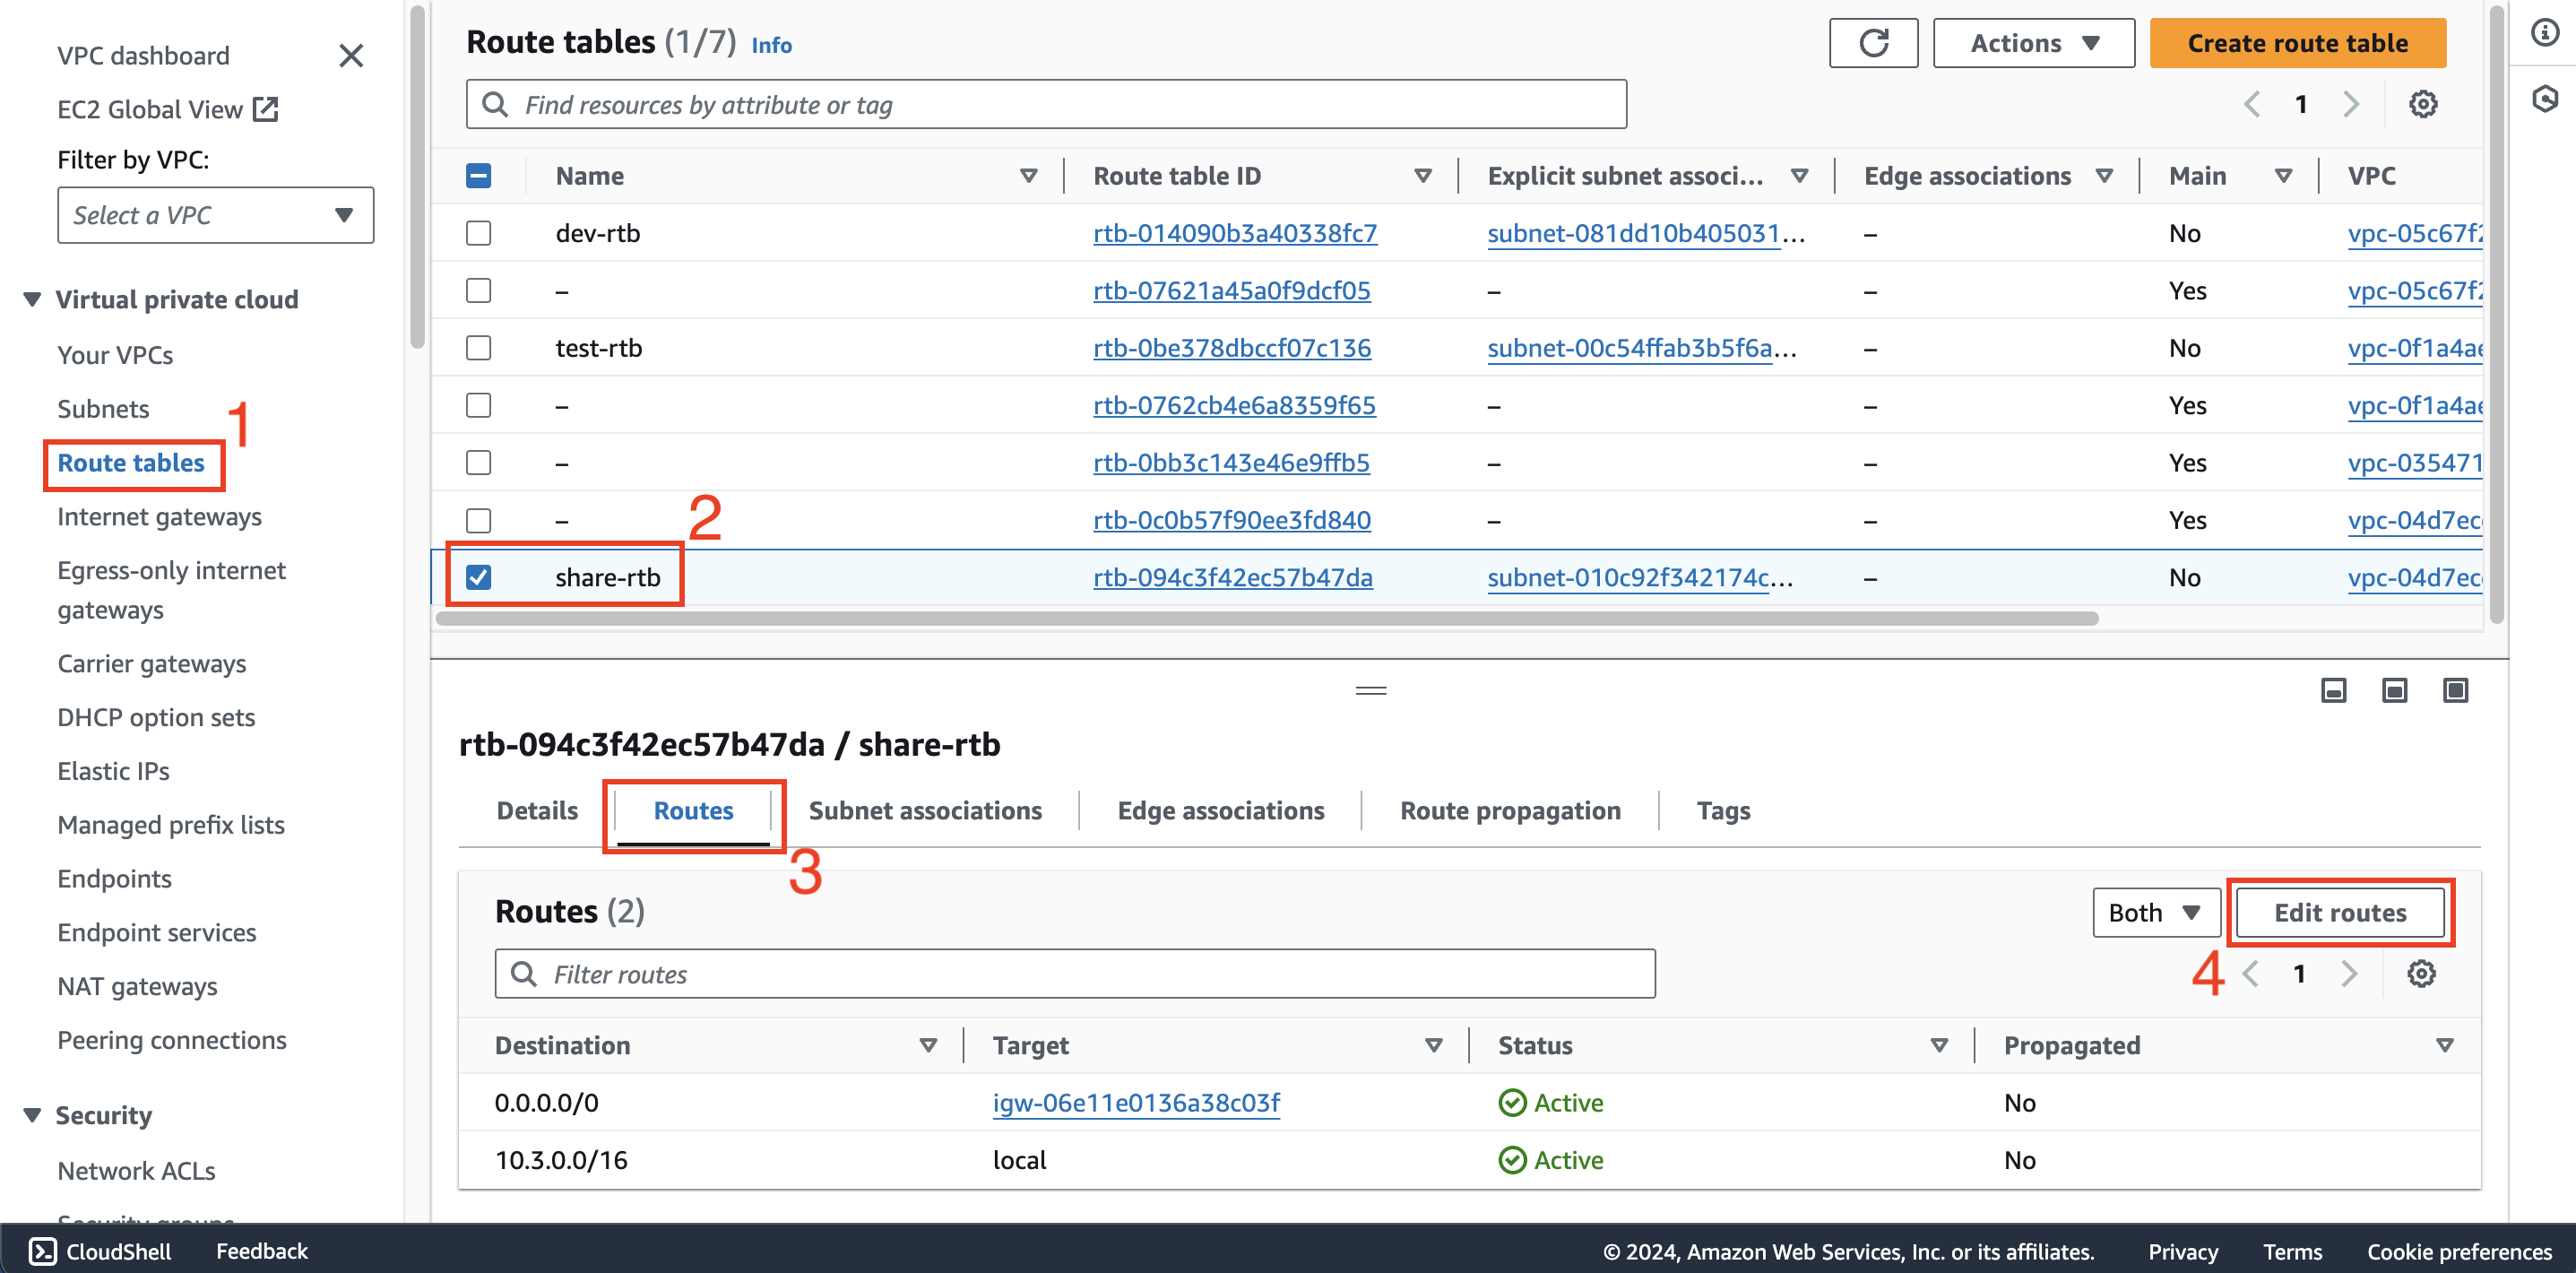
3. Check the connection again
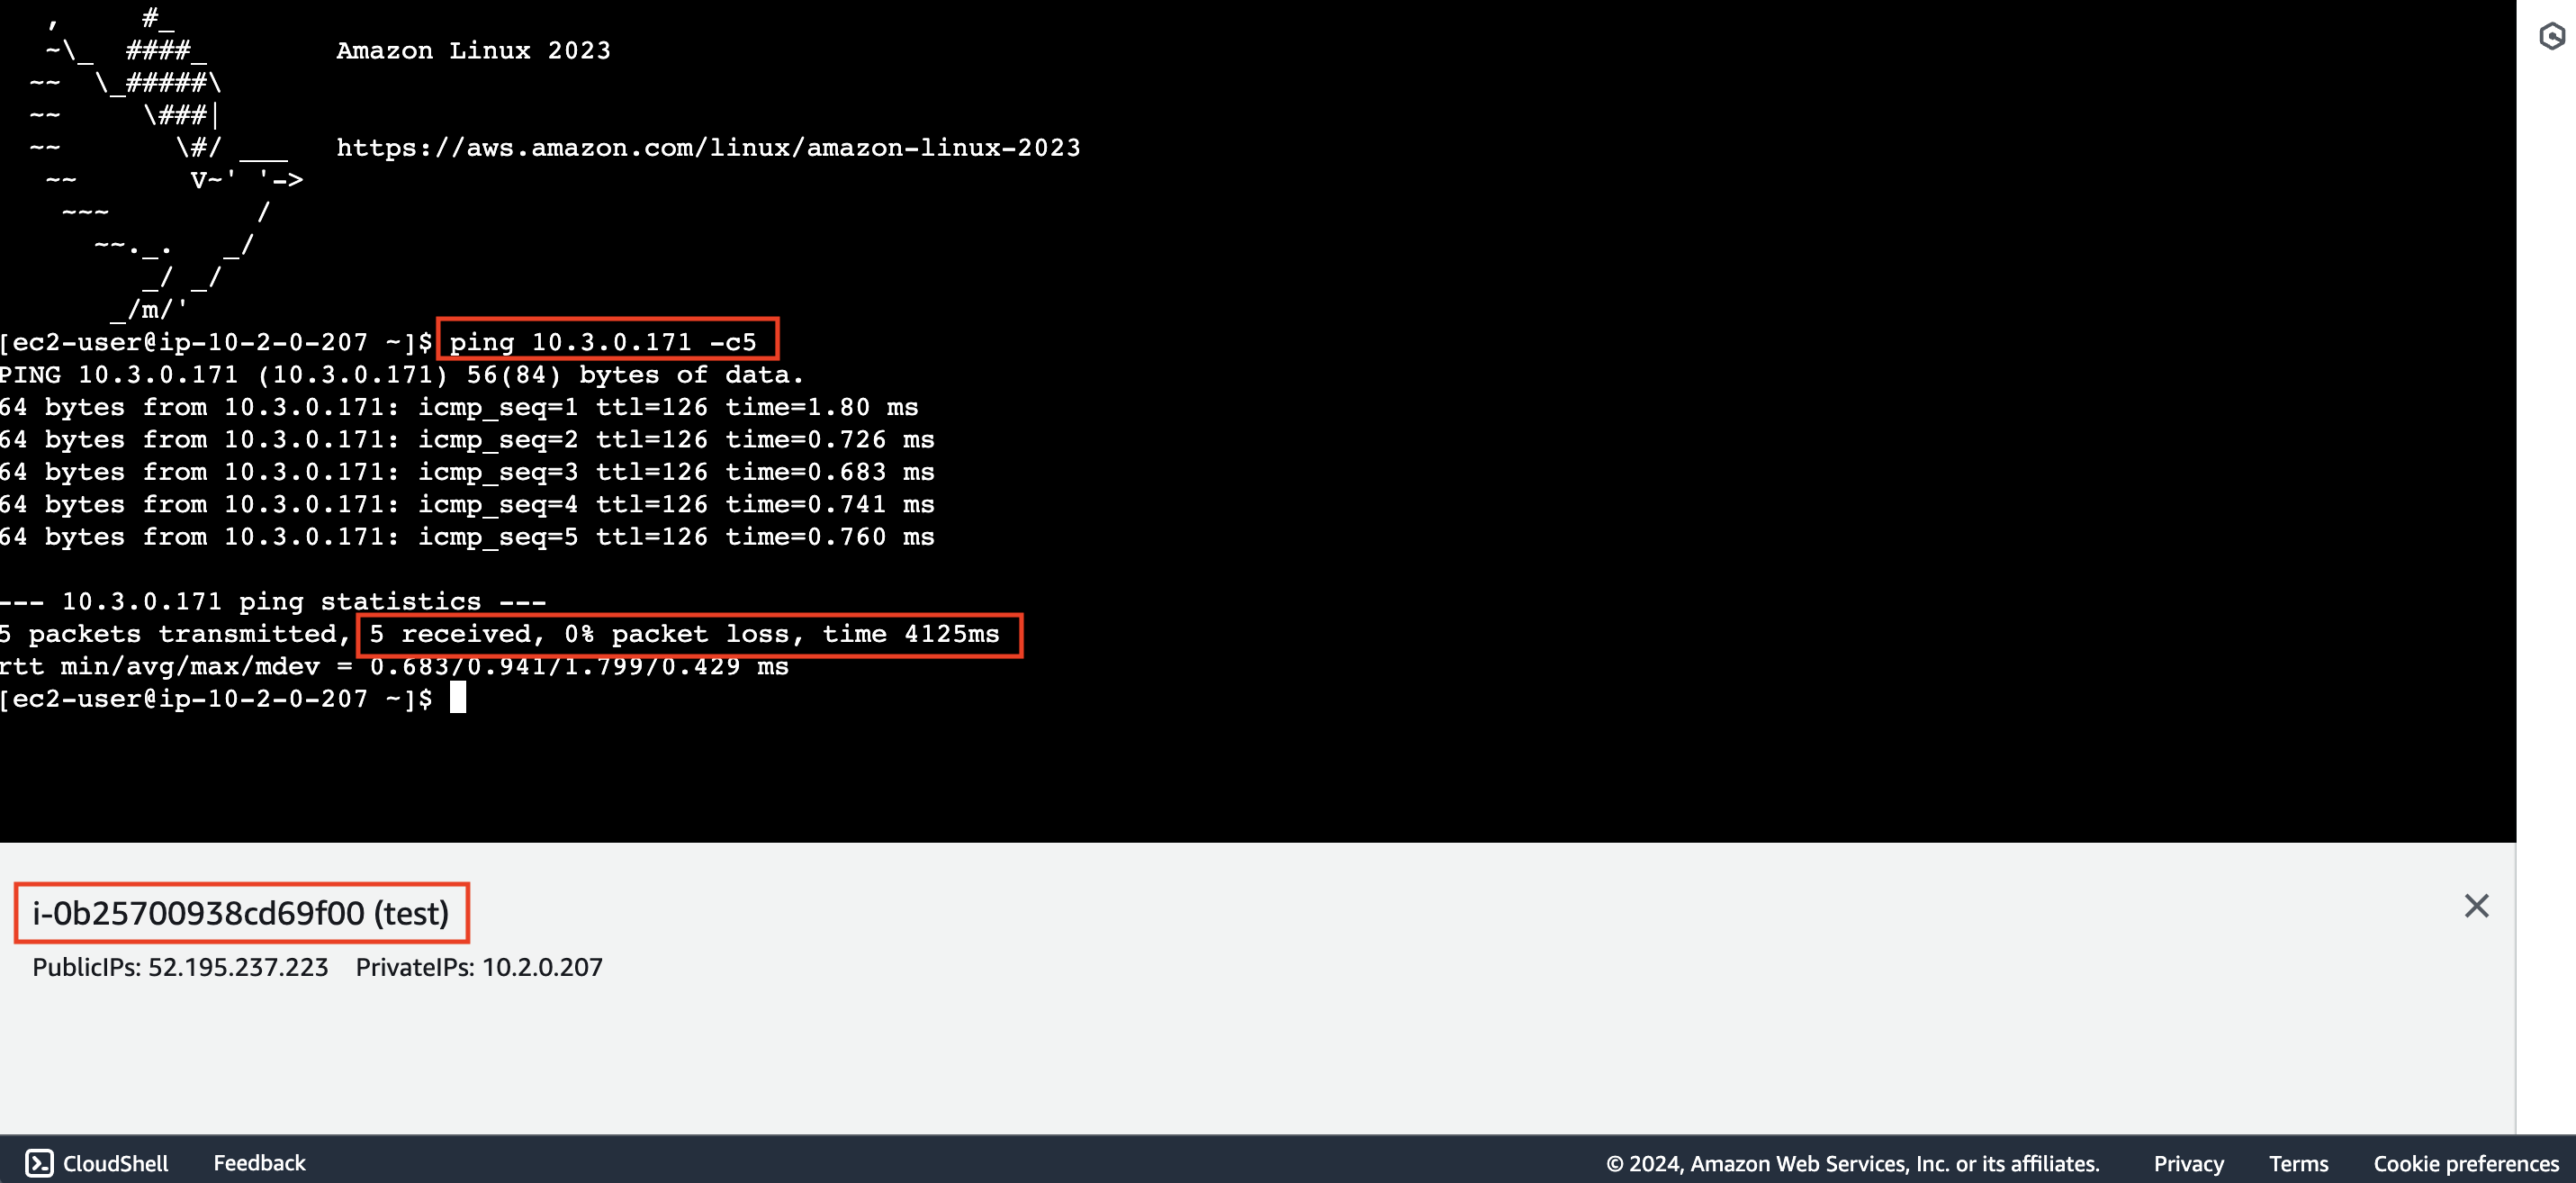
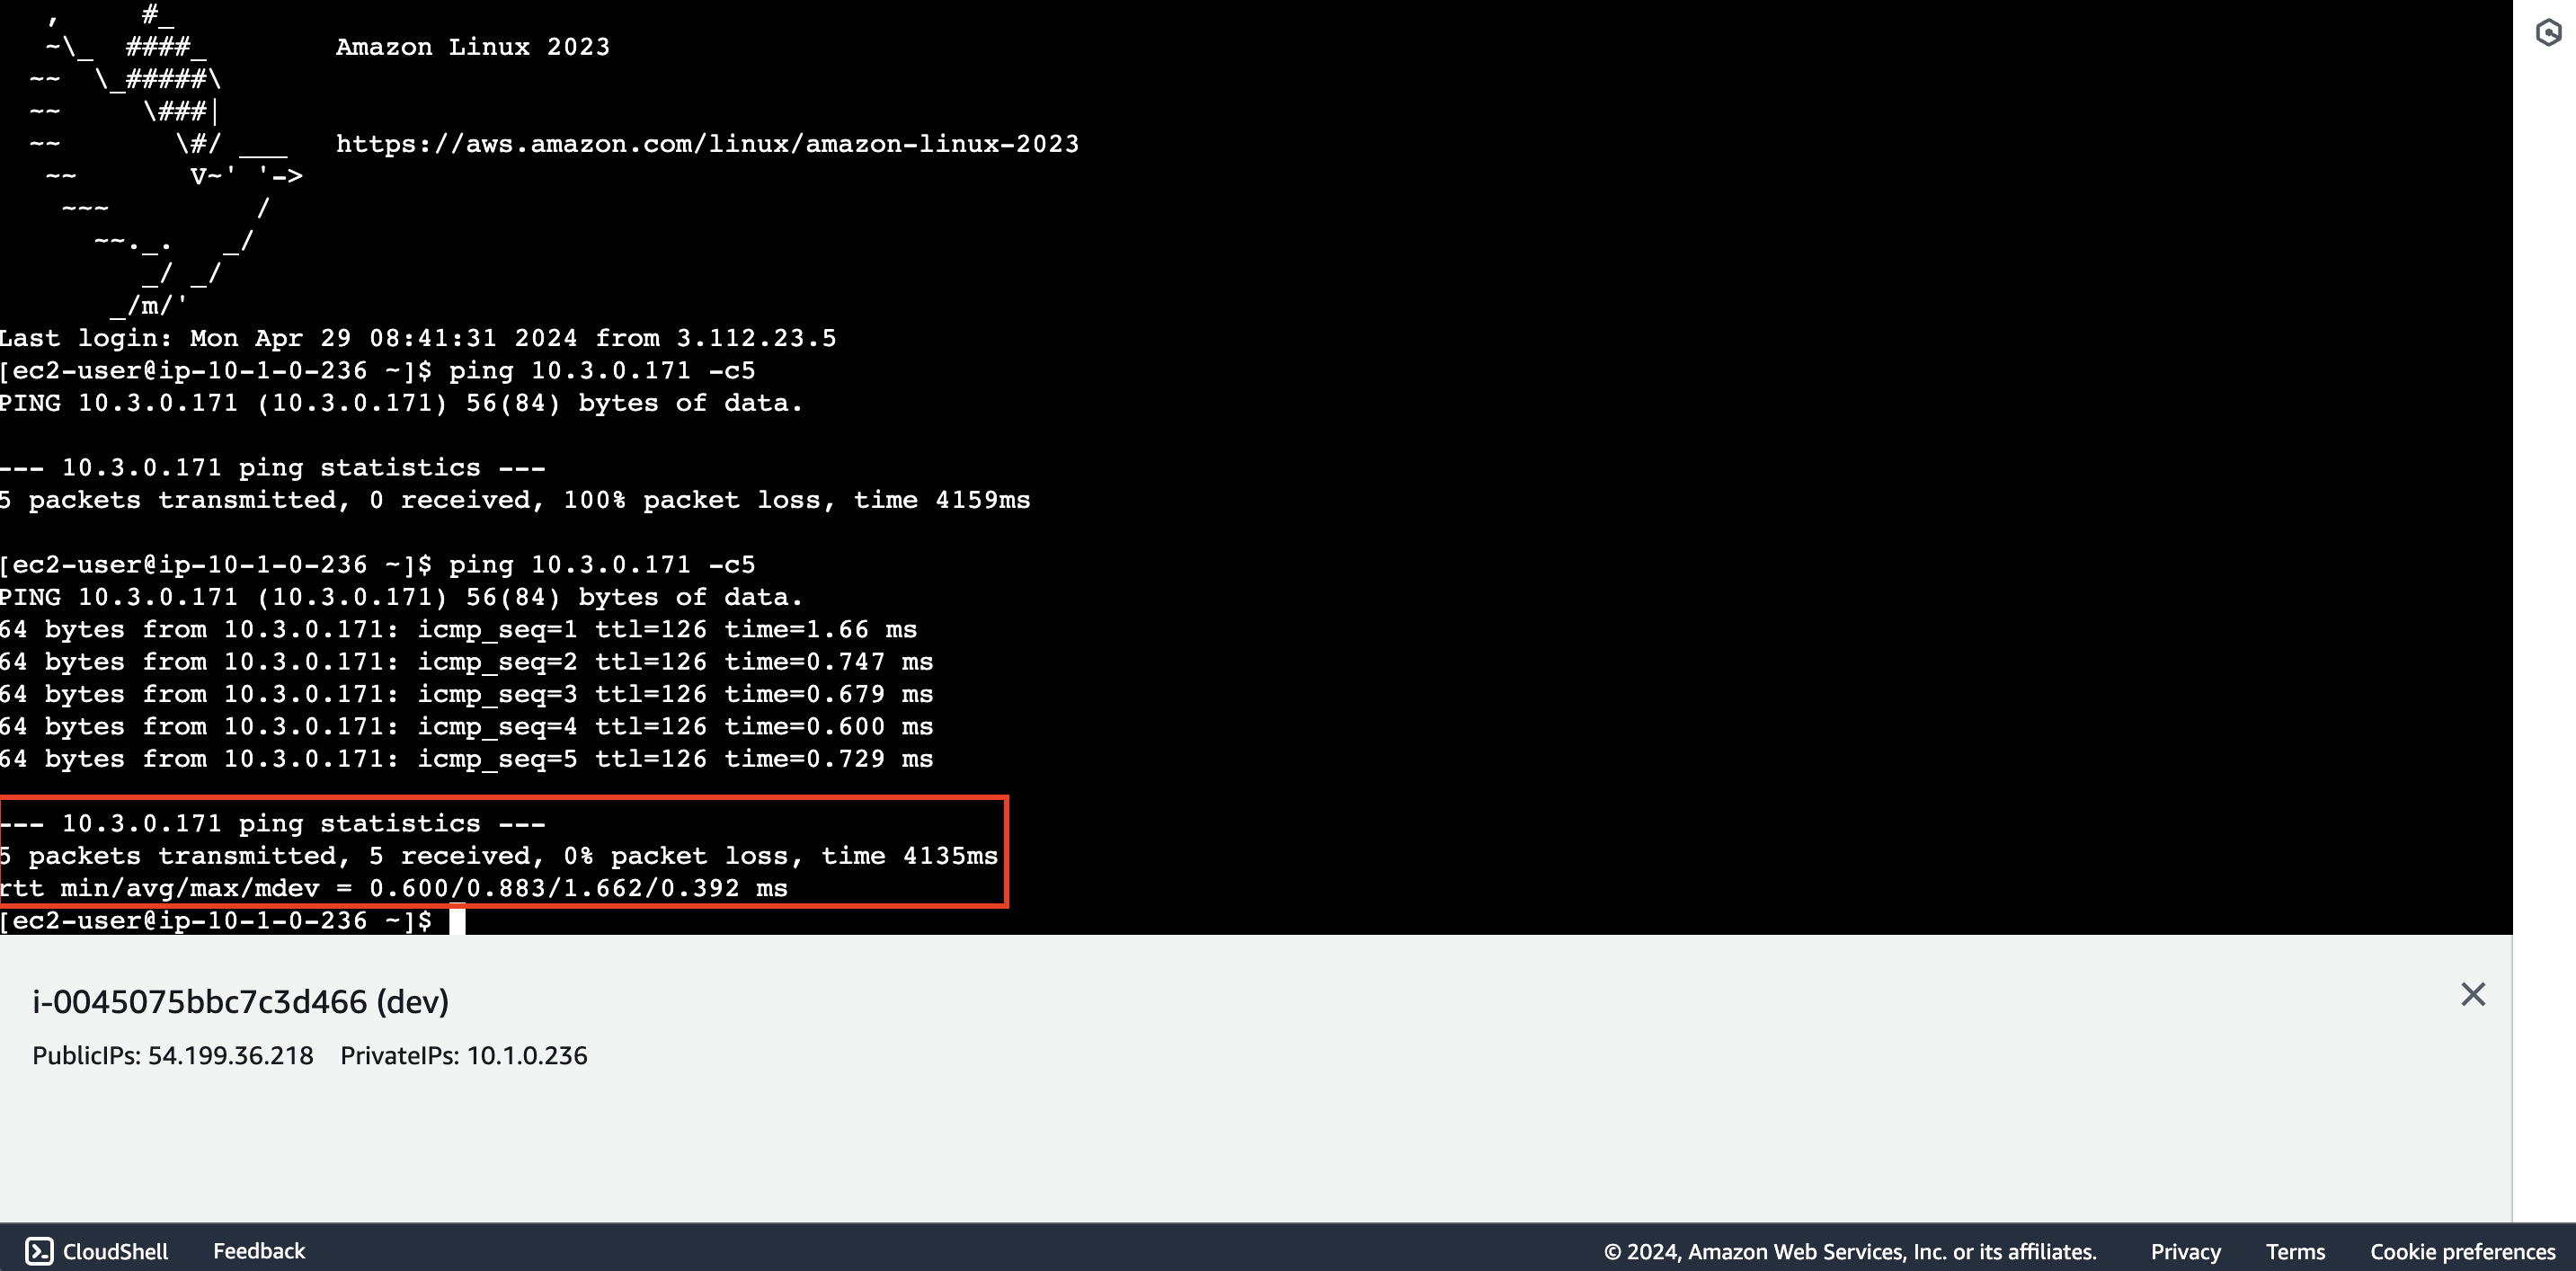
- Return to the EC2 instance connect interface and rerun the following command:
ping <private_ipv4_share_instance> -c5
The results show that it is possible to connect from the dev instance to the share instance, proving that the
Dev VPC and Share VPC can connect to each other through transit gateway.
Configure routing for Test VPC
Repeat the above steps to configure the connection between Test VPC and Share VPC and test your configuration.
